Working with Jupyter Notebooks
Jupyter Notebooks are a great way to work with data science and machine learning projects. They allow you to write and execute Python code in a web-based interface, and they also allow you to include text, images, and other content in the same document. This makes them a great tool for data analysis, data visualization, and other tasks that involve working with data. Let’s validate the notebook that was used to train the model. We’ll also run the data science pipeline to automate the model construction process.
1. Model Training Process & Variations
1.1. Model Training Process
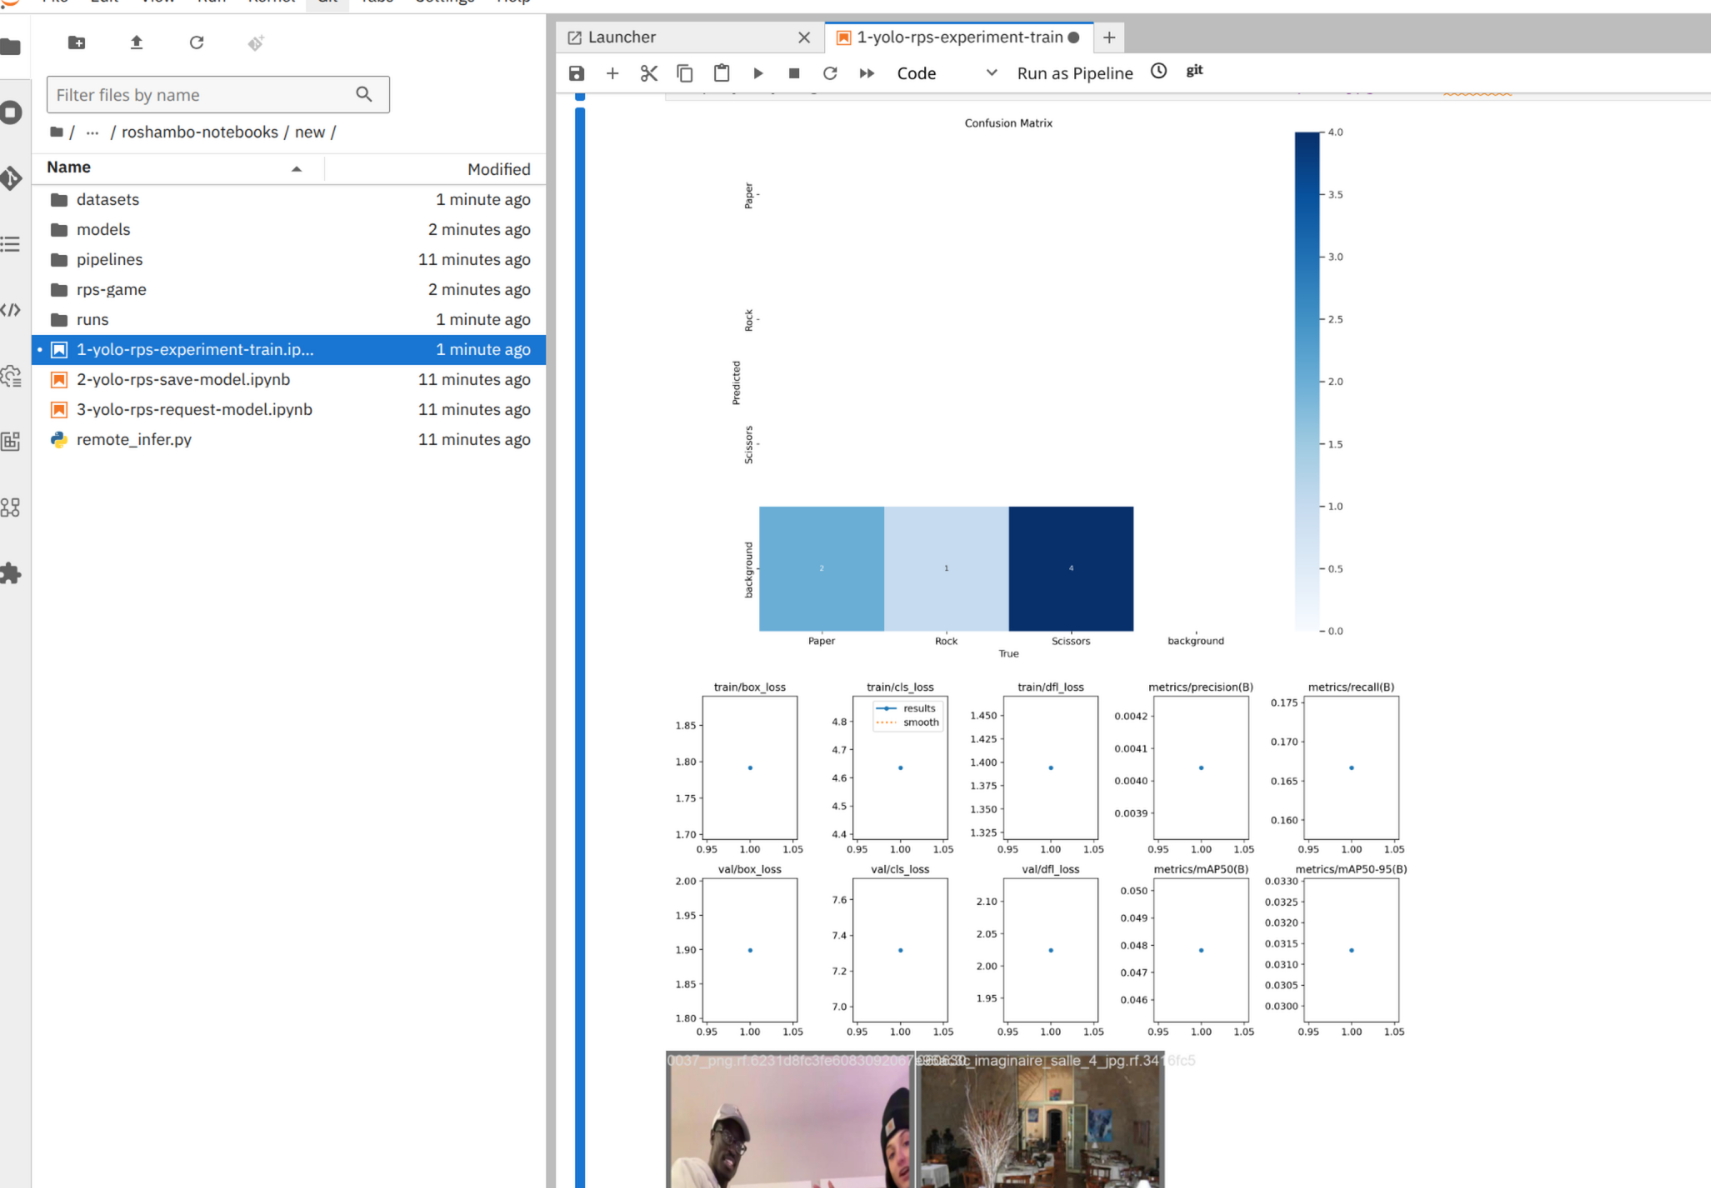
A YOLOv11s object detection model was trained for this project with the following specifications:
-
Dataset Source: Roboflow
-
Training Epochs: 40
-
Evaluation Metric: mAP@50 = 0.95 (High Accuracy)
1.2. Model Variations
YOLOv11, developed by Ultralytics, offers multiple variations to balance speed and accuracy based on application needs:
-
YOLOv11n (Nano): Optimized for edge devices with minimal computational power.
-
YOLOv11s (Small): A lightweight model balancing speed and accuracy, used in this project.
-
YOLOv11m (Medium): A mid-tier model offering higher accuracy at the cost of increased computation.
-
YOLOv11l (Large): Designed for high-accuracy applications, requiring more computational power.
-
YOLOv11xl (Extra Large): The most powerful variant, delivering the highest accuracy for complex object detection tasks.
For this project, we selected YOLOv11s, ensuring an optimal trade-off between inference speed and model performance.
2. Experimenting with the model
Open the 1-yolo-rps-experiment-train.ipynb in the rps-game/roshambo-notebooks directory. This is a Jupyter notebook to understand how the data scientist created and trained the RoShambo game model. This notebook contains the step-by-step process of model creation, training, and validation.
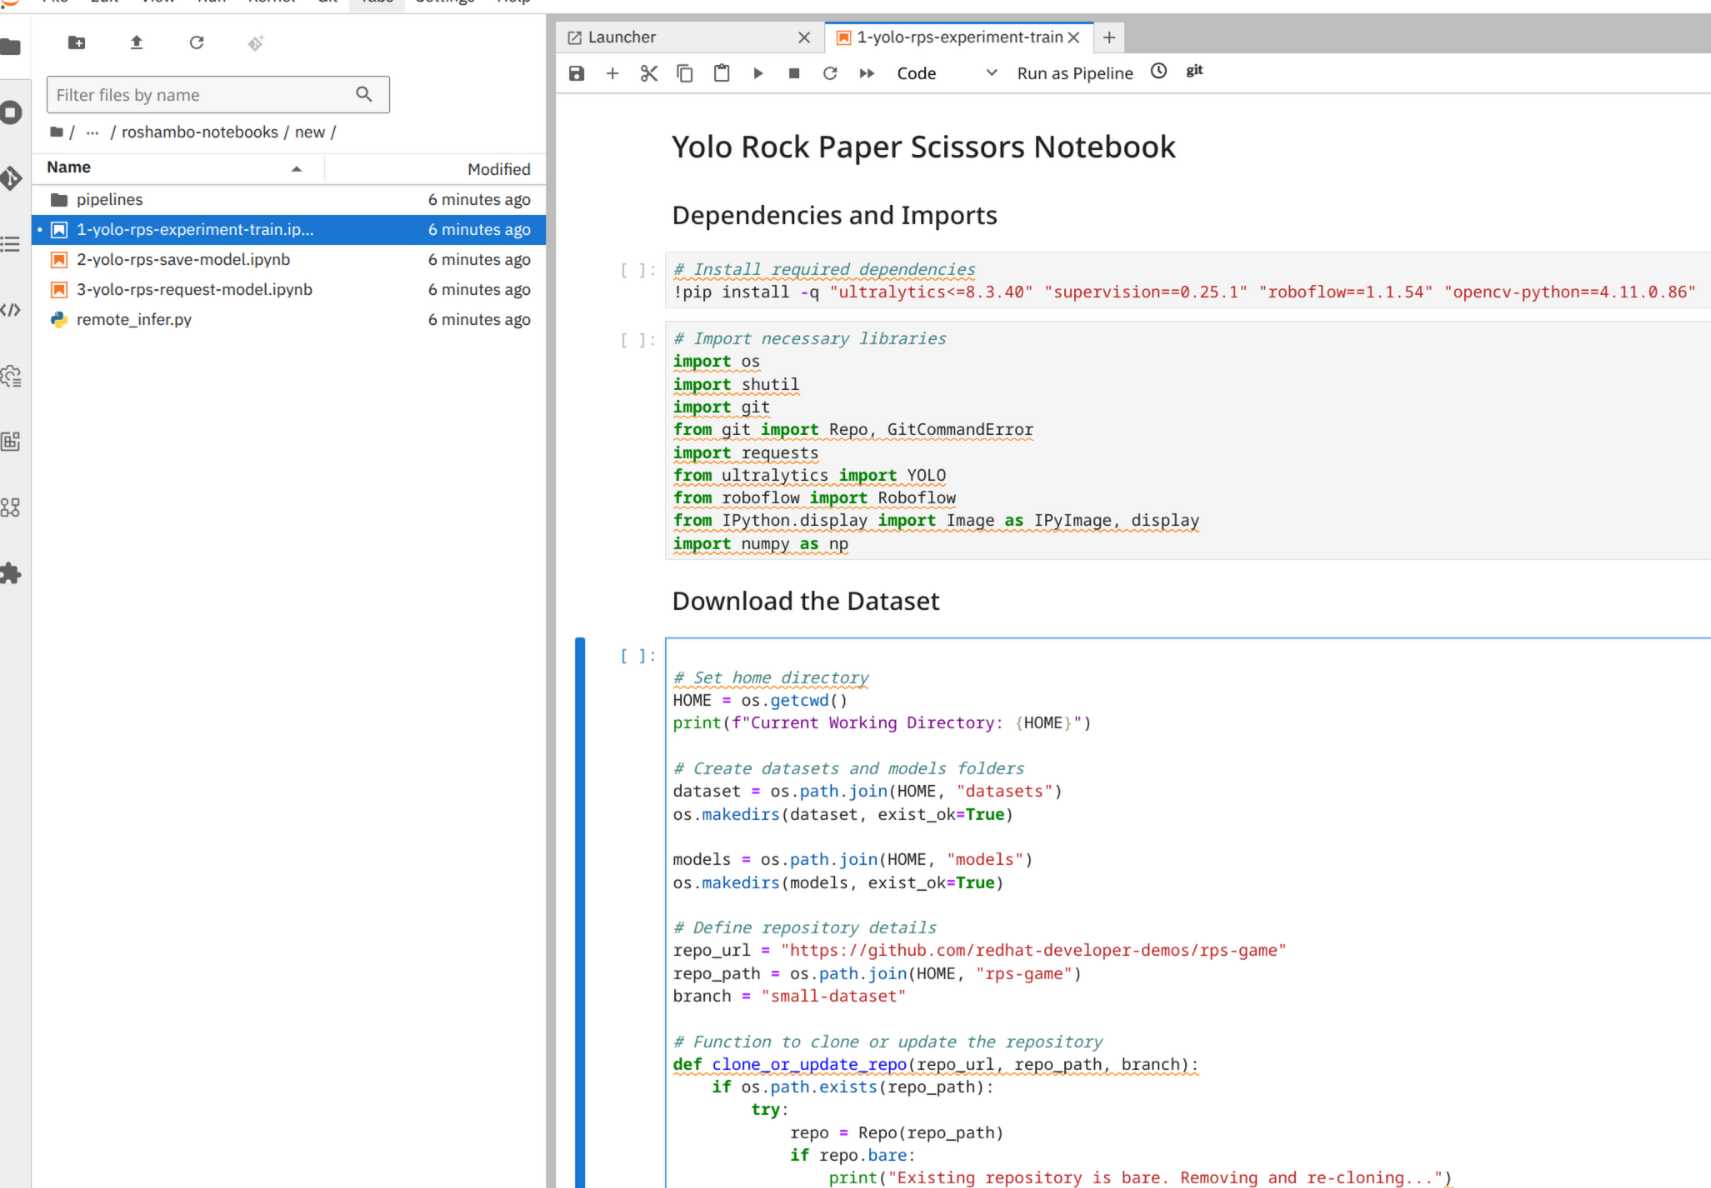
Here’s a bit about the technical details of the model development process.
-
Start from a pretrained model from YOLOv11s.
-
Train the model with additional datasets of rock, paper, scissors and use 1 epoch as an example of training.
-
Load and verify the model from local filesystem.
-
Export the model to the ONNX format, ready to be uploaded to storage and served as an inference API.
You’ll also see in the roshambo-notebooks/dataset/data/train/images directory the training dataset and in roshambo-notebooks/dataset/data/test/images. There are some examples used to test the model.
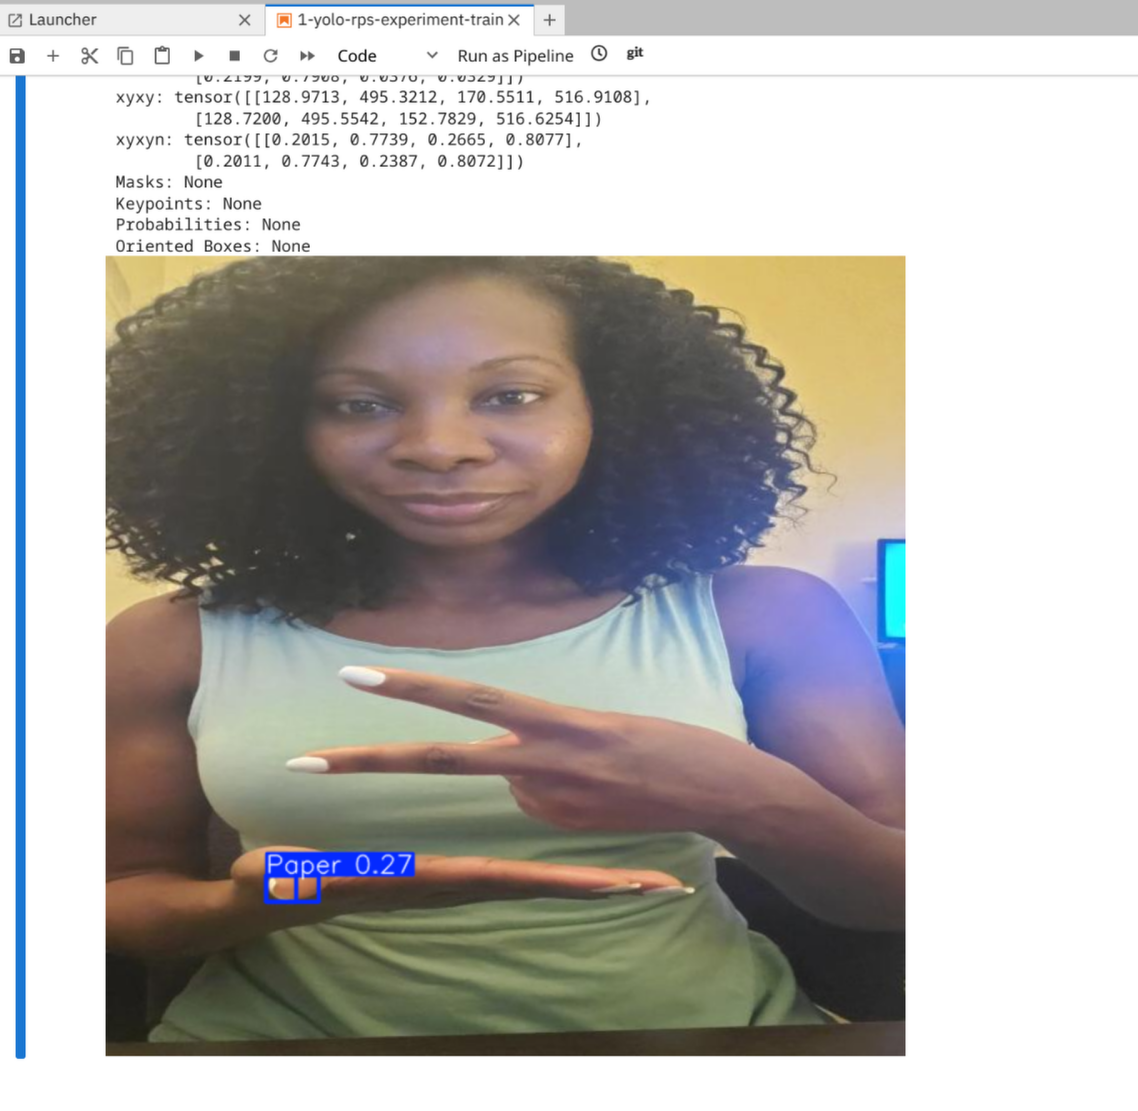
This model doesn’t look great, yet!
3. Export, Save and Register the Model
Now that we have the model exported into an open and standard format such as ONNX, we can save it outside the local filesystem. Generally, an S3-compatible storage is ideal for storing AI models as they could be very large files and the protocol also supports well high availability.
In this section you’ll learn use MinIO as a storage and Kubeflow Model Registry as a registry for the model.
A Model Registry provides a central index for ML model developers to index and manage models, versions, and ML artifacts metadata. It helps with all the lifecycle of the model.
You can now open the 2-yolo-rps-save-model.ipynb notebook and start experimenting with model lifecycle management for your app.
| Some setting such as the notebook connection to MinIO has been automatically configured for you in order to make the flow easier, however you will be asked to change a placeholder user with your own username in some part of the notebook |
## Change this before continue
user = "{user}"

model_path_s3 = "{user}-yolo-rps"
print(model_path_s3)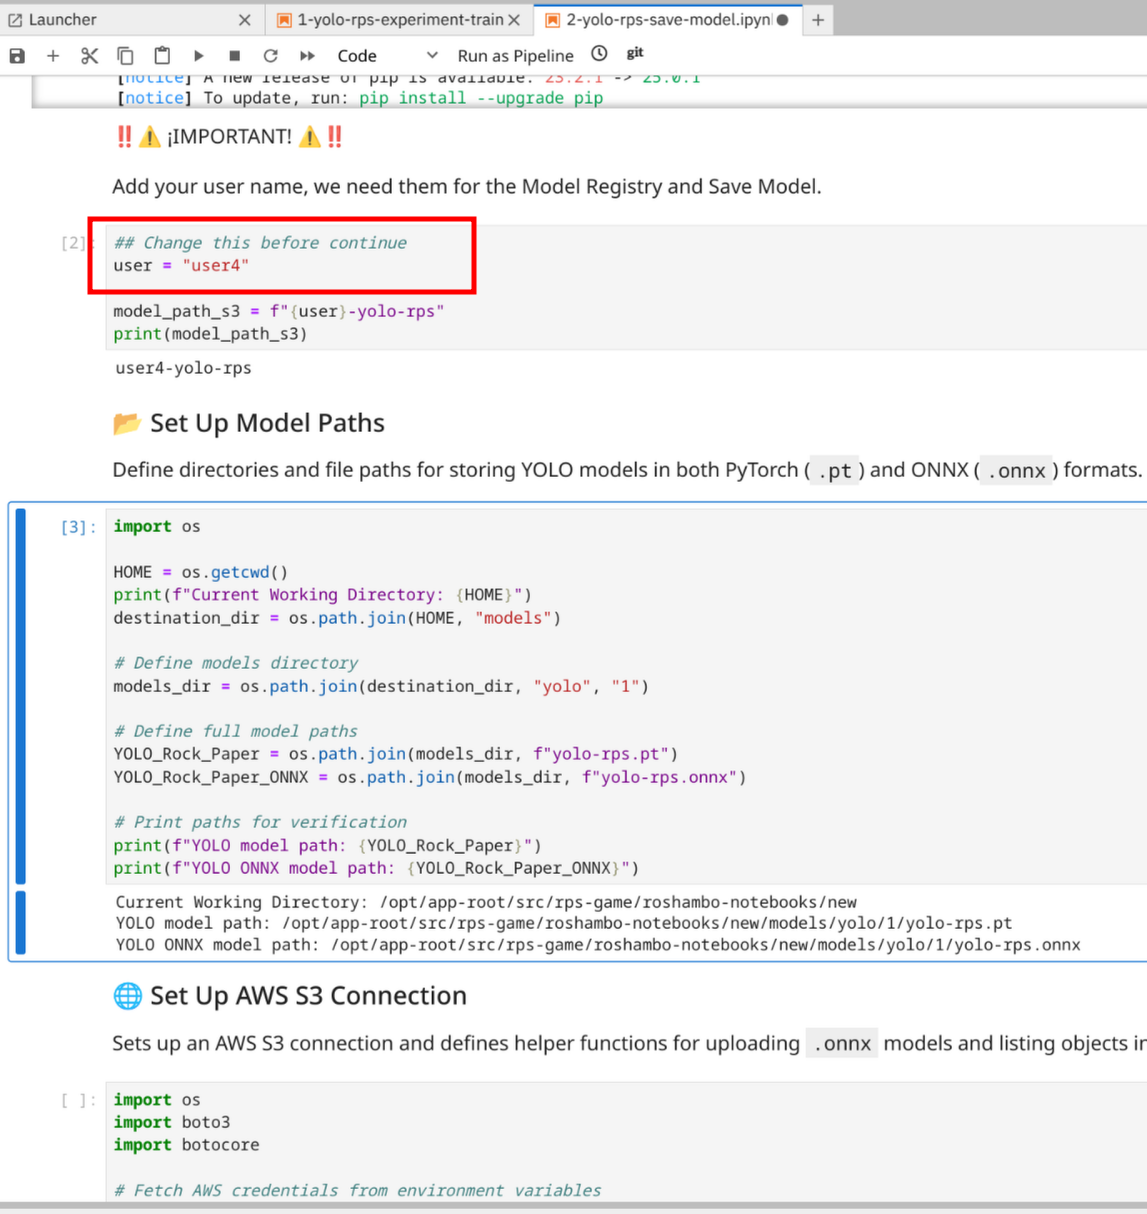
| Make sure that you put your {user} before running the cell of the notebook. |
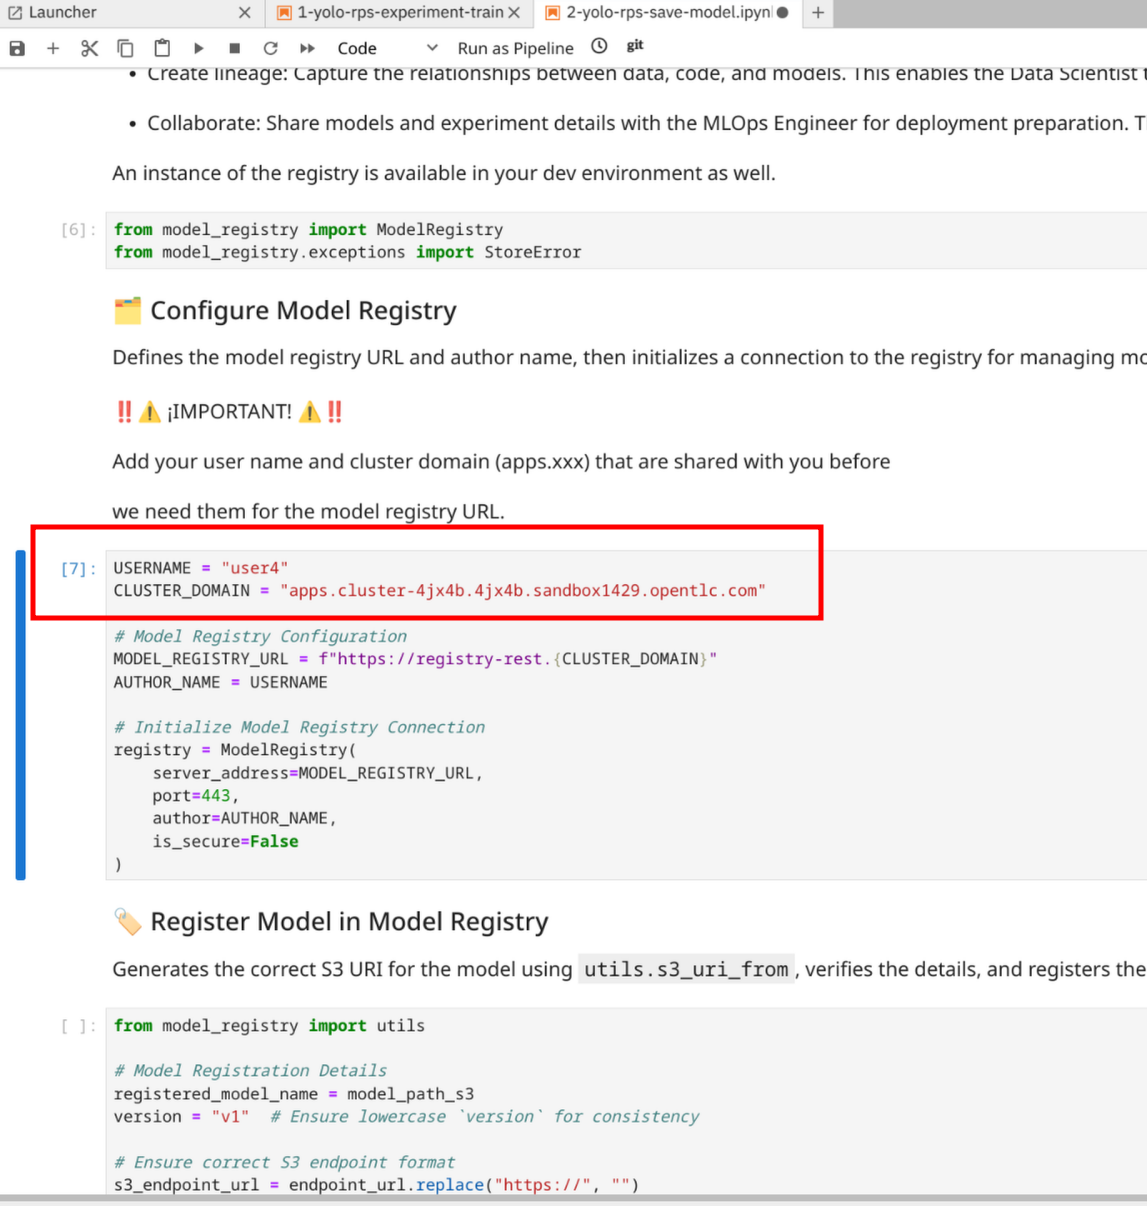
Update the following model registry configuration.
USERNAME = "{user}"
CLUSTER_DOMAIN = "{openshift_cluster_ingress_domain}"

# Model Registry Configuration
MODEL_REGISTRY_URL = f"https://registry-rest.{CLUSTER_DOMAIN}"
AUTHOR_NAME = USERNAME

# Initialize Model Registry Connection
registry = ModelRegistry(
    server_address=MODEL_REGISTRY_URL,
    port=443,
    author=AUTHOR_NAME,
    is_secure=False
)
It should look like this in Notebook:
Go back to the OpenShift AI Dashboard to check if the model is now listed in the Model Registry section.
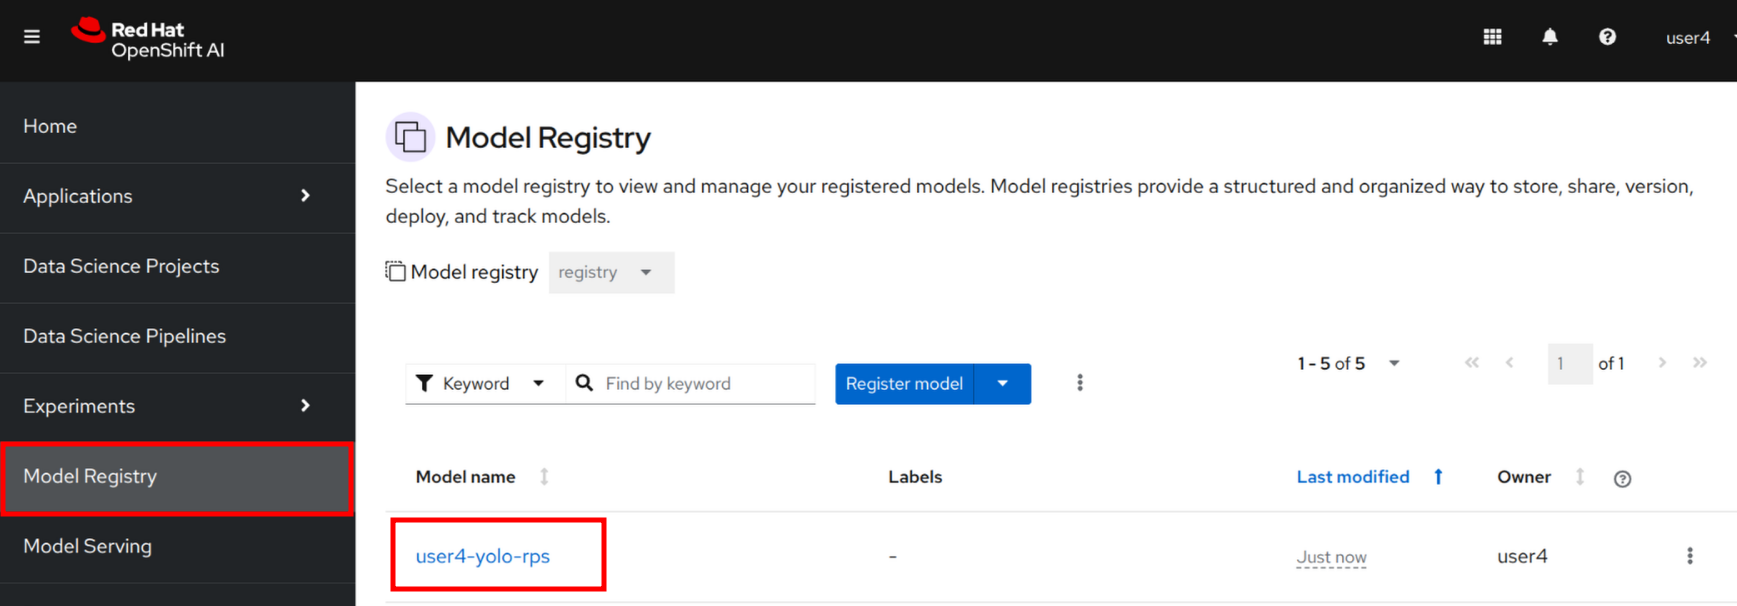
Click to the {user}-yolo-rps item. You should see now available the v1 version of our jupyter notebook generated model.
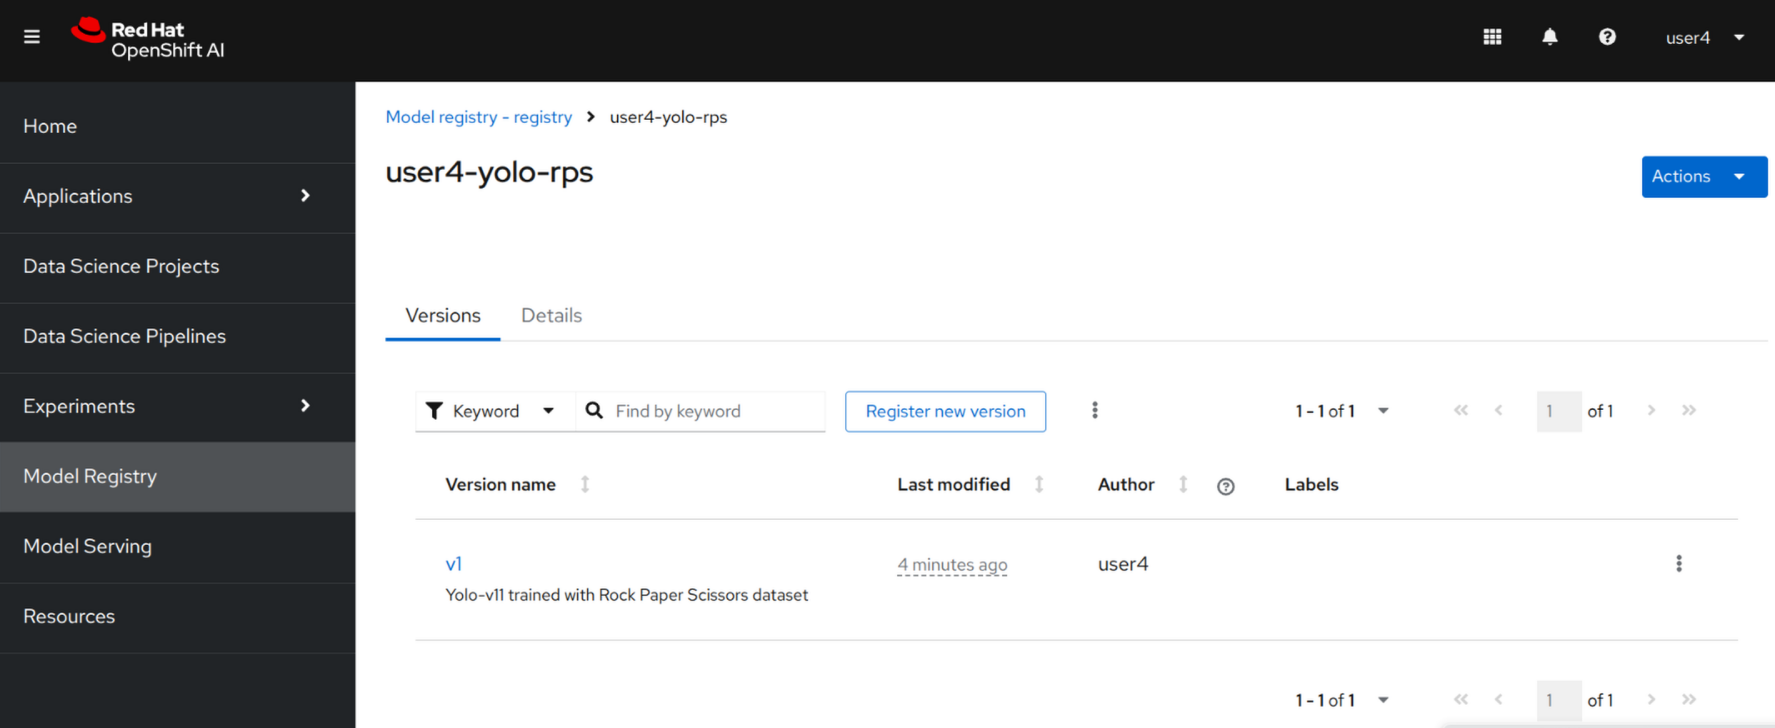
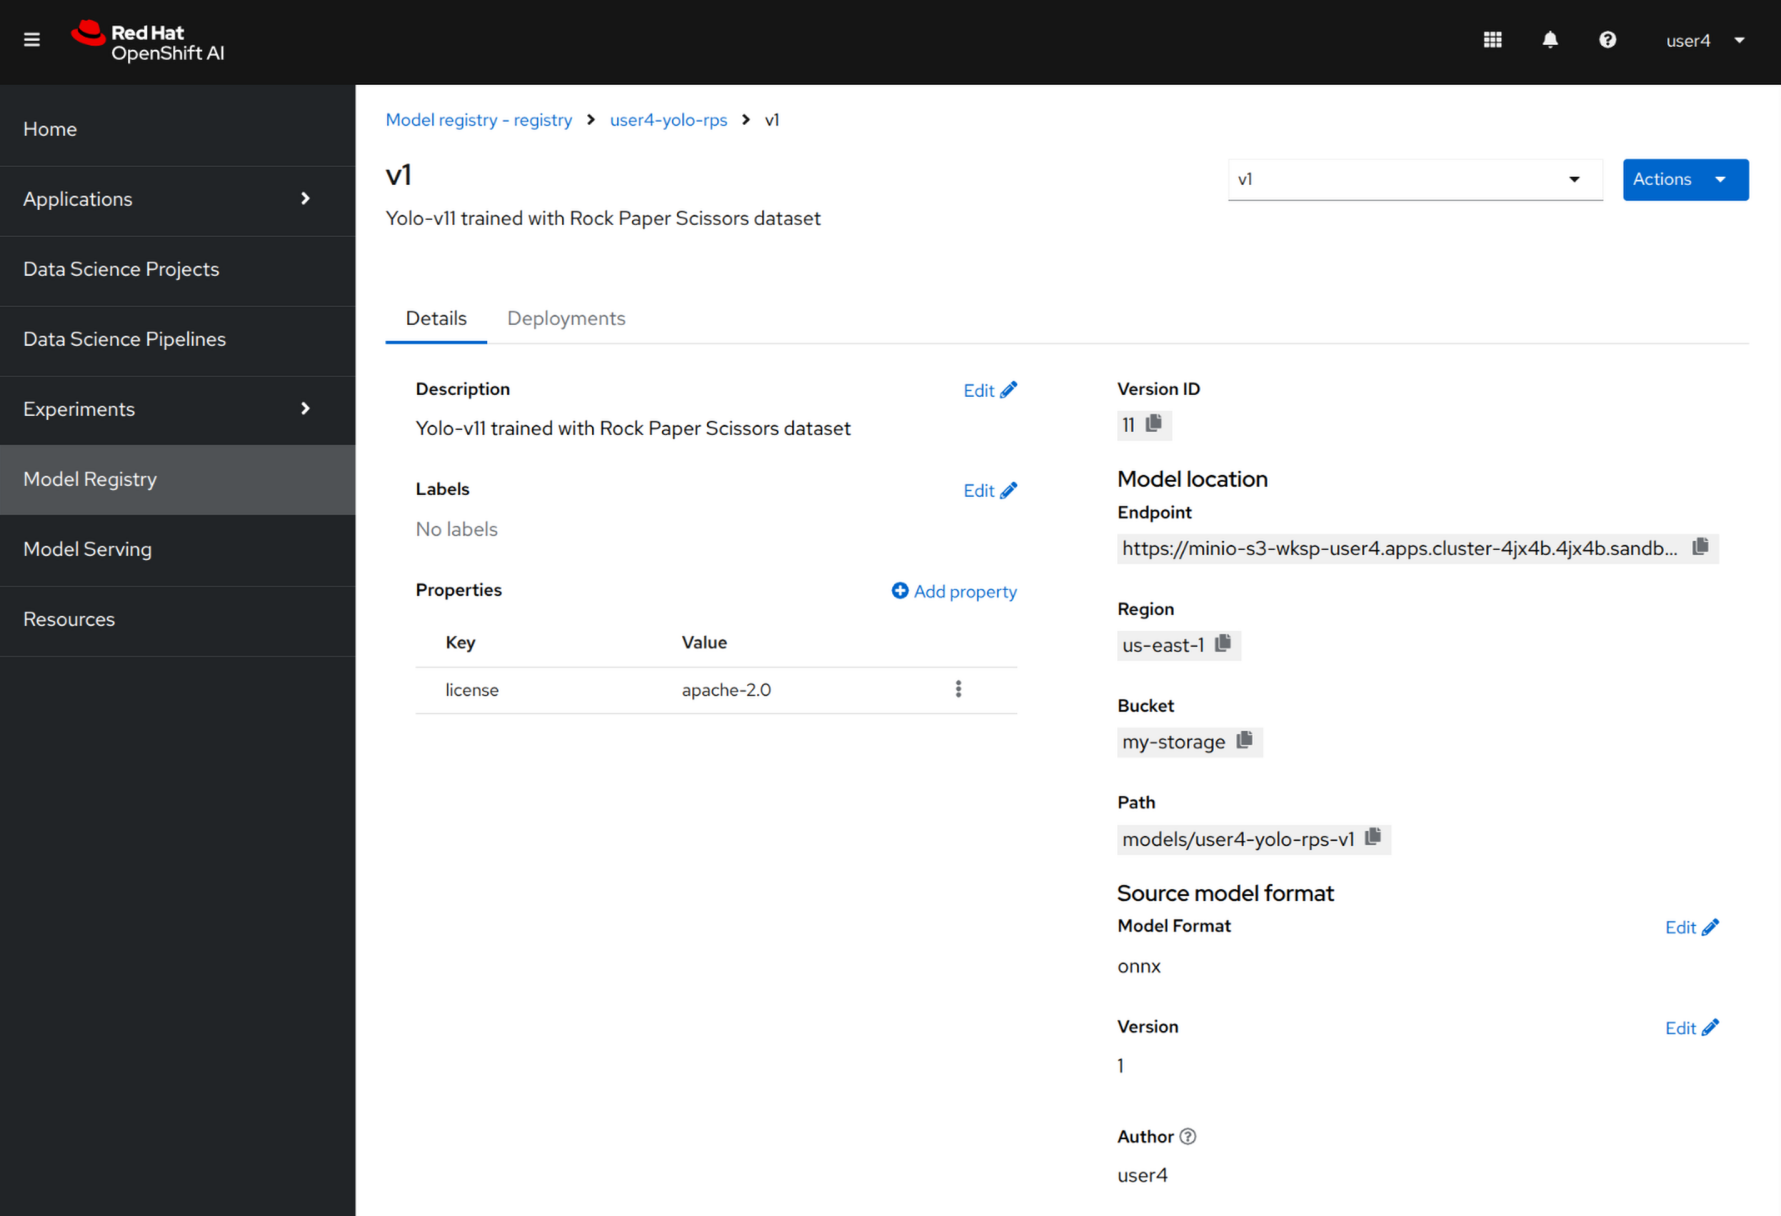
Click to v1 to access all details.
Nice, what about if we want to automate all of this so we can work on a better trained model? In the next section!