2.1 Deploying as Source To Image Application
Now that the application code is working, we’re ready to build it as a container image, create an OpenShift deployment, and have it running as a service you will be able to call from any other application.
This repository was created as a source to image Python application. A Python application developer and a data scientist can work together in this repository to create the buildable application. You can see the template GitHub repository and try for yourself. Here’s some interesting files to examine in the application:
-
wsgi.py - the main entrypoint for the python application and calls the prediction function.
-
prediction.py -which contains the function the data scientist has extracted to make predictions. Called from the application with a dictionary parameter.
-
requirements.txt - where both the app developer and data scientists add their python dependencies for the served application.
-
s2i directory - which contains files to customize the application deployment
You can also learn more about Source to Image and the Python builder image we’ll be using. Now, let’s create the application!
OpenShift Console
We’ll start from the OpenShift Console in the OpenShift Developer Sandbox.
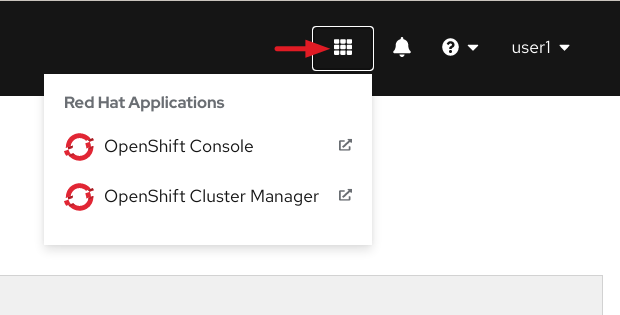
If you’re at the OpenShift Data Science Dashboard and need to navigate to the OpenShift Web Console, use the Application Switcher Icon in the top right of the navigation bar and click on the OpenShift Console menu item.
-
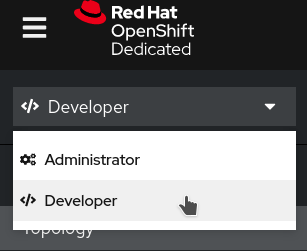
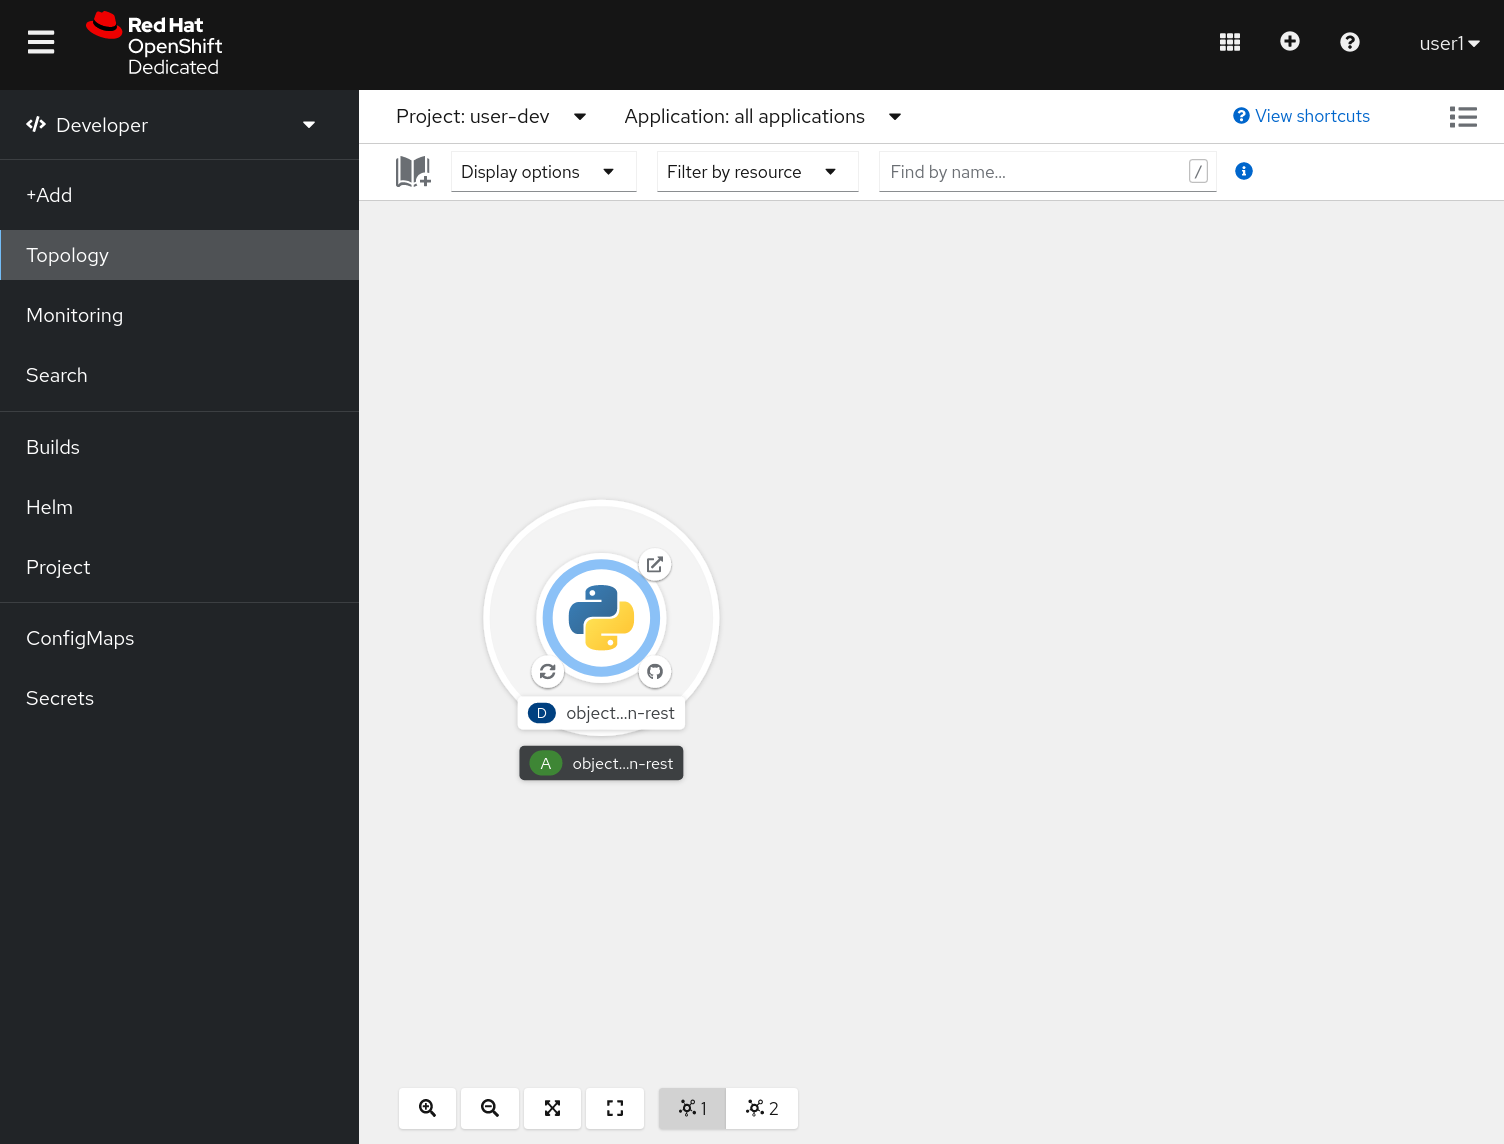
From the OpenShift Console and switch to the developer view from the menu on the top left if it’s not already selected:
-
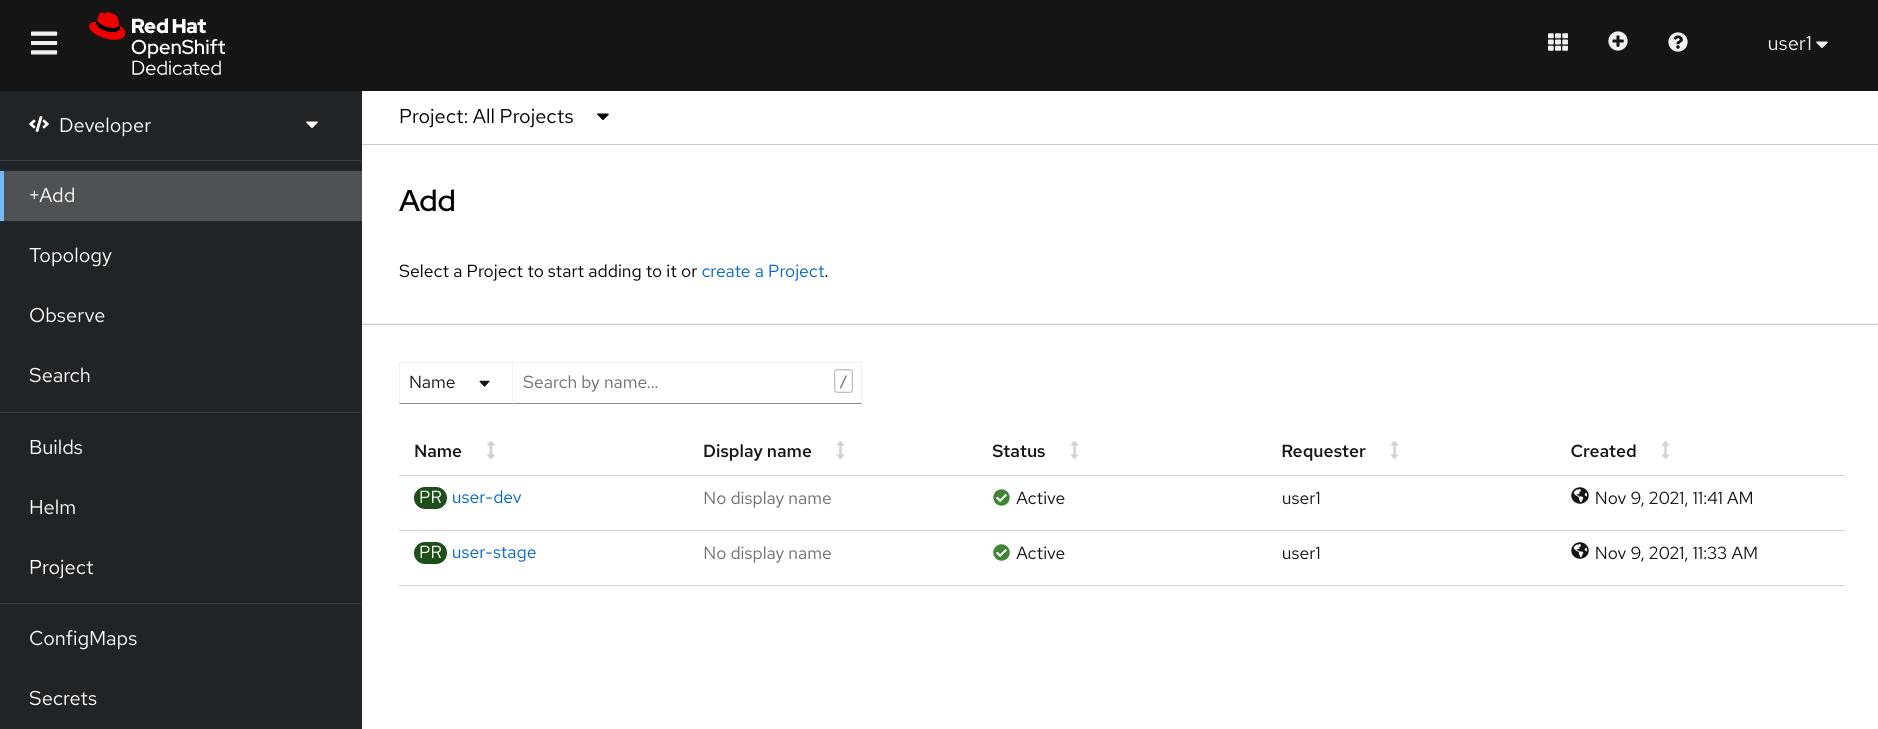
Make sure you have selected (or created) the correct project for your application:

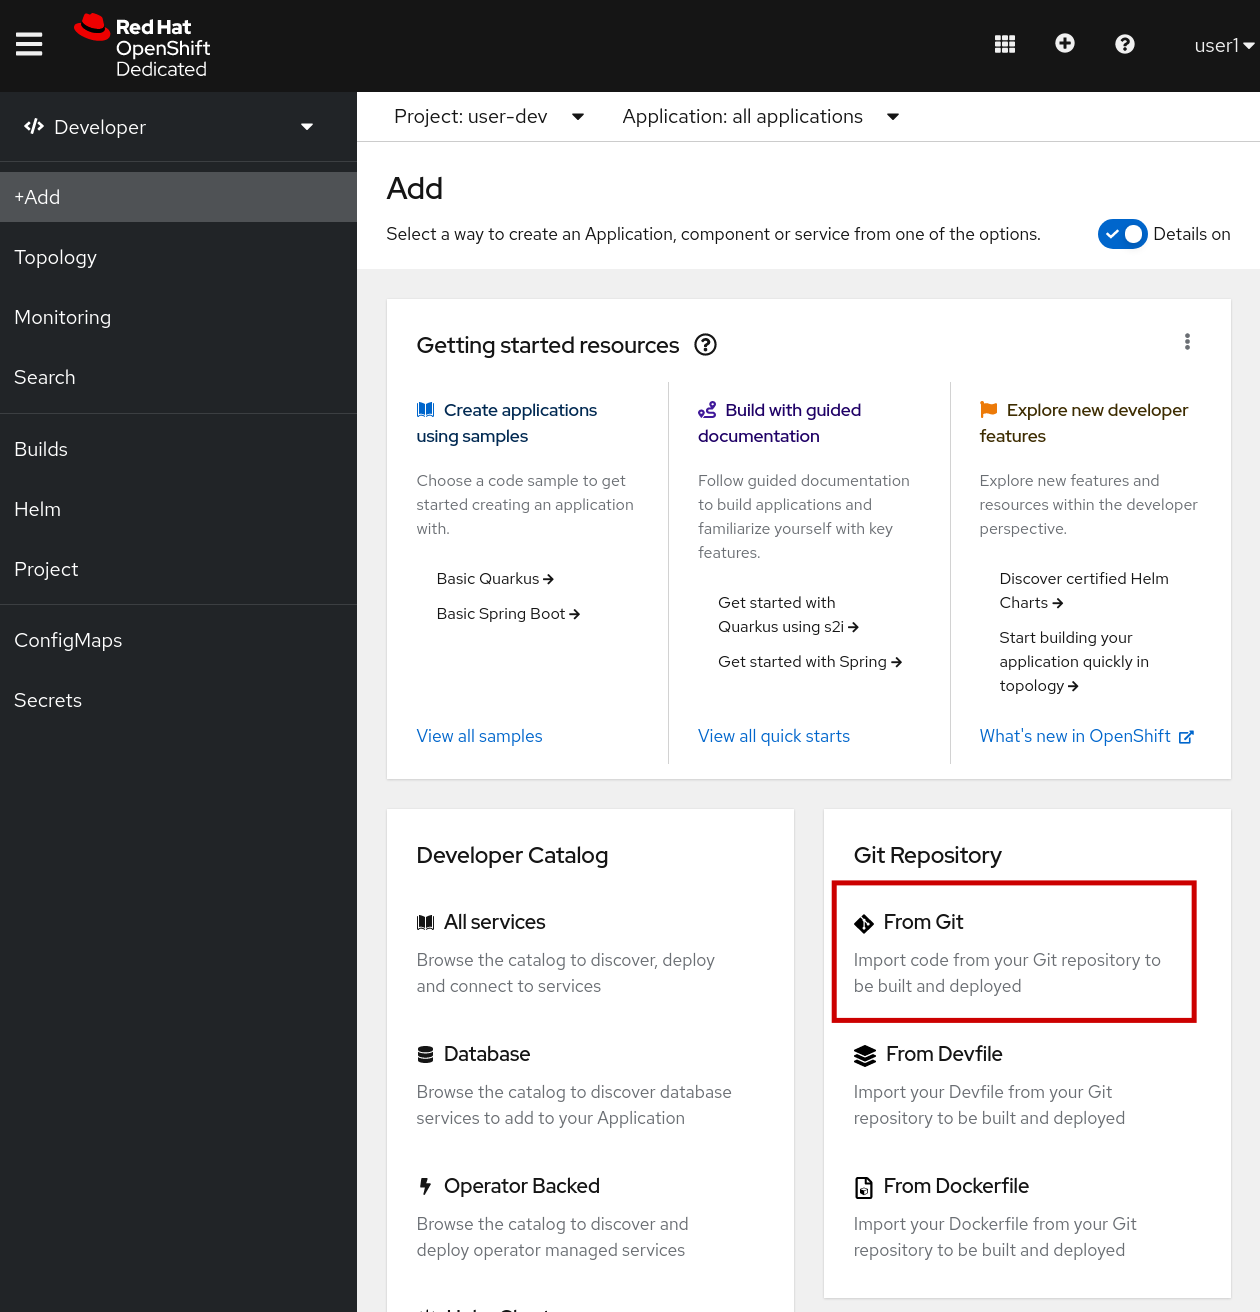
Configure the Application
Set the Git Repo
-
In the Git Repo URL field, enter:
https://github.com/rh-aiservices-bu/object-detection-rest.git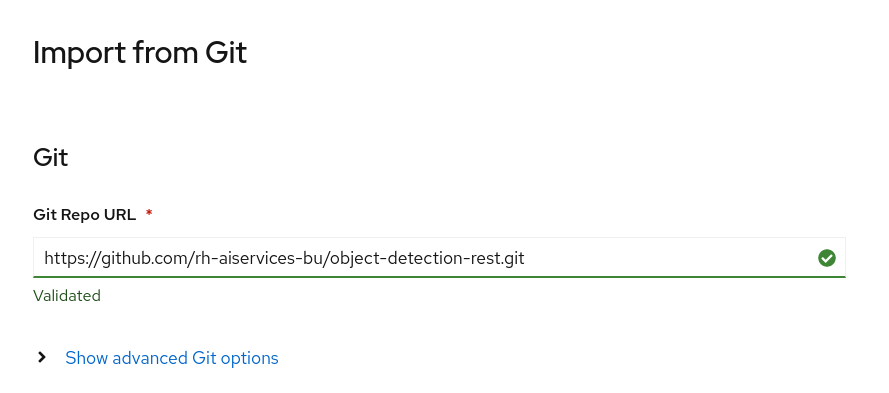
-
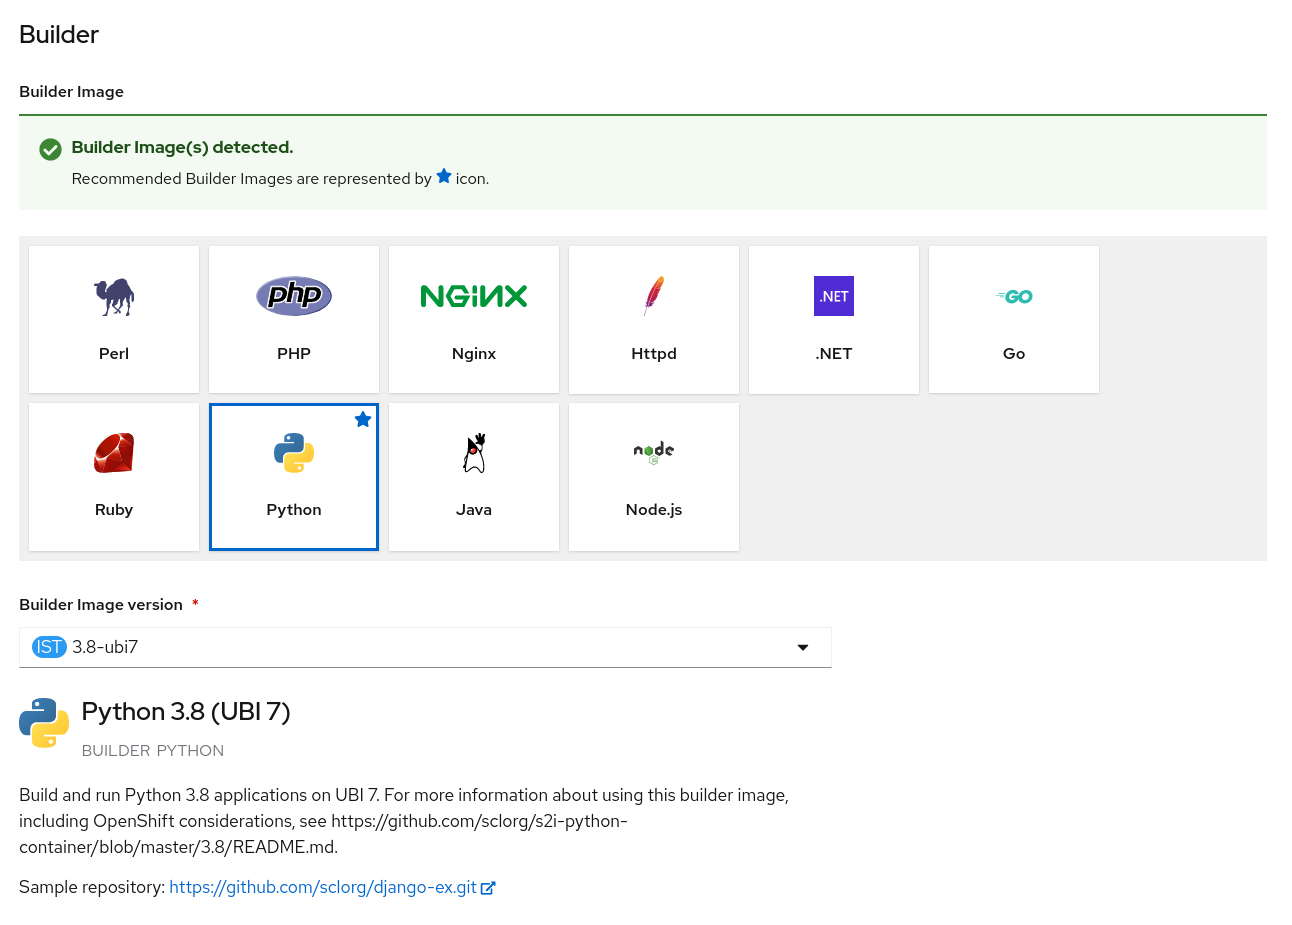
Leave the other builder image selection to the default. You will see that OpenShift automatically recognized that our repo contains Python code, and that the right base image has been selected. Pretty neat, eh?! To ensure compatibility with the Python version we’re using, we’ll also set the Builder Image to
3.8-ubi7or3.8-ubi8.
Customize the App Names
-
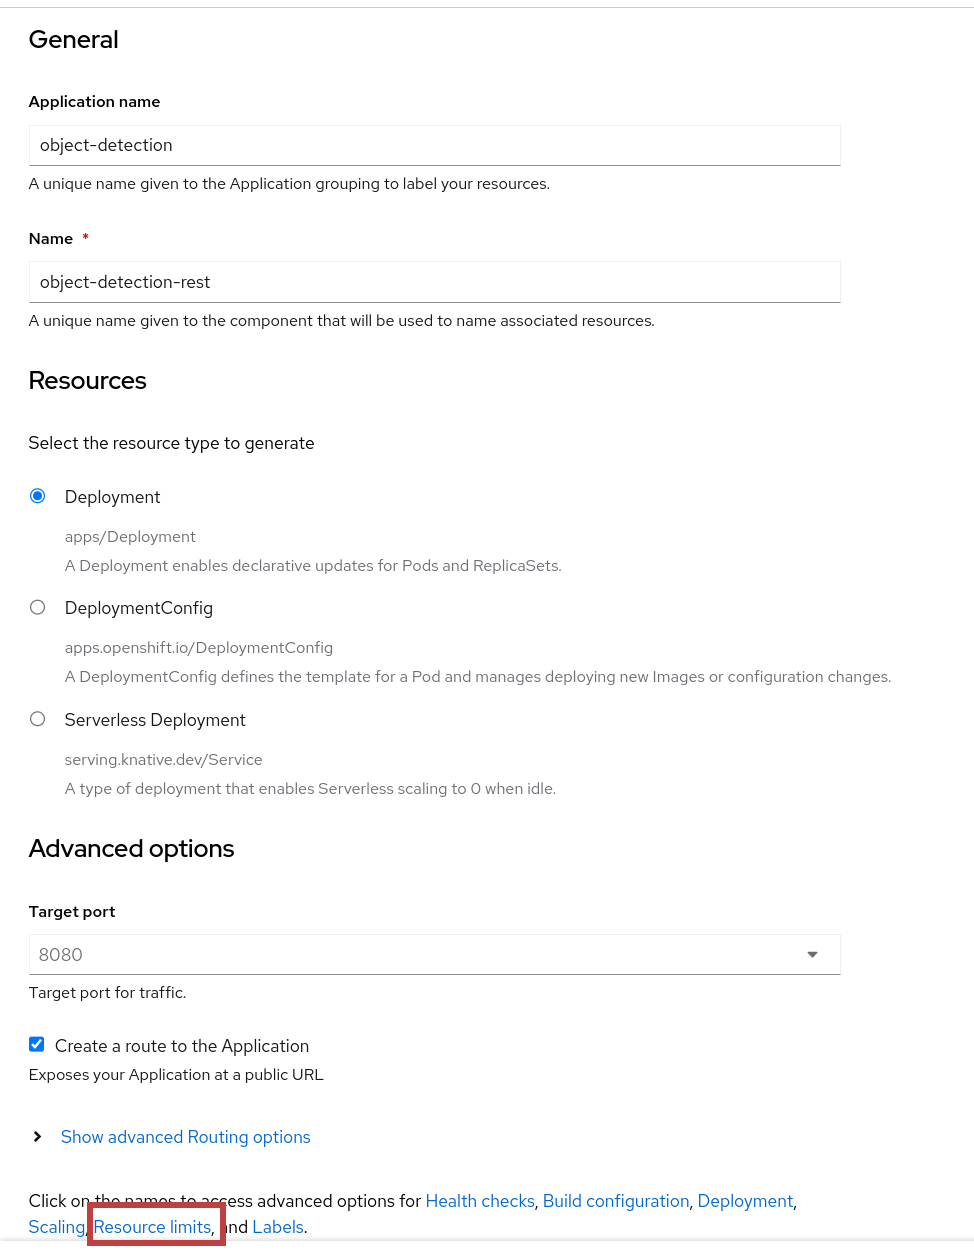
Let’s customize the name of our application. Instead of
object-detection-rest-git-appandobject-detection-rest-git, let’s change the Application name toobject-detectionand the Name toobject-detection-rest. Later when we call our service internally from the same project, we’ll use this name and the service port,http://object-detection-rest:8080.
object-detectionobject-detection-rest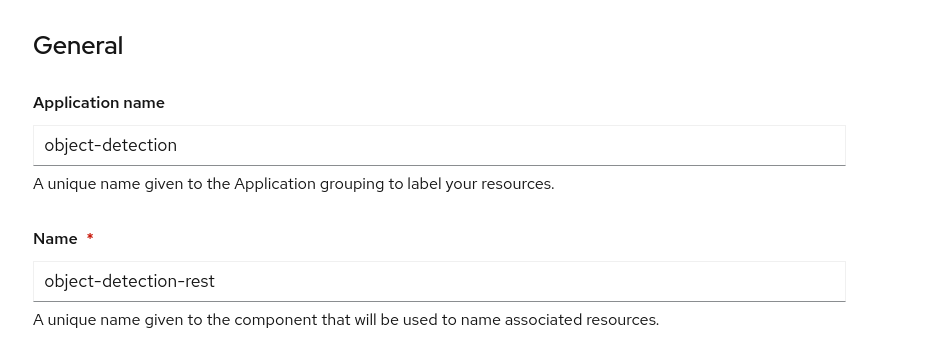
Deployment and Route
-
If you continue to scroll down, you will see that options are automatically selected to create a deployment of your application, and to create a Route through which you will be able to access it. These are good choices for our served model, so you can leave those as selected.
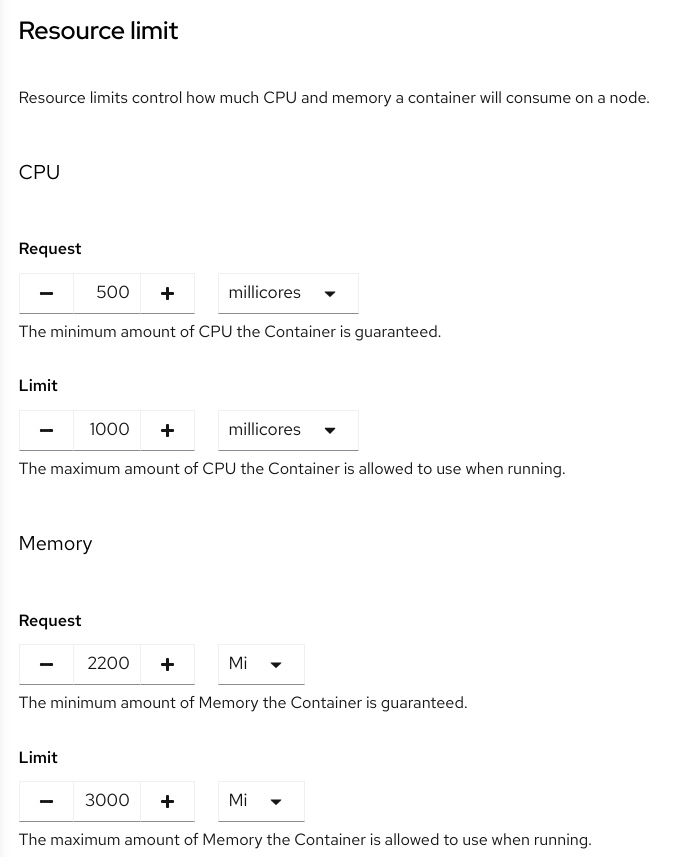
Resource Limits
As TensorFlow models require significant memory and cpu, it is a best practice to set the deployment resource limits to something that will give enough resources.
-
Click on Resource Limits
-
Enter in the following values
-
CPU
-
Request:
500 millicores -
Limit:
1000 millicores(or1 cores)
-
-
Memory
-
Request:
2200 Mi -
Limit:
3000 Mi
-
-
|
Troubleshooting Memory Issues
Instead of receiving OOMKill on the OpenShift pod, the application will not start correctly. If the memory limit is too low, Gunicorn will kill the worker process that is taking up too much memory as a runaway. This will result in messages in the log that look like: In these cases it’s recommended to increase your deployment’s memory limit. |

Checking your Application
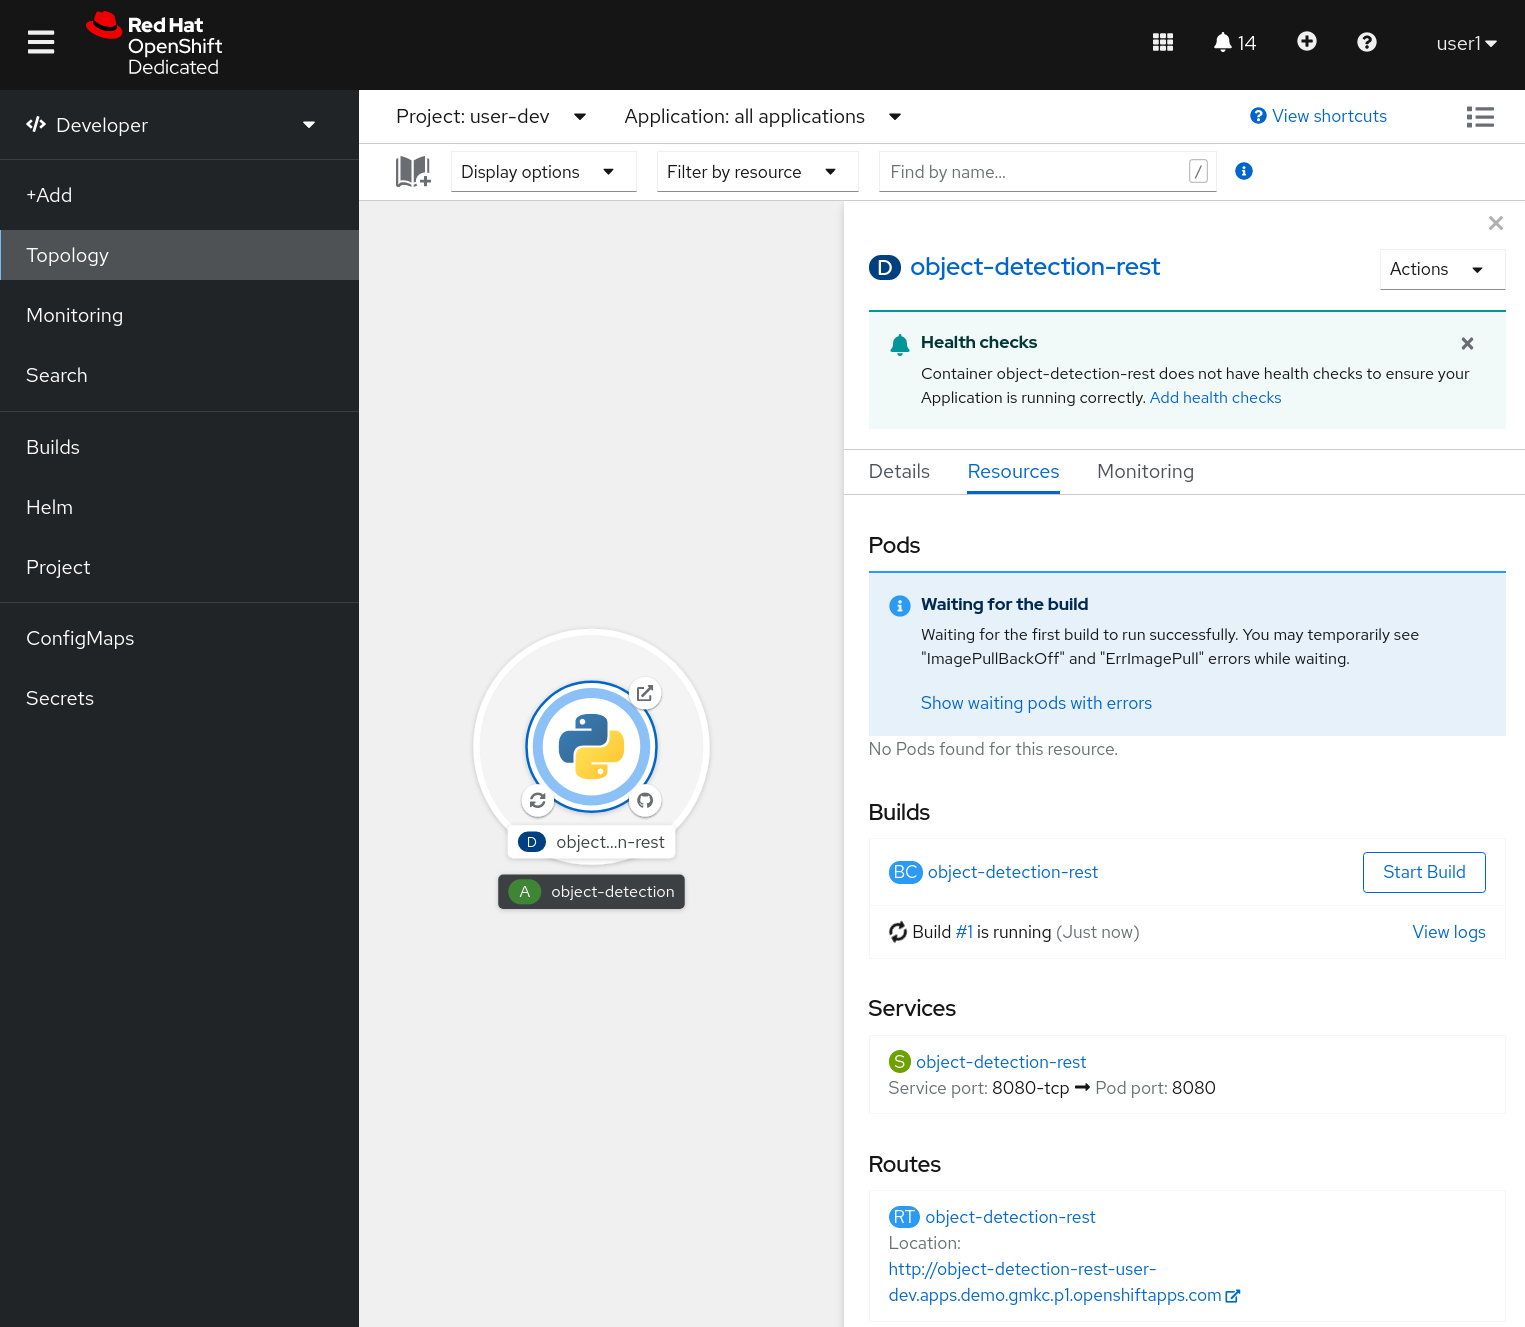
-
You will see that a build is going on:
-
Click on the python logo in the center of the deployment to open a detail panel on the right.
-
The automated building process will take a few minutes. Some alerts (such as ImgPullBackOff) may appear while the first build is still running, but that’s OK. Then OpenShift will deploy the application (rollout). When it’s complete you can see the build is complete and the pod is running.
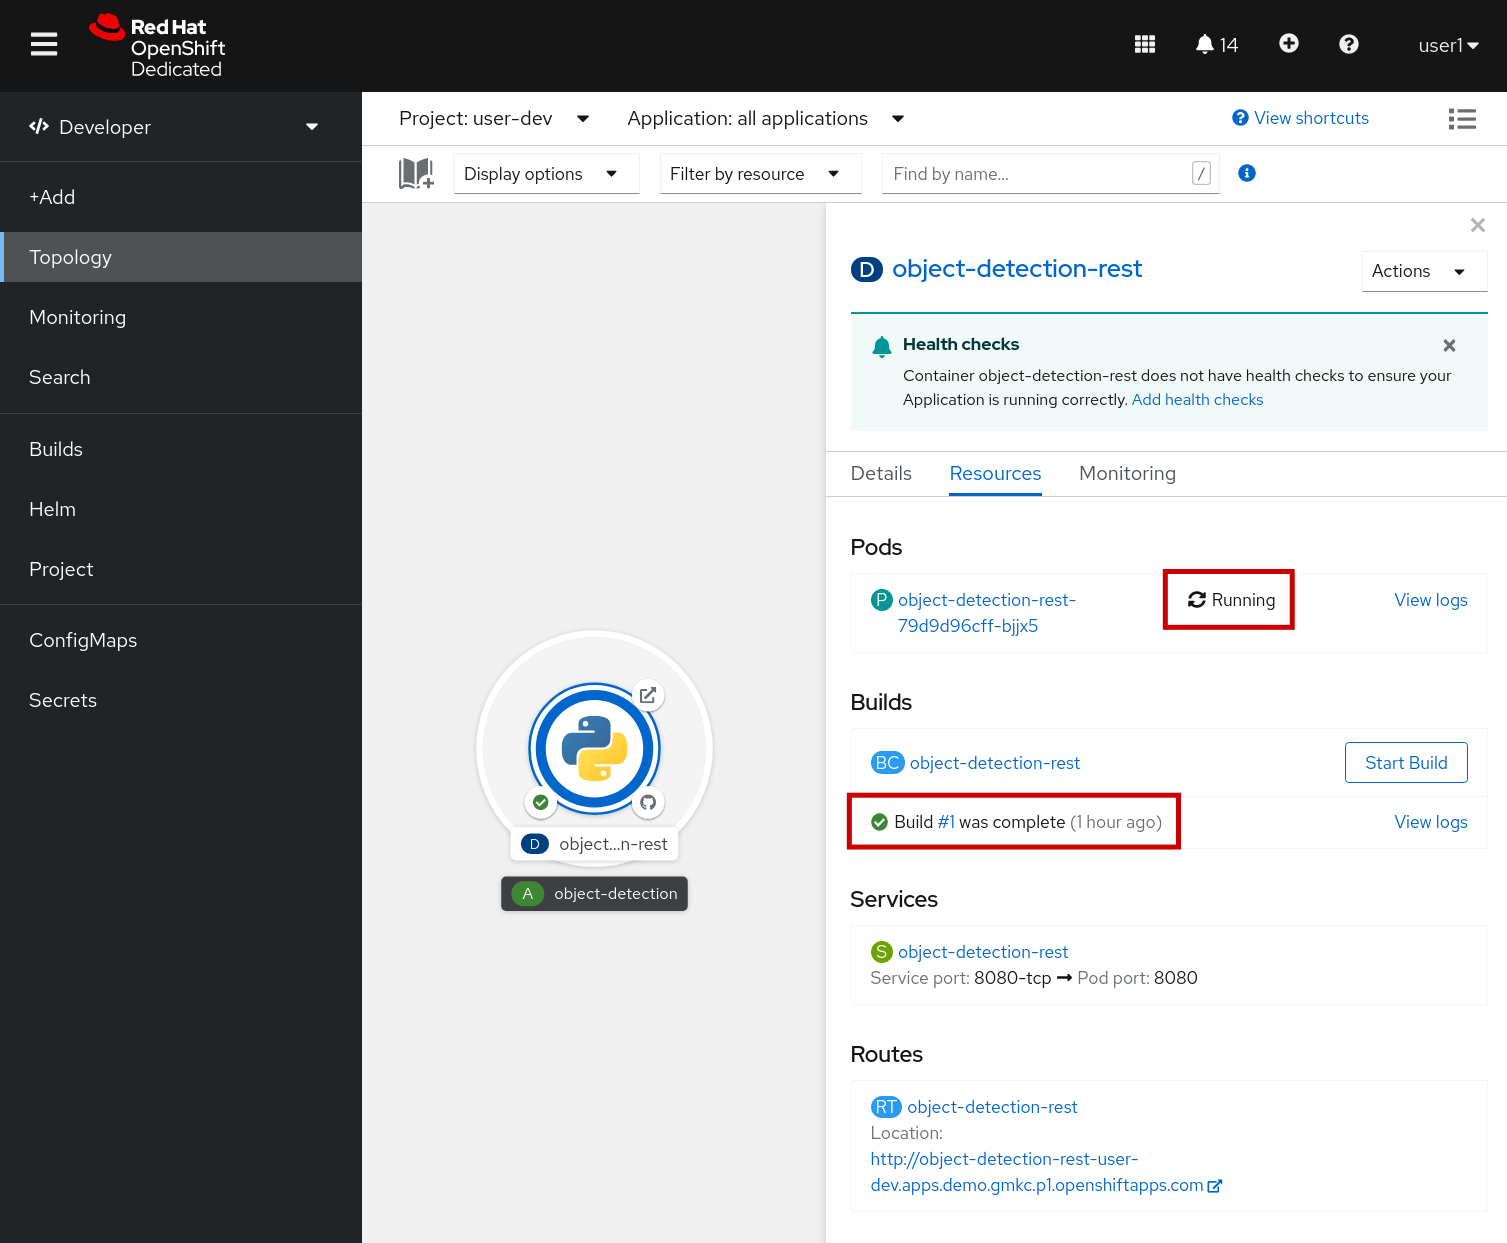
Once the build is complete head to the next section.