1.1 Starting a Jupyter environment
The OpenShift Data Science Dashboard
After logging into the OpenShift Web Console, you should see the OpenShift Data Science Dashboard as a tile in the top right-hand corner. You’ll be prompted to log in to the OpenShift Data Science Dashboard using the Developer Sandbox authentication.
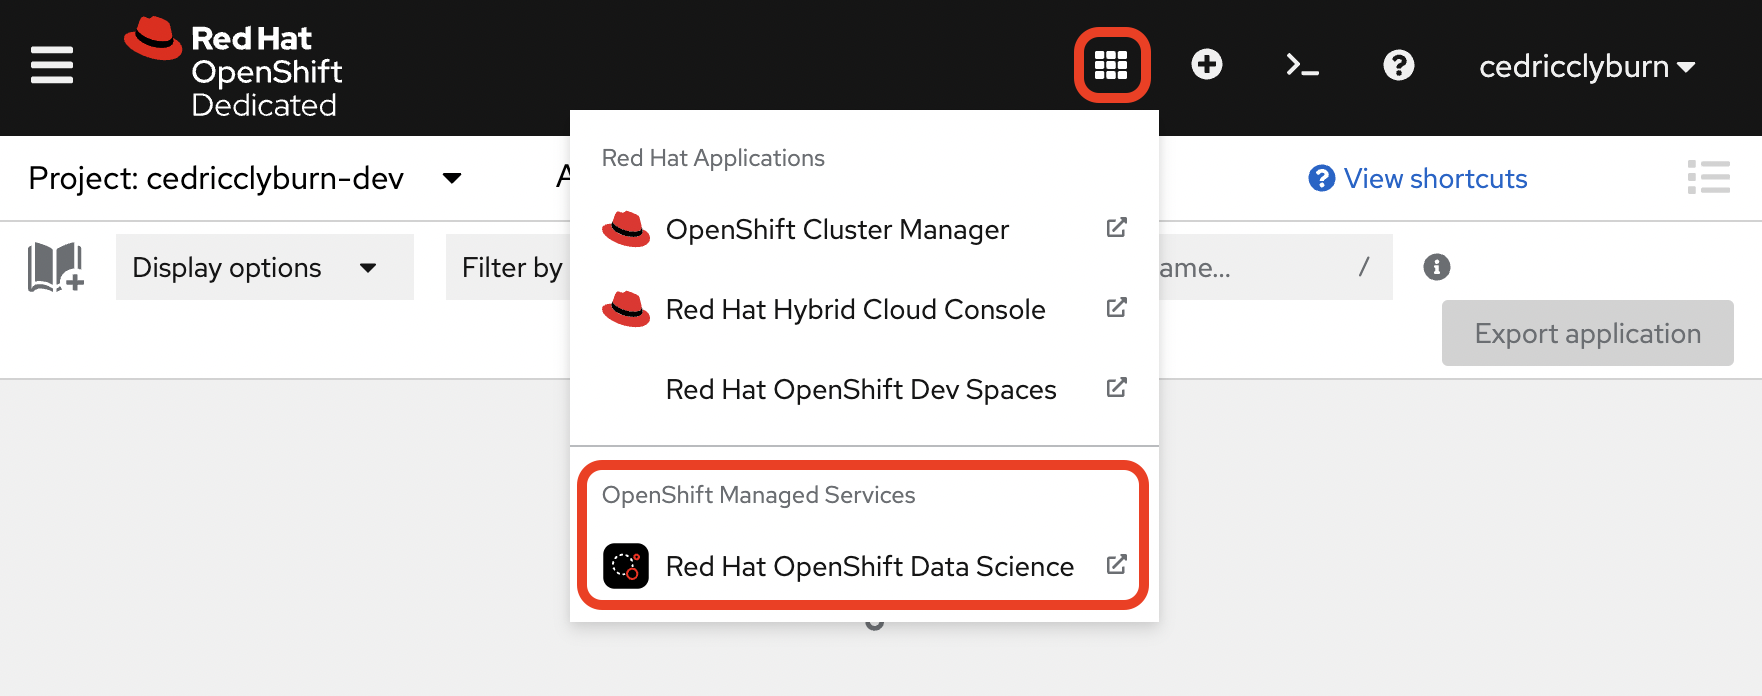
At the OpenShift Data Science Dashboard, you can see the status of any existing environments you have running, as well as launch new environments.
Red Hat OpenShift Data Science brings you on-demand Jupyter Notebook environments. Don’t worry if you’ve never used notebooks before as this workshop will start with a small tutorial on what they are and how to use them.
| If you’re at the OpenShift Web Console and need to navigate back to the OpenShift Data Science Dashboard, use the Application Switcher Icon in the top right of the navigation bar. |
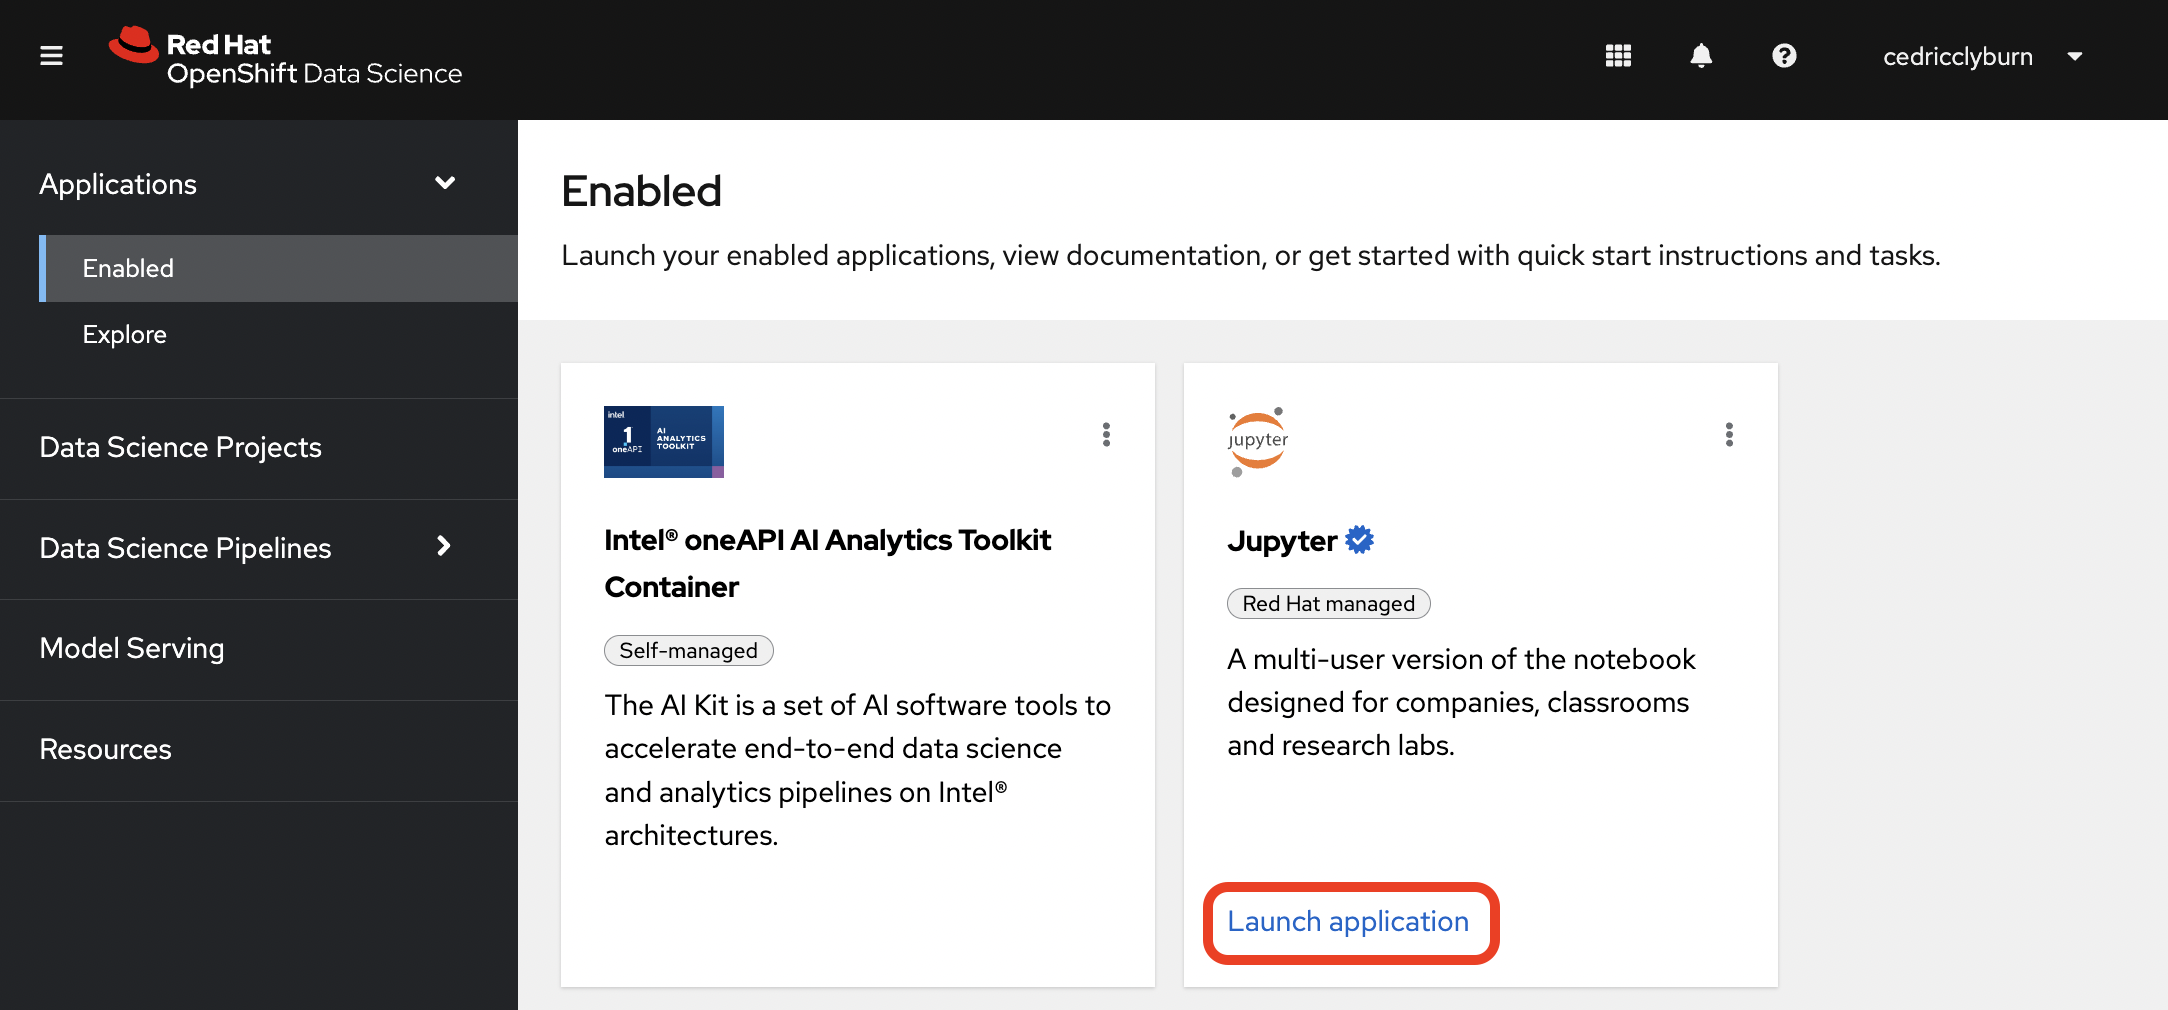
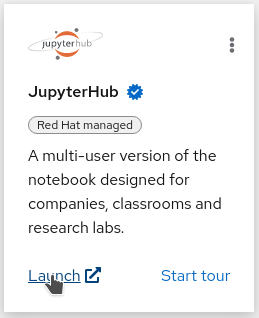
Now that you are logged into to Red Hat OpenShift Data Science, click on the "Launch" link on the JupyterHub card:
Launching JuptyerHub
To begin, we need to launch a JupyterHub environment. This is the environment that will host our Jupyter Notebooks. Click on the Launch link as shown before on the JupyterHub card:
-
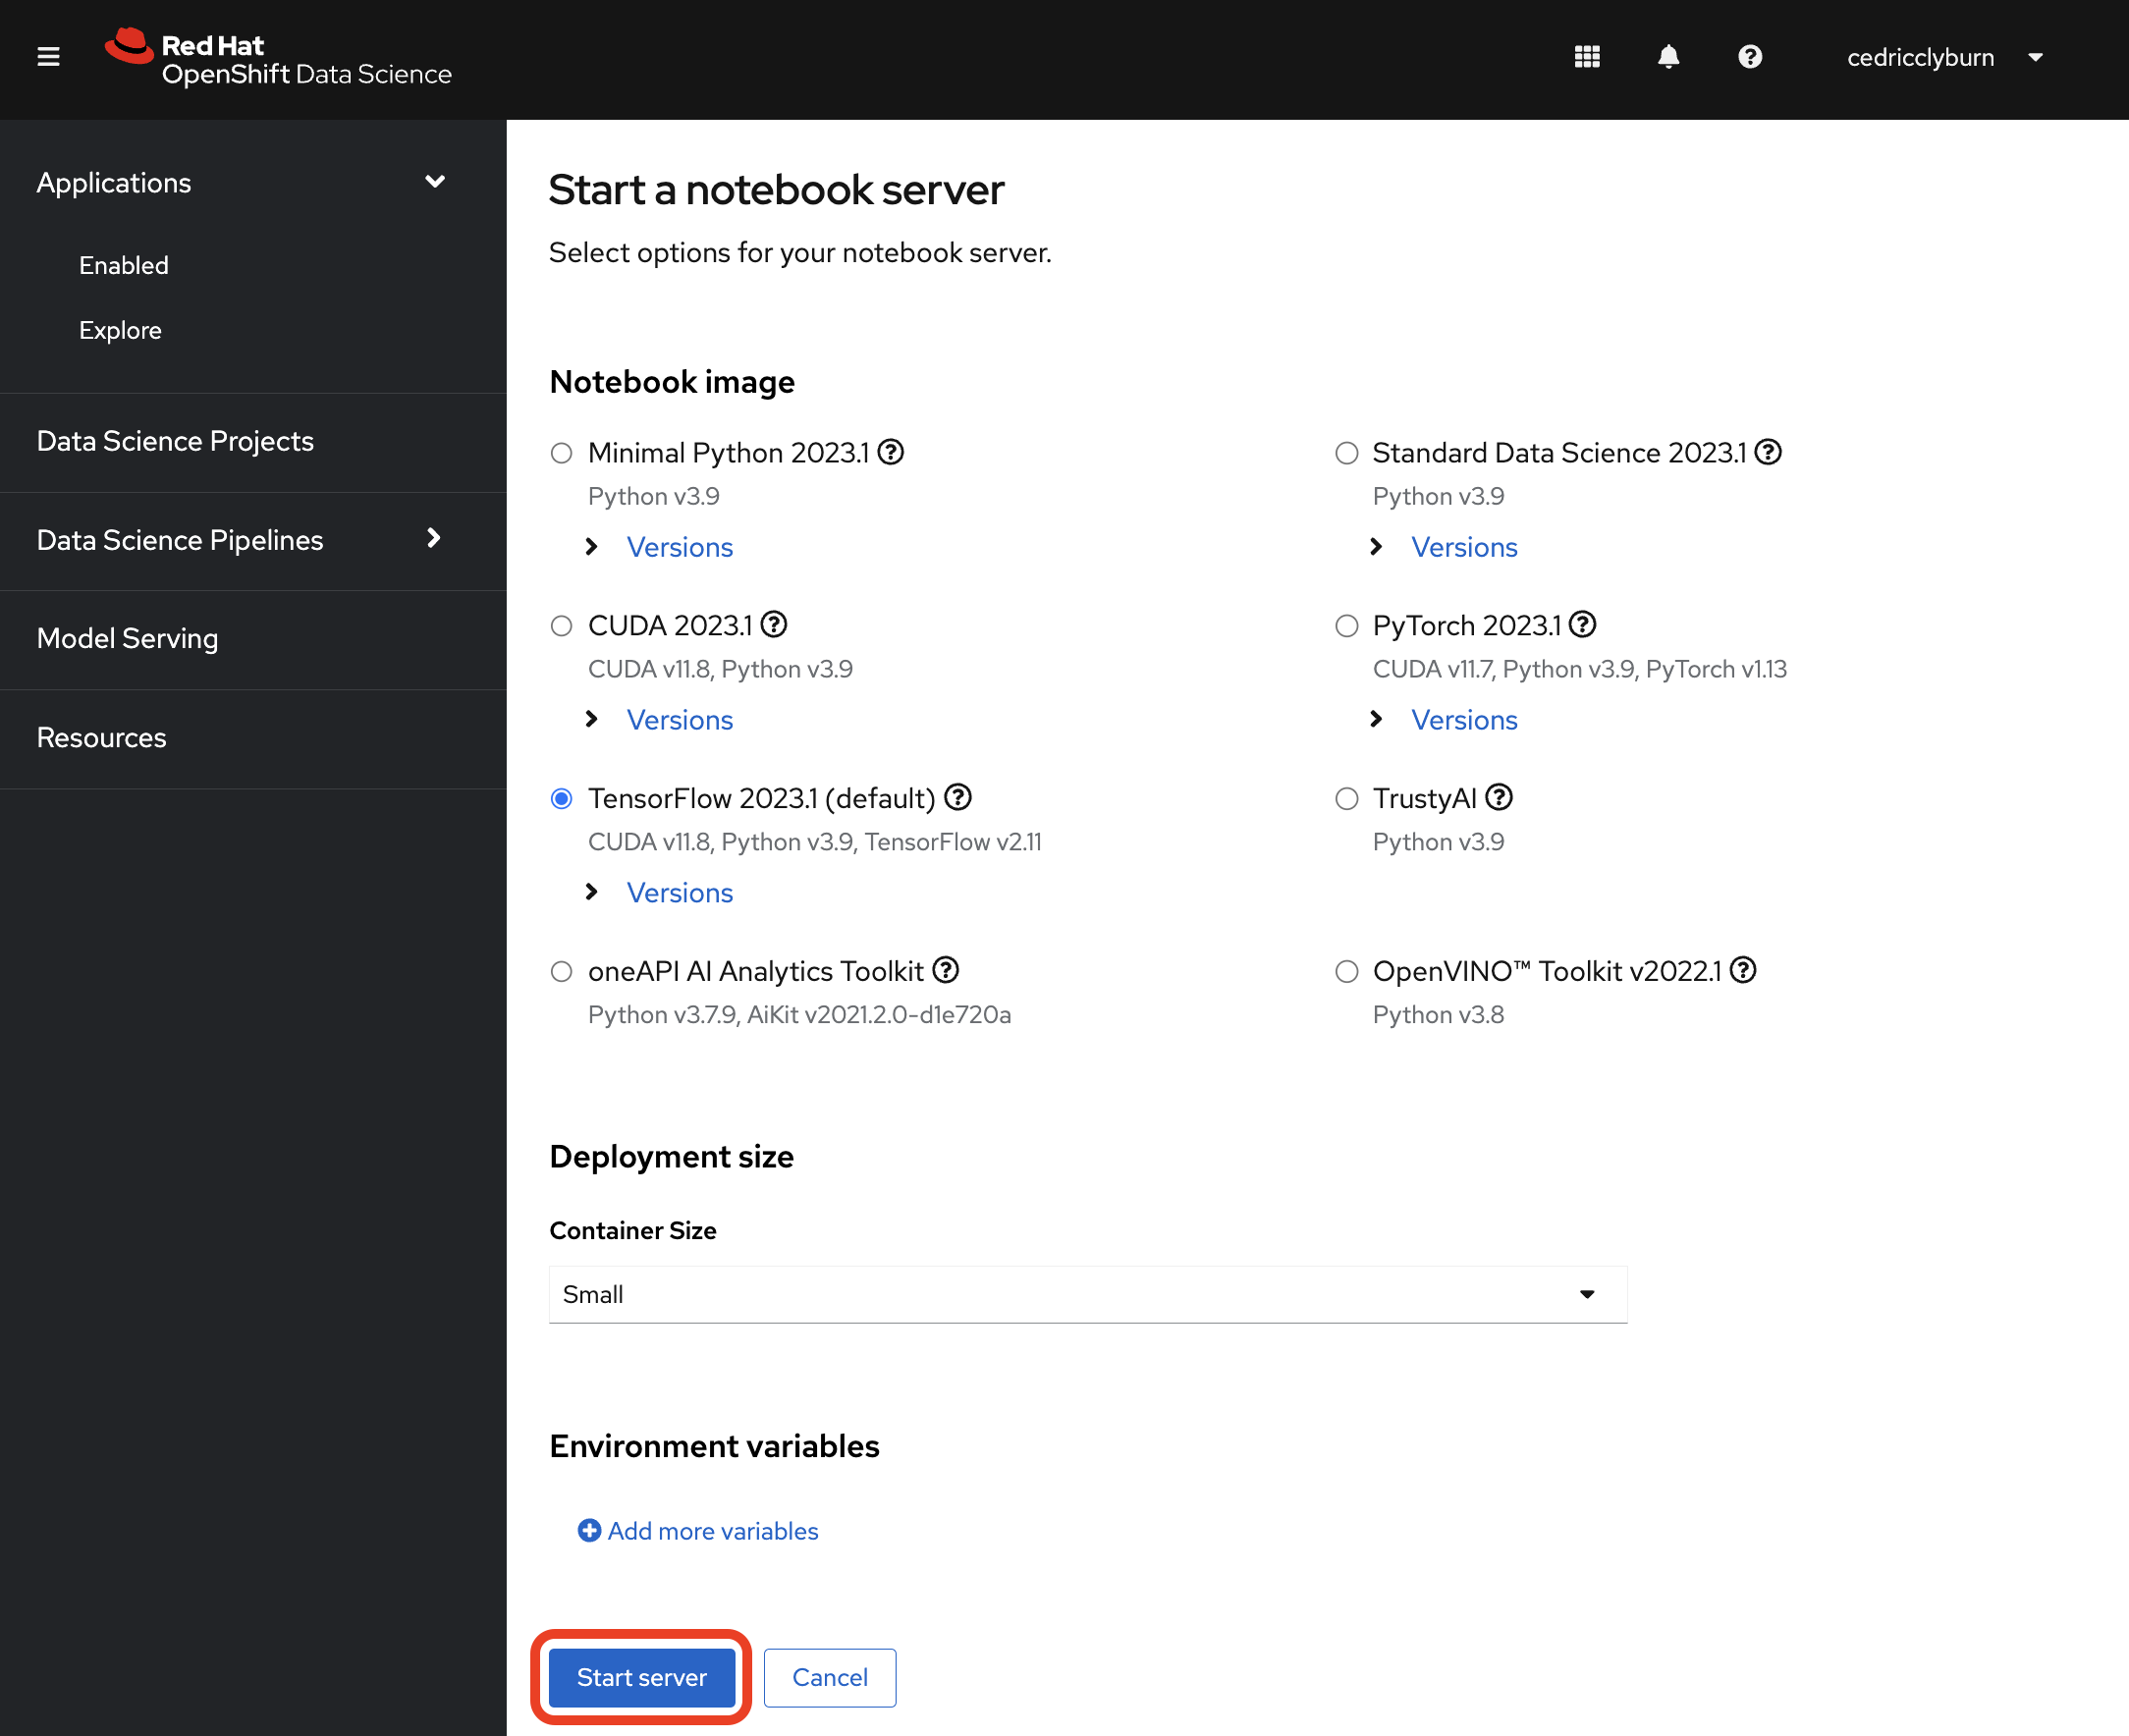
From the "Start a notebook server" page, there are multiple options you can choose from to launch your environment.
-
For the Notebook Image , select TensorFlow 2023.1 (
CUDA v11.8, Python v3.9, TensorFlow v2.11), as this is the flavor of notebook we want to use. It includes the TensorFlow library, which is used to do object detection. -
From the Container size dropdown, select
Small. -
At the bottom of the page you can now click on the Start Server button:
-
It may take a few minutes for your environment to start up. Once it does, you will be taken to the JupyterHub landing page.
| If you do not pick the correct notebook image, TensorFlow, the notebooks in the following sections will fail to run since they do not have the correct Python libraries. If you need to restart your notebook server with the correct image, you can do so from File → Hub Control Panel in the notebook environment in the next section. |