Hibernate Panache
You’ll learn how easy and productive is Quarkus with Hibernate with Panache.
Let’s make our application persists TODOs into a database instead of an in-memory Map.
Create Panache Applications
To start using Hibernate (with Panache), you need to add two extensions, the Hibernate-Panache and the JDBC driver of the database server. In this specific case, we use PostgreSQL, but most of the drivers are supported.
Run the following command in the project directory:
./mvnw quarkus:add-extension -Dextensions="io.quarkus:quarkus-hibernate-orm-panache,io.quarkus:quarkus-jdbc-postgresql"With the extension added, modify the Todo.java to convert it to a PanacheEntity:
package org.acme;

import java.util.List;

import javax.persistence.Column;
import javax.persistence.Entity;
import javax.validation.constraints.NotBlank;
import com.fasterxml.jackson.annotation.JsonSetter;

import io.quarkus.hibernate.orm.panache.PanacheEntity;

@Entity (1)
public class Todo extends PanacheEntity { (2)

    @NotBlank (3)
    @JsonSetter("activity")
    public String title;
    public boolean completed;

    @Column(name = "ordering")
    public int order;

    @JsonSetter("link")
    public String url;

    public static List<Todo> findNotCompleted() { (4)
        return list("completed", false);
    }

    public static List<Todo> findCompleted() {
        return list("completed", true);
    }

    public static long deleteCompleted() {
        return delete("completed", true);
    }

}| 1 | Uses JPA @Entity |
| 2 | Makes entity a PanacheEntity inheriting DB operations |
| 3 | Bean Validation annotation |
| 4 | Implements custom operations |
Notice that we’re not providing an @Id, nor we’re creating the getters and setters. Don’t worry. It’s a Panache feature.
By extending PanacheEntity, we’re using the Active Record persistence pattern instead of a DAO.
This means that all persistence methods are blended with our own Entity.
Hibernate ORM is the de facto JPA implementation and offers you the full breadth of an Object Relational Mapper. It makes complex mappings possible, but it does not make simple and common mappings trivial. Hibernate ORM with Panache focuses on making your entities trivial and fun to write in Quarkus.
Then let’s adapt the TodoResource.java:
package org.acme;

import org.eclipse.microprofile.rest.client.inject.RestClient;


import javax.transaction.Transactional;
import javax.validation.Valid;
import java.util.List;


import javax.ws.rs.DELETE;
import javax.ws.rs.GET;
import javax.ws.rs.OPTIONS;
import javax.ws.rs.PATCH;
import javax.ws.rs.POST;
import javax.ws.rs.Path;
import javax.ws.rs.PathParam;
import javax.ws.rs.WebApplicationException;
import javax.ws.rs.core.Response;
import javax.ws.rs.core.Response.Status;

import io.quarkus.panache.common.Sort;

@Path("/api")
public class TodoResource {

@RestClient
    ActivityService service;

      @GET
    @Path("load")
    @Transactional
    public Response load() {
        for (long i = 0; i < 10; i++) {
            service.getActivity().persist();
        }
        return Response.status(Status.CREATED).build();
    }

    @OPTIONS
    public Response opt() {
        return Response.ok().build();
    }

    @GET
    public List<Todo> getAll() {
        return Todo.listAll(Sort.by("order")); (1)
    }

    @GET
    @Path("/{id}")
    public Todo getOne(@PathParam("id") Long id) {
        Todo entity = Todo.findById(id);
        if (entity == null) {
            throw new WebApplicationException("Todo with id of " + id + " does not exist.", Status.NOT_FOUND);
        }
        return entity;
    }

    @POST
    @Transactional
    public Response create(@Valid Todo item) {
        item.persist(); (2)
        return Response.status(Status.CREATED).entity(item).build();
    }

    @PATCH
    @Path("/{id}")
    @Transactional
    public Response update(@Valid Todo todo, @PathParam("id") Long id) {
        Todo entity = Todo.findById(id);
        entity.id = id;
        entity.completed = todo.completed;
        entity.order = todo.order;
        entity.title = todo.title;
        entity.url = todo.url;
        return Response.ok(entity).build(); (3)
    }

    @DELETE
    @Transactional
    public Response deleteCompleted() {
        Todo.deleteCompleted();
        return Response.noContent().build();
    }

    @DELETE
    @Transactional
    @Path("/{id}")
    public Response deleteOne(@PathParam("id") Long id) {
        Todo entity = Todo.findById(id);
        if (entity == null) {
            throw new WebApplicationException("Todo with id of " + id + " does not exist.", Status.NOT_FOUND);
        }
        entity.delete();
        return Response.noContent().build();
    }
}| 1 | Static method for queries |
| 2 | Method for persisting data |
| 3 | Update is applied automatically within a transaction |
The last thing is to configure Datasource and Hibernate.
Open src/main/resources/application.properties, and add the following Hibernate configuration property to create database schema automatically.
quarkus.hibernate-orm.database.generation=updateAlso add a property to show SQL statements executed by the application but only when using dev-mode.
%dev.quarkus.hibernate-orm.log.sql=trueNow, invoke the /api/load endpoint to enter some data in the database:
curl localhost:8080/api/loadDev services
Quarkus can even provide you with a zero-config database out of the box when testing or running in dev mode, a feature we refer to as Dev Services. Depending on your database type, you may need Docker installed to use this feature.
To use Dev Services, all you need to do is include the relevant extension for the type of database you want (either reactive or JDBC, or both), without configuring any database URL, username, and password.
Quarkus will provide the database. You can just start coding without worrying about config.
Before starting the application, start your local Docker/Podman/CRI-O instance, and start Quarkus app in dev-mode running the following command in the terminal:
./mvnw compile quarkus:devThe output is similar to the following snippet, showing that DevServiceDatasourceProcessor has started a DB:
...
[INFO] Nothing to compile - all classes are up to date
Listening for transport dt_socket at address: 5005

--
2022-04-04 13:28:23,498 INFO  [io.qua.dat.dep.dev.DevServicesDatasourceProcessor] (build-31) Dev Services for the default datasource (postgresql) started.xSocketClientProviderStr
__  ____  __  _____   ___  __ ____  ______
 --/ __ \/ / / / _ | / _ \/ //_/ / / / __/
 -/ /_/ / /_/ / __ |/ , _/ ,< / /_/ /\ \
--\___\_\____/_/ |_/_/|_/_/|_|\____/___/
2022-04-04 13:28:25,903 WARN  [org.hib.eng.jdb.spi.SqlExceptionHelper] (JPA Startup Thread: <default>) SQL Warning Code: 0, SQLState: 00000
2022-04-04 13:28:25,904 WARN  [org.hib.eng.jdb.spi.SqlExceptionHelper] (JPA Startup Thread: <default>) constraint "uk_oxfuur9jdyqshux5rm7g7ga6c" of relation "todo" does not exist, skipping
Now you can open the web page again in a browser (http://localhost:8080/todo.html) and create some TODOs. These are inserted into database instead of a Map. Inspect the logs to see the SQL statements.
Stop the application (Ctrl+C), and let’s see how to deploy the application wit the database to Kubernetes.
Deploy Application and Database in the sandbox
Deploy PostgreSQL in the sandbox
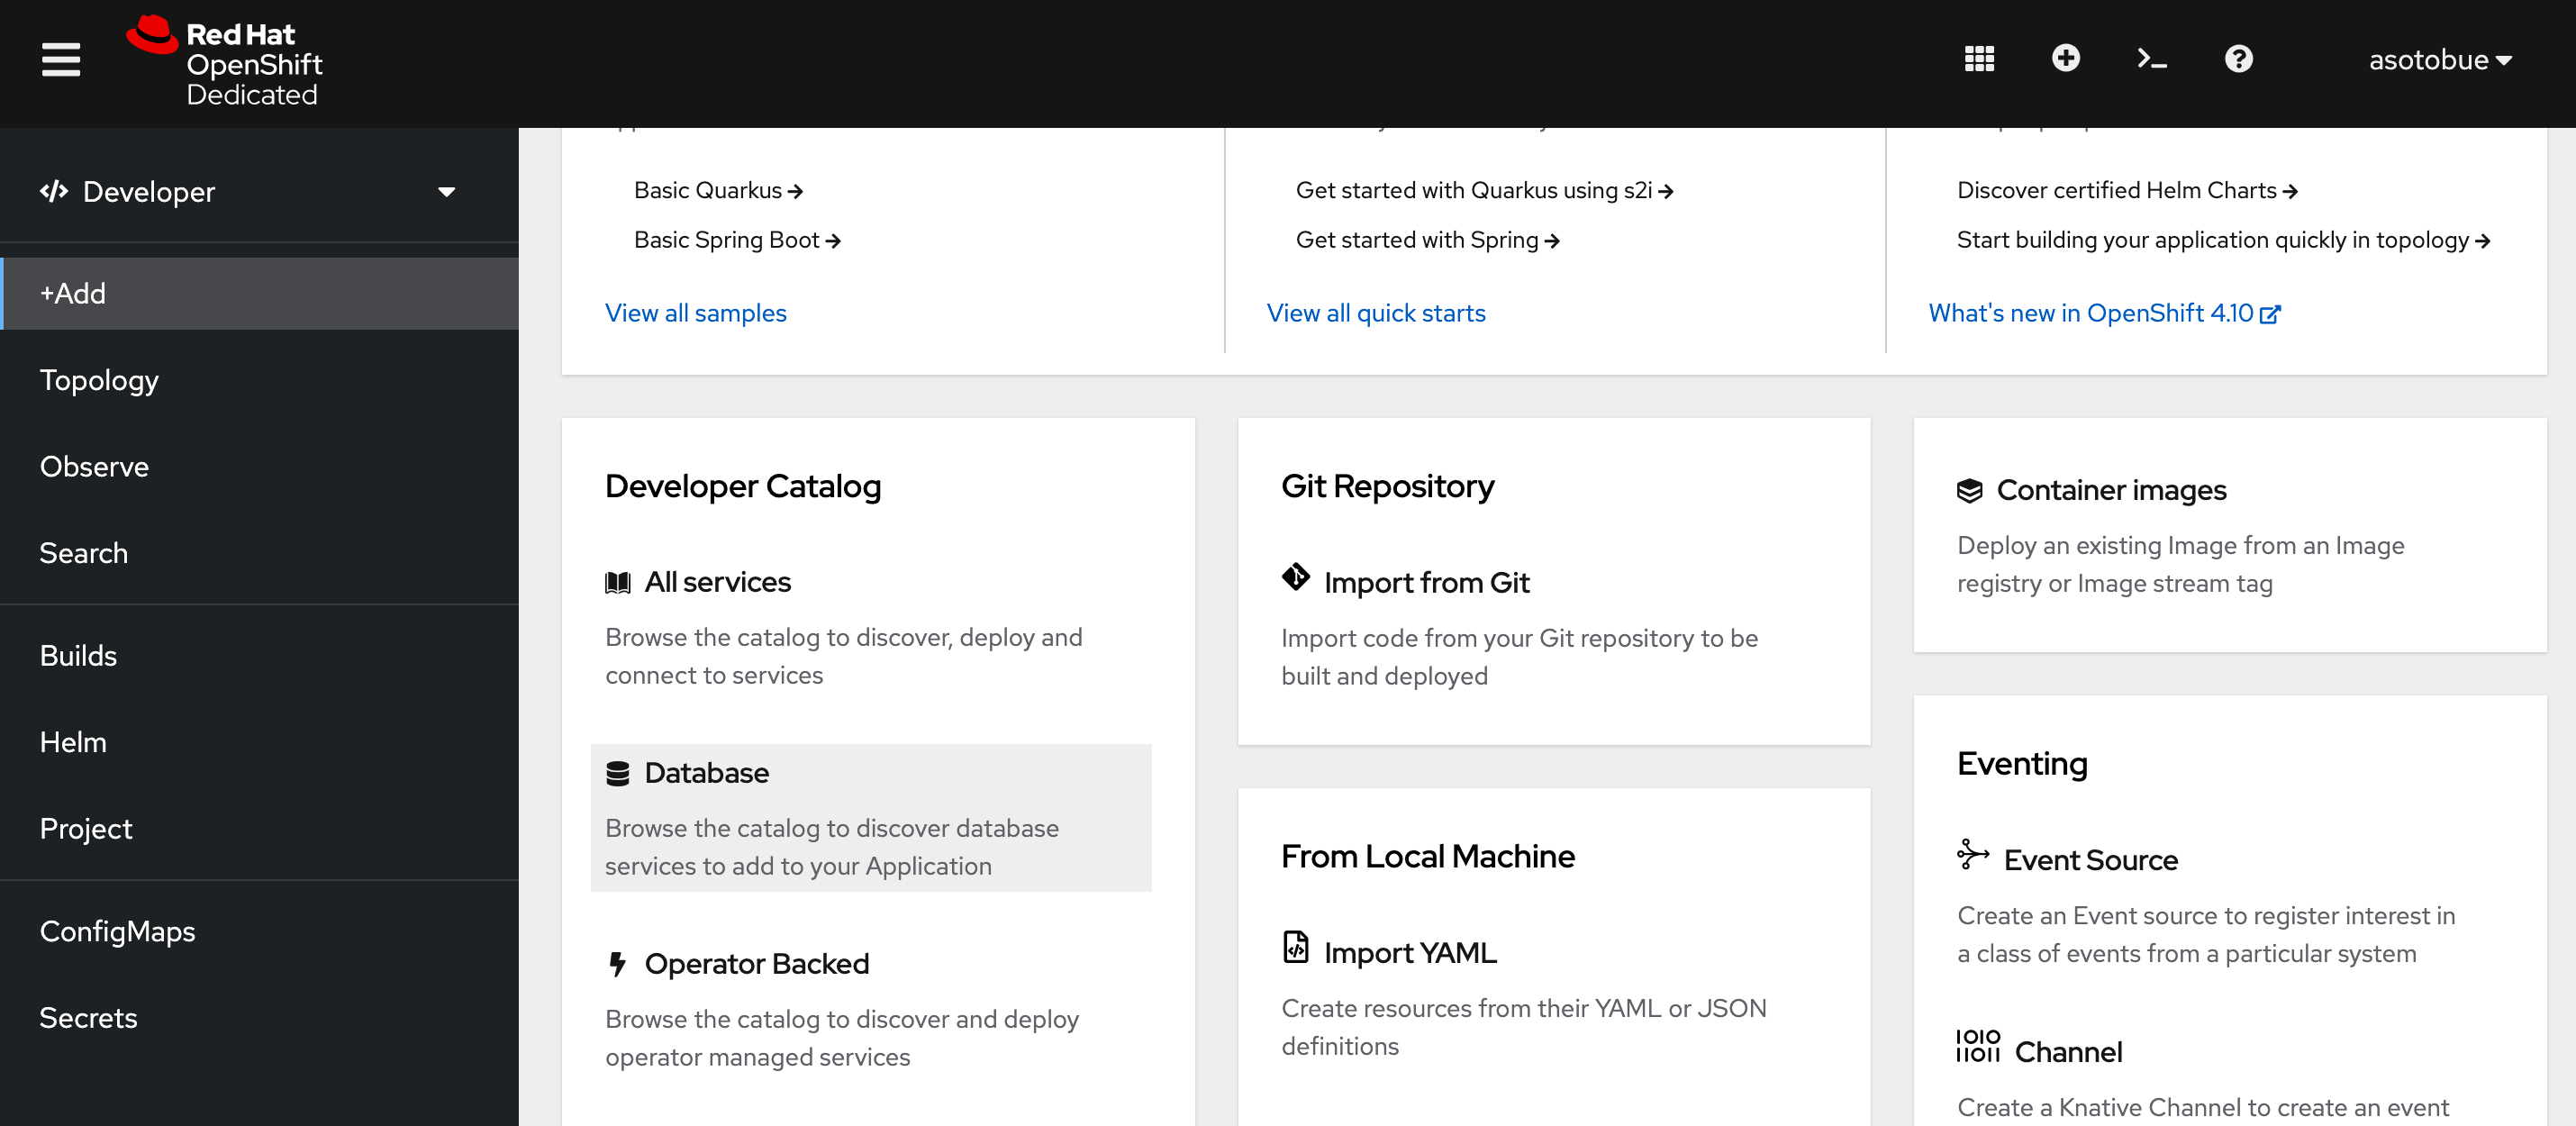
Open the Red Hat Sandbox console in Developers view (if not already there) and create a PostgreSQL instance by running the following steps.
Click to +Add button, scroll to Developers Catalog section, and click on Database section.
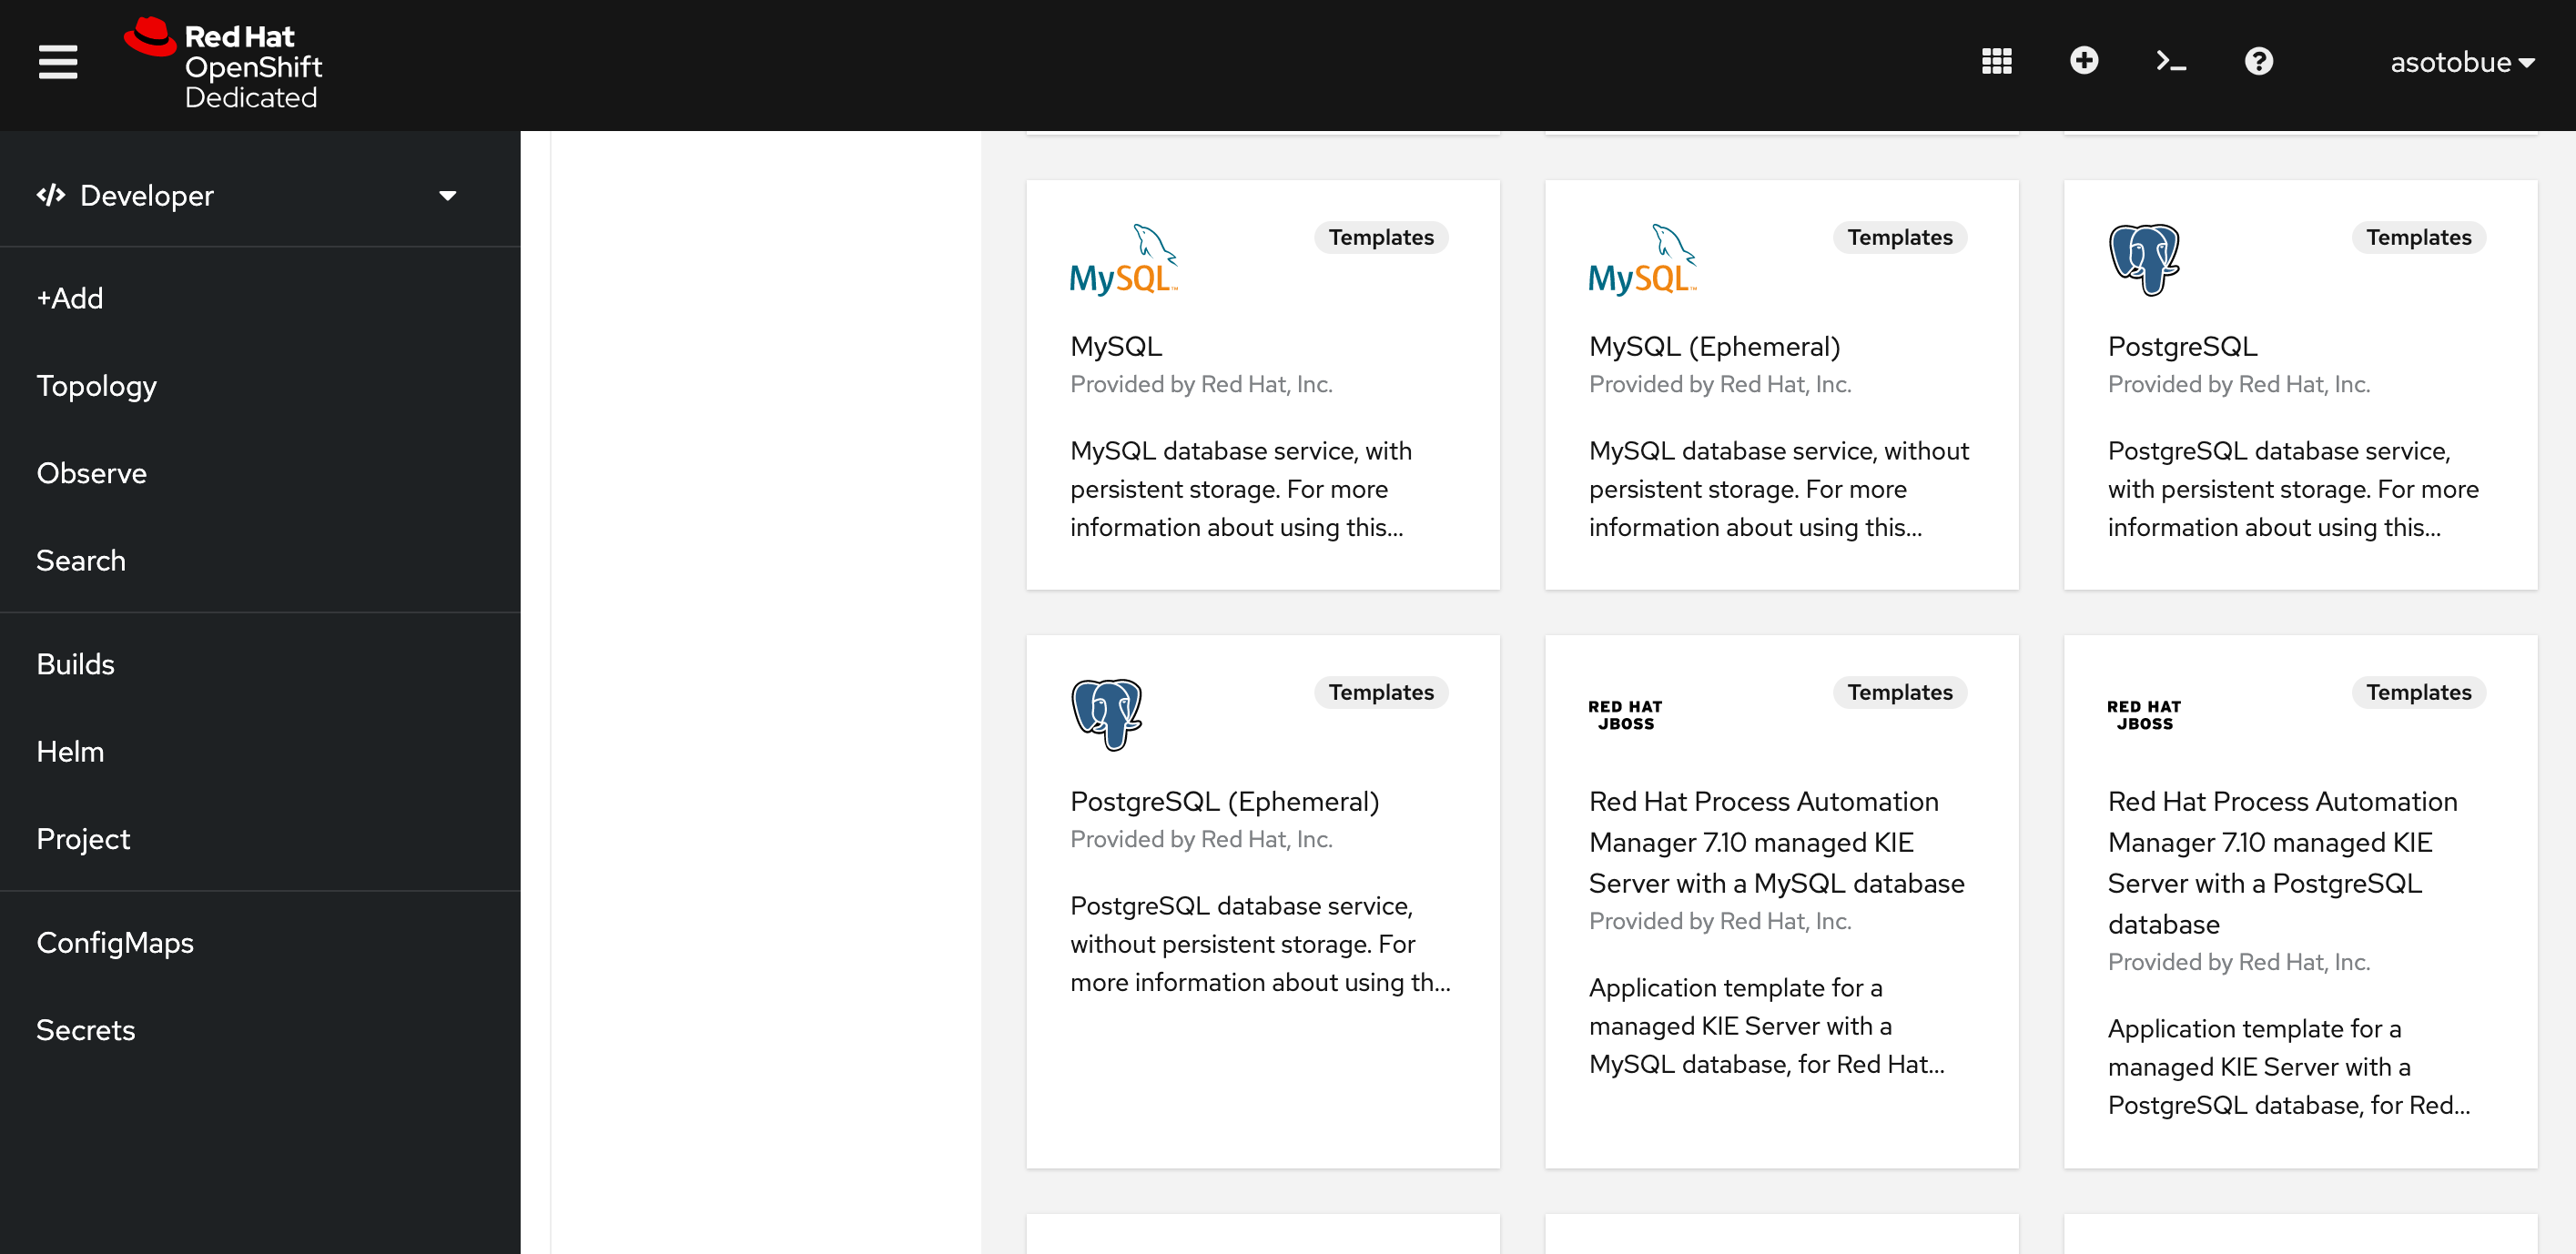
Then click on the template named PostgreSQL (Ephimeral).
Click on Instantiate Template and fill the fields with the values shown in the following image:
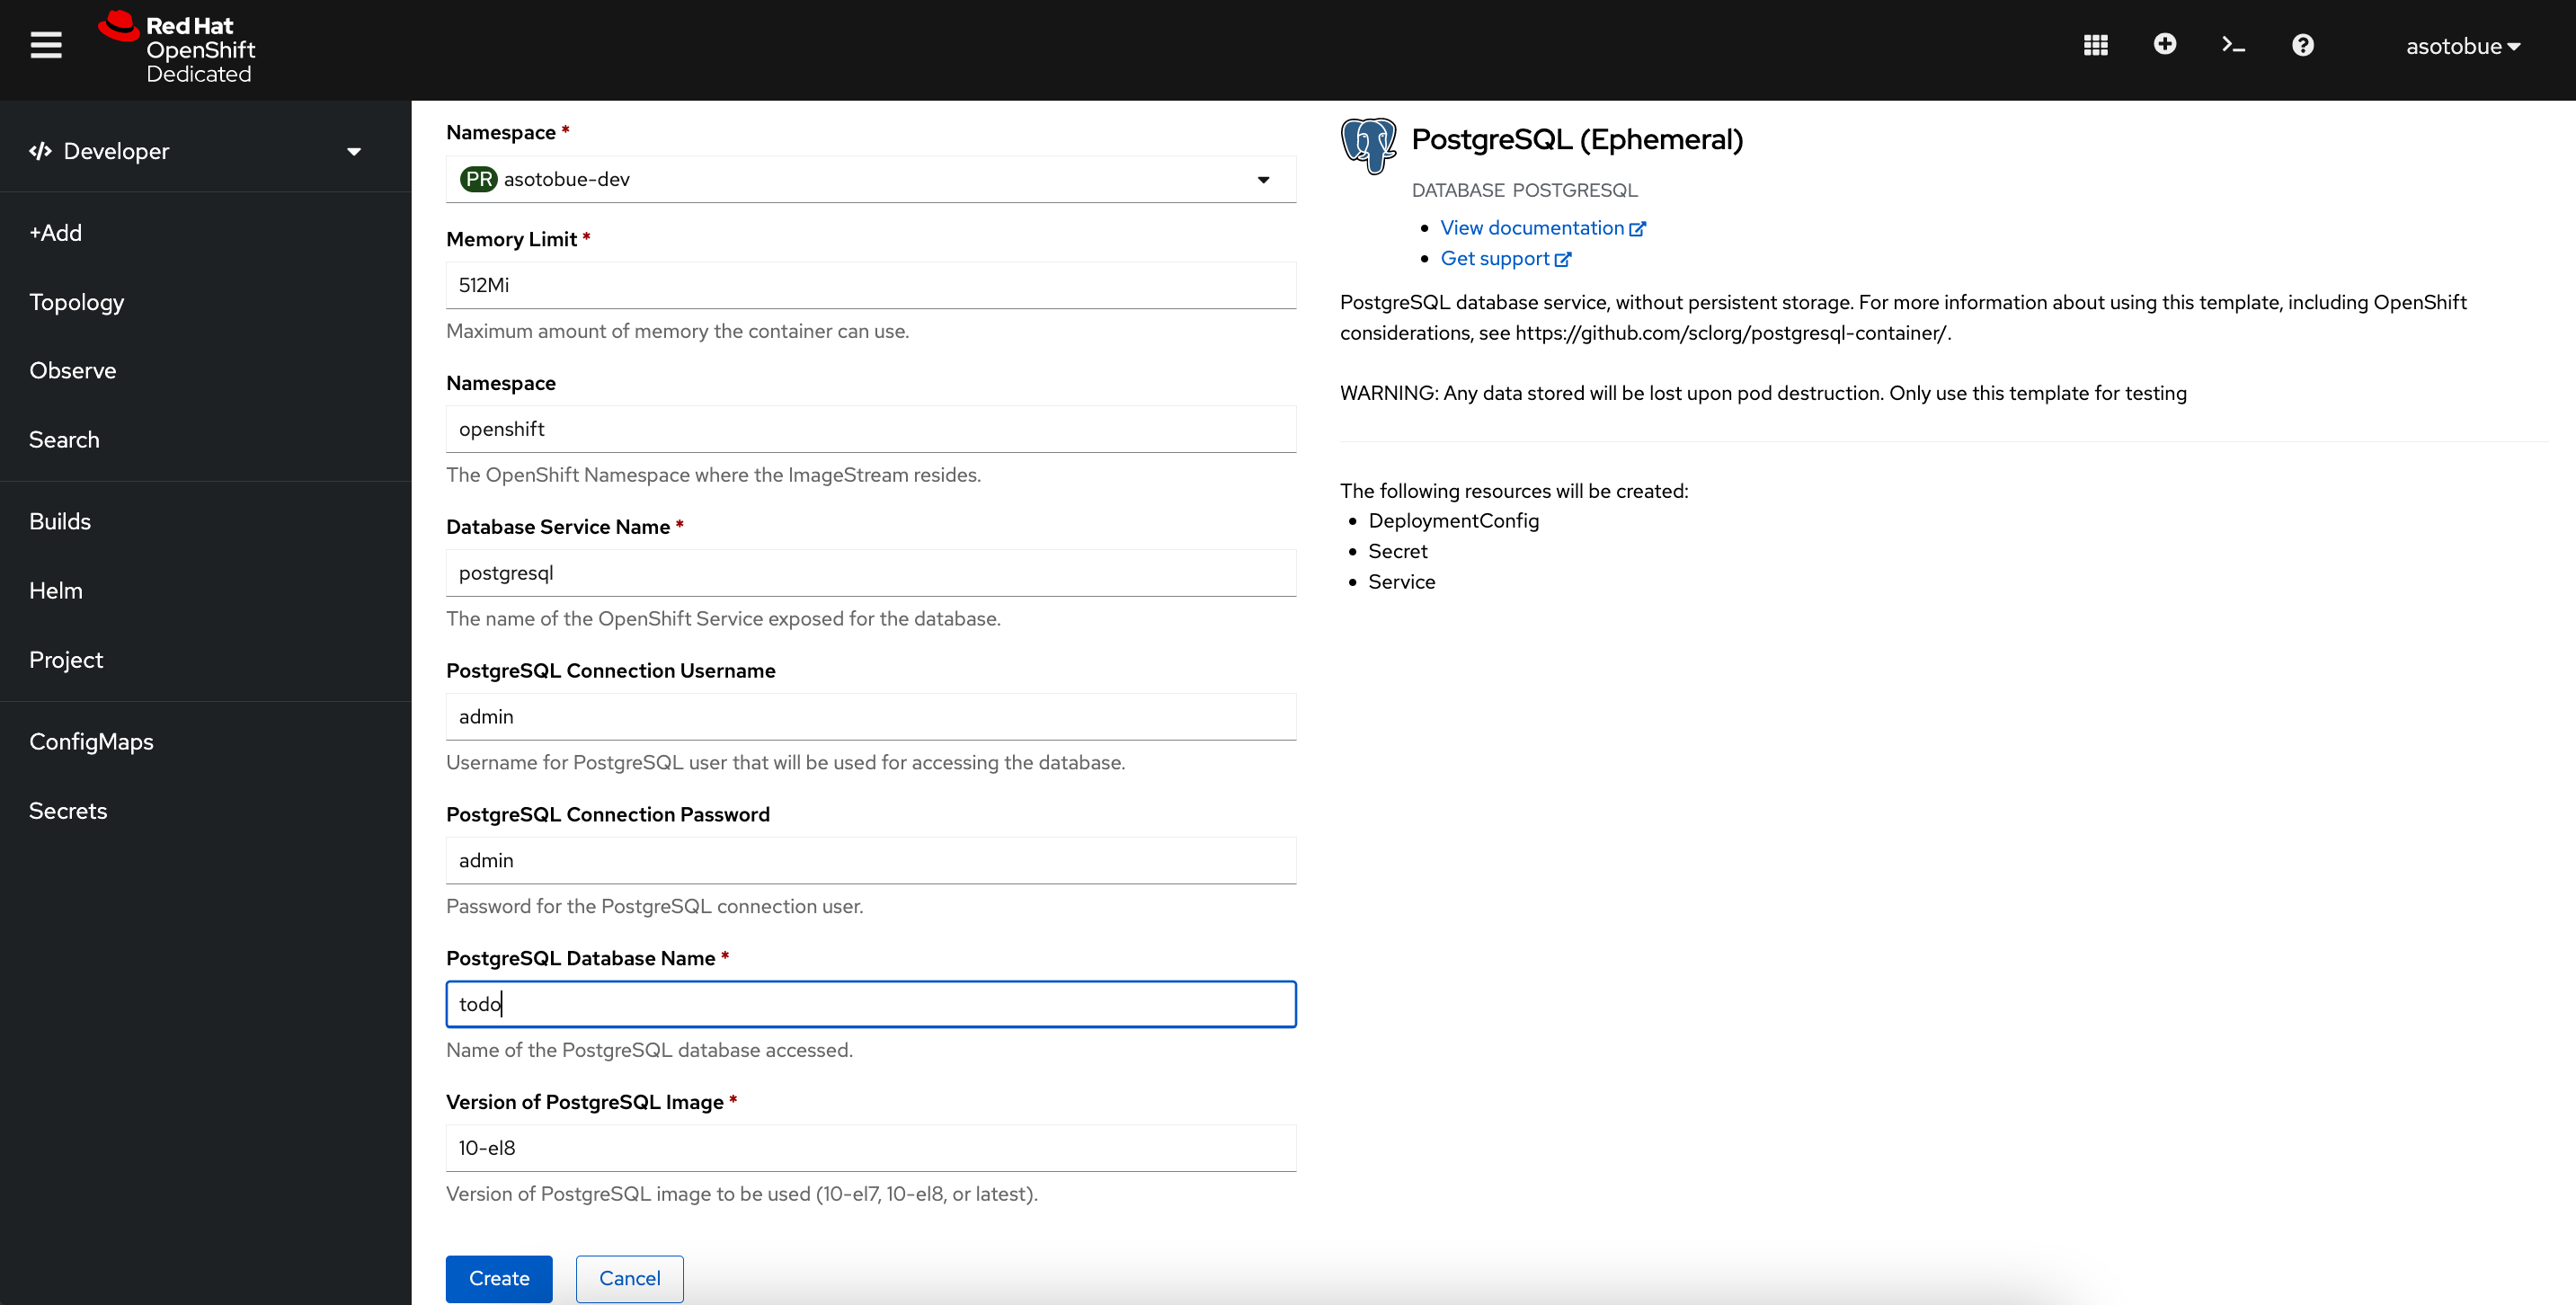
Then push the Create button and wait until the PostgreSQL instance is provided.
Notice that a service is created with postgresql as name, which is the DNS name to access within the cluster to the PostgreSQL instance.
Now open again the src/main/resources/application.properties configuration file and configure the database parameters:
quarkus.kubernetes.env.secrets=postgresql

quarkus.datasource.db-kind=postgresql
quarkus.datasource.username=${database-user:admin}
quarkus.datasource.password=${database-password:admin}
%prod.quarkus.datasource.jdbc.url=jdbc:postgresql://postgresql:5432/${database-name}| Please note that the values for user, password and database name are filled in from a Kubernetes Secret. This secret is generated when you instantiate your PostgreSQL database via the Red Hat OpenShift template. |
The last step is deploying the application to sandbox by running:
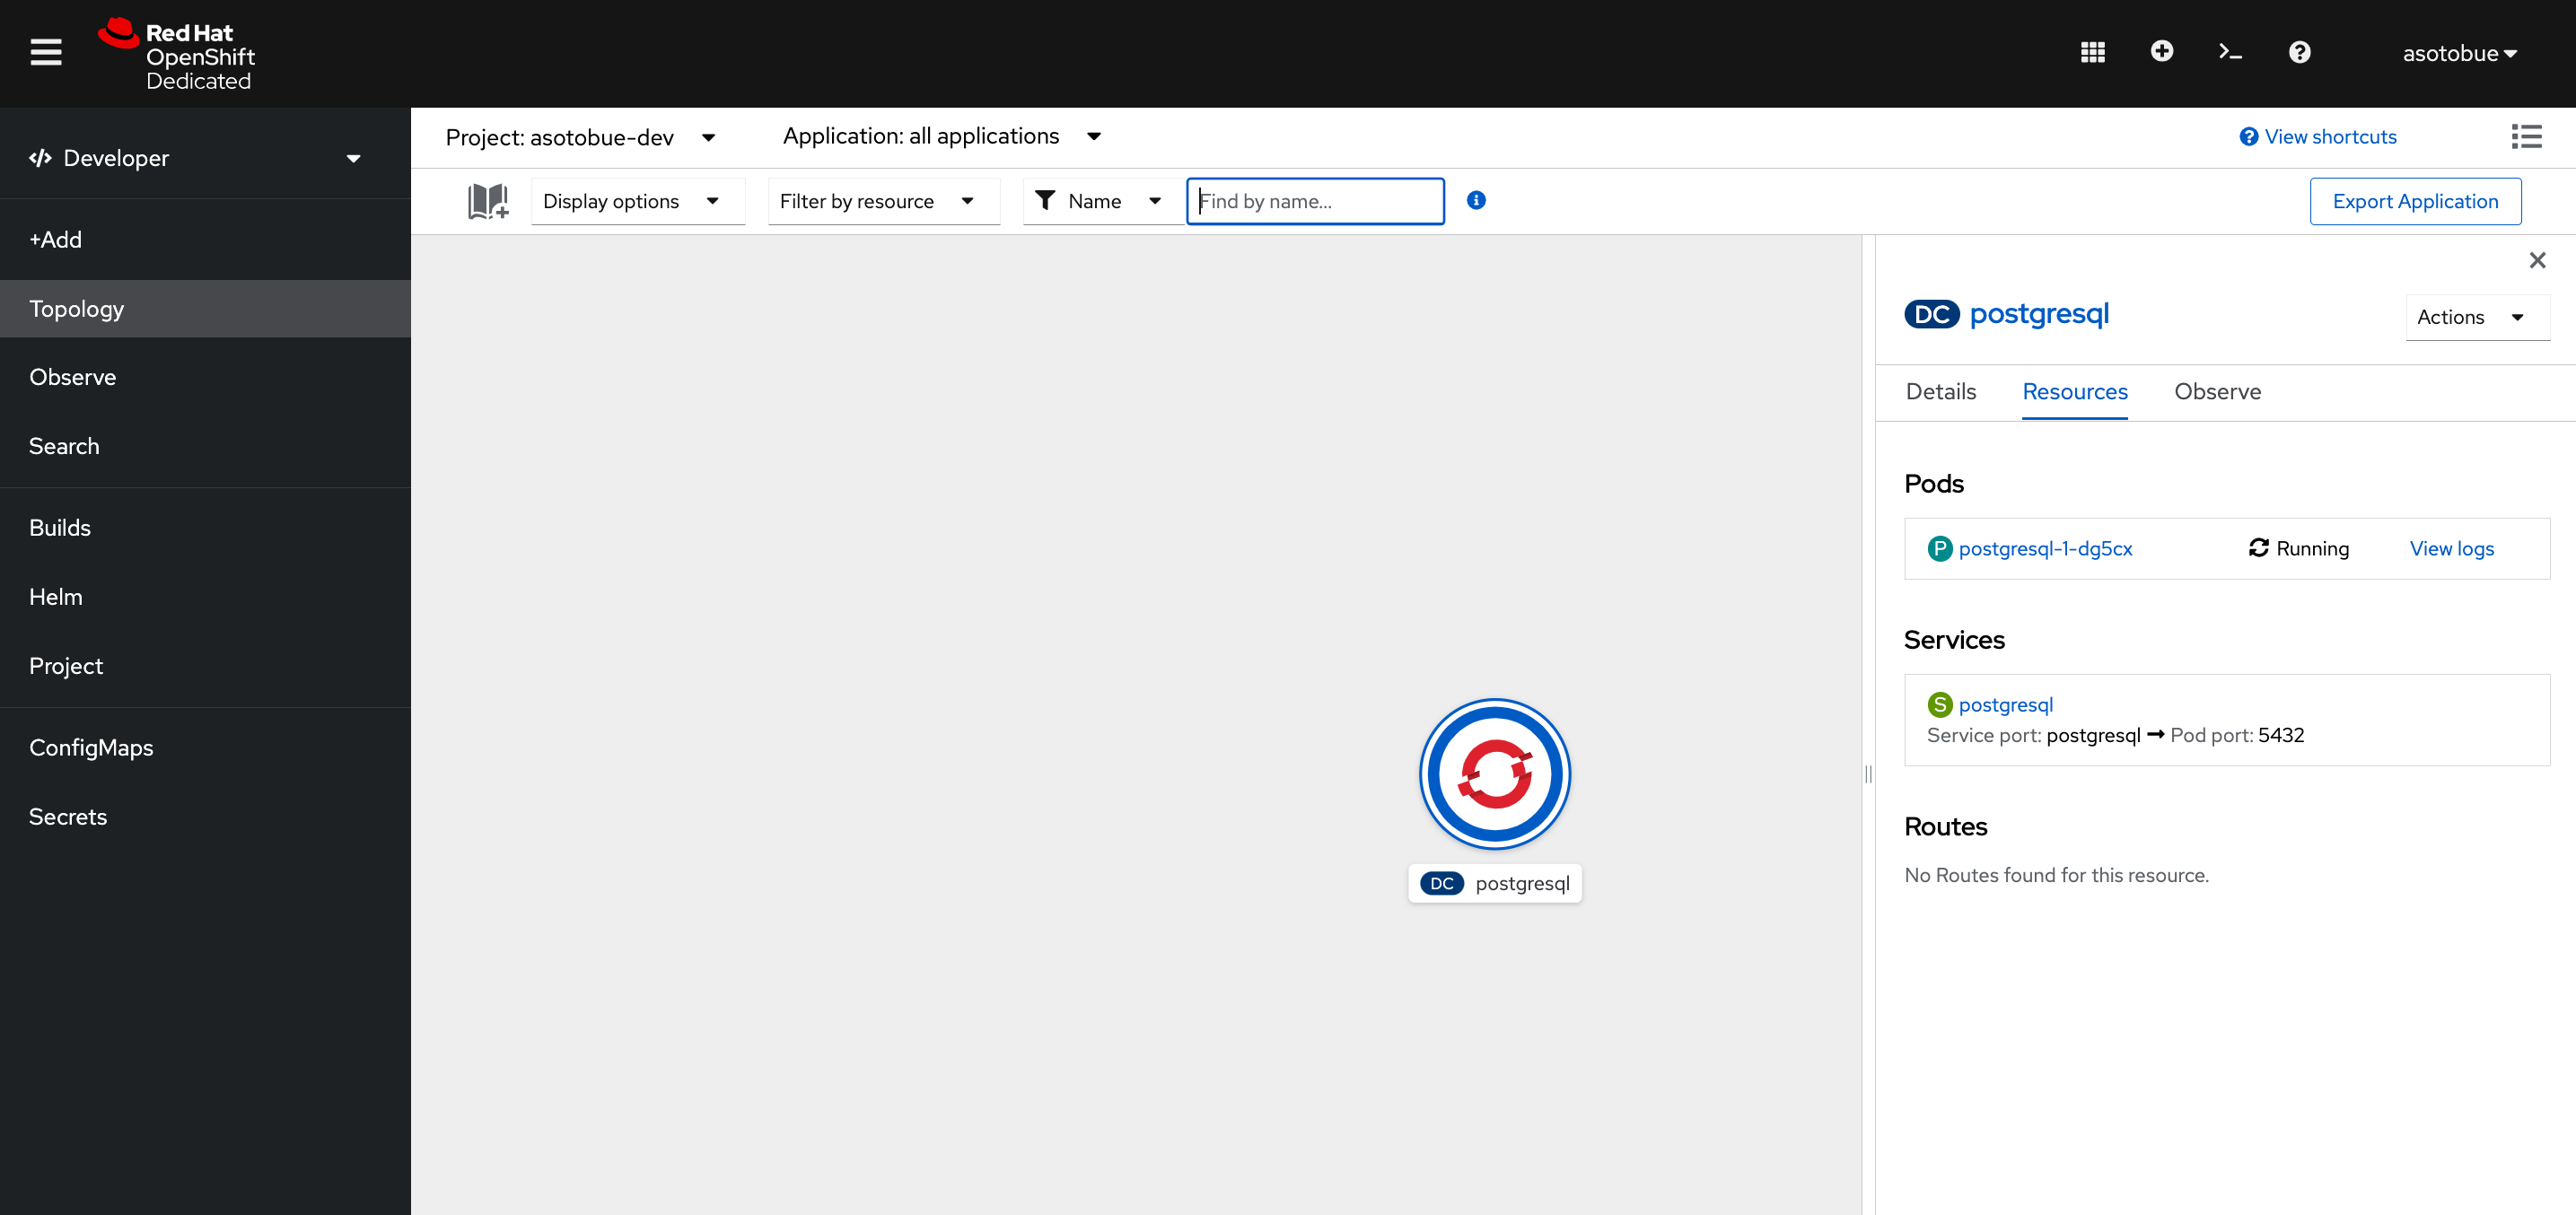
./mvnw clean package -DskipTests -Dquarkus.kubernetes.deploy=trueIf you open the sandbox console you should see both TODO application and the database deployed.

Show Health Checks
Health check extension registers a special readiness health check for databases when using Panache extension.
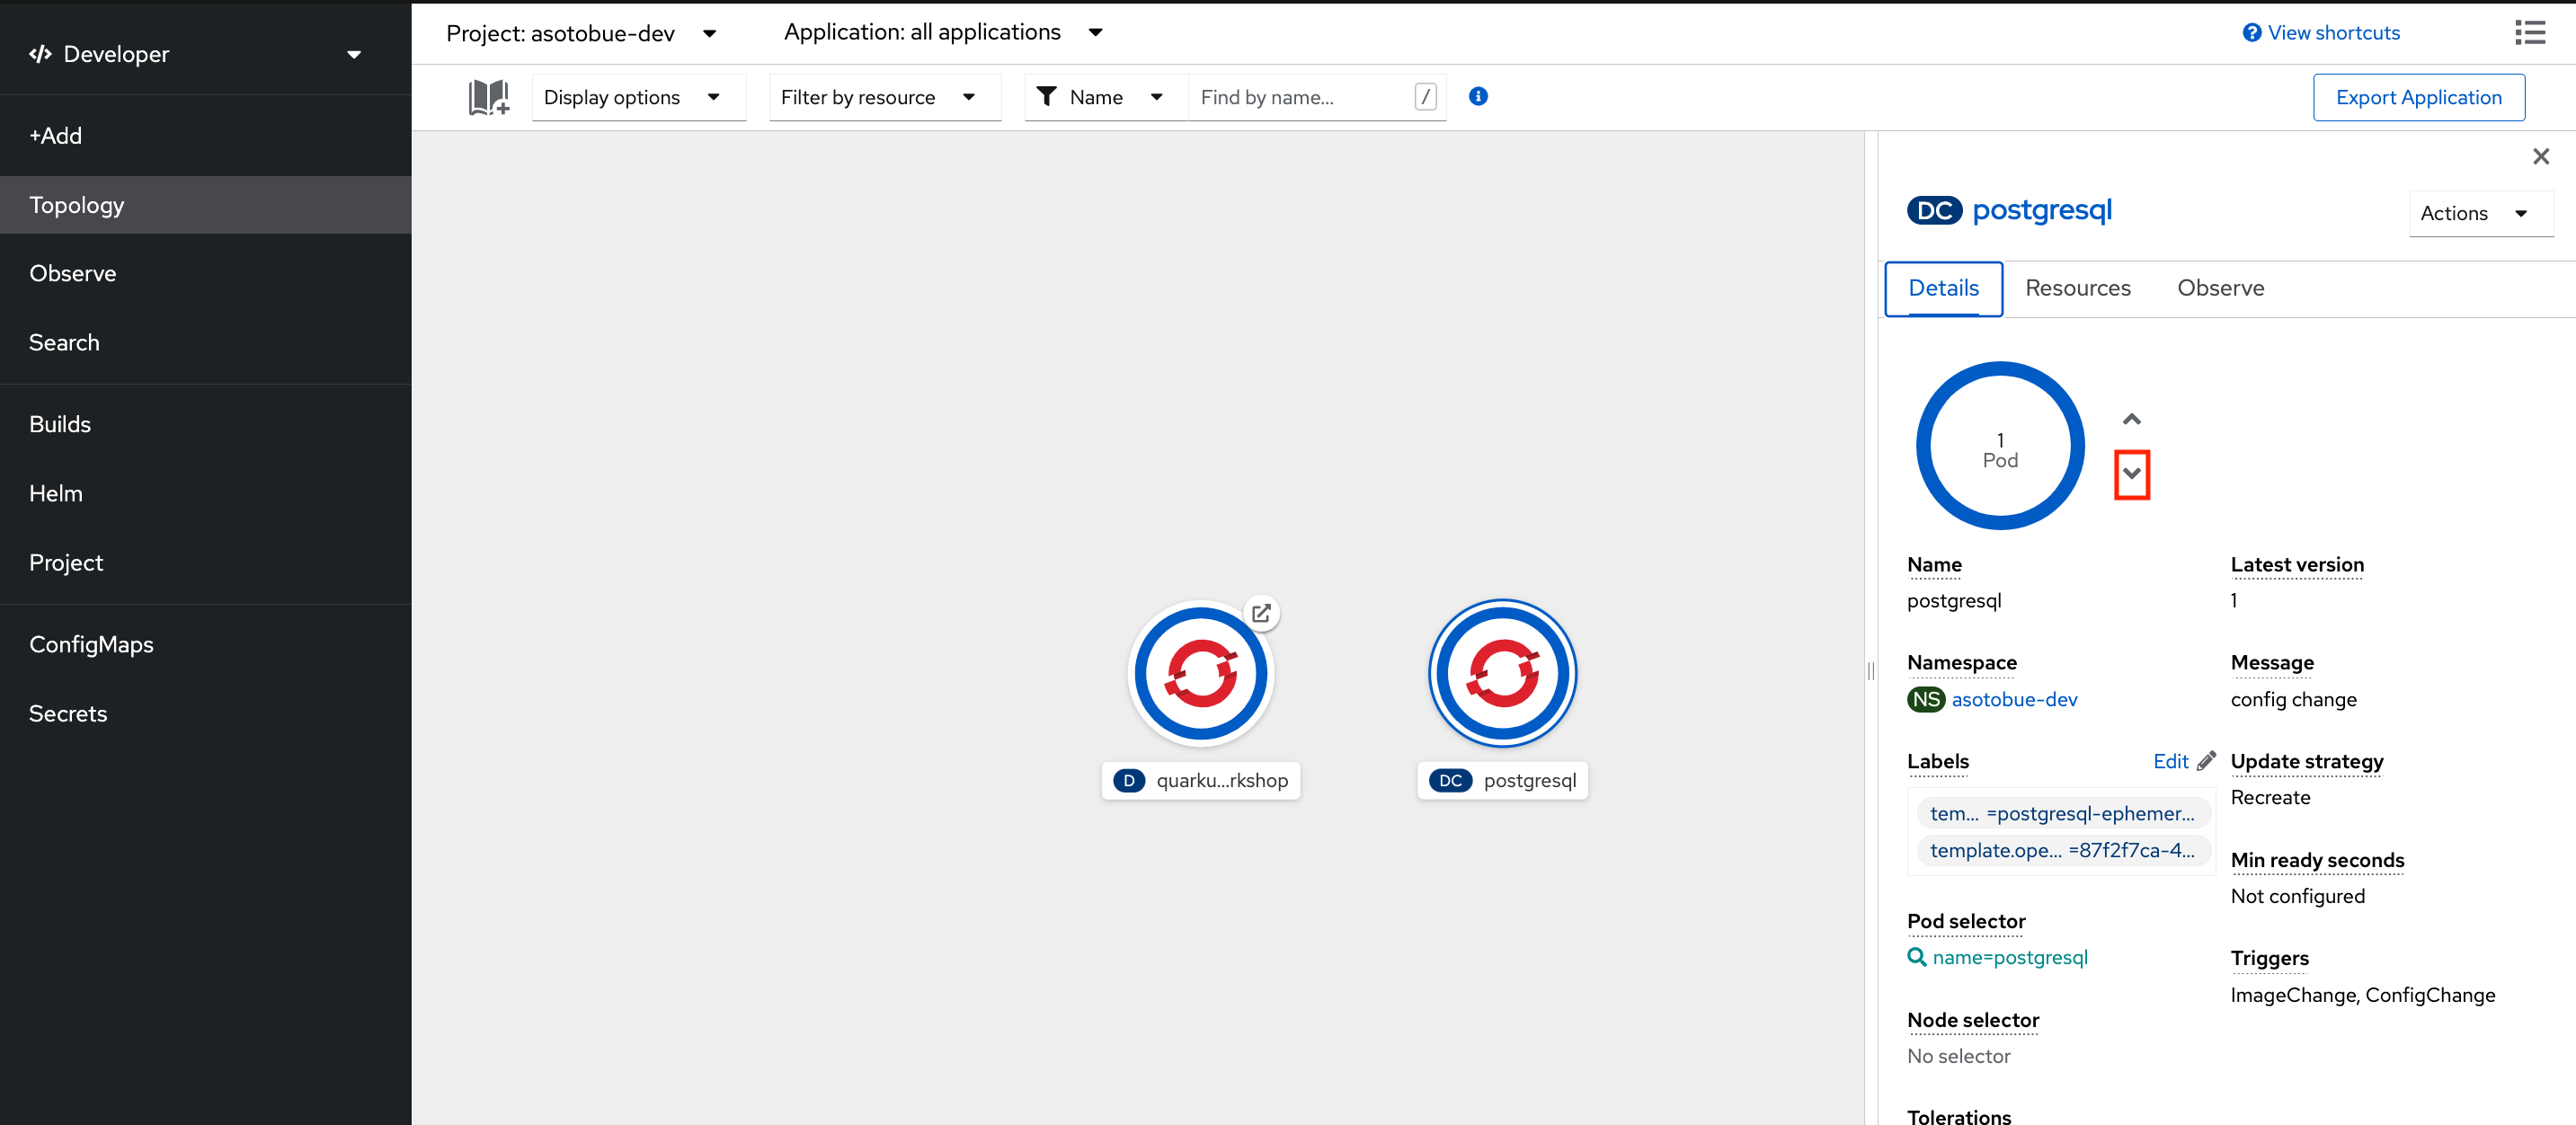
Let’s see how the application is become in not ready state when the database is stopped. Open Topology view, select the PostgreSQL deployment, and go to Details tab. There scale down the Pod to 0 instances by clicking the arrow as shown in the following figure:
Then wait some seconds and you’ll see that the application becomes not ready as the readiness check fails.
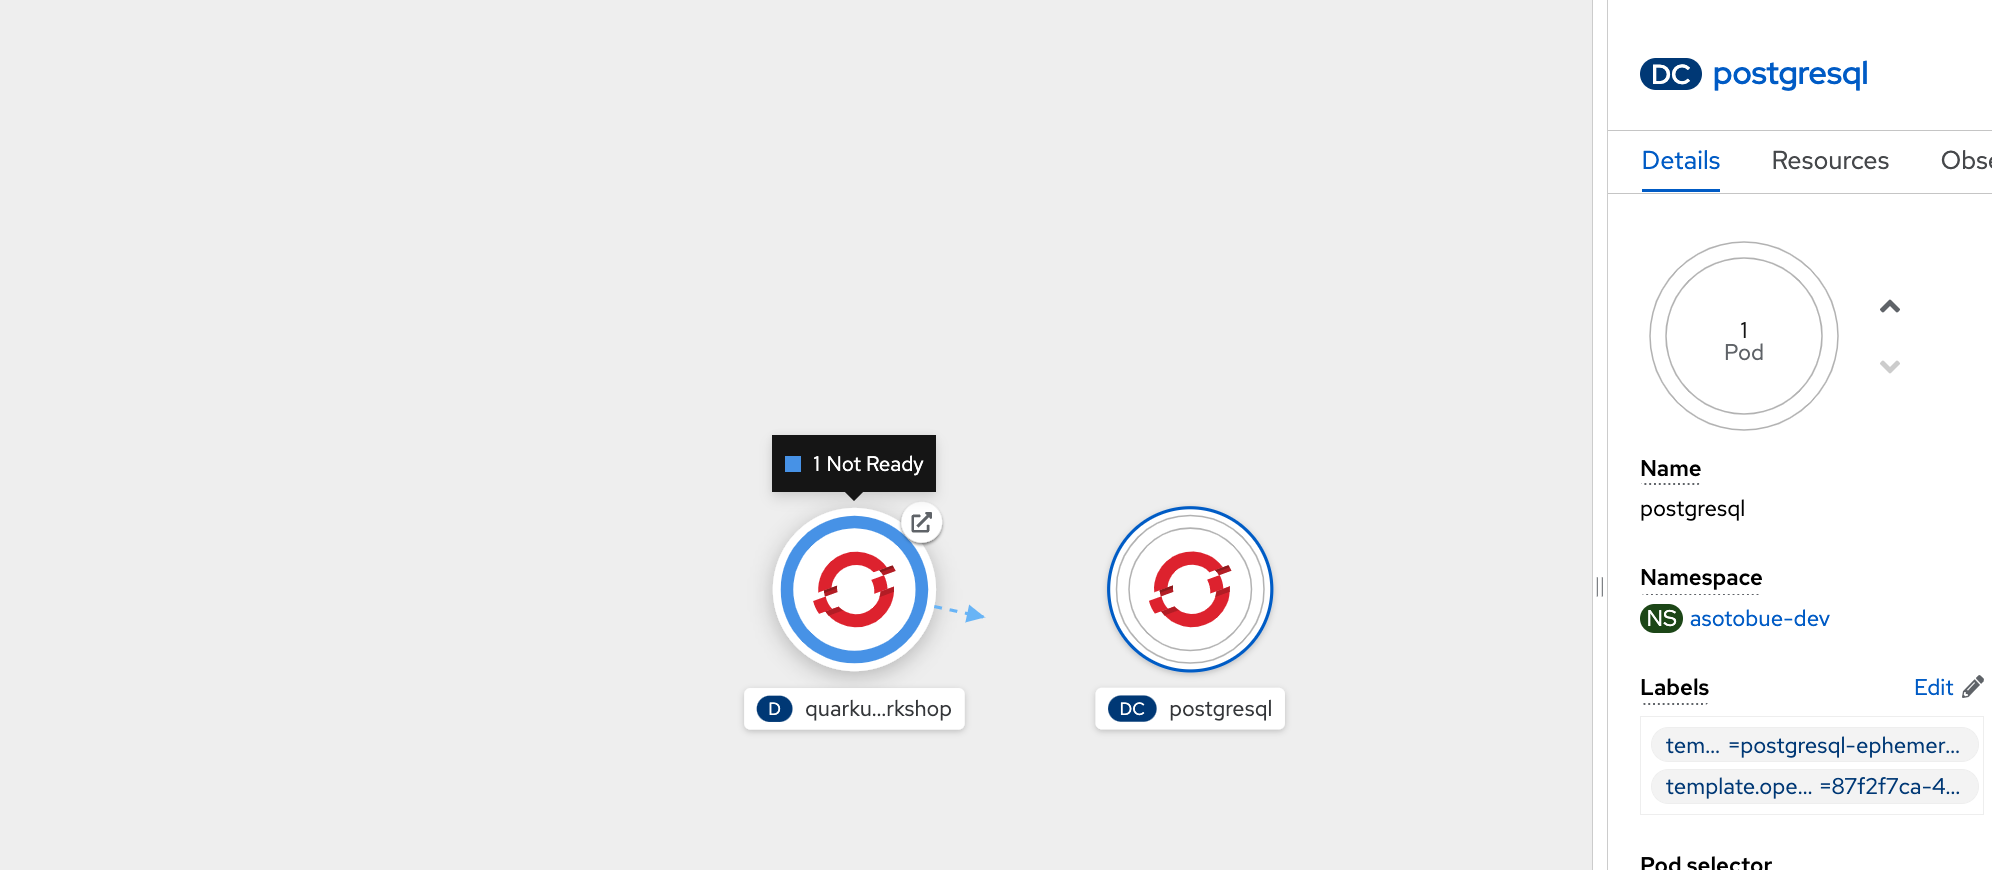
Scaling up the PostgreSQL instance will make the application be ready again.