Creating containers
Now that we have our running workload it’s time that we containerize it !
CLI Tools
The following CLI tools are required for running the exercises in this section.
Please have them installed and configured before you get started with any of the tutorial chapters.
| Tool | macOS | Fedora | Windows |
|---|---|---|---|
Docker |
|
Quay account
By creating your Red Hat Developer account you also have access to Quay
Using dockerfiles
A Dockerfile is where you’ll estabilish the definitions used to build a container image. It uses three main keywords/commands:
-
FROM: where you’ll inform the base image used to build your own image
-
ADD: where you’ll add resources (files) to your image
-
CMD: where you’ll inform how to start the application
|
Sometimes people ask when to use ADD and when to use COPY. Both of them can be used to copy files from the source to destination, but:
|
To let this application ready to be distributed, let’s package it:
mvn packageBuilding a Dockerfile
Create a file named Dockerfile.
FROM registry.access.redhat.com/ubi8/openjdk-11

ADD target/quarkus-app/lib/ /deployments/lib/
ADD target/quarkus-app/quarkus-run.jar /deployments/app.jar
ADD target/quarkus-app/app/ /deployments/app/
ADD target/quarkus-app/quarkus/ /deployments/quarkus/

CMD ["java", "-jar", "/deployments/app.jar"]
You might have noticed that Quarkus already created some Dockerfiles for you in src/main/docker and in the end we will be using those. Here we just want you to learn how to craft your own Dockerfile.
|
Building the image
With the Dockerfile that we created in the last step, let’s build a container image:
docker build -t my-image .You’ll see an output like this:
Sending build context to Docker daemon  10.95MB
Step 1/4 : FROM registry.access.redhat.com/ubi8/openjdk-11
latest: Pulling from ubi8/openjdk-11
396754cf27f9: Pull complete
41e1474940d5: Pull complete
fe52369f78c0: Pull complete
Digest: sha256:98c69a5b81bca0fe331100390c7357c69fd137e8a6228300eda820a0893a1be0
Status: Downloaded newer image for registry.access.redhat.com/ubi8/openjdk-11:latest
 ---> e502114b0d20
Step 2/4 : ADD target/lib/* /deployments/lib/
 ---> 47e879f30cec
Step 3/4 : ADD target/*-runner.jar /deployments/app.jar
 ---> 393bbade30ae
Step 4/4 : CMD ["java", "-jar", "/deployments/app.jar"]
 ---> Running in d09c7708954d
Removing intermediate container d09c7708954d
 ---> 87776d35fc85
Successfully built 87776d35fc85
Successfully tagged my-image:latest
Listing the available images
To see your just create image, just run:
docker imagesYou’ll see at least these two outputs:
REPOSITORY                                   TAG                 IMAGE ID            CREATED             SIZE
my-image                                     latest              87776d35fc85        4 minutes ago       516MB
registry.access.redhat.com/ubi8/openjdk-11   latest              e502114b0d20        2 months ago        505MB
Your image is the my-image and the registry.access.redhat.com/ubi8/openjdk-11 is the image used to build yours.
Running containers
As we removed the image on the previous step, we need to build it again:
docker build -t my-image .Now we are ready to create a container based on this image. Just run:
docker create --name my-container my-imageYou container is created.
Listing containers
To see your newly created container:
docker psYour output is probably something like this:
CONTAINER ID IMAGE COMMAND CREATED STATUS PORTS NAMESWhy isn’t your container in the list if you’ve just created it?
Because it isn’t running, and using plain docker ps will only list the running containers. Now try this:
docker ps -aNow your output should be something like this:
CONTAINER ID        IMAGE               COMMAND                  CREATED             STATUS              PORTS               NAMES
ccaadddf1c48        my-image            "java -jar /deployme…"   3 minutes ago       Created                                 my-container
It’s listing all containers, not matter the status. Your container is listed as Created.
Starting containers
To run the container you’ve just created execute this:
docker start my-containerTo check if it’s running, try the plain docker ps again:
docker psNow your output will be like this:
CONTAINER ID        IMAGE               COMMAND                  CREATED             STATUS              PORTS                          NAMES
ccaadddf1c48        my-image            "java -jar /deployme…"   8 minutes ago       Up 54 seconds       8080/tcp, 8443/tcp, 8778/tcp   my-container
Notice that the status now is Up 54 seconds.
Creating and starting a container at once
Instead of creating a container and then starting, you can do it at once:
docker run --name my-container my-imageNotice that you terminal is attached to the container process. If you use CTRL+C, the container will stop.
So let’s create a detached container. First we remove this one:
docker rm my-containerAnd now we create it detached:
docker run -d --name my-container my-imageChecking the log of a container
To see what this container is logging, use this:
docker logs my-containerIf you want to keep following the output:
docker logs -f my-containerUse CTRL+C to stop following the log.
Port
The application running inside your container can be accessed through the port 8080, so let’s try it:
curl localhost:8080/helloYou should have gotten this output:
curl: (7) Failed to connect to localhost port 8080: Connection refusedThis is happening because we need to explicit expose the ports you need, and we didn’t do it so far. So let’s fix it.
First let’s remove the container:
docker rm -f my-container|
Did you see something different? We used the |
Now we re-create the container, but exposing the port 8080:
docker run -d --name my-container -p 8080:8080 my-imageLet’s try to reach the application again:
curl localhost:8080/helloYou now got this output:
helloMeaning that your application is now accessible.
Pushing an image to a public registry
So far you’ve been working with your container image locally. Now let’s take it to a remote registry.
First you’ll need to tag your image accordingly to your Quay account:
docker tag my-image quay.io/rhdevelopers/quarkus-app-workshopReplace rhdevelopers with your Red Hat Developer username.
Also, if you build your image already using the tag, you won’t need to do this step before pushing it. In our case it would be like this:
docker build -t quay.io/rhdevelopers/quarkus-app-workshop .
From this point, replace myrepository with the name of your own repository.
|
If you now run docker images you’ll see something like this:
REPOSITORY                                   TAG                 IMAGE ID            CREATED             SIZE
my-image                                     latest              a63dec174904        55 minutes ago      516MB
quay.io/rhdevelopers/quarkus-app-workshop    latest              a63dec174904        55 minutes ago      516MB
It’s now ready to be pushed. Before doing it, you just need to login into your Docker Hub account within your terminal:
docker login quay.ioAnd finally you can push it:
docker push quay.io/rhdevelopers/quarkus-app-workshop
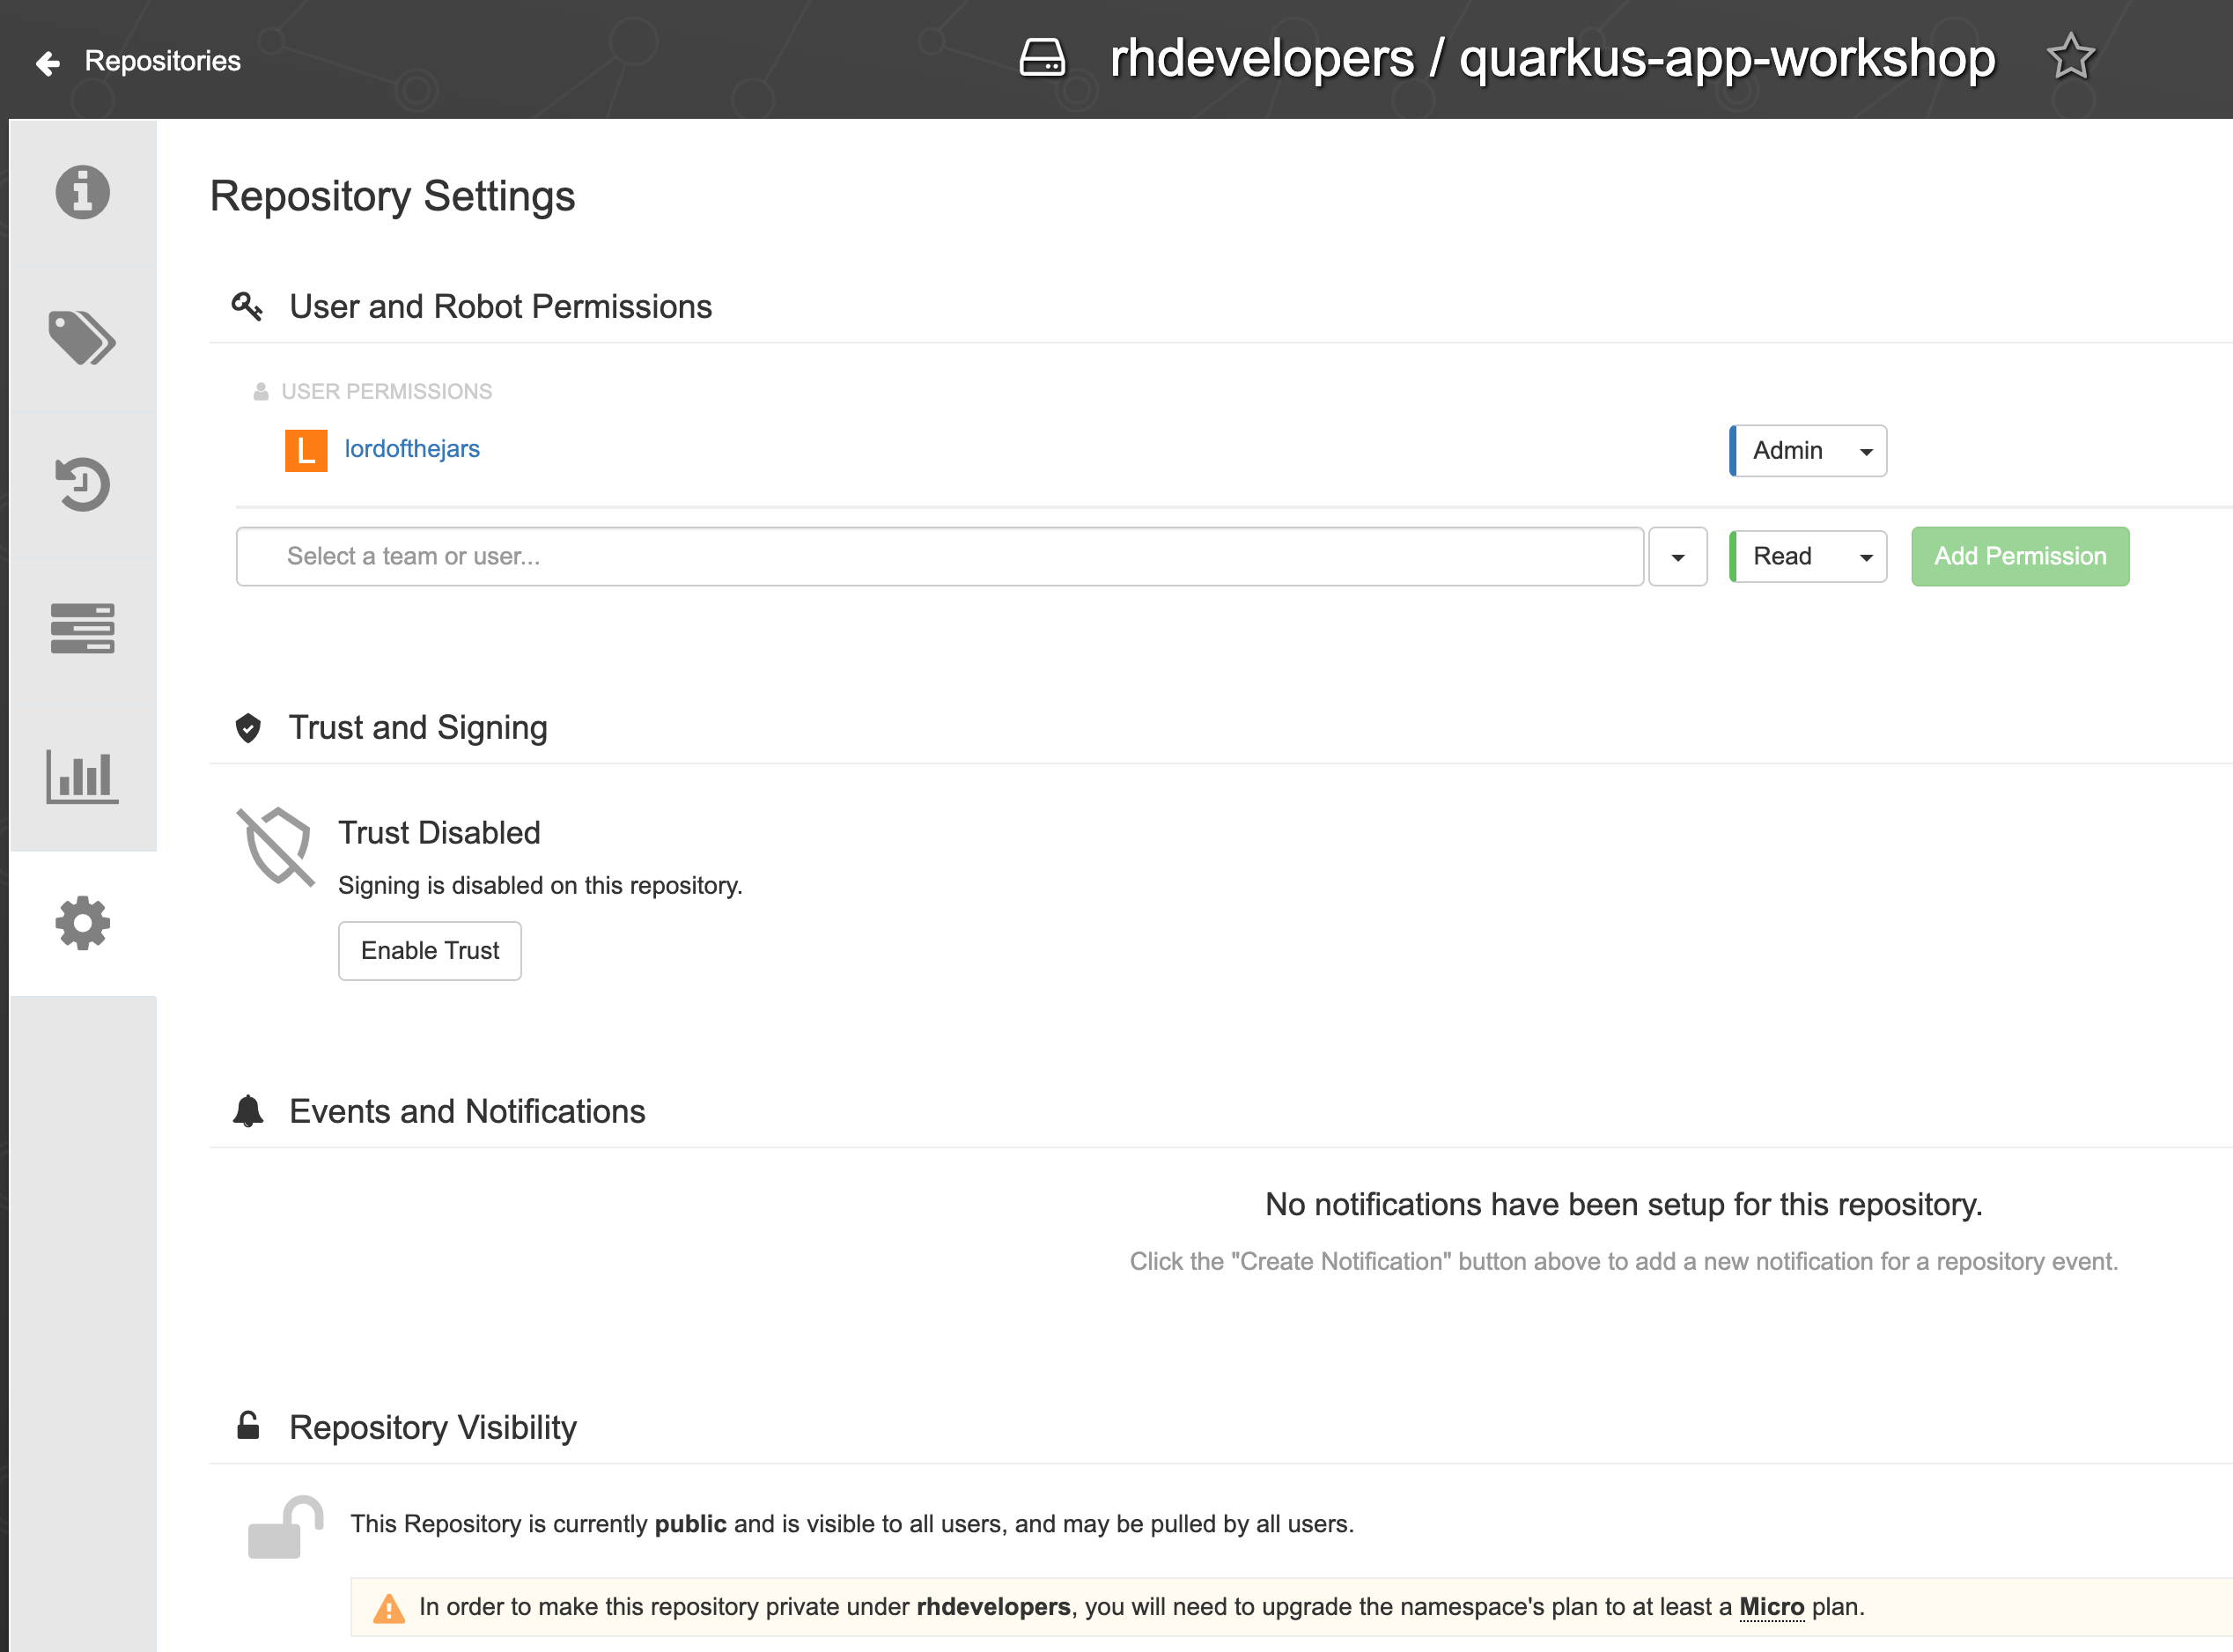
By default, in Quay your image won’t be public. You need to go on the Web Interface, select your image and then go to settings and make it public.
|
Using Jib
Jib builds optimized Docker and OCI images for your Java applications without a Docker daemon - and without deep mastery of Docker best practices.
Quarkus comes with an extension for Jib :
./mvnw quarkus:add-extension -Dextensions="io.quarkus:quarkus-container-image-jib"Then add those properties (but replace with your Quay username):
quarkus.container-image.group=rhdevelopers
quarkus.container-image.registry=quay.io
quarkus.container-image.name=quarkus-app-workshop
You can now and push your image in one command :
./mvnw clean package -Dquarkus.container-image.push=trueAlternatively you can also add this to the properties and each time your build your app the image will also be built and pushed :
quarkus.container-image.push=trueUsing Buildpacks
Before trying this out make sure to remove the io.quarkus:quarkus-container-image-jib extension.
|
The extension quarkus-container-image-buildpack is using buildpacks in order to perform container image builds. Under the hood buildpacks will use a Docker daemon for the actual build. While buildpacks support alternatives to Docker, this extension will only work with Docker.
./mvnw quarkus:add-extension -Dextensions="container-image-buildpack"You need to specify a builder image :
quarkus.buildpack.jvm-builder-image=codejive/buildpacks-quarkus-builderAnd again now you can build and push your image :
./mvnw clean package -Dquarkus.container-image.push=true
When using the buildpack container image extension it is strongly advised to avoid adding quarkus.container-image.build=true in your properties configuration as it might trigger nesting builds within builds. It’s preferable to pass it as an option to the build command instead.
|