Introduction to Kubernetes
Getting your OpenShift Sandbox account
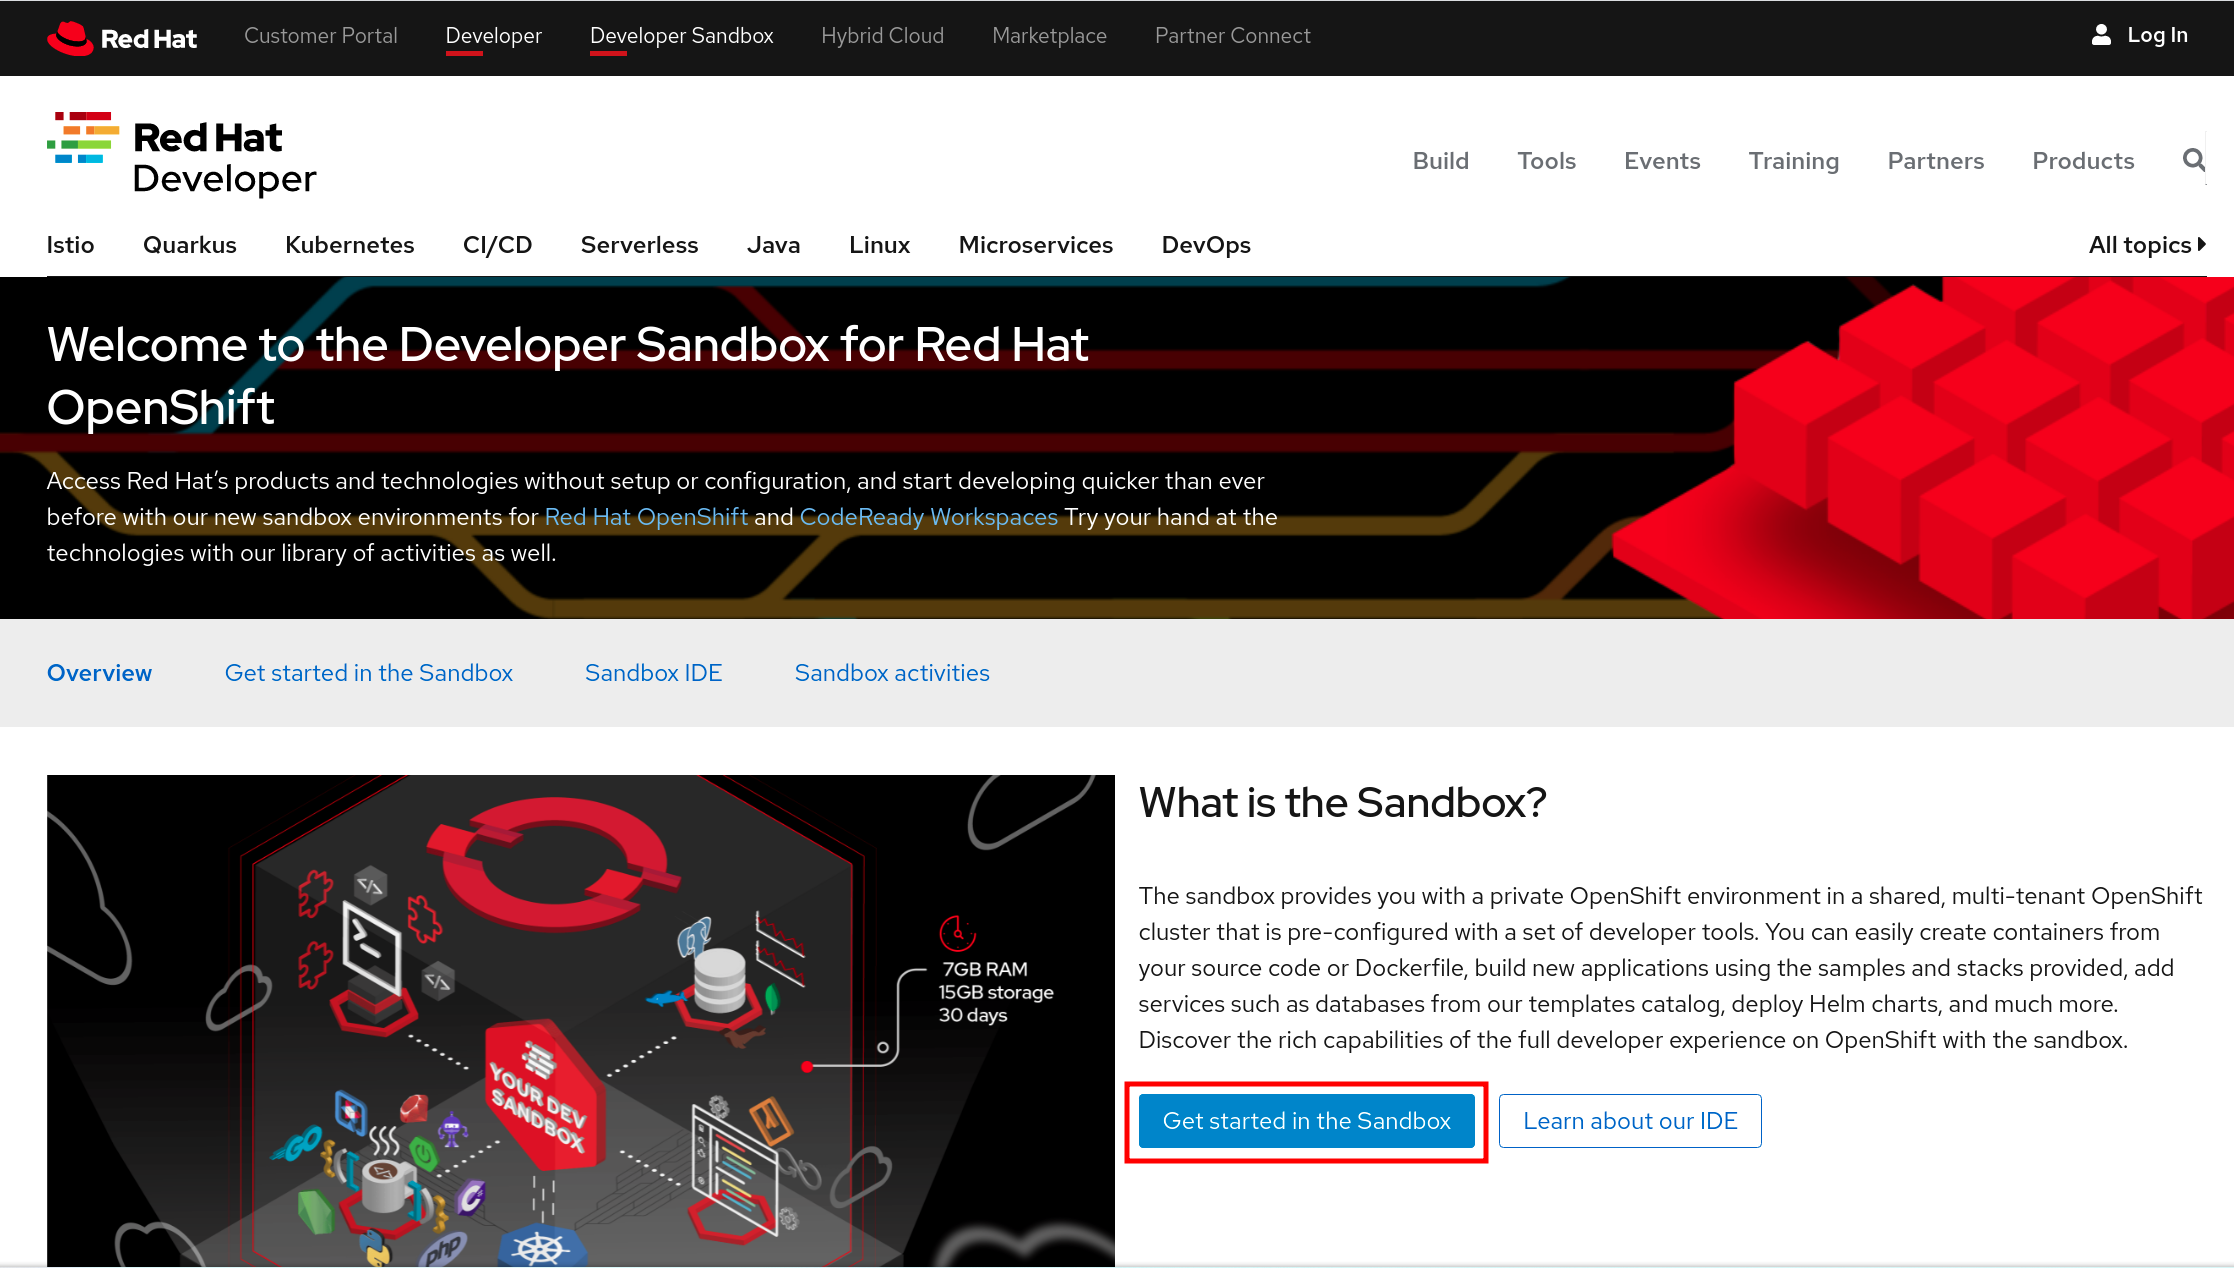
Developer Sandbox for Red Hat OpenShift is a free Kubernetes cloud environment in a shared, multi-tenant OpenShift cluster that is pre-configured with a set of developer tools. The Developer Sandbox is active for 30 days and renewable once it expires.
To create your account, register to Developer Sandbox for Red Hat OpenShift. From there, click on the red button that says Get Started in the Sandbox as shown in the following image.
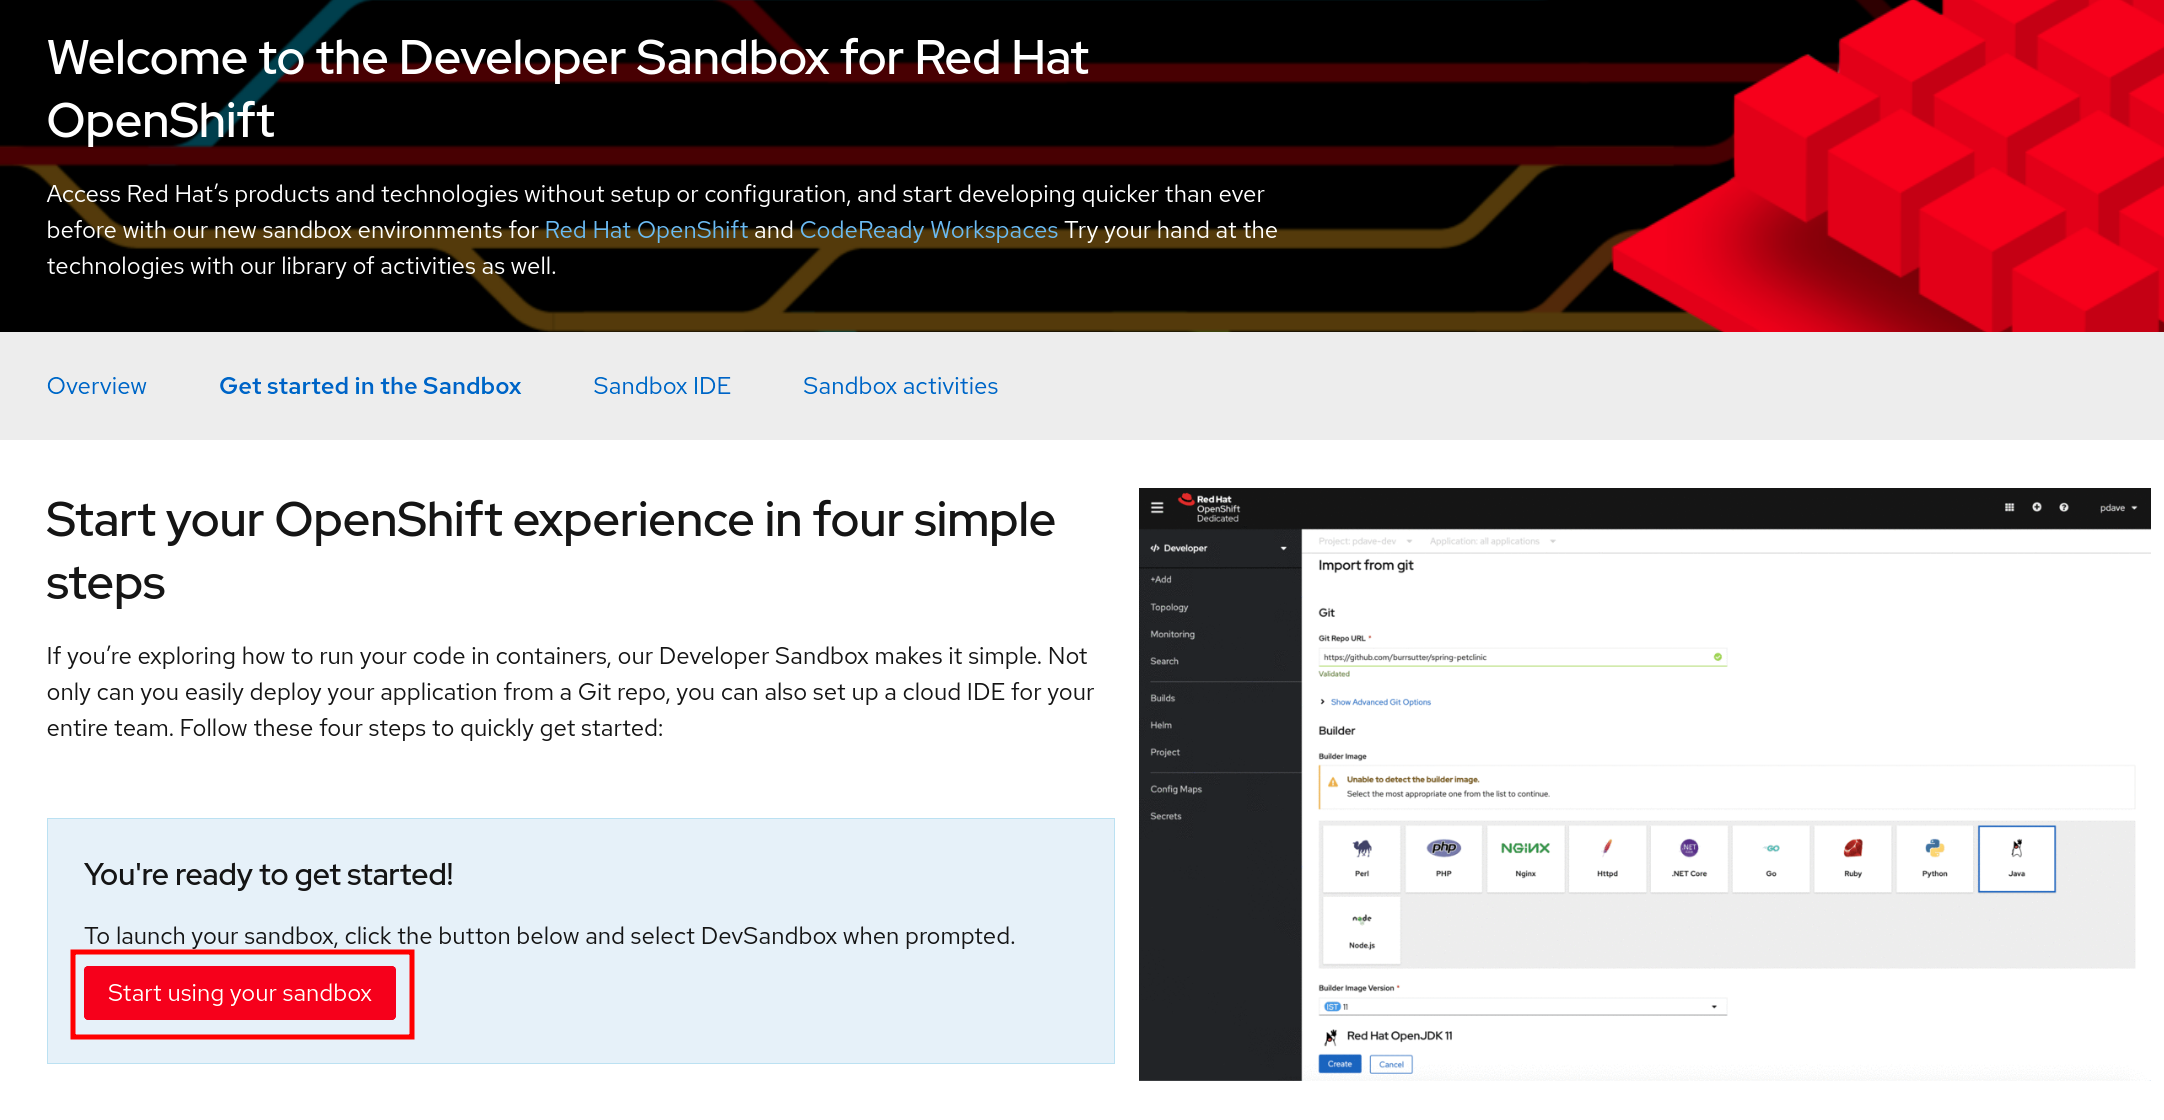
Use your existing Red Hat account or create a new one, then follow the instructions on the screen. You should then be redirected to the Developer Sandbox page again, but this time, you should see a button labelled Start using your sandbox.
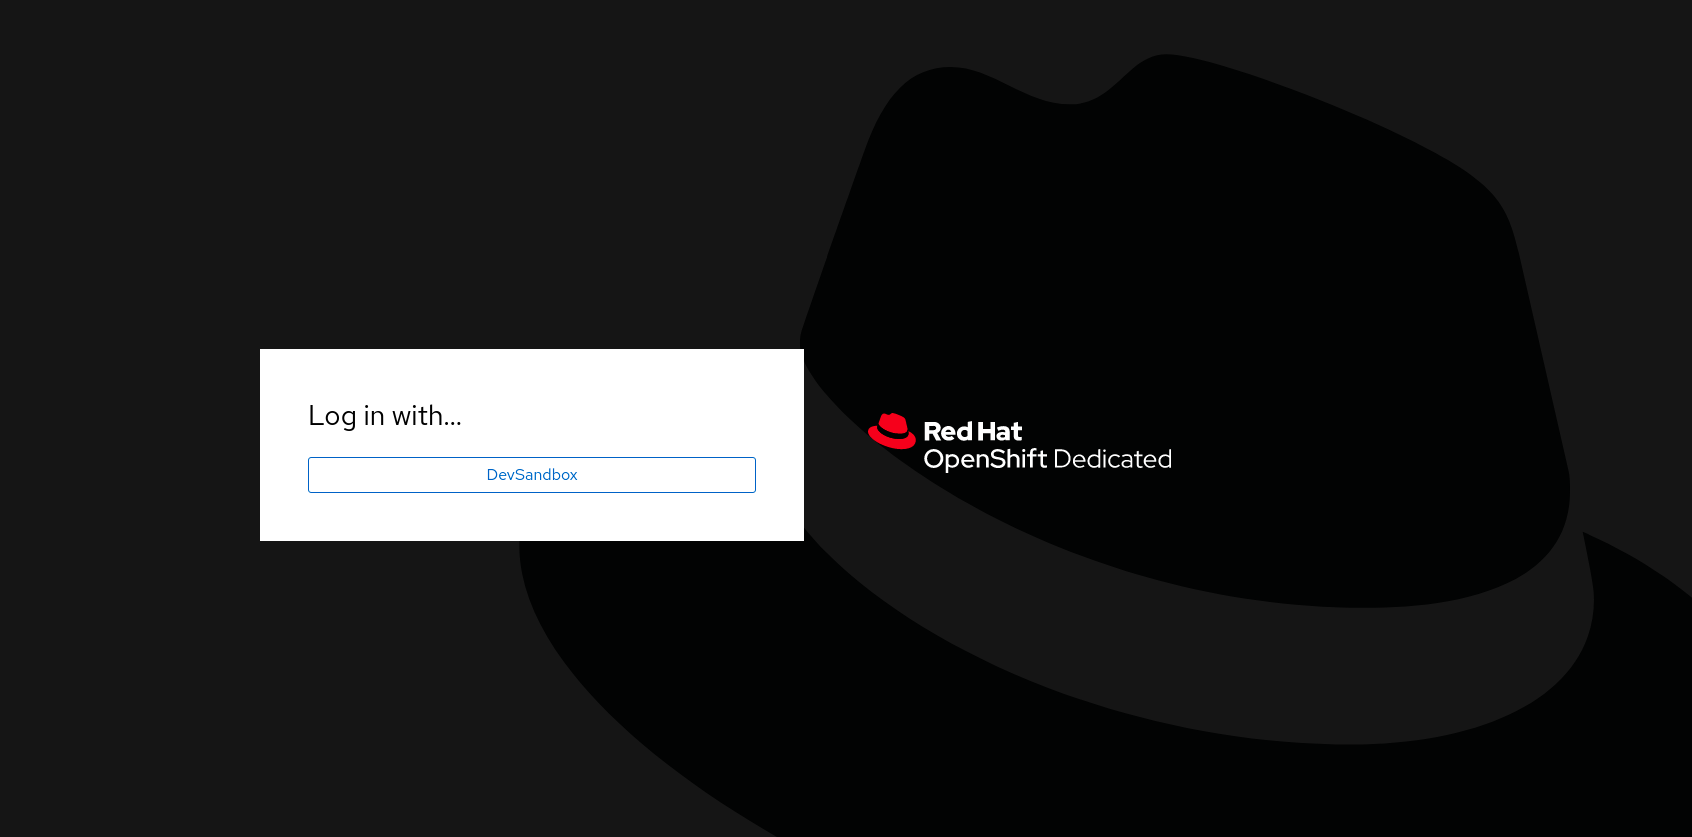
Clicking on it opens up the OpenShift login screen where you can log in using the DevSandbox button, as seen below.
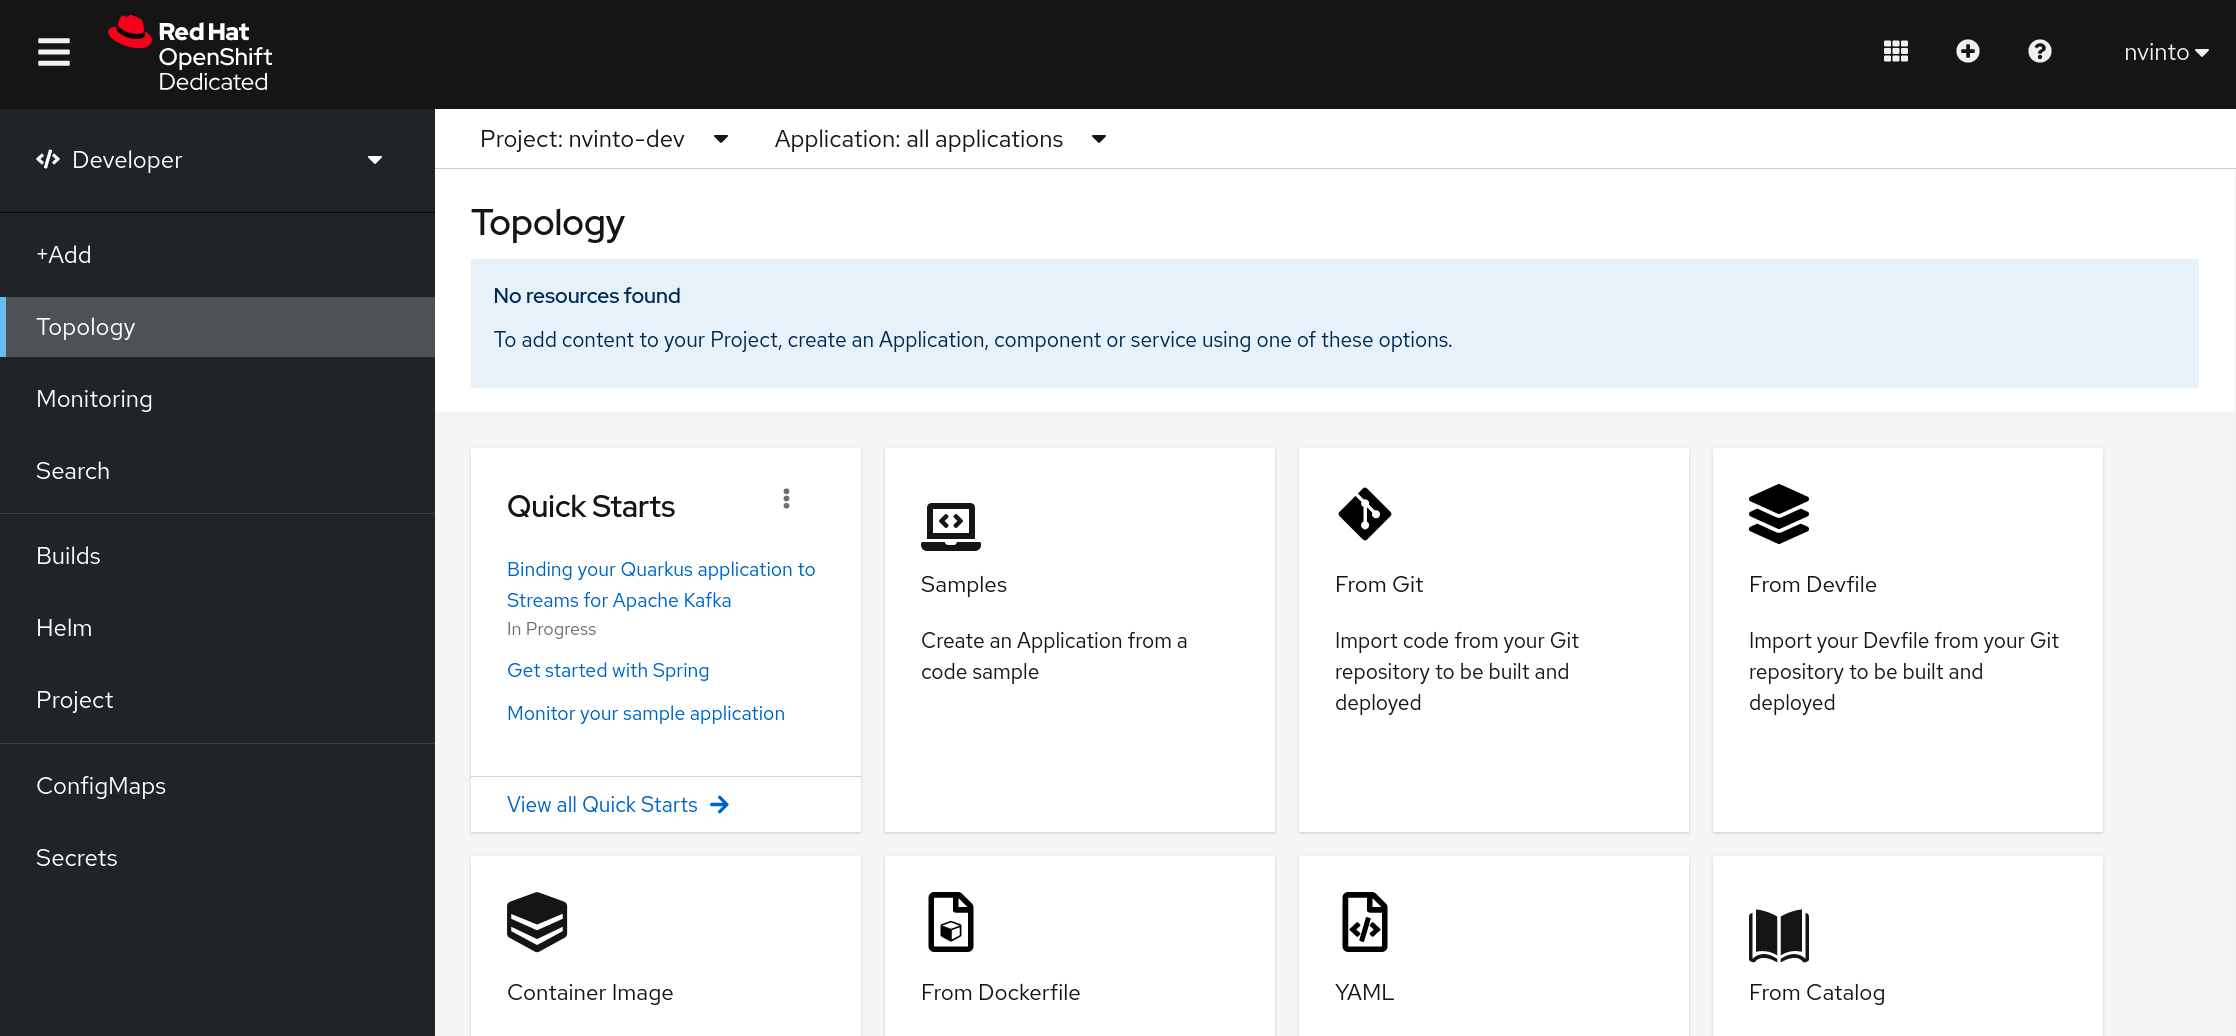
Clicking this button opens up your new OpenShift cluster console.
Command Line Interface
OpenShift ships with a feature rich web console as well as command line tools to provide users with a nice interface to work with applications deployed to the platform. The OpenShift tools are a single executable written in the Go programming language and is available for the following operating systems:
-
Microsoft Windows
-
Mac OS X
-
Linux
You might already have the OpenShift CLI available on your environment. You can verify
it by running an oc command:
oc versionYou should see the following (or something similar):
Client Version: 4.9.2
Server Version: 4.9.15 (1)
Kubernetes Version: v1.22.3+e790d7f| 1 | NOTE: you will only see the Server Version and Kubernetes Version if you are currently connected to a Kubenetes or OpenShift cluster |
If you see output like the above you can skip to Connect to the OpenShift Cluster from CLI.
However, if the oc command doesn’t exist or you have an older version of the OpenShift CLI (e.g. < 4.4.x), select the tab appropriate to your OS and follow the instructions to install or update the OpenShift CLI.
Download OpenShift CLI
If you have HomeBrew installed you can instead install the OpenShift CLI using the brew command. If you don’t have homebrew, then follow the manual download and install instructions that follow the inset.
|
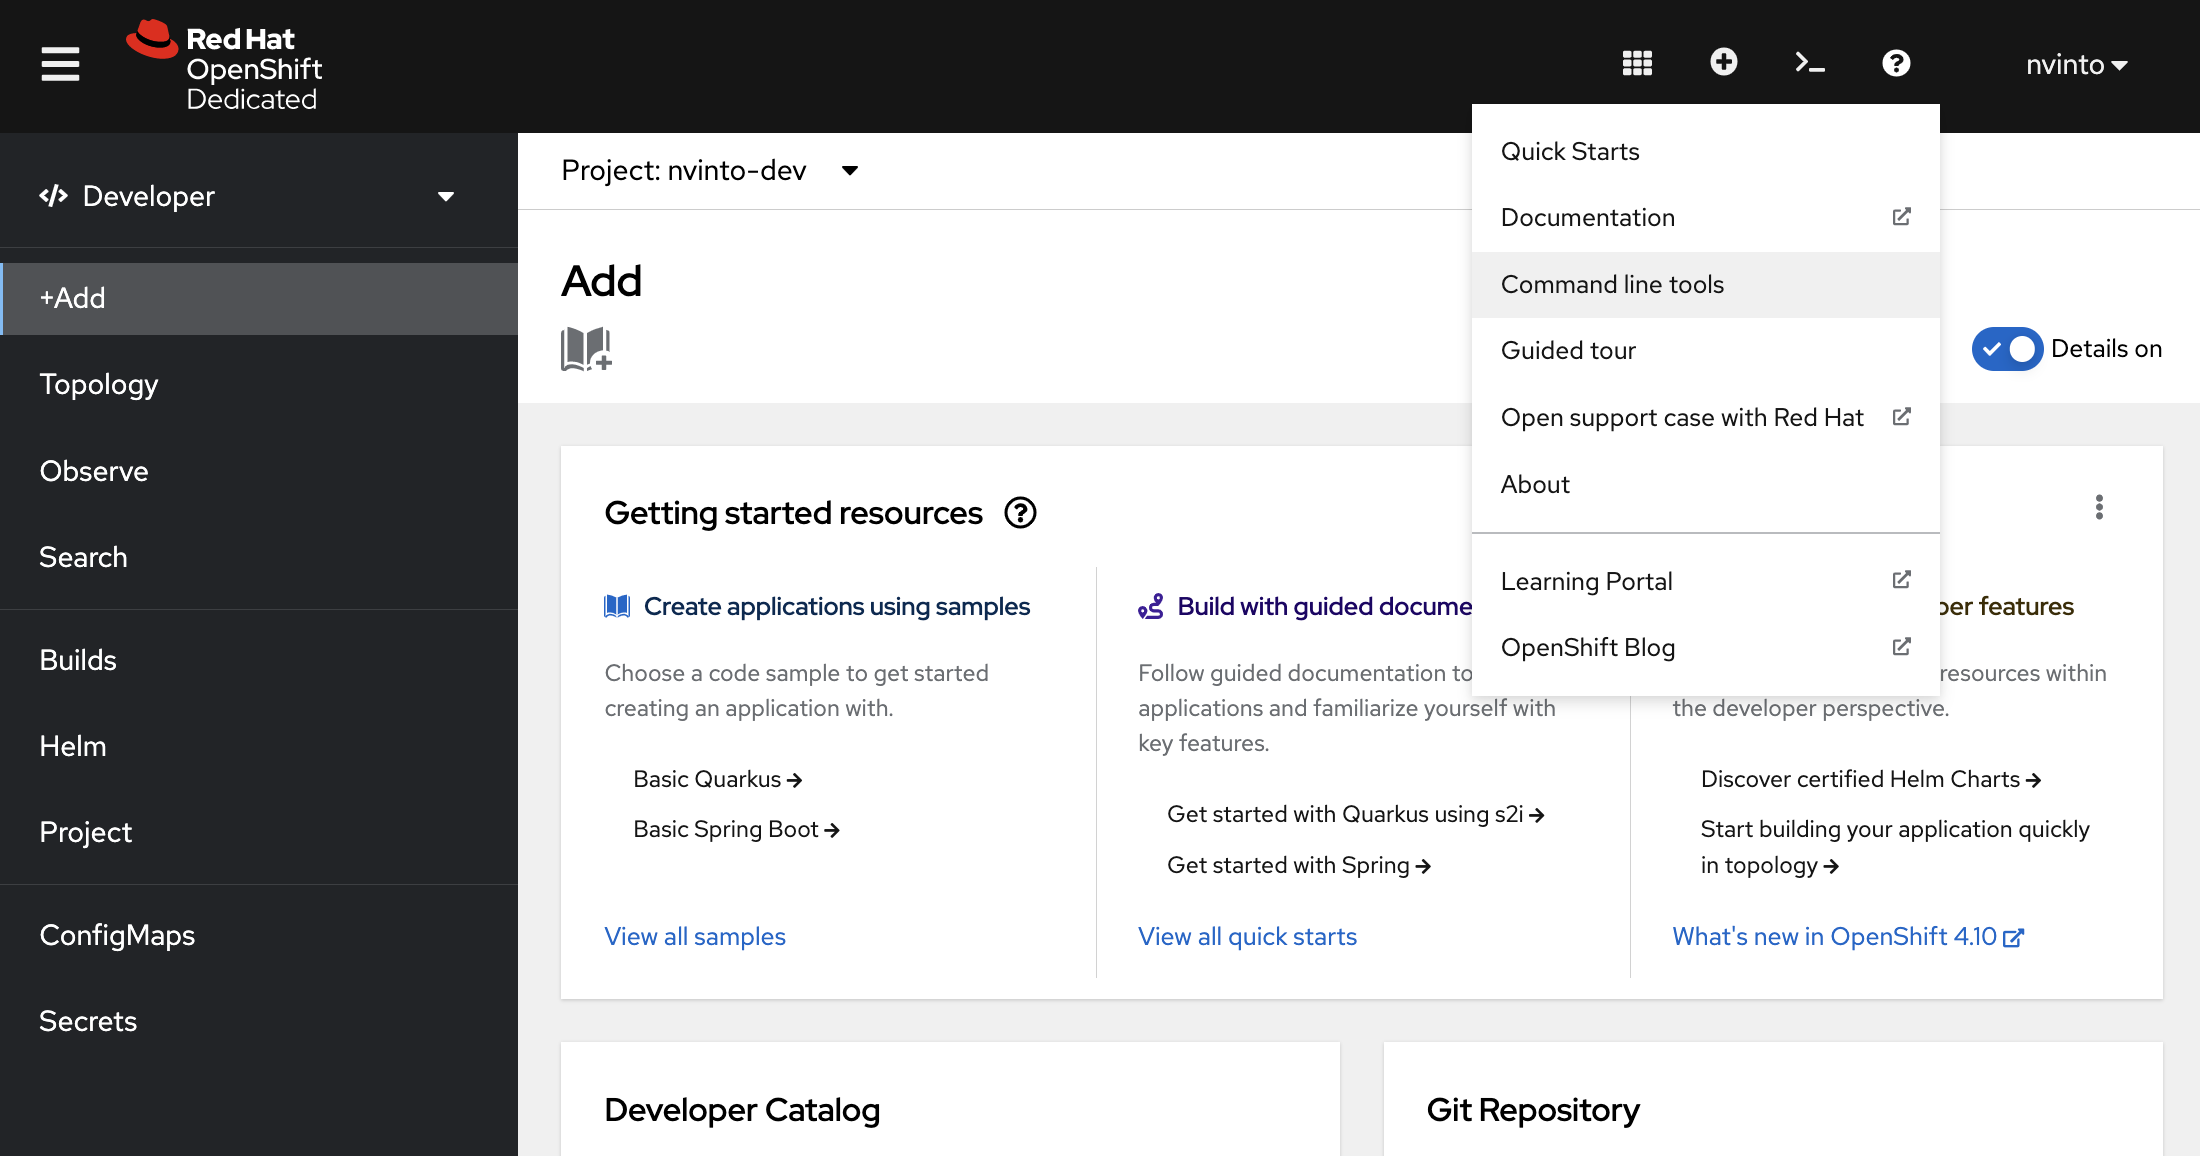
From top right menu bar, click to the little white question mark icon, then click to Command Line Tools:
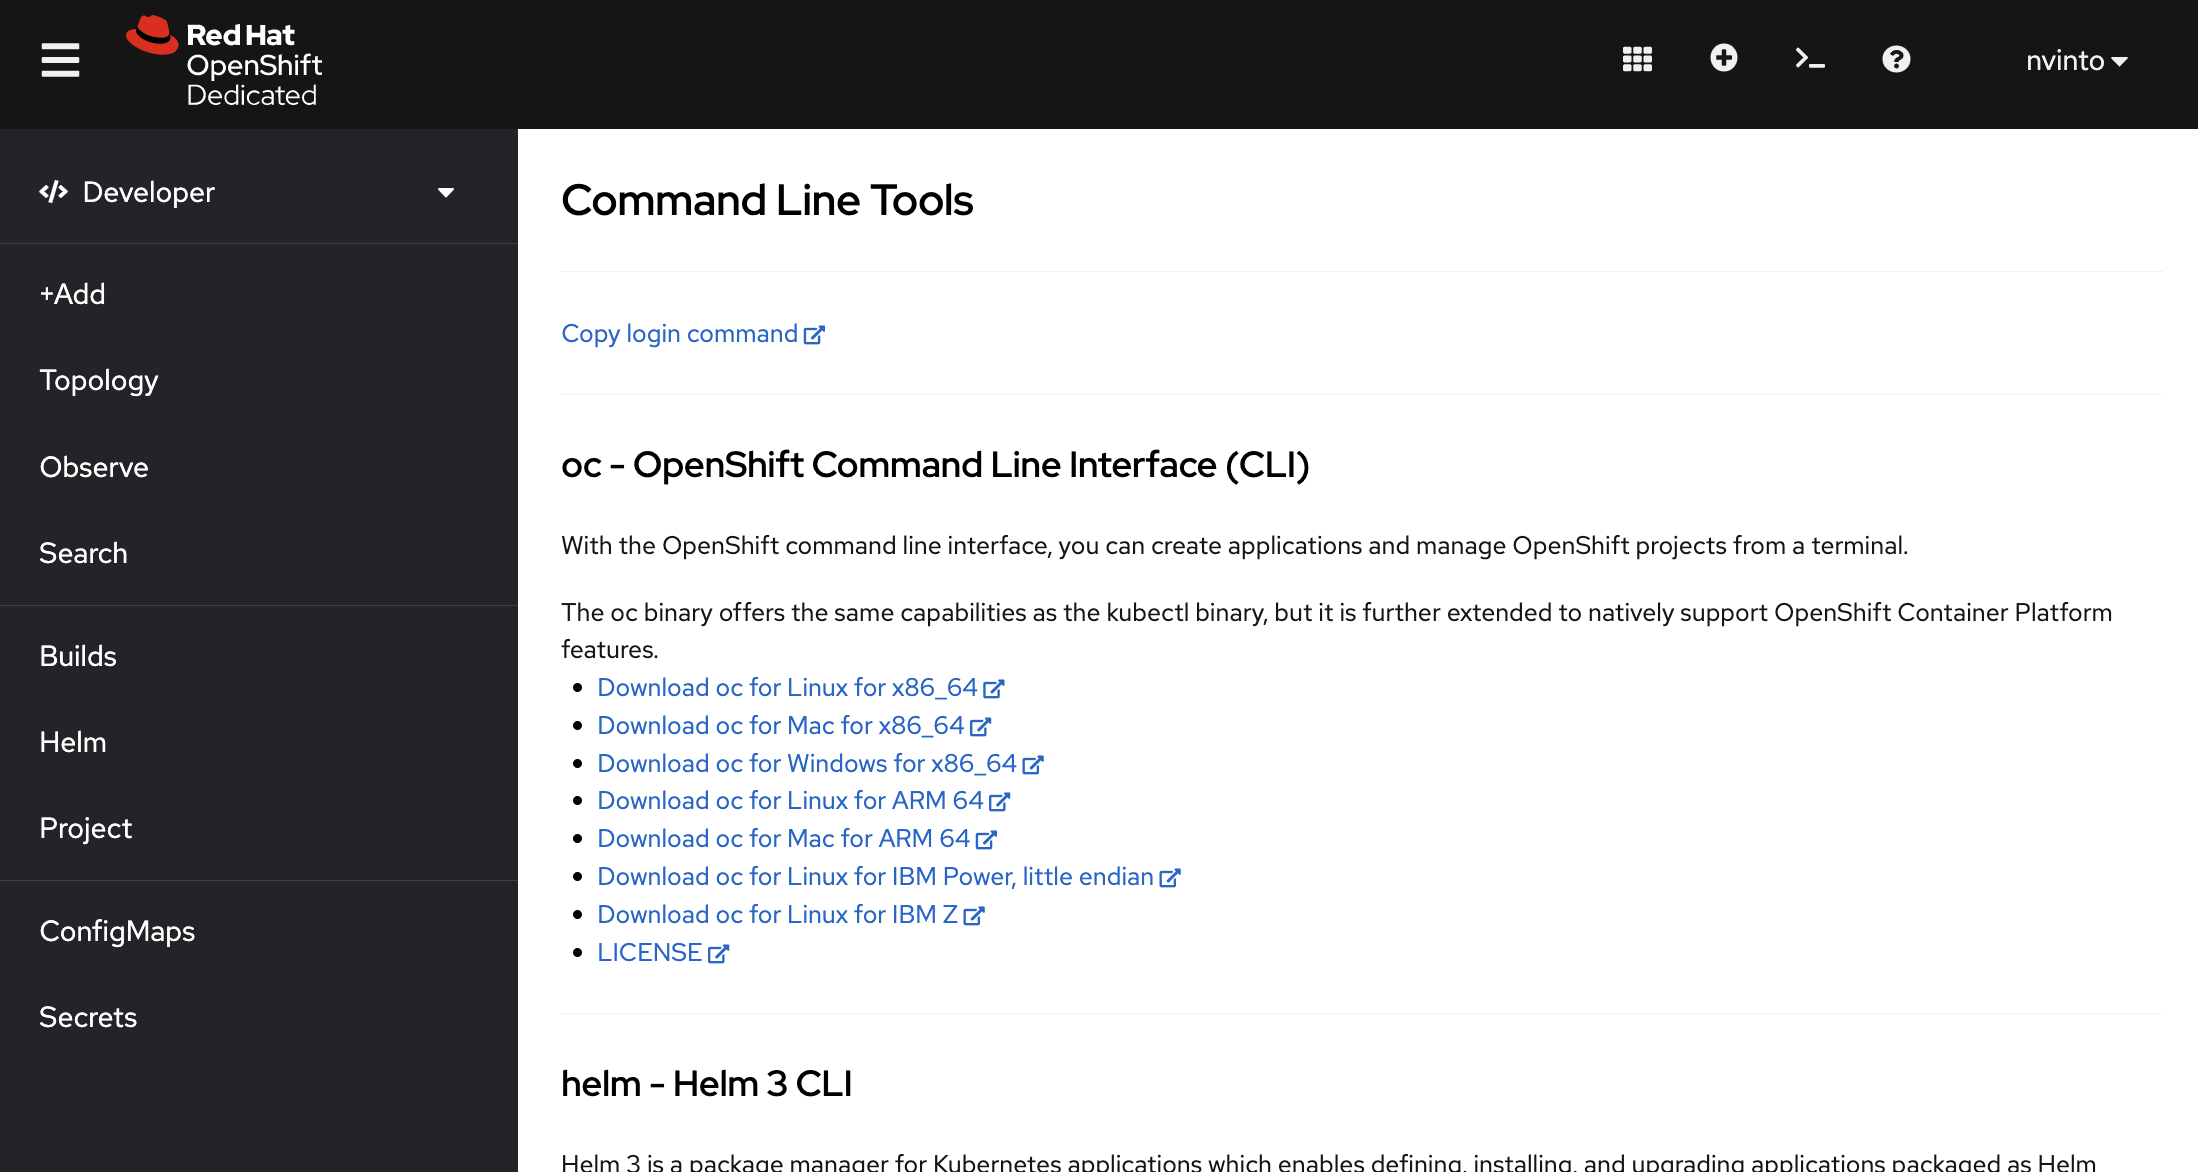
Scroll down to oc - OpenShift Command Line Interface (CLI) and click on the link appropriate to your OS
Once the file has been downloaded, you will need to extract the contents as it is a compressed archive. It is recommended that this file is saved to the following directory:
~/OpenShiftOpen up a terminal window and change to the directory where you downloaded the file. Once you are in the directory, enter in the following command:
| The name of the oc packaged archive may vary. Adjust accordingly. |
tar zxvf oc-macosx.tar.gzThe tar.gz file name needs to be replaced by the entire name that was downloaded in the previous step.
Now you can add the OpenShift CLI tools to your PATH.
export PATH=$PATH:~/OpenShiftAt this point, we should have the oc tool available for use. Let’s test this
out by printing the version of the oc command:
oc versionYou should see the following (or something similar):
Client Version: 4.7.0If you get an error message, you may not have not updated your path correctly. If after checking your PATH you
still cannot get the oc command to work, contact your lab instructor for assistence.
From top right menu bar, click to the little white question mark icon, then click to Command Line Tools:
Scroll down to oc - OpenShift Command Line Interface (CLI) and click on the link appropriate to your OS
The CLI for Windows is provided as a zip archive. Download and unzip the archive with a ZIP program and move the oc binary to a directory on your PATH. To check your PATH, open the Command Prompt and run:
pathCheckout this blog post if you’d like to set it up with Powershell
At this point, we should have the oc tool available for use. Let’s test this
out by printing the version of the oc command:
oc versionYou should see the following (or something similar):
Client Version: 4.7.0If you get an error message, you may not have not updated your path correctly. If after checking your PATH you
still cannot get the oc command to work, contact your lab instructor for assistence.
From top right menu bar, click to the little white question mark icon, then click to Command Line Tools:
Scroll down to oc - OpenShift Command Line Interface (CLI) and click on the link appropriate to your OS
Once the file has been downloaded, you will need to extract the contents as it is a compressed archive. It is recommended that this file is saved to the following directory:
~/OpenShiftOpen up a terminal window and change to the directory where you downloaded the file. Once you are in the directory, enter in the following command:
| The name of the oc packaged archive may vary. Adjust accordingly. |
tar zxvf oc-linux.tar.gzThe tar.gz file name needs to be replaced by the entire name that was downloaded in the previous step.
Now you can add the OpenShift CLI tools to your PATH.
export PATH=$PATH:~/OpenShiftAt this point, we should have the oc tool available for use. Let’s test this
out by printing the version of the oc command:
oc versionYou should see the following (or something similar):
Client Version: 4.7.0If you get an error message, you may not have not updated your path correctly. If after checking your PATH you
still cannot get the oc command to work, contact your lab instructor for assistence.
Web Terminal
OpenShift Web Console supports a web based Terminal called Web Terminal. Instead of installing the oc CLI locally, you could just run this web based terminal containing useful tools such as:
-
oc -
kubectl -
odo -
helm -
tkn -
kn
If you want to have it in your current cluster, you can install it from OperatorHub following the documentation.
| If you are using Developer Sandbox for OpenShift, this has been already installed to your cluster! |
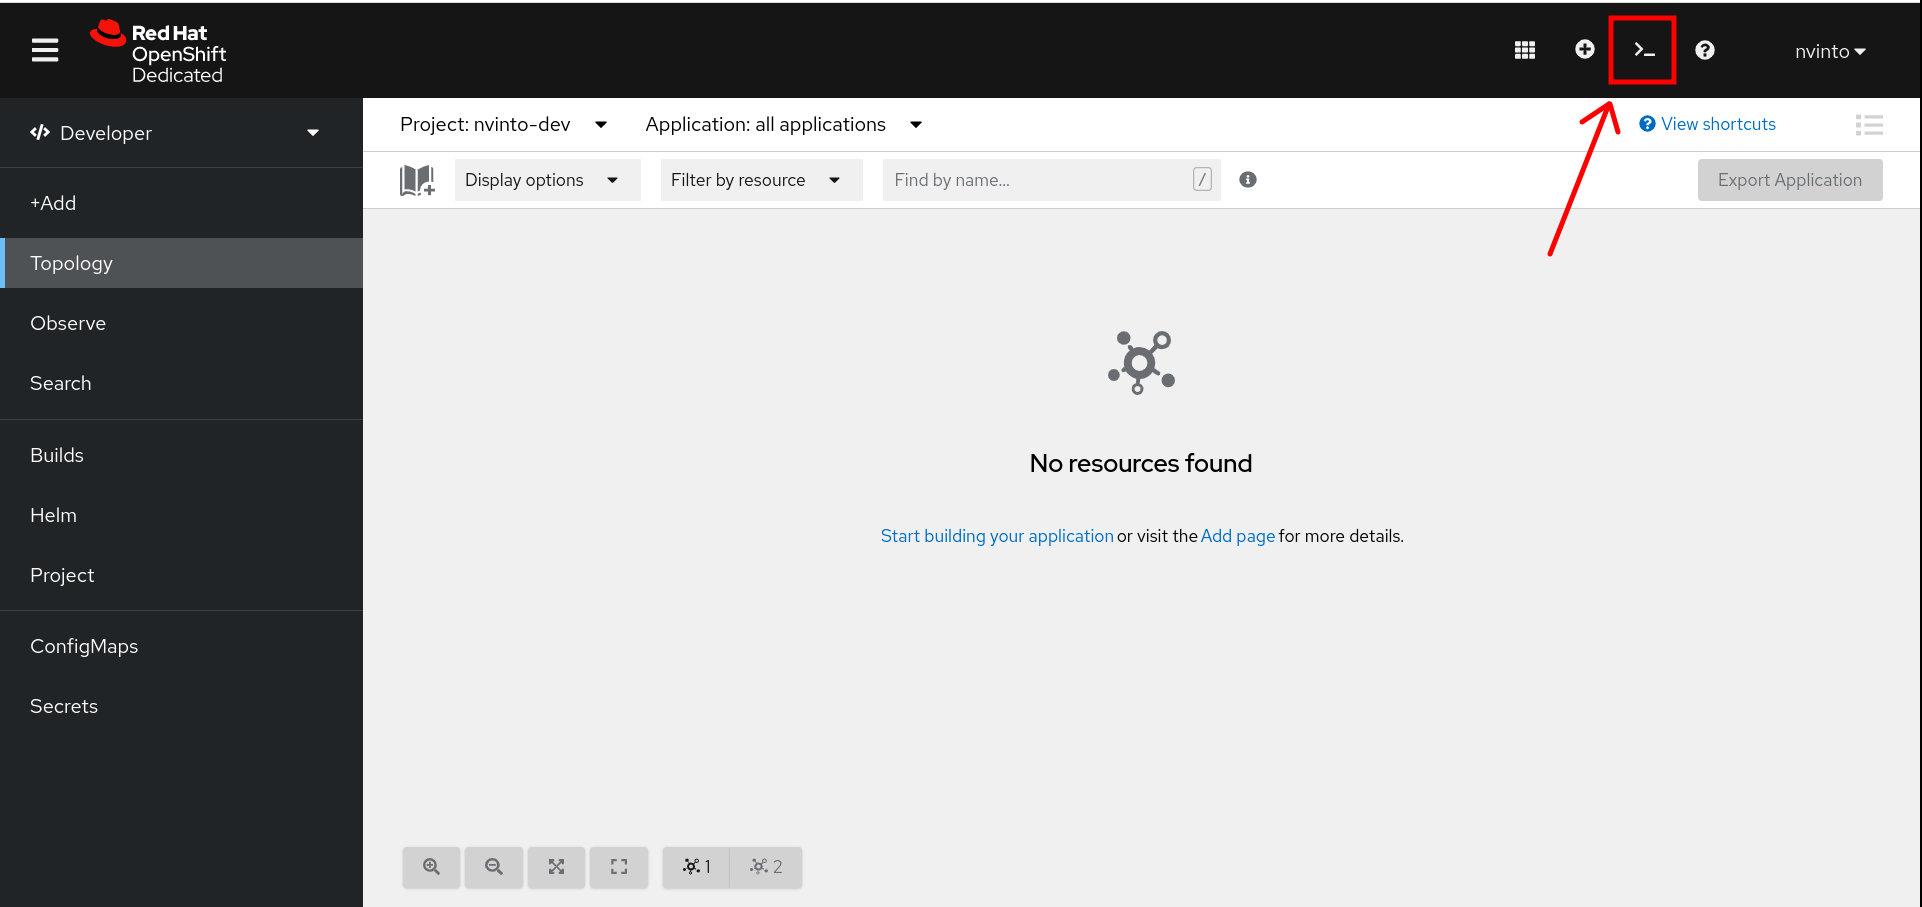
Navigate to top-right, click the command line terminal icon.
From bottom-left, click the Start button.
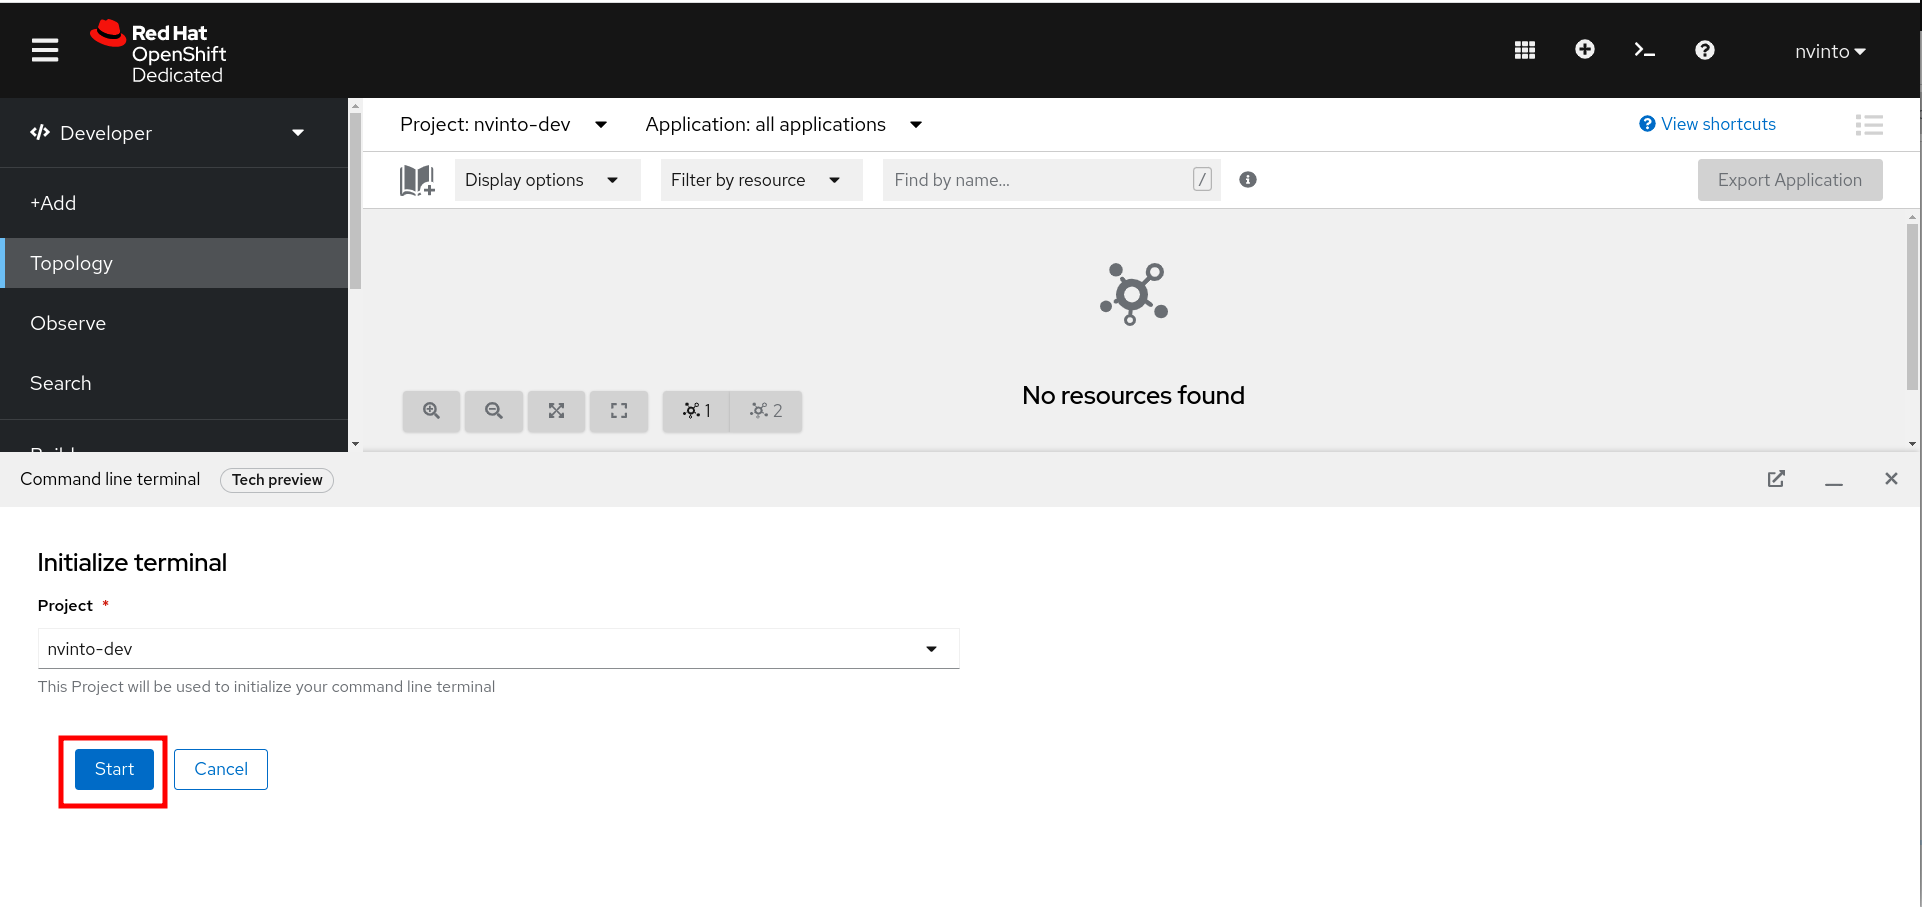
Start using oc from the web terminal. The session is usually already authenticated to the cluster so you can skip the following section on how to connect from CLI.
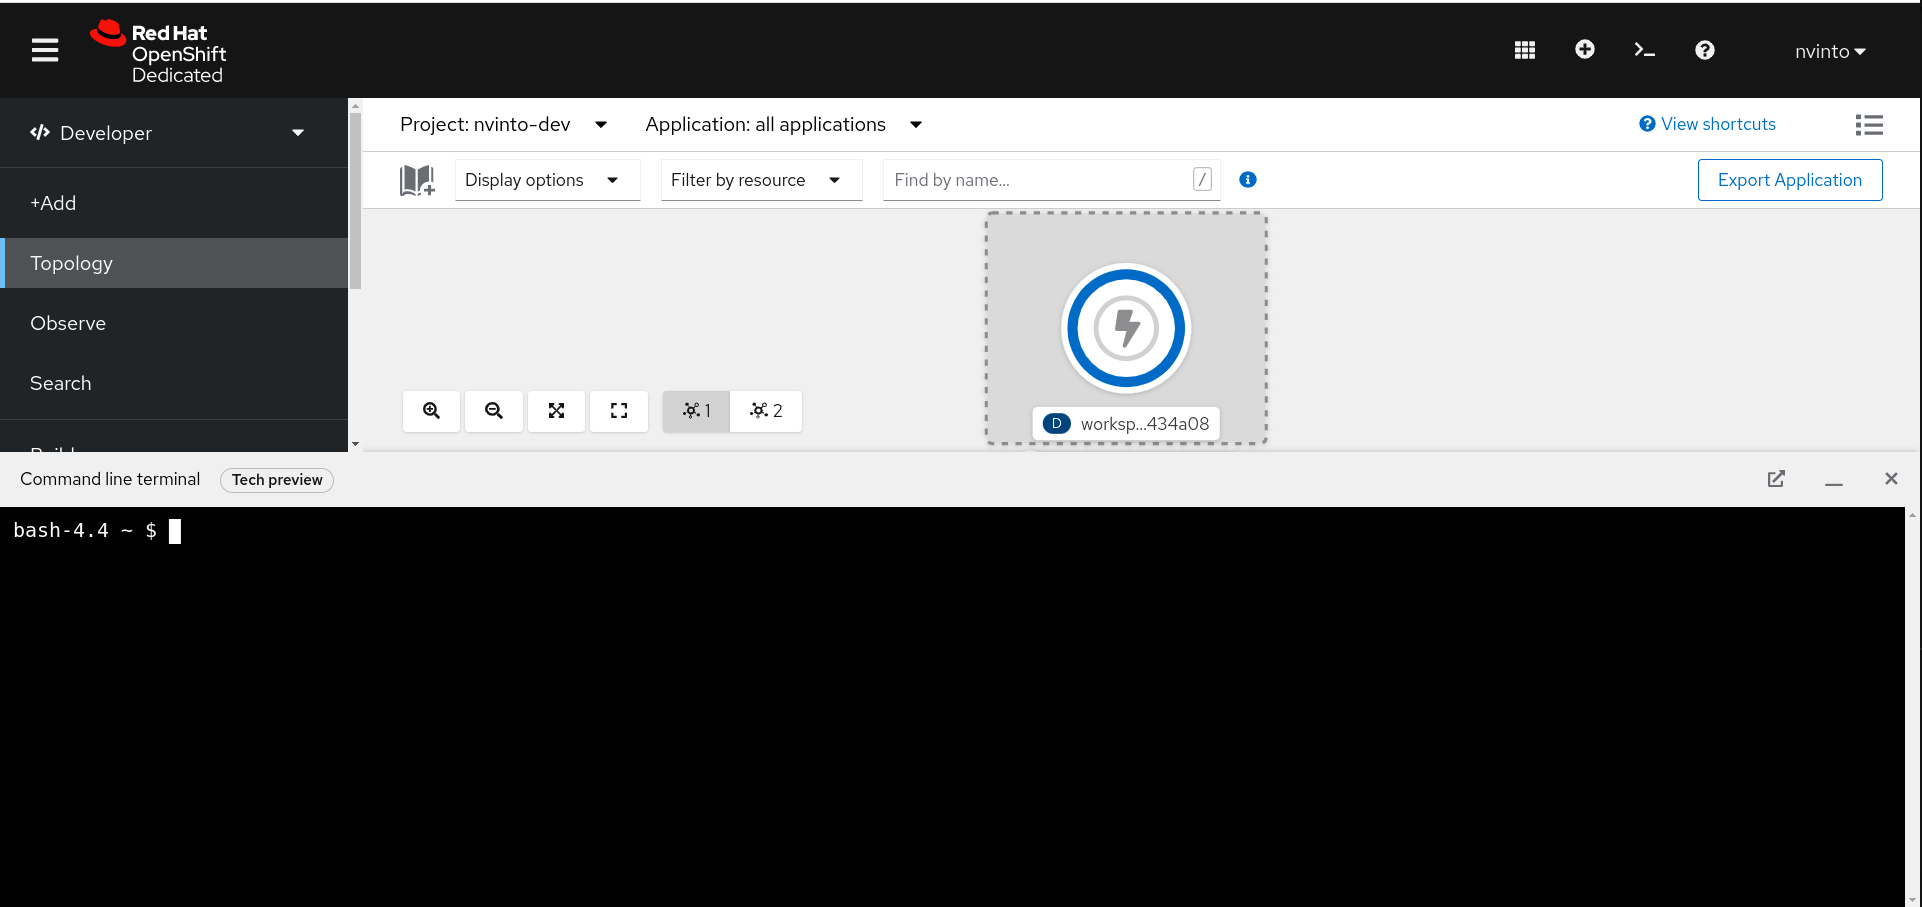
oc whoamiConnect to the OpenShift Cluster from CLI
Once your oc client is setup on your Workstation, you can connect to cluster and start working also with OpenShift CLI.
From Web Console overview, go to top-right menu bar and click to the dropdown menu containing your username, then click Copy Login Command:
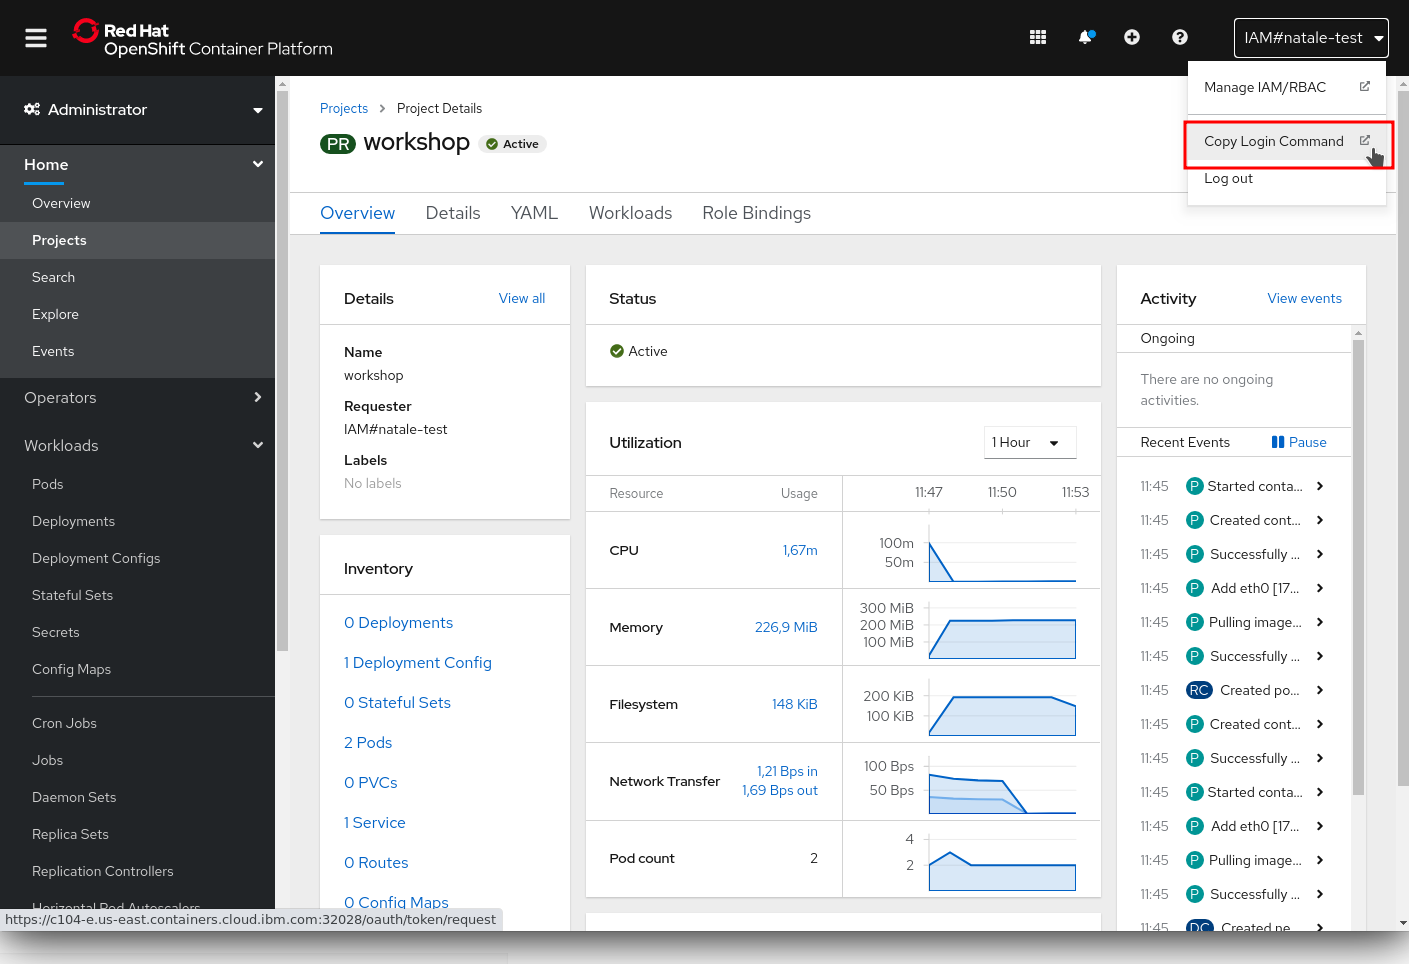
Click on Display Token and copy the command under Login with this token:
Example:
oc login --token=some_token --server=https://c104-e.us-east.containers.cloud.ibm.com:32208Logged into "https://c104-e.us-east.containers.cloud.ibm.com:32208" as "%USERNAME%" using the token provided.
You have access to 68 projects, the list has been suppressed. You can list all projects with 'oc projects'
Using project "default".Getting your Quay account
Quay.io is an artifact repository for building, analyzing and distributing container images.
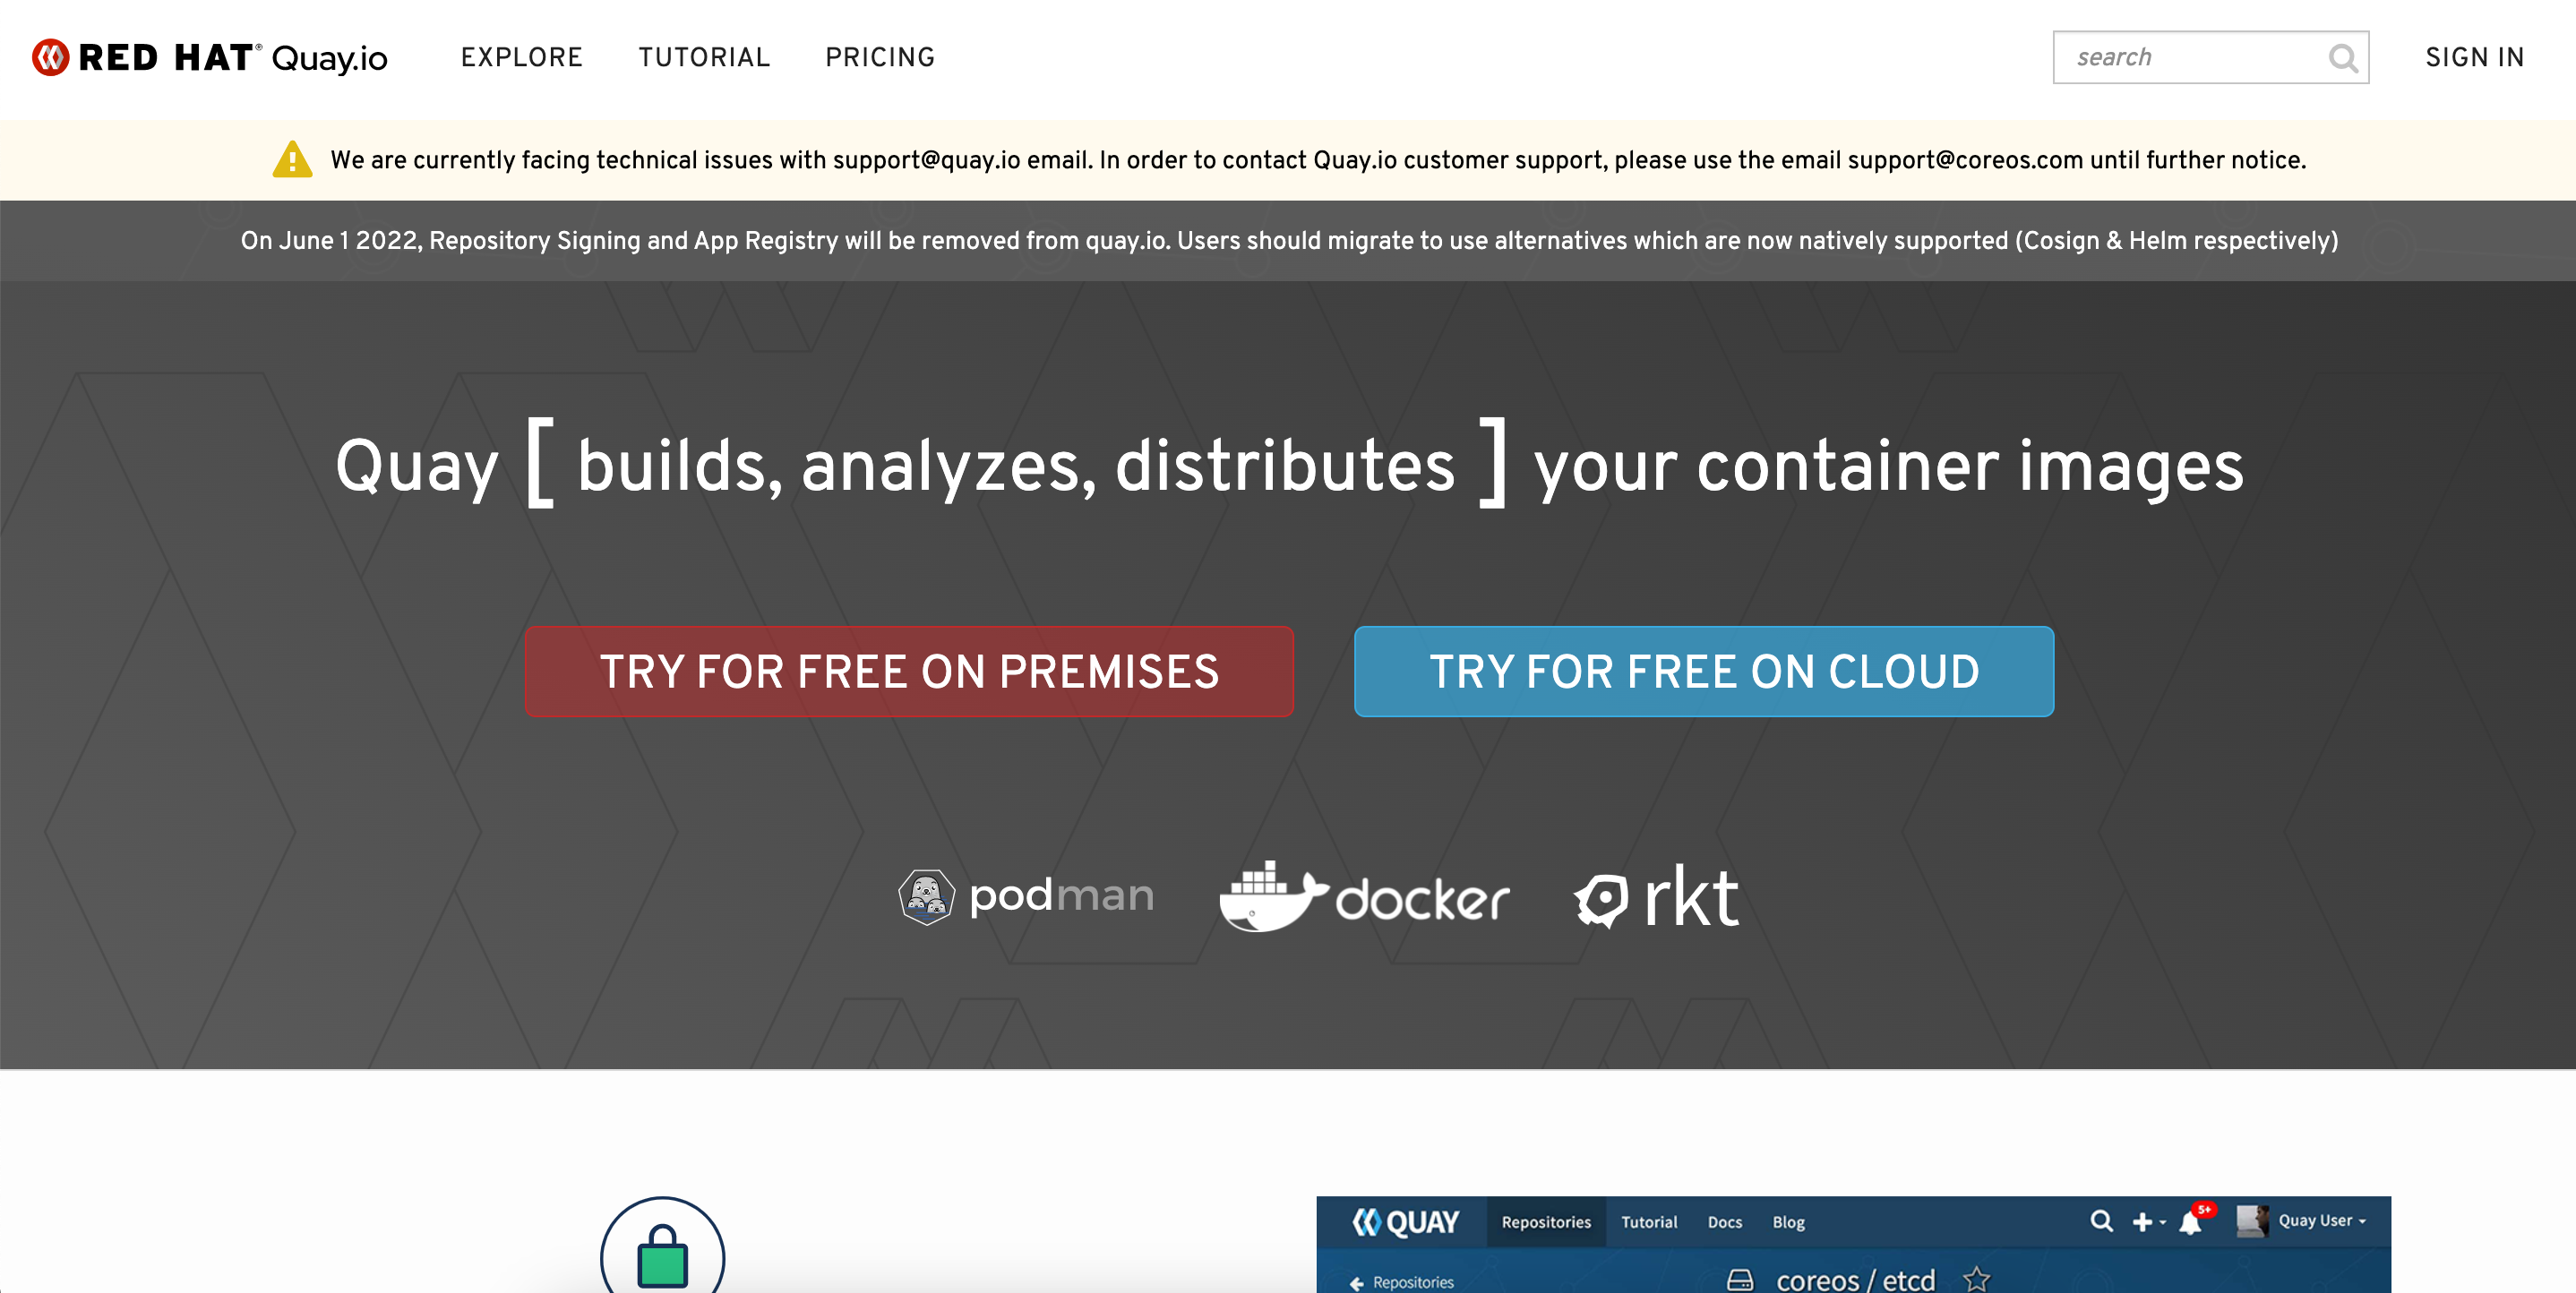
With the account created in Getting your OpenShift Sandbox account, you can also sign in to the Quay.io to start publishing containers.

And now that you are logged, you should see something similar as:

With a Kubernetes cluster up and running, and Quay.io account setup, it’s time to start deploying something to Kubernetes to understand the concepts behind Kubernetes.
Deploy Something
kubectl create deployment myapp --image=quay.io/rhdevelopers/quarkus-demo:v1kubectl get events --sort-by=.metadata.creationTimestampLAST SEEN TYPE REASON OBJECT MESSAGE
<unknown> Normal Scheduled pod/myapp-5dcbf46dfc-ghrk4 Successfully assigned mystuff/myapp-5dcbf46dfc-ghrk4 to g
cp-5xldg-w-a-5ptpn.us-central1-a.c.ocp42project.internal
29s Normal SuccessfulCreate replicaset/myapp-5dcbf46dfc Created pod: myapp-5dcbf46dfc-ghrk4
29s Normal ScalingReplicaSet deployment/myapp Scaled up replica set myapp-5dcbf46dfc to 1
21s Normal Pulling pod/myapp-5dcbf46dfc-ghrk4 Pulling image "quay.io/burrsutter/quarkus-demo:1.0.0"
15s Normal Pulled pod/myapp-5dcbf46dfc-ghrk4 Successfully pulled image "quay.io/burrsutter/quarkus-dem
o:1.0.0"
15s Normal Created pod/myapp-5dcbf46dfc-ghrk4 Created container quarkus-demo
15s Normal Started pod/myapp-5dcbf46dfc-ghrk4 Started container quarkus-demoCreated Objects
Pods
kubectl get pods --show-labelsNAME READY STATUS RESTARTS AGE LABELS
myapp-5dcbf46dfc-ghrk4 1/1 Running 0 2m18s app=myapp,pod-template-hash=5dcbf46dfcLogs
kubectl logs -l app=myapp2020-03-22 14:41:30,497 INFO [io.quarkus] (main) Quarkus 0.22.0 started in 0.021s. Listening on: http://0.0.0.0:8080
2020-03-22 14:41:30,497 INFO [io.quarkus] (main) Installed features: [cdi, resteasy]Expose a Service
kubectl expose deployment myapp --port=8080 --type=LoadBalancerTalk to the App
kubectl get servicesNAME TYPE CLUSTER-IP EXTERNAL-IP PORT(S)
myapp LoadBalancer 172.30.30.51 a515aaf73ae40447d804bb4ba234fc89-774051193.us-east-1.elb.amazonaws.com 8080:31534/TCP 3m9s
workspace680adb7c461a4d04-service ClusterIP 172.30.247.111 <none> 4444/TCPmyapp is the service to access to the deployment.
Wait until EXTERNAL-IP is set, it might take from 1 to 2 minutes.
curl a515aaf73ae40447d804bb4ba234fc89-774051193.us-east-1.elb.amazonaws.com:8080|
If it takes more than 2 minutes create an OpenShift route: |
Scale the App
kubectl scale deployment myapp --replicas=3

kubectl get deployments
NAME READY STATUS RESTARTS AGE
myapp-5dcbf46dfc-6sn2s 0/1 ContainerCreating 0 4s
myapp-5dcbf46dfc-ghrk4 1/1 Running 0 5m32s
myapp-5dcbf46dfc-z6hqw 0/1 ContainerCreating 0 4sUpdating container
Start a rolling update by changing the image:
kubectl set image deployment/myapp quarkus-demo=quay.io/rhdevelopers/myboot:v1Supersonic Subatomic Java with Quarkus myapp-5dcbf46dfc-6sn2s:188
Supersonic Subatomic Java with Quarkus myapp-5dcbf46dfc-z6hqw:169
Aloha from Spring Boot! 0 on myapp-58b97dbd95-vxd87
Aloha from Spring Boot! 1 on myapp-58b97dbd95-vxd87
Supersonic Subatomic Java with Quarkus myapp-5dcbf46dfc-6sn2s:189
Supersonic Subatomic Java with Quarkus myapp-5dcbf46dfc-z6hqw:170
Aloha from Spring Boot! 2 on myapp-58b97dbd95-vxd87kubectl set image deployment/myapp quarkus-demo=quay.io/rhdevelopers/myboot:v2Bonjour from Spring Boot! 2 on myapp-7d58855c6b-6c8gd
Bonjour from Spring Boot! 3 on myapp-7d58855c6b-6c8gd
Aloha from Spring Boot! 7 on myapp-58b97dbd95-mjlwx
Bonjour from Spring Boot! 4 on myapp-7d58855c6b-6c8gd
Aloha from Spring Boot! 8 on myapp-58b97dbd95-mjlwx
Bonjour from Spring Boot! 5 on myapp-7d58855c6b-6c8gdkubectl set image deployment/myapp quarkus-demo=quay.io/rhdevelopers/quarkus-demo:v1Bonjour from Spring Boot! 14 on myapp-7d58855c6b-dw67s
Supersonic Subatomic Java with Quarkus myapp-5dcbf46dfc-tcfwp:3
Supersonic Subatomic Java with Quarkus myapp-5dcbf46dfc-tcfwp:4
Bonjour from Spring Boot! 15 on myapp-7d58855c6b-dw67s
Supersonic Subatomic Java with Quarkus myapp-5dcbf46dfc-tcfwp:5
Bonjour from Spring Boot! 13 on myapp-7d58855c6b-72wp8
Supersonic Subatomic Java with Quarkus myapp-5dcbf46dfc-7rkxj:1
Supersonic Subatomic Java with Quarkus myapp-5dcbf46dfc-7rkxj:2
Supersonic Subatomic Java with Quarkus myapp-5dcbf46dfc-7lf9t:1
Supersonic Subatomic Java with Quarkus myapp-5dcbf46dfc-7rkxj:3
Supersonic Subatomic Java with Quarkus myapp-5dcbf46dfc-7lf9t:2
Supersonic Subatomic Java with Quarkus myapp-5dcbf46dfc-7lf9t:3
Supersonic Subatomic Java with Quarkus myapp-5dcbf46dfc-tcfwp:6