Externalize Application Configuration
15 MINUTE EXERCISE
In this lab you will learn how to manage application configuration and how to provide environment specific configuration to the services.
Create Databases for Inventory and Catalog
So far Catalog and Inventory services have been using an in-memory H2 database. Although H2 is a convenient database to run locally on your laptop, it’s in no way appropriate for production or even integration tests. Since it’s strongly recommended to use the same technology stack (operating system, JVM, middleware, database, etc.) that is used in production across all environments, you should modify Inventory and Catalog services to use PostgreSQL/MariaDB instead of the H2 in-memory database.
Fortunately, OpenShift supports stateful applications such as databases which require access to a persistent storage that survives the container itself. You can deploy databases on OpenShift and regardless of what happens to the container itself, the data is safe and can be used by the next database container.
Let’s create a MariaDB database for the Inventory Service using the MariaDB template that is provided out-of-the-box:
|
OpenShift Templates use YAML/JSON to compose multiple containers and their configurations as a list of objects to be created and deployed at once, making it simple to re-create complex deployments by just deploying a single template. Templates can be parameterized to get input for fields like service names and generate values for fields like passwords. |
In the OpenShift Web Console, click on '+Add' and select 'Database'
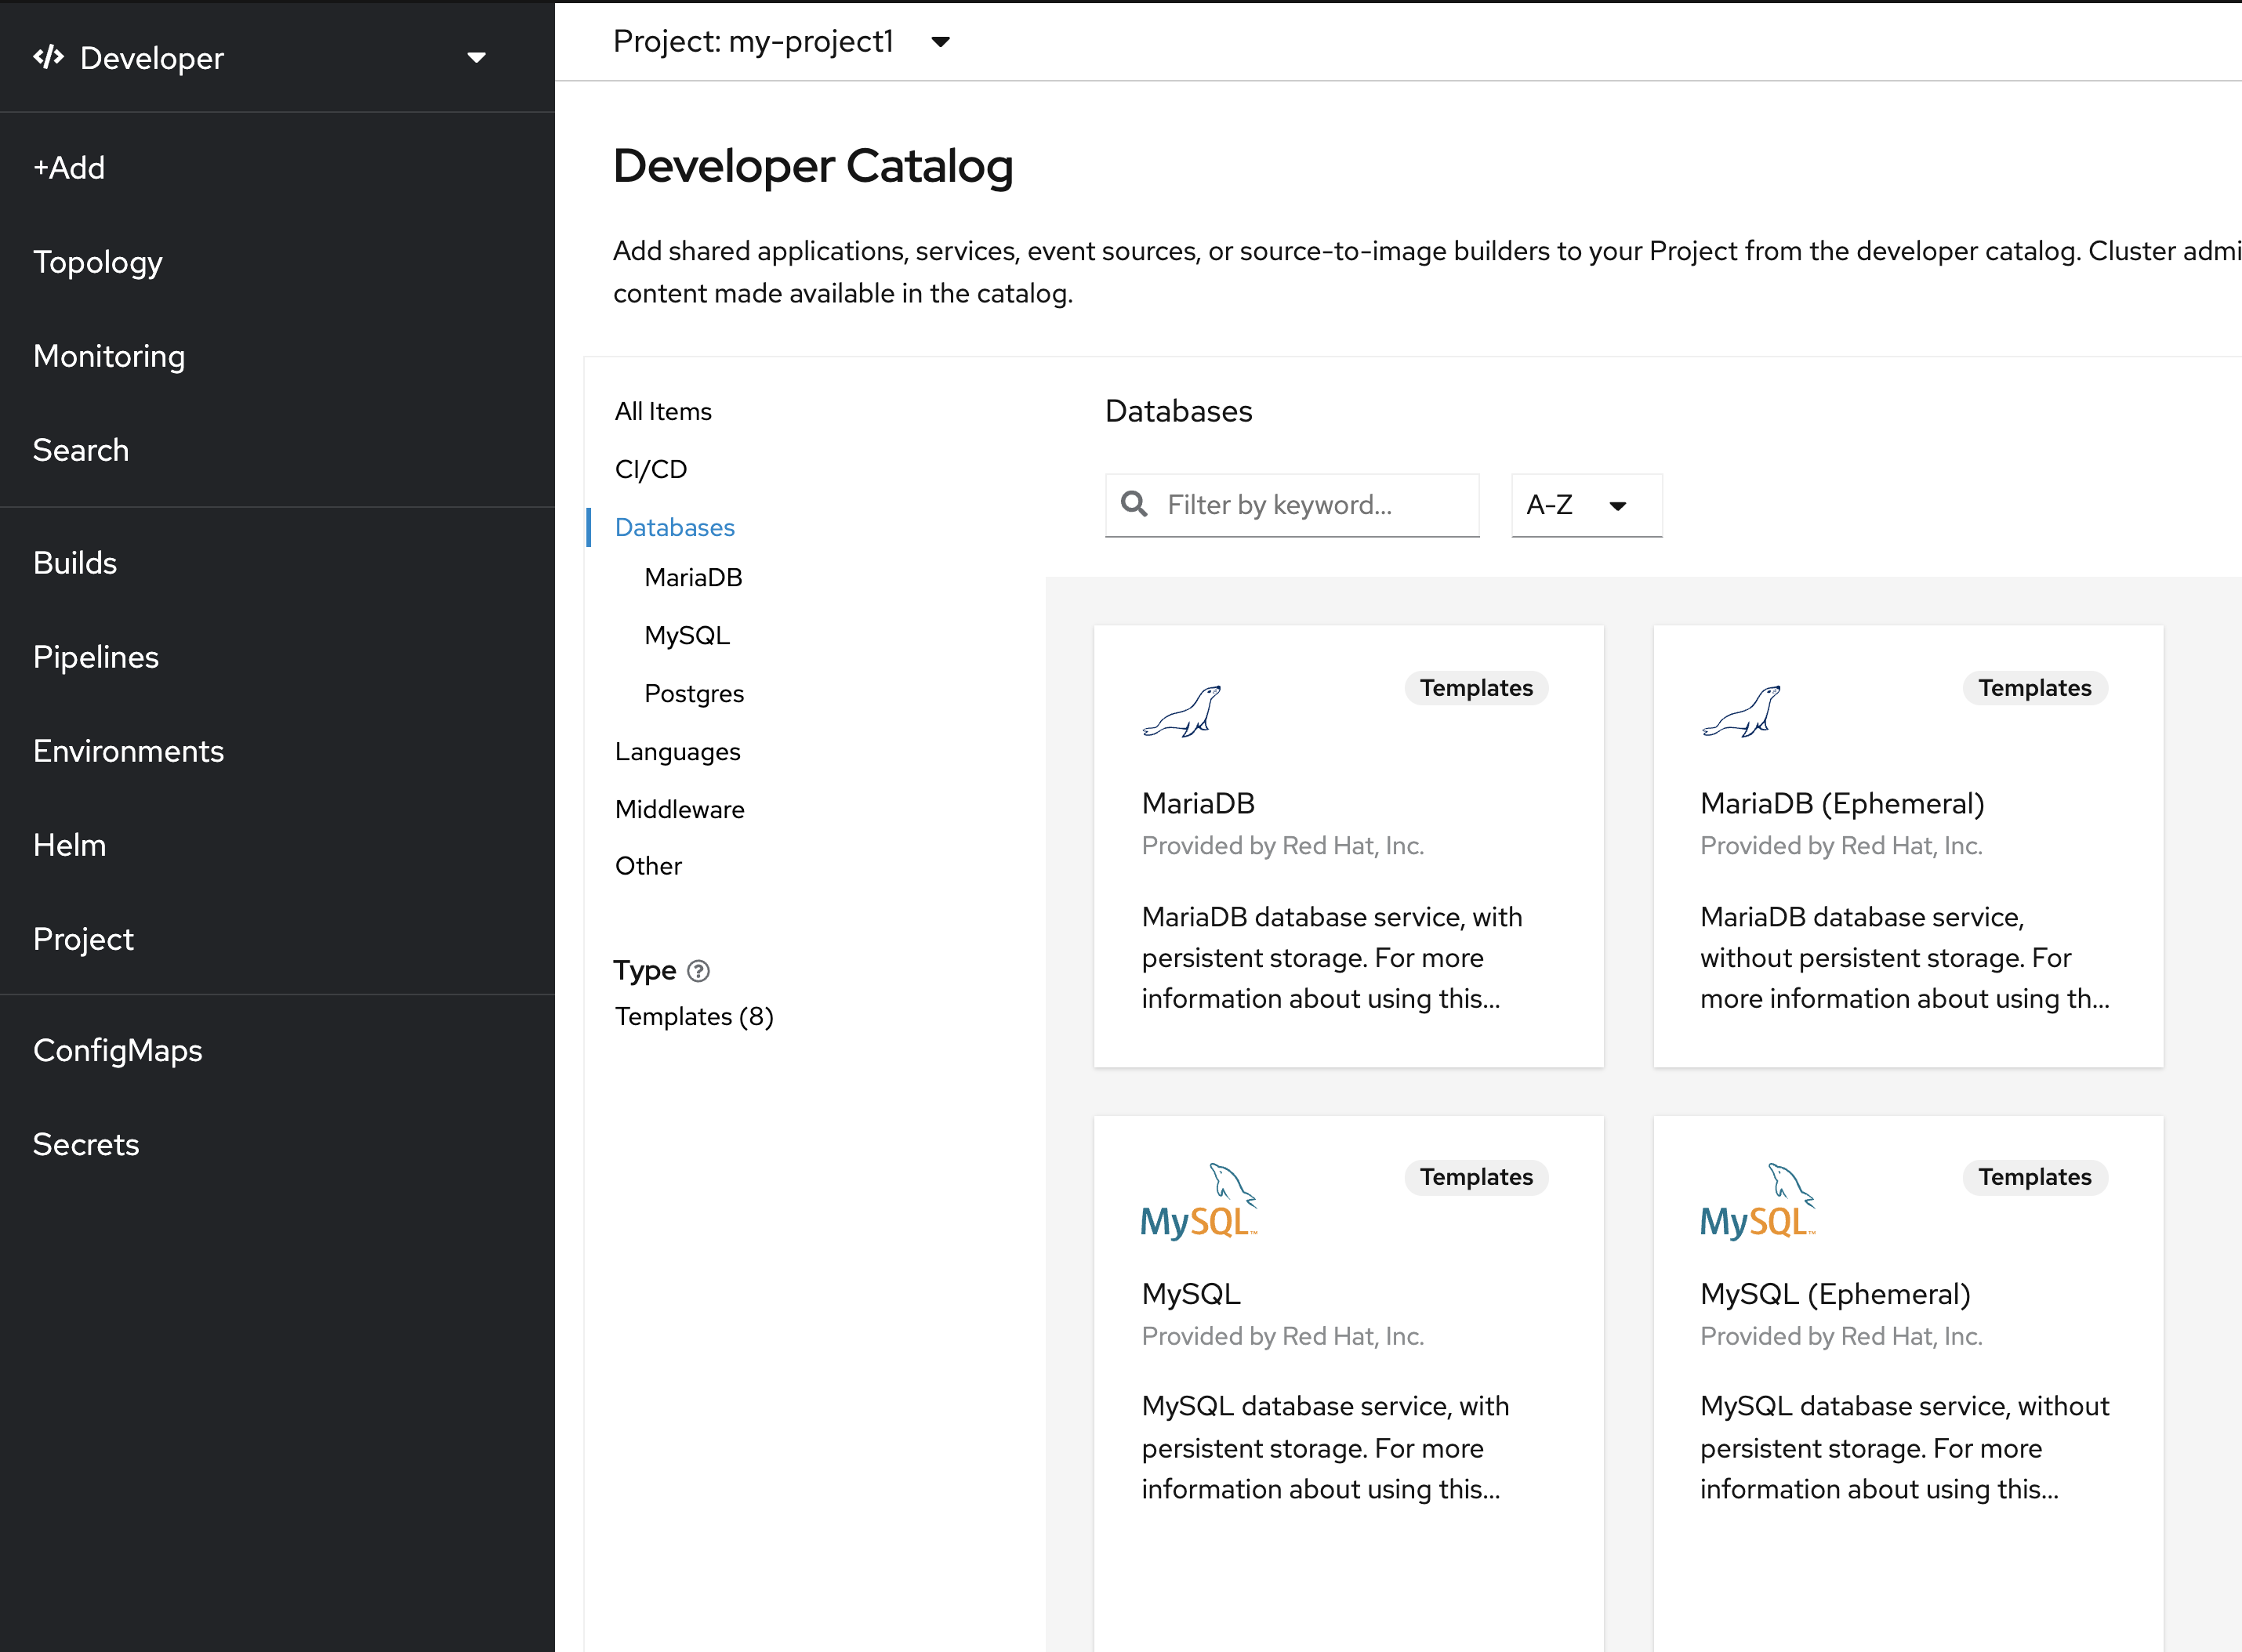
Select 'MariaDB (Ephemeral)' and click on 'Instantiate Template'
Then, enter the following information:
| Parameter | Value |
|---|---|
Namespace* |
my-project%USER_ID% |
Memory Limit* |
512Mi |
Namespace |
openshift |
Database Service Name* |
inventory-mariadb |
MariaDB Connection Username |
inventory |
MariaDB Connection Password |
inventory |
MariaDB root Password |
inventoryadmin |
MariaDB Database Name* |
inventorydb |
Version of MariaDB Image* |
10.3-el8 |
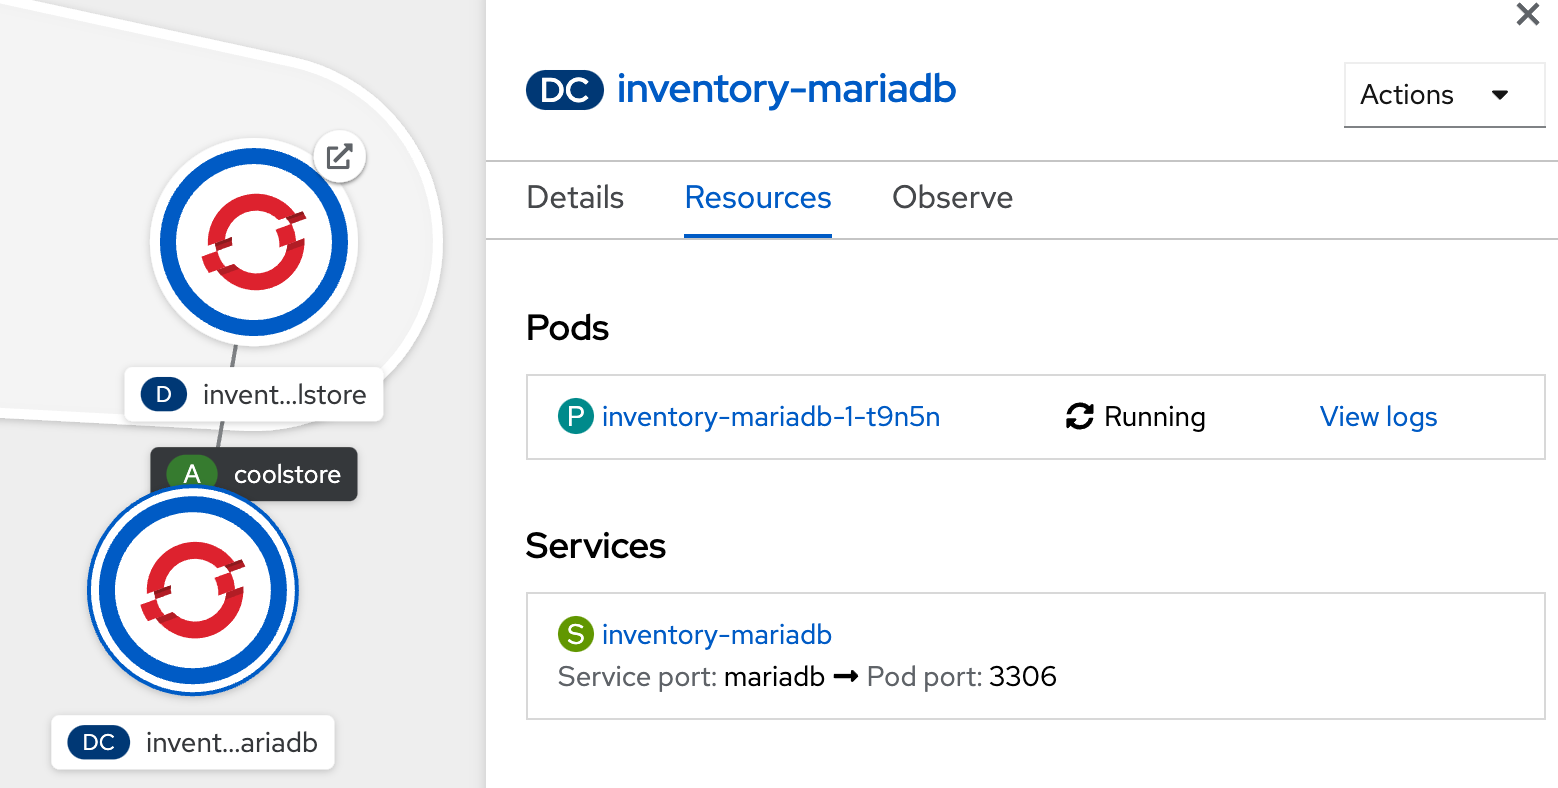
Click on 'Create' button, shortly a Maria database pod should be created:-
Now click again on '+Add' and select 'Database', select 'PostgreSQL (Ephemeral)' and click on 'Instantiate Template'
to create the Catalog Database as follows:
Then, enter the following information:
| Parameter | Value |
|---|---|
Namespace* |
my-project%USER_ID% |
Memory Limit* |
512Mi |
Namespace |
openshift |
Database Service Name* |
catalog-postgresql |
PostgreSQL Connection Username |
catalog |
PostgreSQL Connection Password |
catalog |
PostgreSQL Database Name* |
catalogdb |
Version of PostgreSQL Image* |
10-el8 |
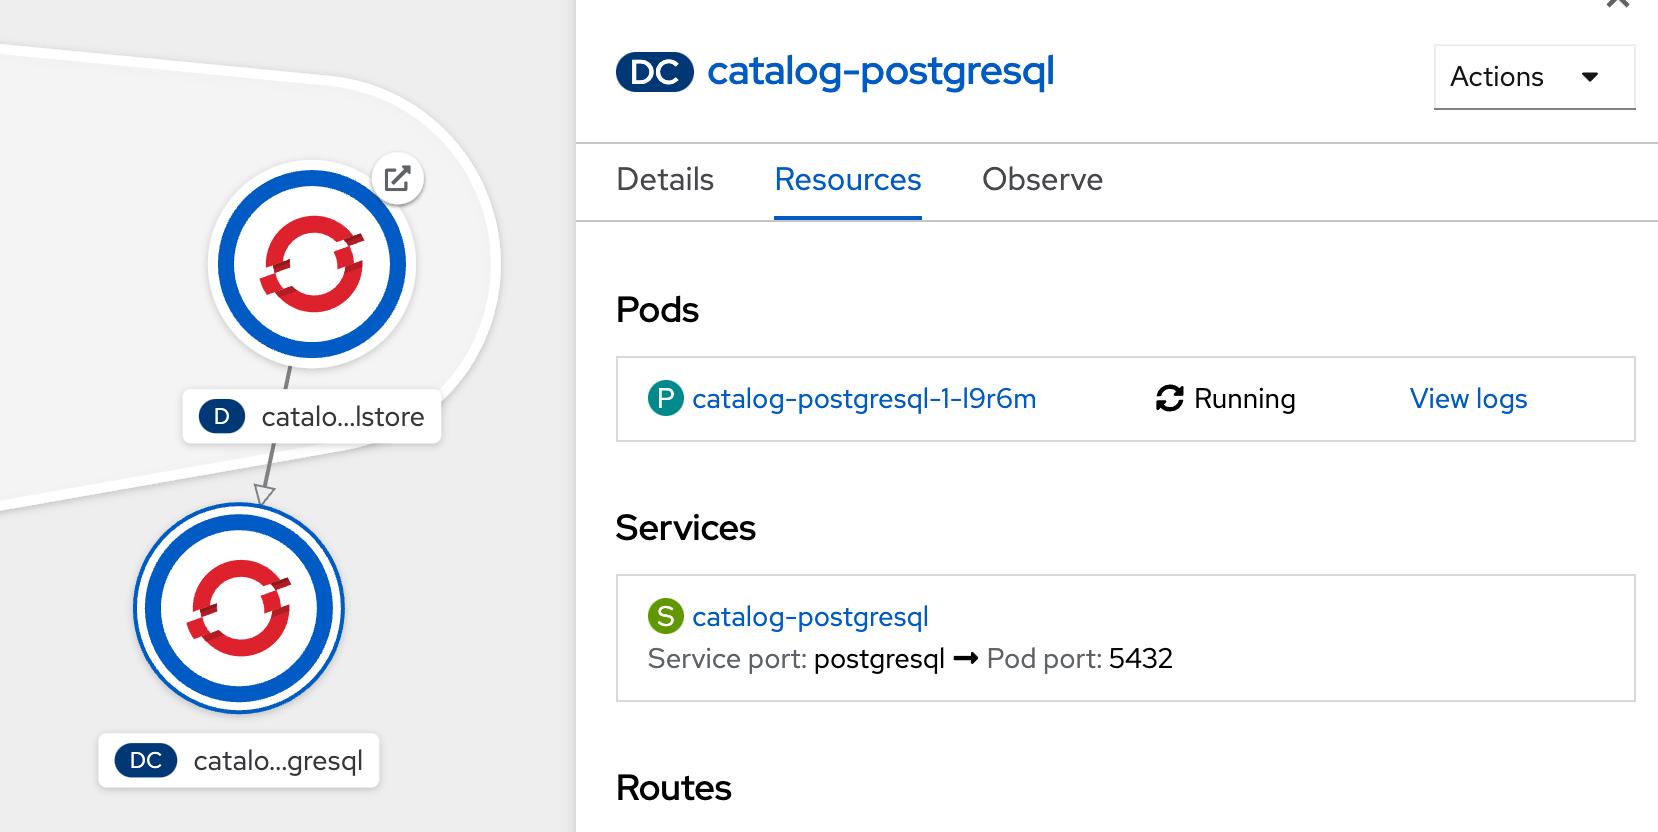
Click on 'Create' button, shortly a Postgresql dtabase pod should be created:-
Now you can move on to configure the Inventory and Catalog service to use these databases.
Give permissions to discover Kubernetes objects
By default, due to security reasons, containers are not allowed to snoop around OpenShift clusters and discover objects. Security comes first and discovery is a privilege that needs to be granted to containers in each project.
Since you do want our applications to discover the config maps inside the my-project%USER_ID% project, you need to grant permission to the Service Account to access the OpenShift REST API and find the config maps.
oc policy add-role-to-user view -n my-project%USER_ID% -z defaultExternalize Quarkus (Inventory) Configuration
Quarkus supports multiple mechanisms for externalizing configurations such as environment variables, Maven properties, command-line arguments and more. The recommended approach for the long-term for externalizing configuration is however using an application.properties which you have already packaged within the Inventory Maven project.
In Quarkus, Driver is a build time property and cannot be overridden. So as you are going to change the database technology, you need to change the 'quarkus.datasource.driver' parameter in /projects/workshop/labs/inventory-quarkus/src/main/resources/application.properties and rebuild the application.
In your Workspace, edit the '/projects/workshop/labs/inventory-quarkus/pom.xml' file and add the
'JDBC Driver - MariaDB' dependency
    <dependency>
      <groupId>io.quarkus</groupId>
      <artifactId>quarkus-kubernetes-config</artifactId> (1)
    </dependency>
    <dependency>
      <groupId>io.quarkus</groupId>
      <artifactId>quarkus-jdbc-mariadb</artifactId> (2)
</dependency>| 1 | Extension which allows developers to use Kubernetes ConfigMaps and Secrets as a configuration source, without having to mount them into the Pod running the Quarkus application or make any other modifications to their Kubernetes Deployment. |
| 2 | Extension which allows developers to connect to MariaDB databases using the JDBC driver |
Then add the '%prod.quarkus.datasource.driver' parameter in
the '/projects/workshop/labs/inventory-quarkus/src/main/resources/application.properties' file as follows
%prod.quarkus.datasource.db-kind=mariadb(1)
%prod.quarkus.kubernetes-config.enabled=true(2)
%prod.quarkus.kubernetes-config.config-maps=inventory(3)| 1 | The kind of database we will connect to |
| 2 | If set to true, the application will attempt to look up the configuration from the API server |
| 3 | ConfigMaps to look for in the namespace that the Kubernetes Client has been configured for |
| With the %prod prefix, this option is only activated when building the jar intended for deployments. |
|
Leave the 'quarkus.datasource.jdbc.url', 'quarkus.datasource.username' and 'quarkus.datasource.password' parameters unchanged. They will be overridden later. |
Now, let’s create the Quarkus configuration content using the database credentials.
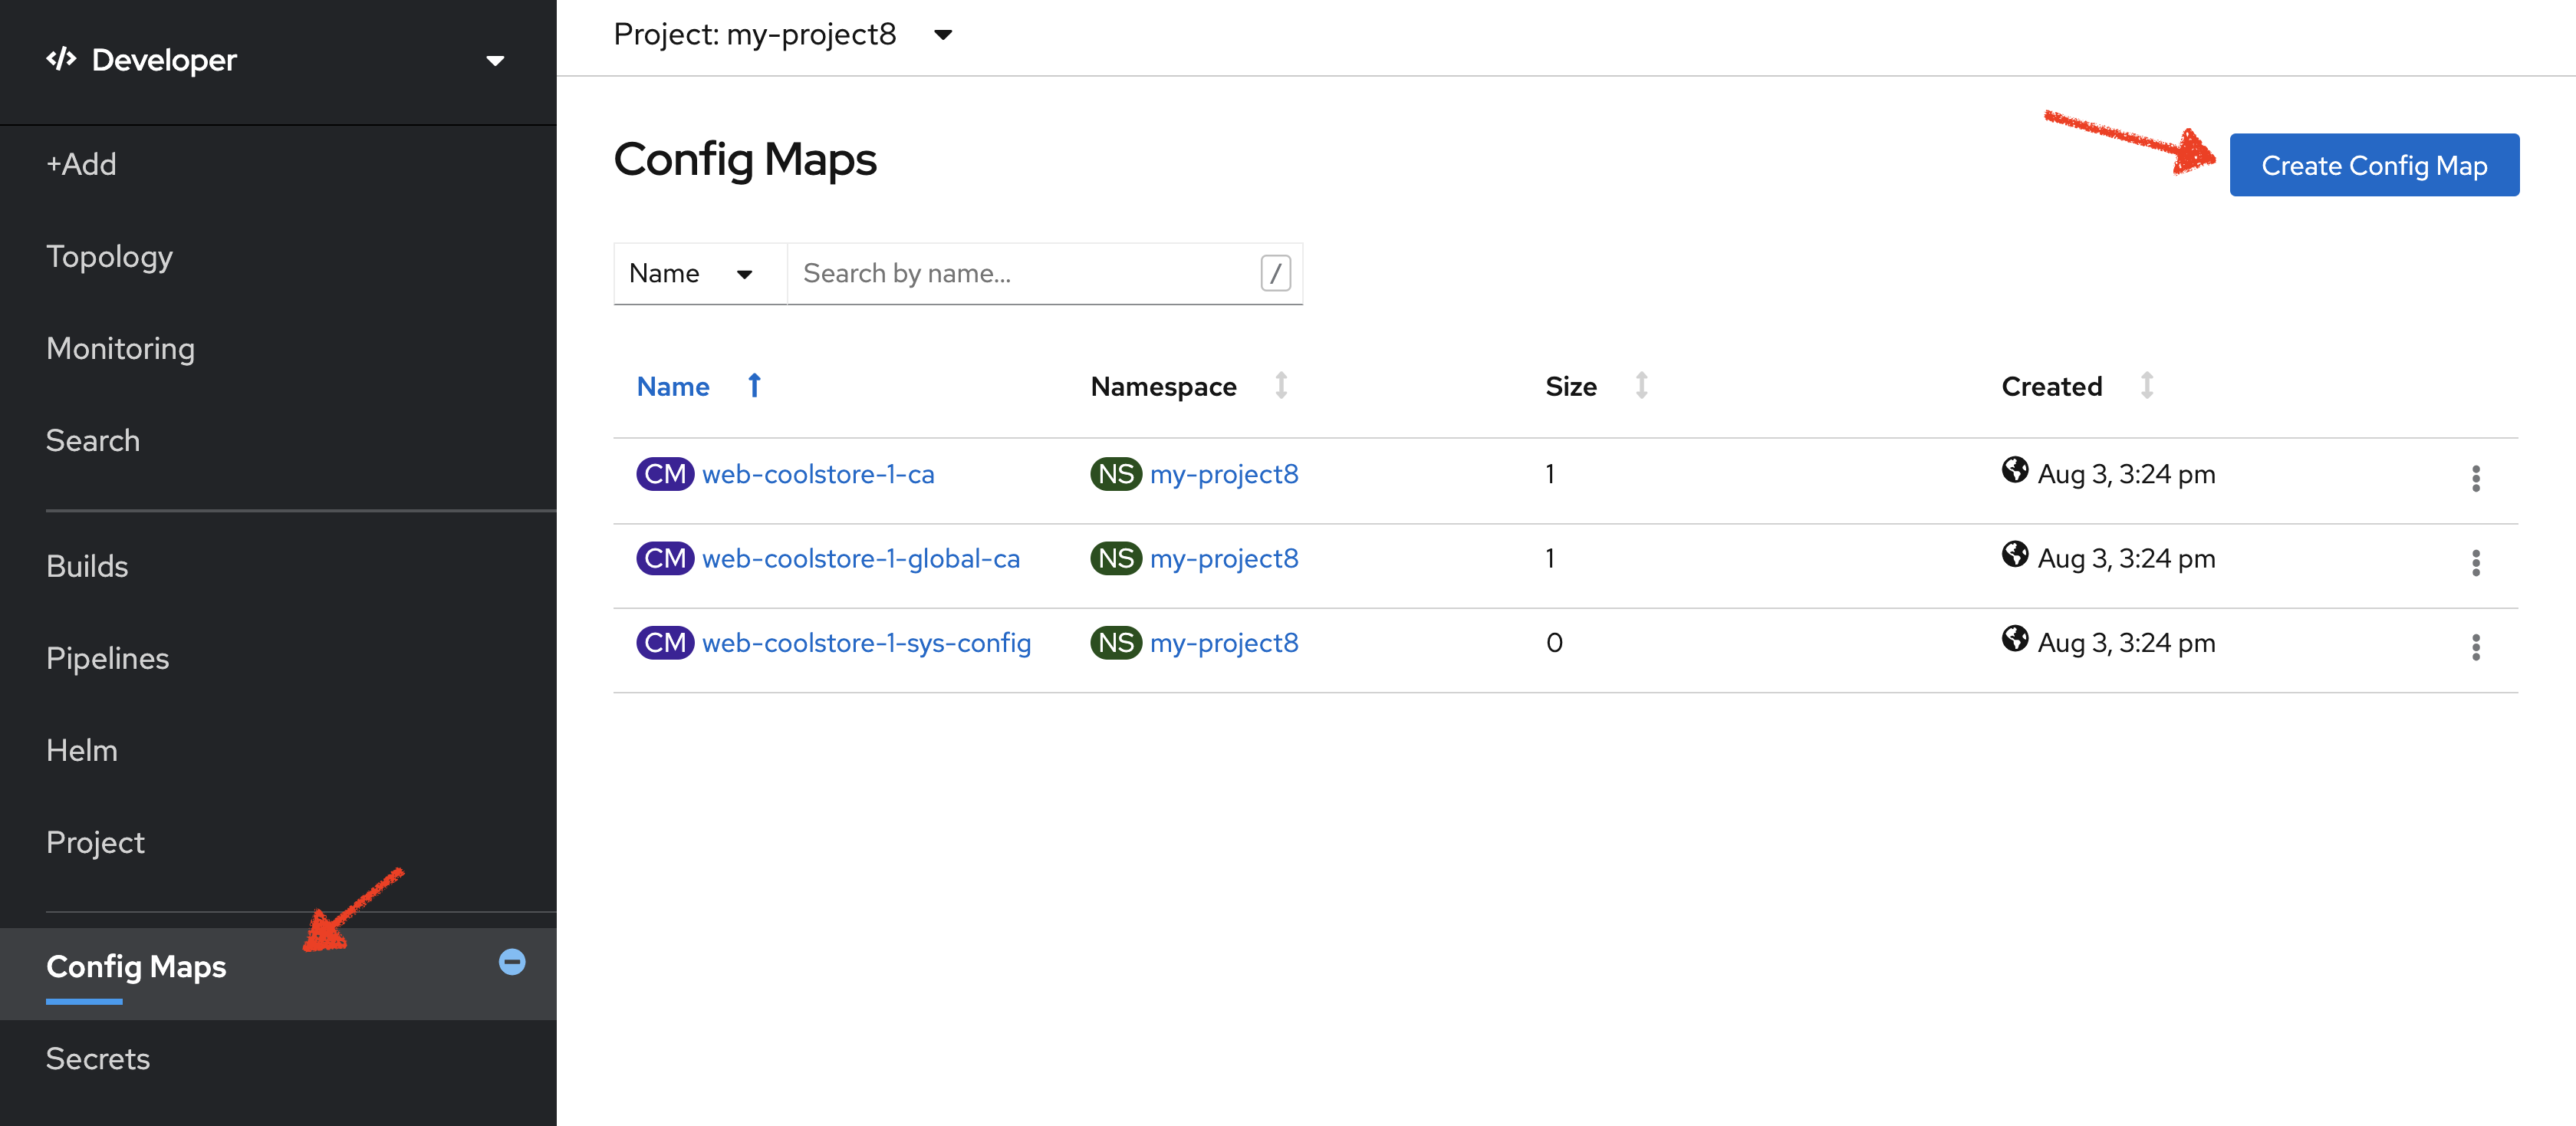
In the OpenShift Web Console, from the Developer view,
click on 'Config Maps' then click on the 'Create Config Map' button.
Then replace the content with the following input:
apiVersion: v1
kind: ConfigMap
metadata:
  name: inventory
  namespace: my-project%USER_ID%
  labels:
    app: coolstore
    app.kubernetes.io/instance: inventory
data:
  application.properties: |-
    quarkus.datasource.jdbc.url=jdbc:mariadb://inventory-mariadb.my-project%USER_ID%.svc:3306/inventorydb
    quarkus.datasource.username=inventory
    quarkus.datasource.password=inventory
Click on the 'Create' button.
Once the source code is updated and the ConfigMap is created, build and push the updated Inventory Service to the OpenShift cluster.
The Inventory pod gets restarted automatically due to the configuration changes. Wait till it’s ready, and then verify that the config map is in fact injected into the container by checking if the seed data is loaded into the database.
Execute the following commands in the terminal window
oc rsh -n my-project%USER_ID% dc/inventory-mariadbOnce connected to the MariaDB container, run the following:
|
Run this command inside the Inventory MariaDB container, after opening a remote shell to it. |
mysql --user=$MYSQL_USER --password=$MYSQL_PASSWORD --host=$HOSTNAME --execute="select * from INVENTORY" $MYSQL_DATABASEYou should have the following output:
+--------+----------+
| itemId | quantity |
+--------+----------+
| 100000 |        0 |
| 165613 |       45 |
| 165614 |       87 |
| 165954 |       43 |
| 329199 |       12 |
| 329299 |       35 |
| 444434 |       32 |
| 444435 |       53 |
+--------+----------+
Finally, exit from inside the database container:
exitYou have now created a config map that holds the configuration content for Inventory and can be updated at anytime for example when promoting the container image between environments without needing to modify the Inventory container image itself.
Externalize Spring Boot (Catalog) Configuration
You should be quite familiar with config maps by now. Spring Boot application configuration is provided via a properties file called application.properties and can be overriden and overlayed via multiple mechanisms.
|
Check out the default Spring Boot configuration in Catalog Maven project catalog-spring-boot/src/main/resources/application.properties. |
In this lab, you will configure the Catalog Service which is based on Spring Boot to override the default configuration using an alternative application.properties backed by a config map.
Let’s create the Spring Boot configuration content using the database credentials and create the Config Map.
In the OpenShift Web Console, from the Developer view,
click on 'Config Maps' then click on the 'Create Config Map' button.
Then replace the content with the following input:
apiVersion: v1
kind: ConfigMap
metadata:
  name: catalog
  namespace: my-project%USER_ID%
  labels:
    app: coolstore
    app.kubernetes.io/instance: catalog
data:
  application.properties: |-
    spring.datasource.url=jdbc:postgresql://catalog-postgresql.my-project%USER_ID%.svc:5432/catalogdb
    spring.datasource.username=catalog
    spring.datasource.password=catalog
    spring.datasource.driver-class-name=org.postgresql.Driver
    spring.jpa.hibernate.ddl-auto=create
    spring.jpa.properties.hibernate.jdbc.lob.non_contextual_creation=true
The Spring Cloud Kubernetes plug-in implements the integration between Kubernetes and Spring Boot and is already added as a dependency to the Catalog Maven project. Using this dependency, Spring Boot would search for a config map (by default with the same name as the application) to use as the source of application configurations during application bootstrapping and if enabled, triggers hot reloading of beans or Spring context when changes are detected on the config map.
Delete the Catalog Pod to make it start again and look for the config maps:
oc delete pod -l component=catalog -n my-project%USER_ID%When the Catalog container is ready, verify that the PostgreSQL database is being used. Check the Catalog pod logs repeatedly:
oc logs -c application deployment/catalog-coolstore -n my-project%USER_ID% | grep hibernate.dialectYou should have the following output:
2017-08-10 21:07:51.670 INFO 1 --- [ main] org.hibernate.dialect.Dialect : HHH000400: Using dialect: org.hibernate.dialect.PostgreSQL95DialectYou can also connect to the Catalog PostgreSQL database and verify that the seed data is loaded:
oc rsh -n my-project%USER_ID% dc/catalog-postgresqlOnce connected to the PostgreSQL container, run the following:
|
Run this command inside the Catalog PostgreSQL container, after opening a remote shell to it. |
psql catalogdb -U catalog -c "select item_id, name, price from product"You should have the following output:
  item_id |              name               | price
  ---------+---------------------------------+-------
  100000  | Red Fedora                      | 34.99
  329299  | Quarkus T-shirt                 |    10
  329199  | Pronounced Kubernetes           |     9
  165613  | Knit socks                      |  4.15
  444434  | Red Hat Impact T-shirt          |     9
  444435  | Quarkus twill cap               |    13
  165614  | Quarkus H2Go water bottle       | 14.45
  444437  | Nanobloc Universal Webcam Cover |  2.75
  165954  | Patagonia Refugio pack 28L      |     6
  (9 rows)
Finally, exit from inside the database container:
exitExplore Sensitive Configuration Data
You won’t create any secrets in this lab; however, you have already created two secrets when you created the PostgreSQL and MariaDB databases. The Database template by default stores the database credentials in a secret in the project in which it’s being created:
oc describe secret catalog-postgresqlYou should have the following output:
Name: catalog-postgresql
Namespace: coolstore
Labels: app=catalog
template=postgresql-persistent-template
Annotations: openshift.io/generated-by=OpenShiftNewApp
template.openshift.io/expose-database_name={.data['database-name']}
template.openshift.io/expose-password={.data['database-password']}
template.openshift.io/expose-username={.data['database-user']}
Type: Opaque
Data
====
database-name: 9 bytes
database-password: 7 bytes
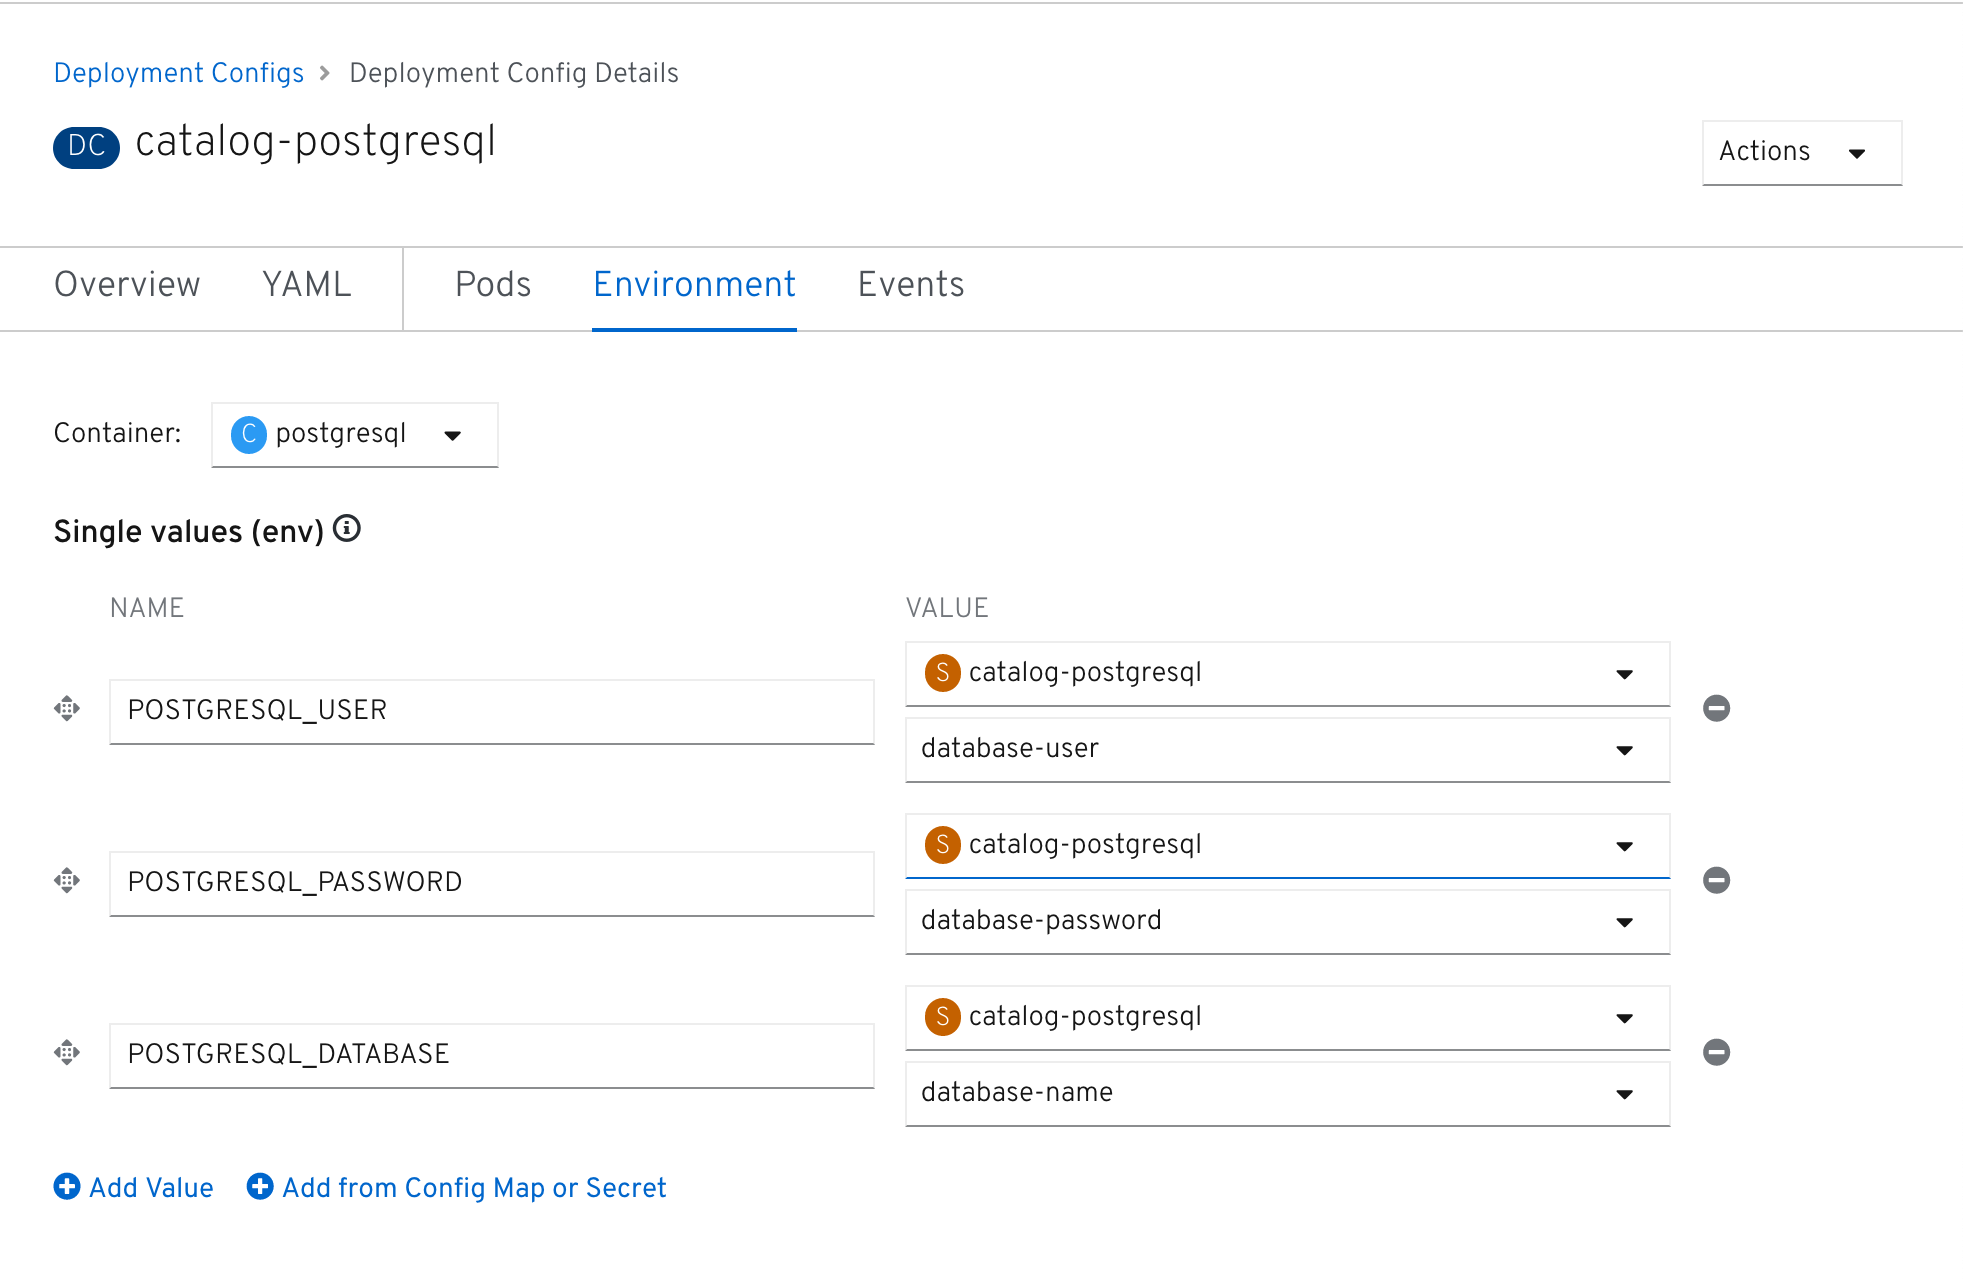
database-user: 7 bytesThis secret has three encrypted properties defined as database-name, database-user and database-password which hold the PostgreSQL database name, username and password values. These values are injected in the PostgreSQL container as environment variables and used to initialize the database.
In the OpenShift Web Console, from the Developer view,
click on 'DC catalog-postgresql' → 'DC catalog-postgresql' → 'Environment'. Notice the values
from the secret are defined as env vars on the deployment:
Test your Service (again)
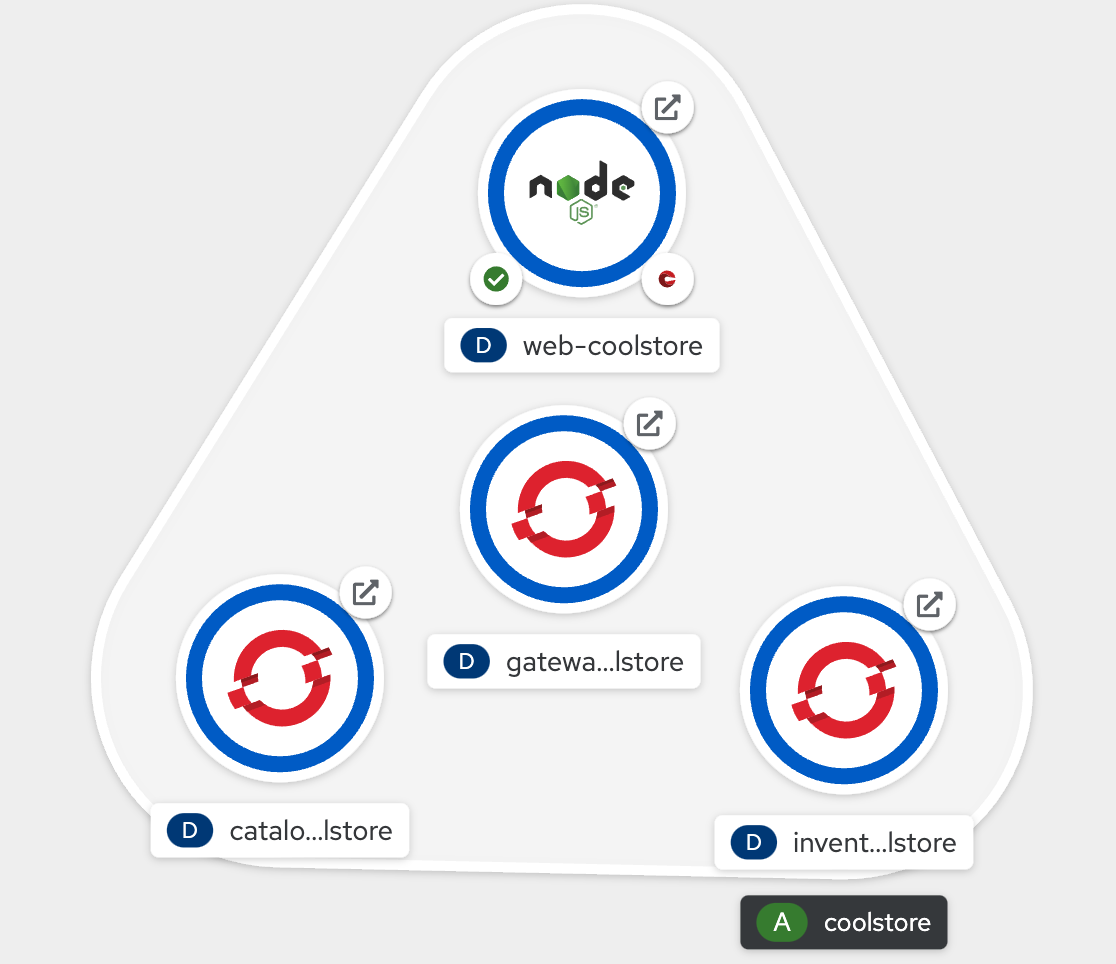
Having made all those changes with adding databases and the application configuration you should now test that the Coolstore application still works. Just like you did a couple of chapters ago you need to use the toplogy display in the web console.
In the OpenShift Web Console, from the Developer view,
click on the 'Open URL' icon of the Web Service
Your browser will be redirect to your Web Service running on OpenShift. You should be able to see the CoolStore application with all products and their inventory status.
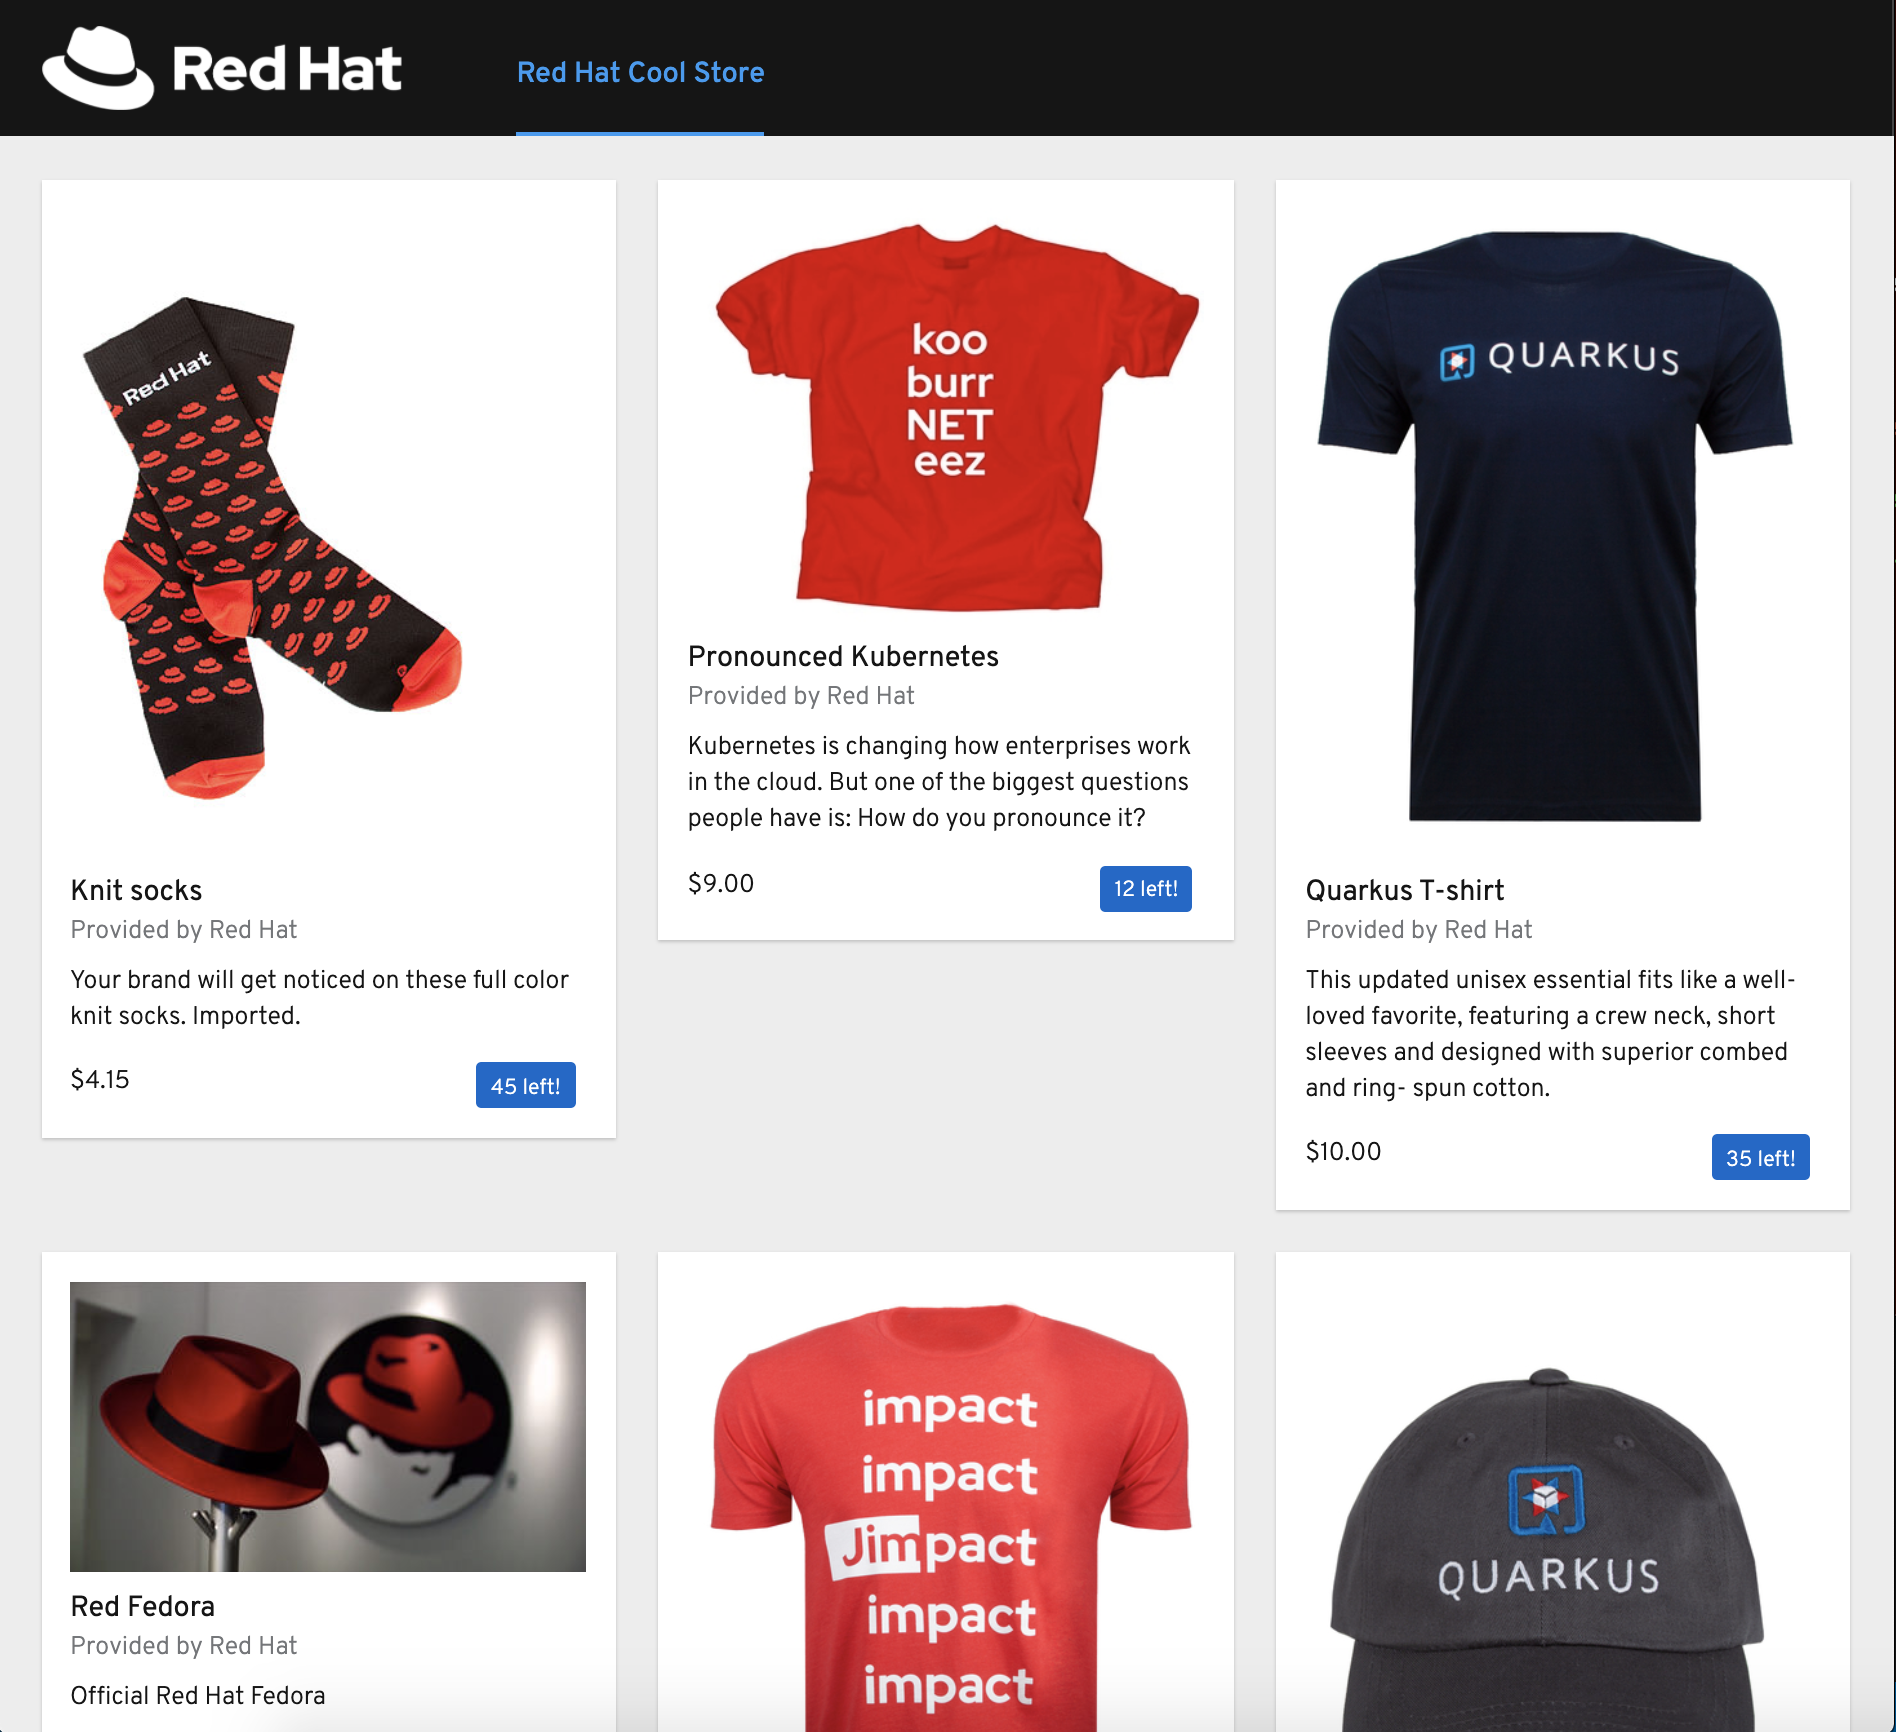
That’s all for this lab! You are ready to move on to the next lab.