Roles
In this section, you’ll learn the following:
-
Create a Role
-
Different ways to invoke a Role
-
Why Handlers are important
-
Sharing Roles
-
Downloading Roles from Ansible Galaxy
So far, we’ve seen how to write Ansible playbooks, as this is the entry point for Ansible, but when you have already written some playbooks, the task is repetitive as most of the playbooks look the same.
Ansible Roles enable us to reuse and share Ansible code (tasks). Then you only call the Role/s from the playbook, and all the magic happens.
For example, you could have a Role to install PostgreSQL and reuse it in all tasks of all projects when a PostgreSQL database is required.
But Roles let you organize Ansible code as it provides a hierarchy of directories to follow (tasks, handlers, templates, vars, …), and a way to invoke them cleanly, making playbook files easy to follow and maintain.
First Role
In the project’s root directory (app1), create a new directory called roles.
This is the default directory where Ansible will look for available Roles at invocation time.
mkdir roles
cd roles
Inside the roles directory, let’s use the ansible-galaxy command (already installed with Ansible) to scaffold the directory layout for a Role.
Name the Role printfile.
Run the following command in the terminal window:
ansible-galaxy init printfileScaffold the Role
Let’s implement a Role to read a file from a remote host and print its content to the local console.
Enter into the printfile directory:
cd printfileThis directory has the following directory structure:
- defaults
-
Includes default values for variables of the role.
- files
-
Contains static and custom files.
- handlers
-
A set of handlers that are triggered by tasks of the role.
- meta
-
Metadata information for the role.
- tasks
-
A list of tasks to be executed by the role.
- templates
-
Template files used by tasks of the role.
- tests
-
Configuration files related to role testing.
- vars
-
Contains variables defined for the role.
tasks directory is similar to the task section of a playbook, so let’s implement the task to print the content of a given file in that directory.
Implement the Role
Open tasks/main.yml file and put the following content:
- name: Display file contents
  command: "cat {{show_file}} chdir={{show_directory}}" (1)
  register: command_output
- name: Print to console
  debug:
msg: "{{command_output.stdout}}" (2)| 1 | Gets the file content from show_directory/show_file variables |
| 2 | Prints the file content to the local console |
Let’s set some default values for these two variables.
Open the vars/main.yml file and put the following content:
---
show_file: hosts
show_directory: /etc
By default, this Role shows the remote content of /etc/hosts to the console.
Create a Playbook invoking a Role
Finally, we create a playbook file into root directory (apps1) referencing the folder of the created role:
cd ../..At this point you should be inside the app1 folder.
- hosts: all
  become: true
  roles:
- role: printfile (1)| 1 | Folder name |
Now, run the playbook and inspect the output:
ansible-playbook -i inventory simple-role-playbook.yaml[WARNING]: Found both group and host with same name: production
[WARNING]: Found both group and host with same name: staging
PLAY [all] *********************************************************************
TASK [Gathering Facts] *********************************************************
ok: [production]
ok: [staging]
TASK [printfile : Display file contents] ***************************************
changed: [production]
changed: [staging]
TASK [printfile : Print to console] ********************************************
ok: [staging] => {
"msg": "127.0.0.1\tlocalhost\n::1\tlocalhost ip6-localhost ip6-loopback\nfe00::0\tip6-localnet\nff00::0\tip6-mcastprefix\nff02::1\tip6-allnodes\nff02::2\tip6-allrouters\n192.168.0.3\t6d4b0c215195"
}
ok: [production] => {
"msg": "127.0.0.1\tlocalhost\n::1\tlocalhost ip6-localhost ip6-loopback\nfe00::0\tip6-localnet\nff00::0\tip6-mcastprefix\nff02::1\tip6-allnodes\nff02::2\tip6-allrouters\n192.168.0.2\tf602be09e2c3"
}
PLAY RECAP *********************************************************************
production : ok=3 changed=1 unreachable=0 failed=0 skipped=0 rescued=0 ignored=0
staging : ok=3 changed=1 unreachable=0 failed=0 skipped=0 rescued=0 ignored=0Override Variables
You can override any variable value from the playbook file by setting them under the role section:
- hosts: all
  become: true
  roles:
    - role: printfile
show_file: host.conf (1)| 1 | Overrides show_file variable |
Run again the playbook, and the output prints the host.conf content:
ansible-playbook -i inventory simple-role-playbook.yaml[WARNING]: Found both group and host with same name: staging
[WARNING]: Found both group and host with same name: production
PLAY [all] *********************************************************************
TASK [Gathering Facts] *********************************************************
ok: [staging]
ok: [production]
TASK [printfile : Display file contents] ***************************************
changed: [production]
changed: [staging]
TASK [printfile : Print to console] ********************************************
ok: [staging] => {
"msg": "multi on"
}
ok: [production] => {
"msg": "multi on"
}
PLAY RECAP *********************************************************************
production : ok=3 changed=1 unreachable=0 failed=0 skipped=0 rescued=0 ignored=0
staging : ok=3 changed=1 unreachable=0 failed=0 skipped=0 rescued=0 ignored=0Handlers
Ansible offers handlers to run operations on change. For example, restarting a service when a task changes a configuration file.
Creation of the Handler
Let’s create a handler for debugging a variable.
Open roles/printfile/handlers/main.yml file and copy the following content:
- name: Print to console (1)
debug:
msg: "{{command_output.stdout}}"| 1 | Name of the handler |
The syntax is similar like a task and is executed when it’s notified.
Let’s modify the Role code to notify after the cat command is executed.
Fire the Handler
Open roles/printfile/tasks/main.yml file and copy the following content:
---
- name: Display file contents
command: "cat {{show_file}} chdir={{show_directory}}"
register: command_output
notify: Print to console (1)| 1 | Fires the content defined in the handler named Print to console. |
Run the Playbook
Run the playbook without any change, and the console prints the variable value but coming from a handler instead of a task:
ansible-playbook -i inventory simple-role-playbook.yaml[WARNING]: Found both group and host with same name: production
[WARNING]: Found both group and host with same name: staging
PLAY [all] *********************************************************************
TASK [Gathering Facts] *********************************************************
ok: [production]
ok: [staging]
TASK [Print Hosts] *************************************************************
TASK [printfile : Display file contents] ***************************************
changed: [staging]
changed: [production]
RUNNING HANDLER [printfile : Print to console] *********************************
ok: [staging] => {
"msg": "127.0.0.1\tlocalhost\n::1\tlocalhost ip6-localhost ip6-loopback\nfe00::0\tip6-localnet\nff00::0\tip6-mcastprefix\nff02::1\tip6-allnodes\nff02::2\tip6-allrouters\n192.168.0.3\t6d4b0c215195"
}
ok: [production] => {
"msg": "127.0.0.1\tlocalhost\n::1\tlocalhost ip6-localhost ip6-loopback\nfe00::0\tip6-localnet\nff00::0\tip6-mcastprefix\nff02::1\tip6-allnodes\nff02::2\tip6-allrouters\n192.168.0.2\tf602be09e2c3"
}
PLAY RECAP *********************************************************************
production : ok=3 changed=1 unreachable=0 failed=0 skipped=0 rescued=0 ignored=0
staging : ok=3 changed=1 unreachable=0 failed=0 skipped=0 rescued=0 ignored=0Share Roles
So far, we’ve seen Ansible Roles enable extracting everyday tasks in a structured way and reusing them in different Tasks (or Playbooks). But how to share Roles between different projects/teams?
There are several ways to do this, like Ansible Galaxy or Ansible Tower, but the easiest way is using a well-known old friend named Git.
Create a Git repository
First, we need a public Git repository to push the printfile role.
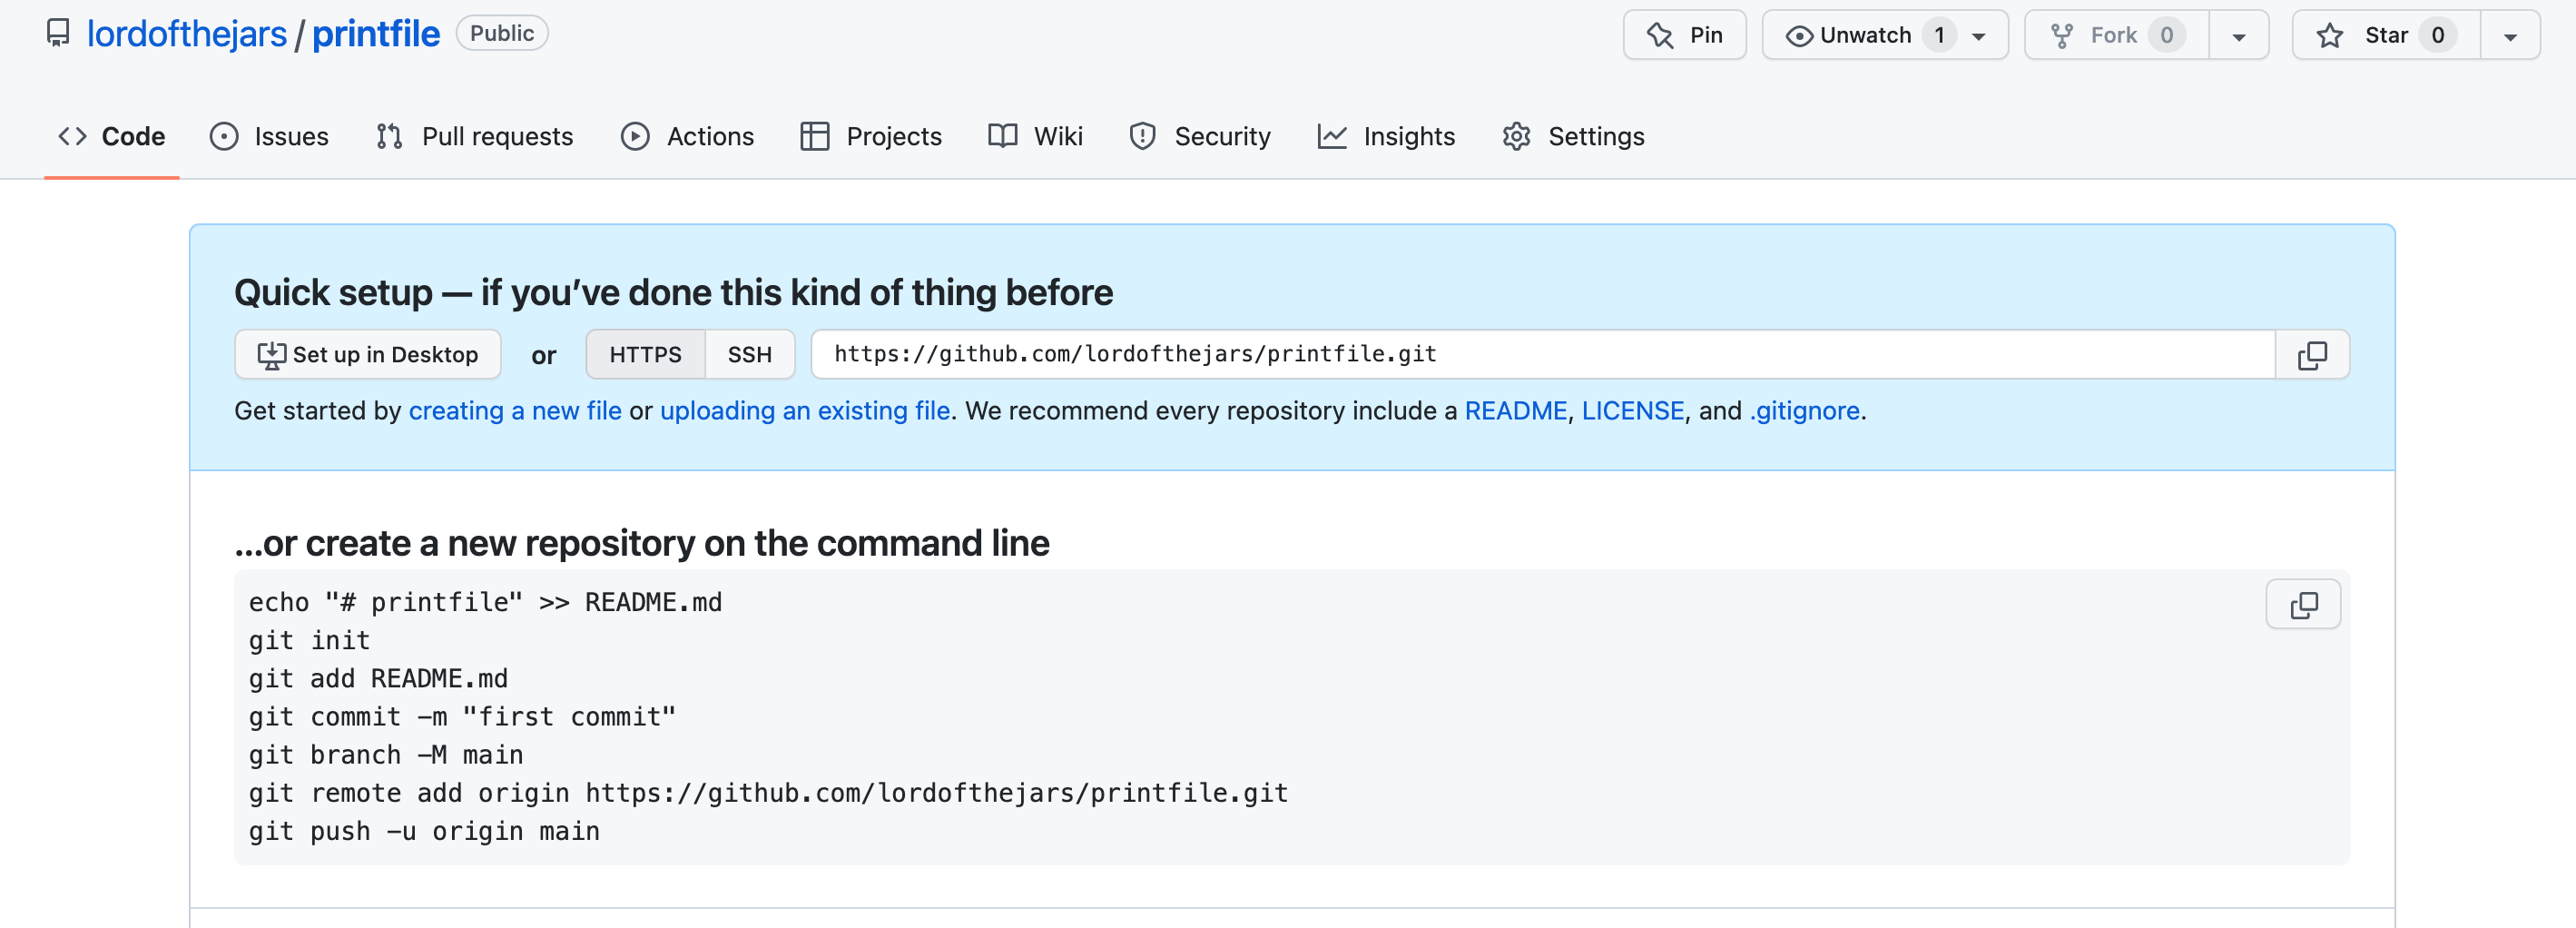
Go to your GitHub account (GitLab, … are also acceptable) and create a new repository named printfile:
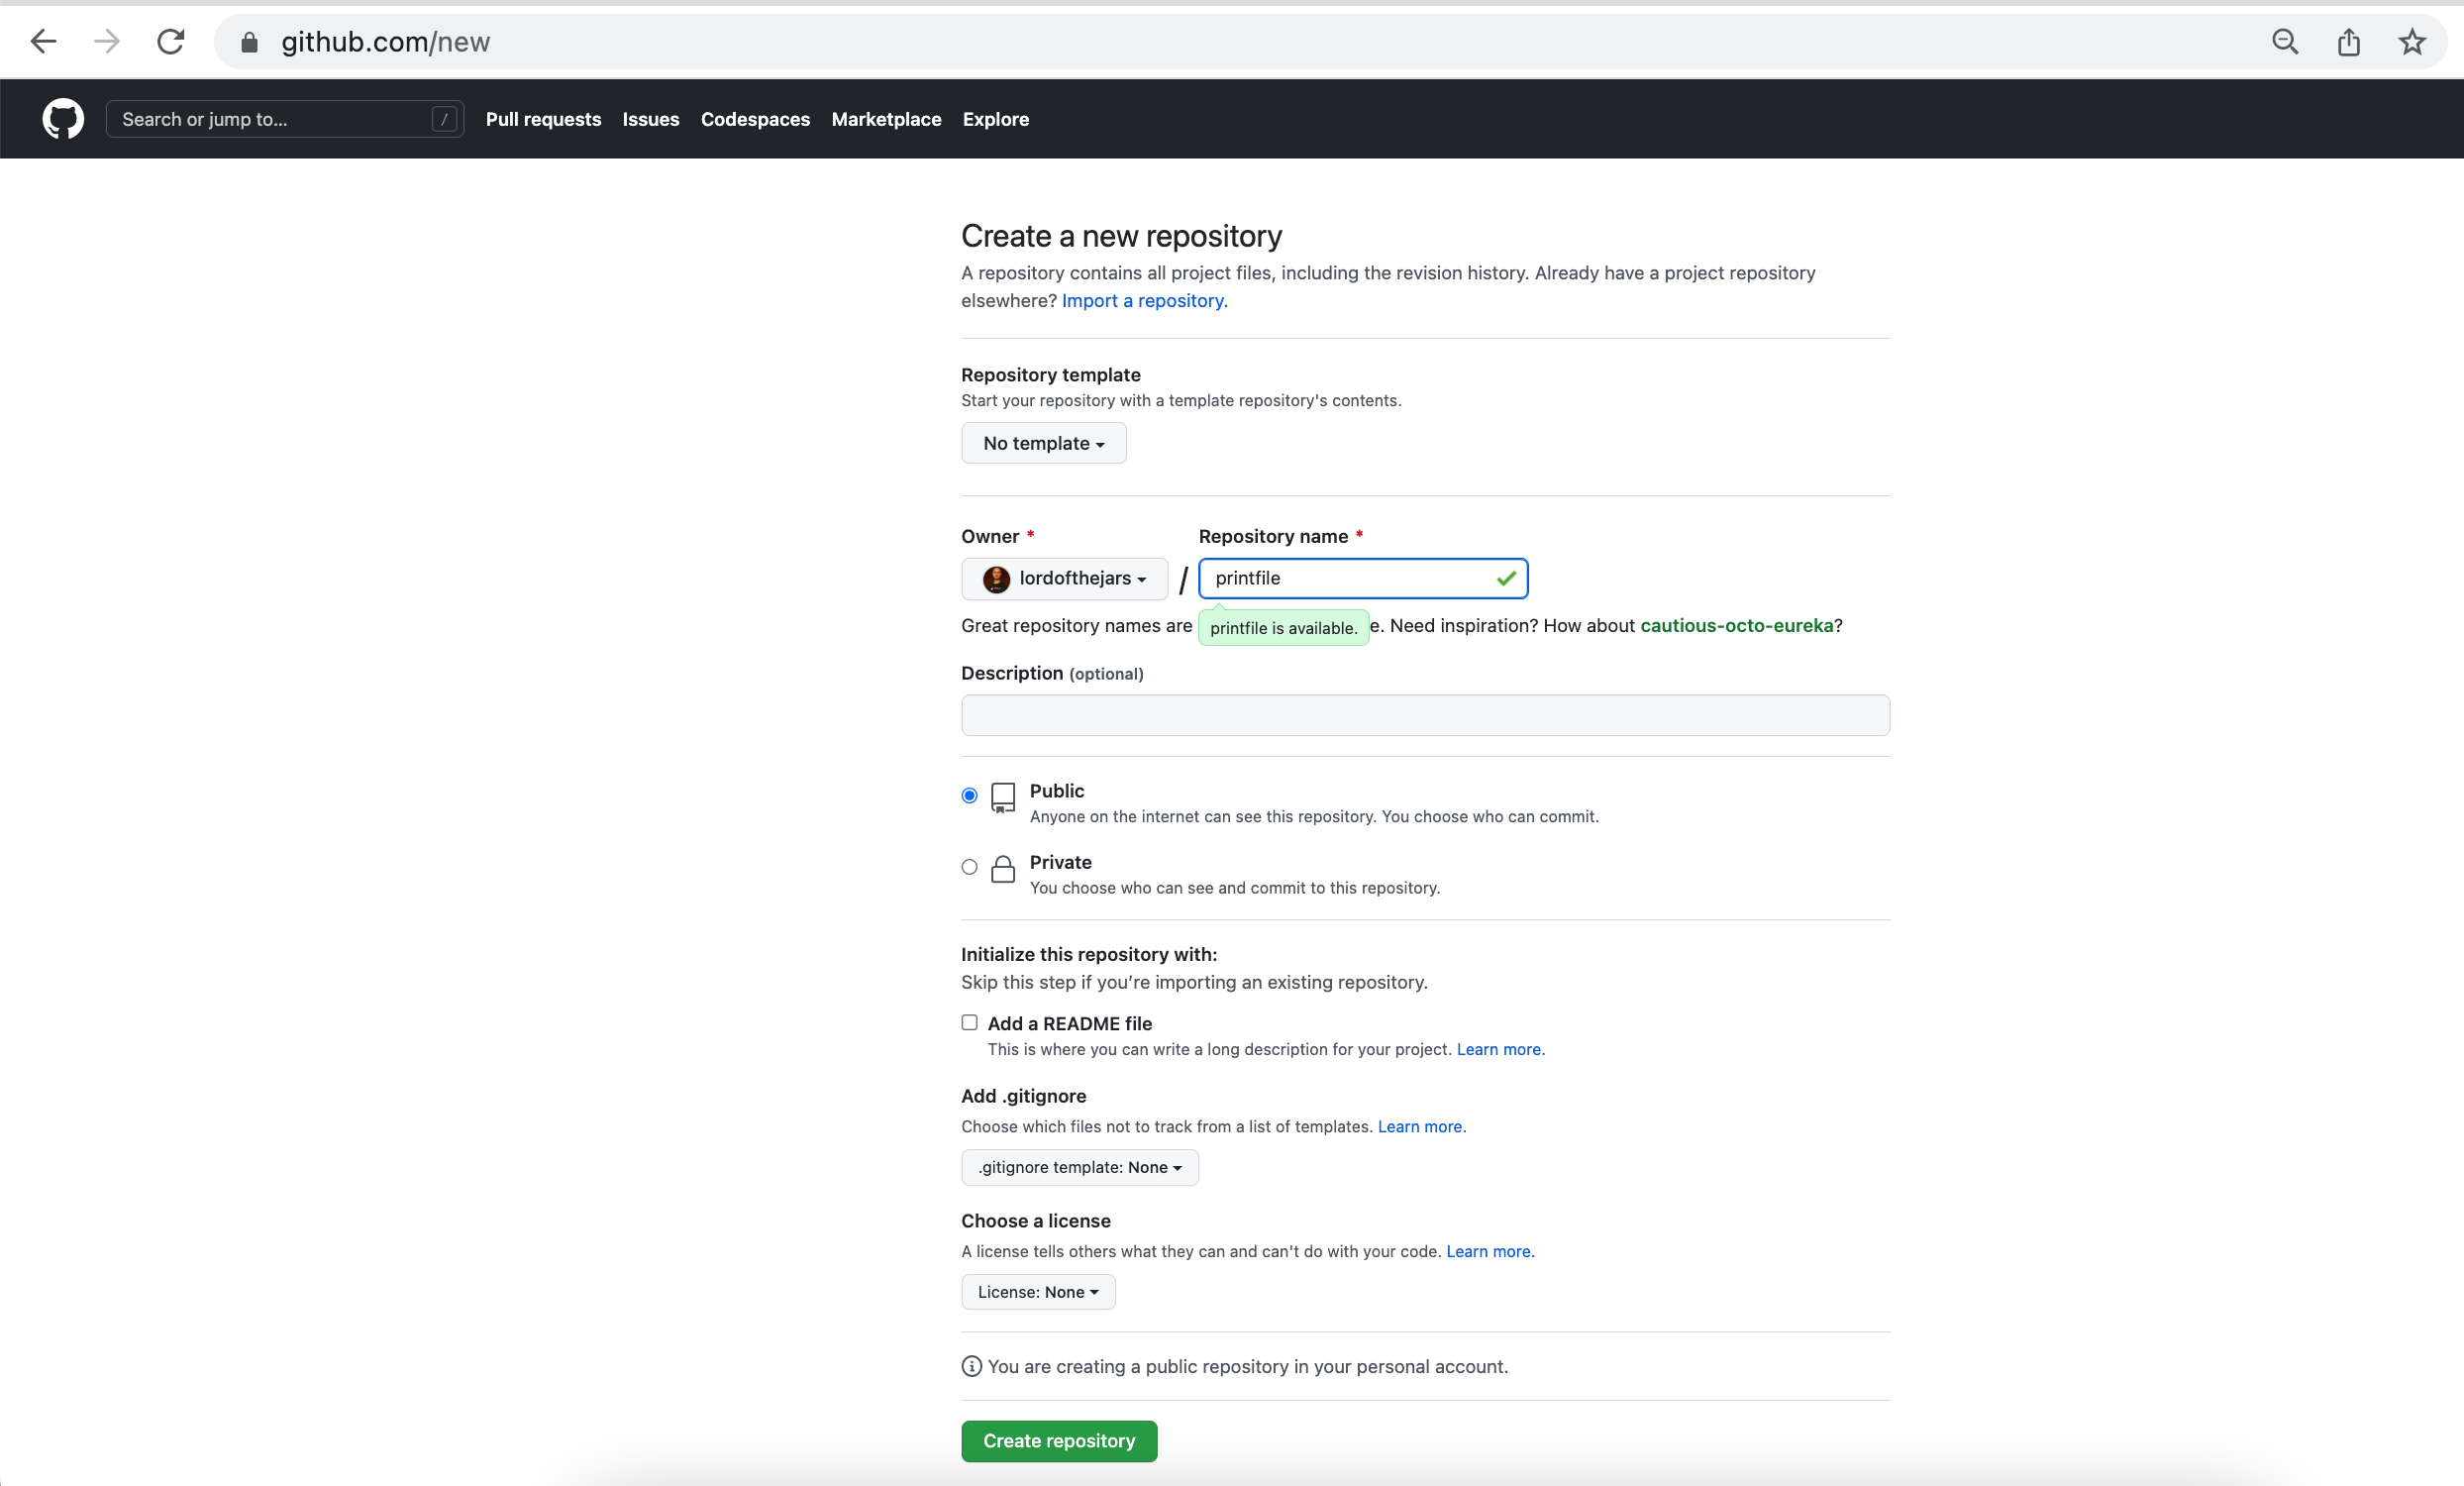
Push the Create Repository button and validate it’s public repo and the full URL:
Publish The Ansible Role
To publish the Role, convert the printfile directory into a Git repository.
From apps1 folder, run the following command:
cd roles/printfileAnd initialize the repository:
git init .
git add .
git commit -m "First role"
git branch -M main
git remote add origin git@github.com:lordofthejars/printfile.git (1)
git push -u origin main| 1 | Change the repo to your location |
At this point, the Ansible Role is published to a Git repo. Let’s create a new Playbook which reuses this Role.
Create a New Playbook
Create a new directory to store a new Ansible code using the published role.
Go to parent directory of app1 directory, and create an app2 directory:
mkdir app2
cd app2Create a new file named inventory with the following content:
[staging]
staging ansible_user=root ansible_host=127.0.0.1 ansible_port=2223 ansible_ssh_private_key_file=~/.ssh/id_rsa_ansible
[production]
production ansible_user=root ansible_host=127.0.0.1 ansible_port=2224 ansible_ssh_private_key_file=~/.ssh/id_rsa_ansibleThen create the Playbook referencing the printfile Role:
- hosts: all
  become: true
  tasks:
    - name: Print Hosts
      include_role:
name: printfileAt this point, Ansible looks for a Role named printfile but Role is not installed yet.
Install the Role
To install the Role, create a new directory named roles inside app2 directory:
mkdir roles
cd roles
Inside roles directory, create a requirements.yml file with the following content:
- src: https://github.com/lordofthejars/printfile.git (1)
  version: main (2)
name: printfile (3)| 1 | Change the repo to your location |
| 2 | Branch |
| 3 | Name of the Role |
Finally, run the following command from the root directory to download the role:
ansible-galaxy install -r roles/requirements.ymlStarting galaxy role install process
- extracting printfile to /Users/asotobu/.ansible/roles/printfile
- printfile (main) was installed successfullyRole is installed and can be executed from the Playbook.
Execute the Playbook
Execute the Playbook as done in the other sections:
ansible-playbook -i inventory playbook.yaml[WARNING]: Found both group and host with same name: staging
[WARNING]: Found both group and host with same name: production
PLAY [all] *****************************************************************************
TASK [Gathering Facts] *****************************************************************
ok: [production]
ok: [staging]
TASK [Print Hosts] *********************************************************************
TASK [printfile : Display file contents] ***********************************************
changed: [production]
changed: [staging]
RUNNING HANDLER [printfile : Print to console] *****************************************
ok: [staging] => {
"msg": "127.0.0.1\tlocalhost\n::1\tlocalhost ip6-localhost ip6-loopback\nfe00::0\tip6-localnet\nff00::0\tip6-mcastprefix\nff02::1\tip6-allnodes\nff02::2\tip6-allrouters\n192.168.0.3\t6d4b0c215195"
}
ok: [production] => {
"msg": "127.0.0.1\tlocalhost\n::1\tlocalhost ip6-localhost ip6-loopback\nfe00::0\tip6-localnet\nff00::0\tip6-mcastprefix\nff02::1\tip6-allnodes\nff02::2\tip6-allrouters\n192.168.0.2\tf602be09e2c3"
}
PLAY RECAP *****************************************************************************
production : ok=3 changed=1 unreachable=0 failed=0 skipped=0 rescued=0 ignored=0
staging : ok=3 changed=1 unreachable=0 failed=0 skipped=0 rescued=0 ignored=0Ansible Galaxy
Ansible Galaxy provides community pre-packaged Ansible Roles and Collections to download and use in the Playbooks.
At the beginning of this tutorial, we installed the JDK using the dnf module.
This is one way of doing it, but the community has provided a Role for installing JDK.
Let’s install Java using an Ansible Role downloaded from Ansible Galaxy.
Download Java Role
The Java Role is located at https://galaxy.ansible.com/geerlingguy/java and has the id geerlingguy.java.
Use the ansible-galaxy tool to download the Role and install it to the local Roles repository.
In a terminal window, run the following command:
ansible-galaxy install geerlingguy.javaStarting galaxy role install process
- downloading role 'java', owned by geerlingguy
- downloading role from https://github.com/geerlingguy/ansible-role-java/archive/2.2.0.tar.gz
- extracting geerlingguy.java to /Users/asotobu/.ansible/roles/geerlingguy.java
- geerlingguy.java (2.2.0) was installed successfullyUse the Role
With Role installed, create a Playbook named playbook-jdk.yml with the following content:
- hosts: all
  become: true
  roles:
    - role: geerlingguy.java (1)
      when: "ansible_os_family == 'RedHat'" (2)
      java_packages: (3)
- java-1.8.0-openjdk| 1 | Role is already downloaded |
| 2 | when keyword is used by Ansible to define when to run a Task/Role |
| 3 | Custom properties |
Execute Playbook
Execute the Playbook as done in the other sections:
ansible-playbook -i inventory playbook-jdk.yaml[WARNING]: Found both group and host with same name: staging
[WARNING]: Found both group and host with same name: production
PLAY [all] *****************************************************************************
TASK [Gathering Facts] *****************************************************************
ok: [staging]
ok: [production]
TASK [geerlingguy.java : Include OS-specific variables for Fedora or FreeBSD.] *********
ok: [staging]
ok: [production]
TASK [geerlingguy.java : Include version-specific variables for CentOS/RHEL.] **********
skipping: [staging]
skipping: [production]
TASK [geerlingguy.java : Include version-specific variables for Ubuntu.] ***************
skipping: [staging]
skipping: [production]
TASK [geerlingguy.java : Include version-specific variables for Debian.] ***************
skipping: [staging]
skipping: [production]
TASK [geerlingguy.java : Define java_packages.] ****************************************
skipping: [staging]
skipping: [production]
TASK [geerlingguy.java : include_tasks] ************************************************
included: /Users/asotobu/.ansible/roles/geerlingguy.java/tasks/setup-RedHat.yml for staging, production
TASK [geerlingguy.java : Ensure Java is installed.] ************************************
changed: [staging]
changed: [production]
TASK [geerlingguy.java : include_tasks] ************************************************
skipping: [staging]
skipping: [production]
TASK [geerlingguy.java : include_tasks] ************************************************
skipping: [staging]
skipping: [production]
TASK [geerlingguy.java : Set JAVA_HOME if configured.] *********************************
skipping: [staging]
skipping: [production]
PLAY RECAP *****************************************************************************
production : ok=4 changed=1 unreachable=0 failed=0 skipped=7 rescued=0 ignored=0
staging : ok=4 changed=1 unreachable=0 failed=0 skipped=7 rescued=0 ignored=0