Working with Pods
In the previous step, we successfully built, ran, and tested a multi-container application using Podman Desktop.
Optional: Working with Compose
| As you already have these two containers running, you’ll have to stop them before proceeding with the Compose example, and re-do the previous steps before continuing. Feel free to just view the instructions below and skip this step if you prefer. |
As you know, we had to do a workaround to get the IP from the Redis container and then pass that in as an environment variable to the Quarkus container, which wasn’t a very sustainable way to do our local container work. On a production environment, workloads with close affinity might actually be deployed in the same localhost network. To accomplish this same behavior, we could create a docker-compose.yml file and run it with podman (You installed Compose during the setup of Podman Desktop). Feel free to check out the docker-compose.yml file in the root directory of podify-quarkus-redis project and then run the following command:
cd ~/podify-quarkus-redis && podman compose up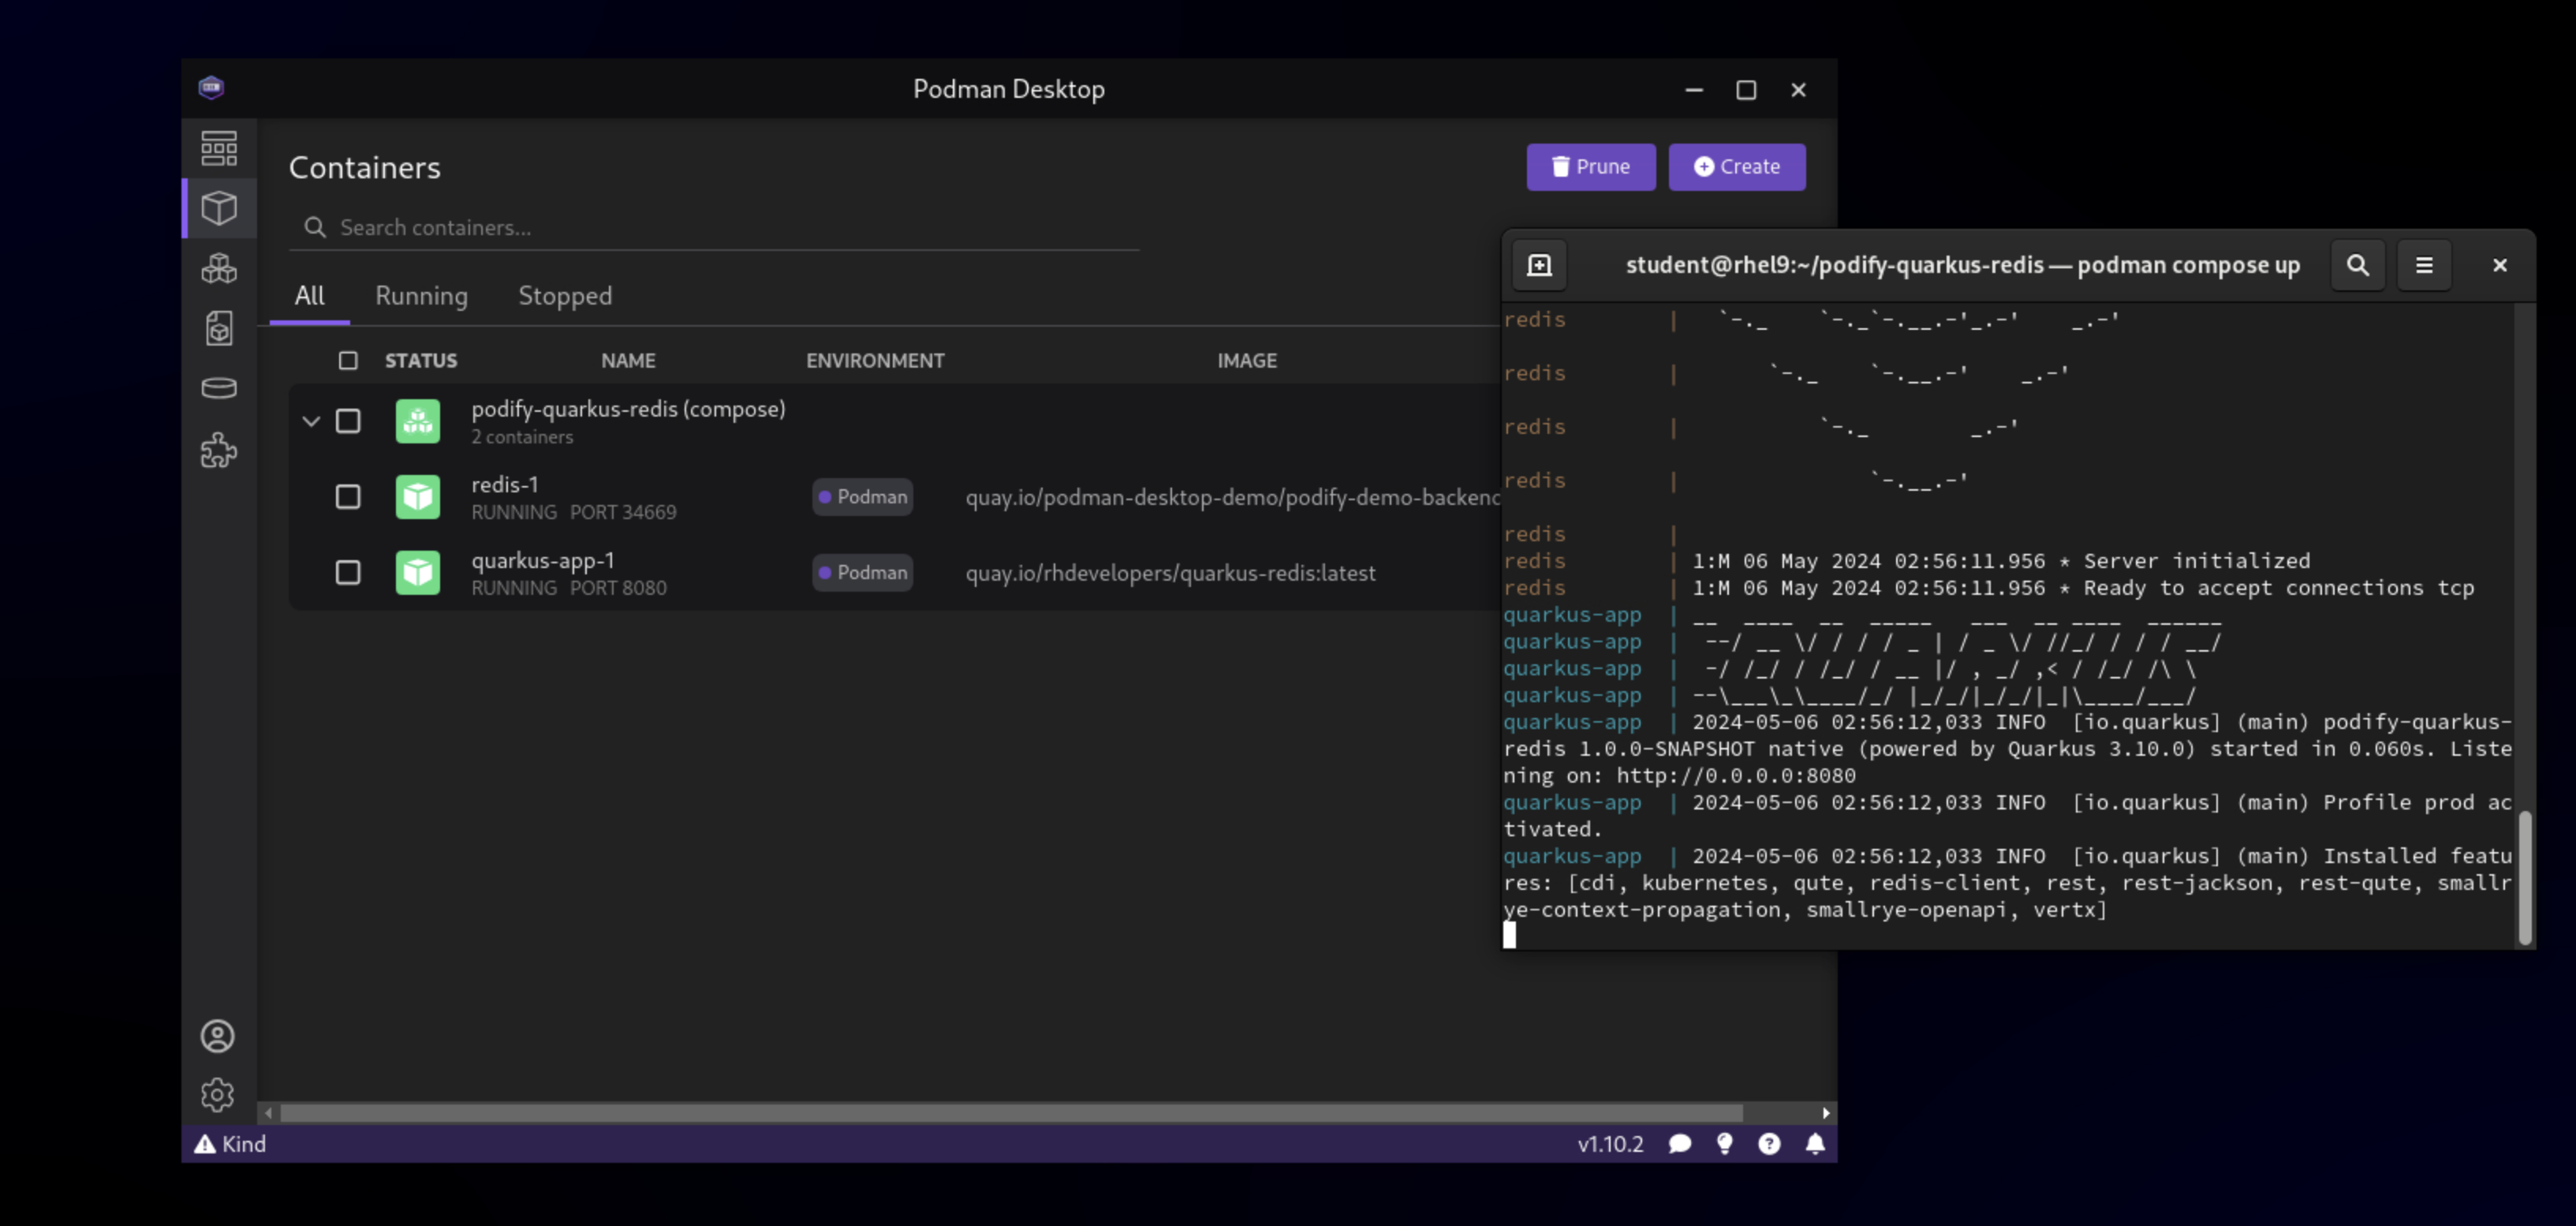
You’ll notice that both containers are started together and you can even test the application in your browser again.
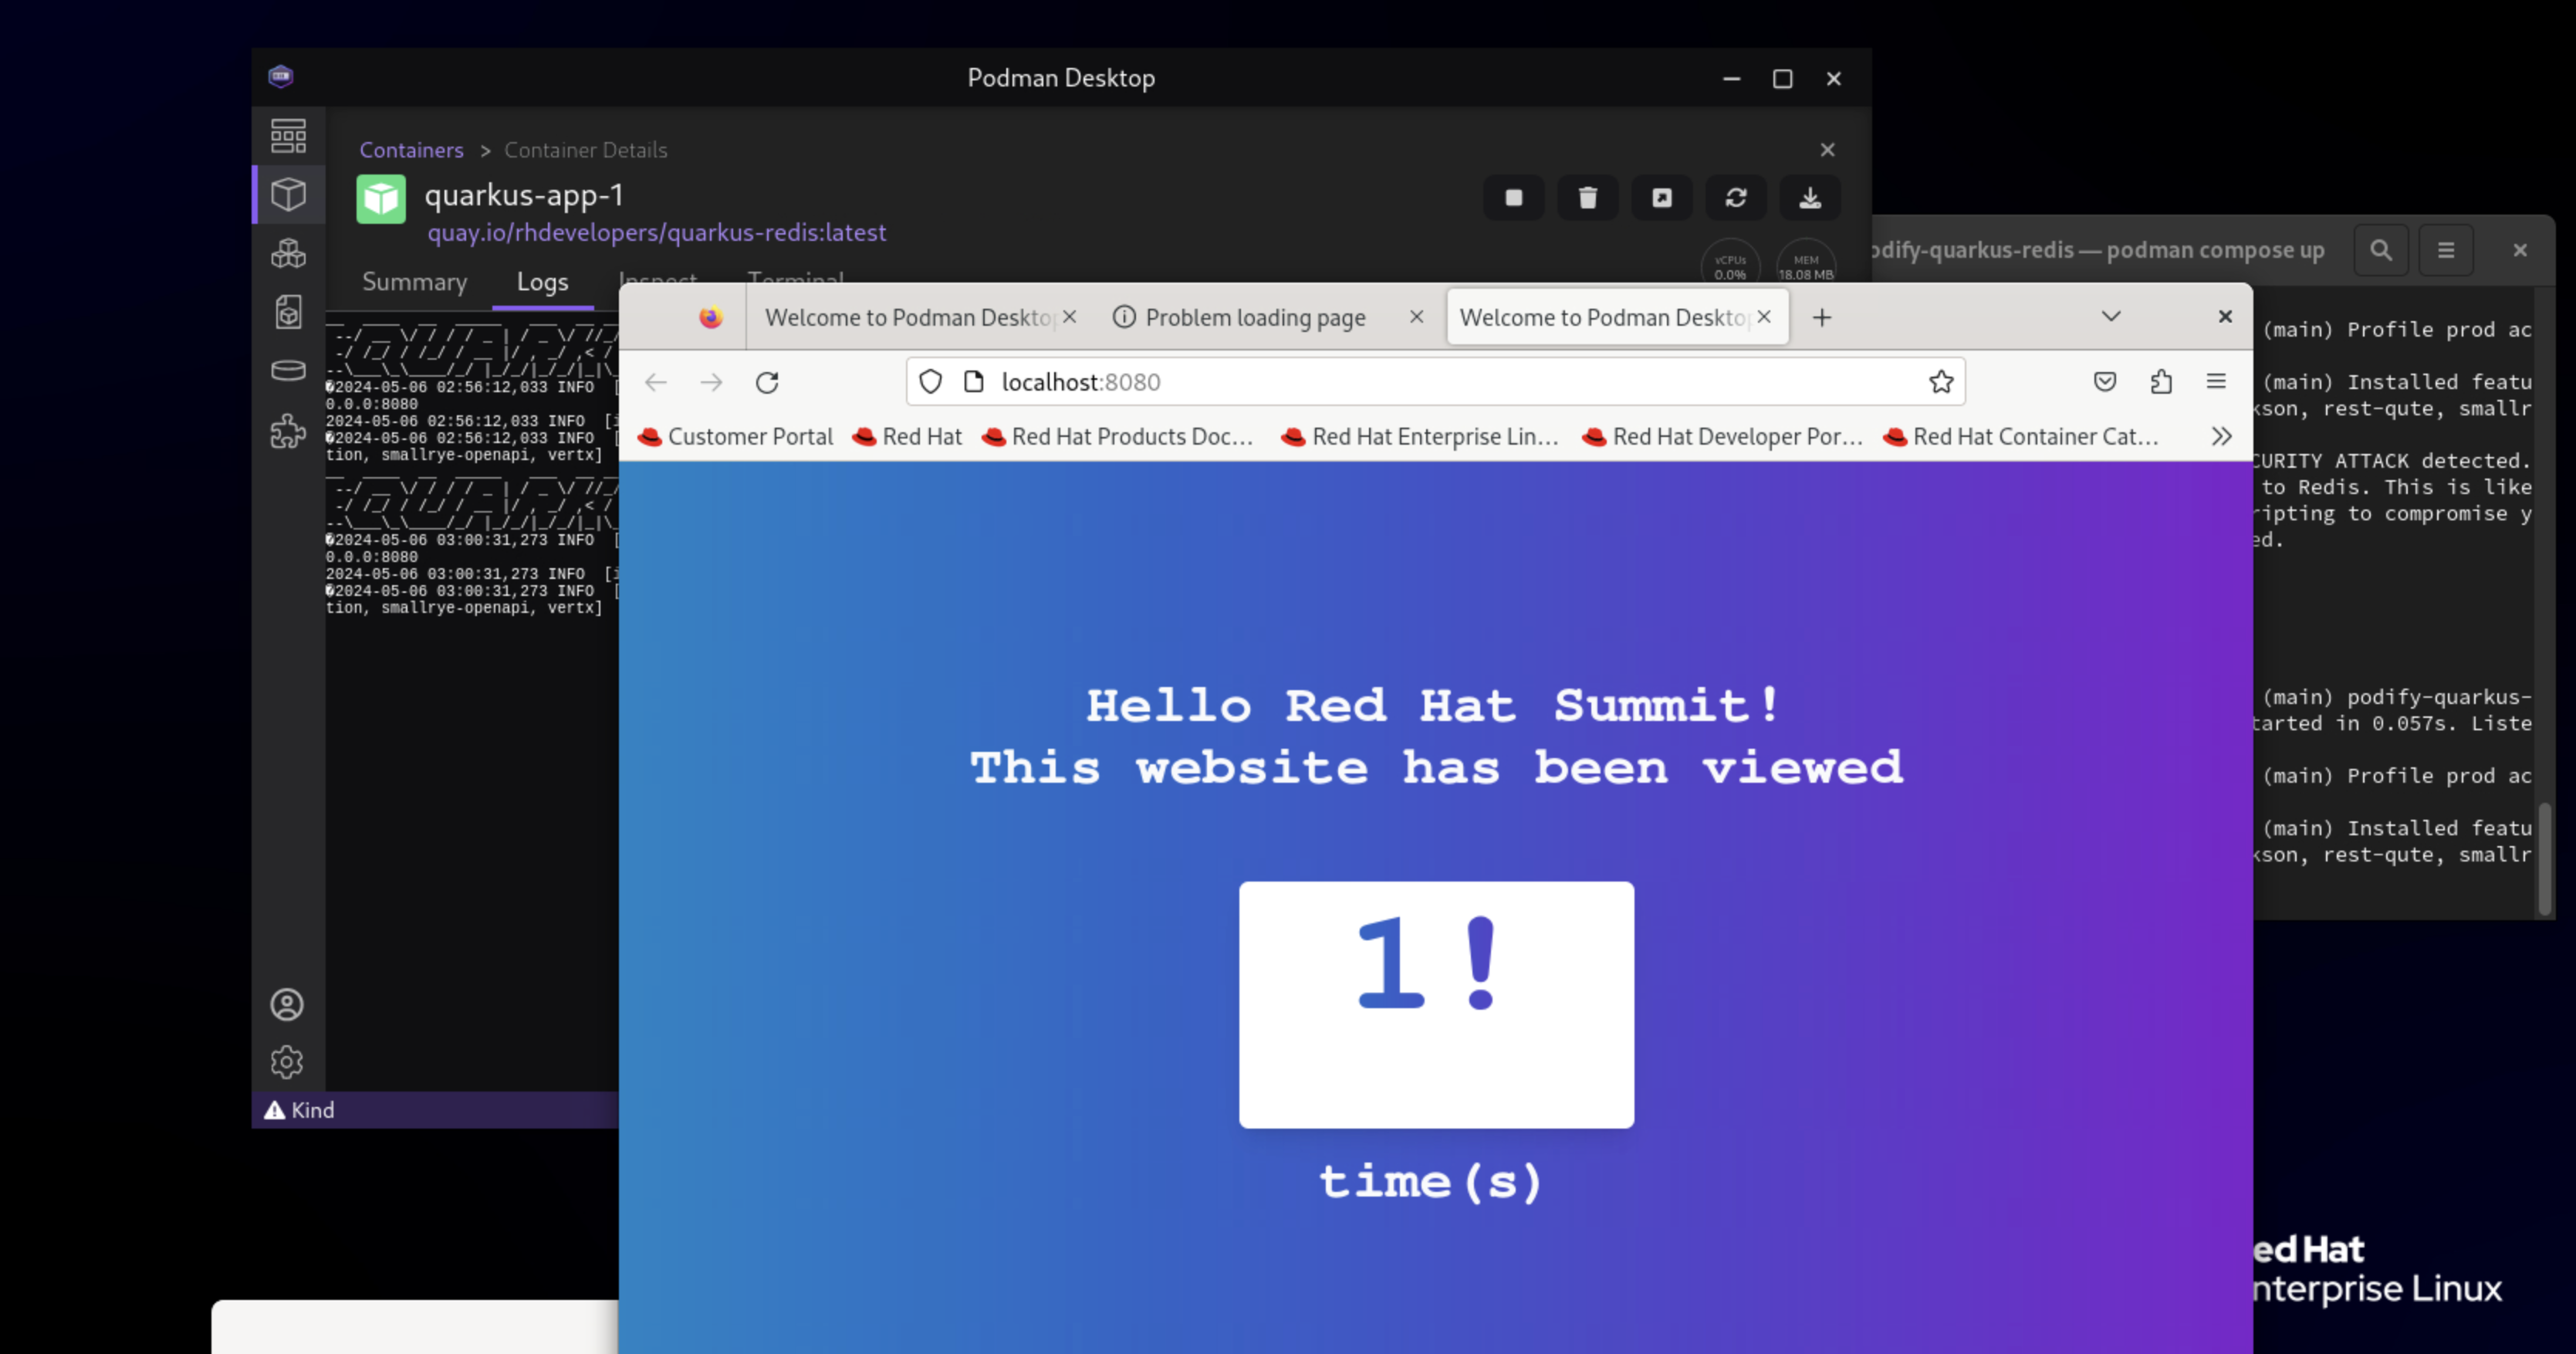
The downside of using Docker Compose is that you will need expertise in creating docker-compose.yml files, and it’s a little bit of a dead-end street, since you cannot take the definitions in the compose files further to a Kubernetes environment.
What if instead we could create a nice little pod for our containers to live in together and share their resources? As the name of the project already implies, that’s of course exactly what Podman can do! Podman Desktop streamlines the process of creating a pod from existing containers, offering a seamless transition from development to Kubernetes, where Pods are the most basic deployable units.
What are Pods?
Pods are a fundamental concept in container orchestration systems like Kubernetes and OpenShift. They provide an abstraction layer that encapsulates one or more containers, treating them as a single entity.
| Pods are designed to be the smallest deployable unit, and you should avoid running unrelated containers within the same pod. |

Pods offer several key advantages over running containers individually, including:
-
Simplified management and scalability: Pods allow you to manage related containers as a single entity, simplifying deployment, scaling, and monitoring processes. By grouping containers that need to work together, you can easily scale your application by adding or removing pod replicas. However, pods are designed to be the smallest deployable unit, and you should avoid running unrelated containers within the same pod.
-
Efficient resource sharing: Containers within a pod share the same network namespace, enabling them to communicate with each other using
localhost. This eliminates the need for complex networking configurations and allows for efficient inter-container communication. Additionally, pods can share volumes, ensuring data persistence and enabling containers to access the same data simultaneously. -
Enhanced security and isolation: Pods provide a level of isolation and security by default. Each pod has its own unique IP address and can define its own network policies, limiting access to and from other pods. Moreover, resource limits and security policies can be applied at the pod level, ensuring better control over the containers' runtime environment.
Creating Pods from Podman Desktop
Podman Desktop’s Podify feature takes advantage of these pod benefits by simplifying the process of creating a pod from existing containers. Let’s walk through the steps to create a pod from the Quarkus app and Redis containers.
First, you will need to change the environment variable redis to point to localhost instead of the hard coded IP we set earlier. In order to do so, delete the existing quarkus-app container and create a new one from the Images tab.
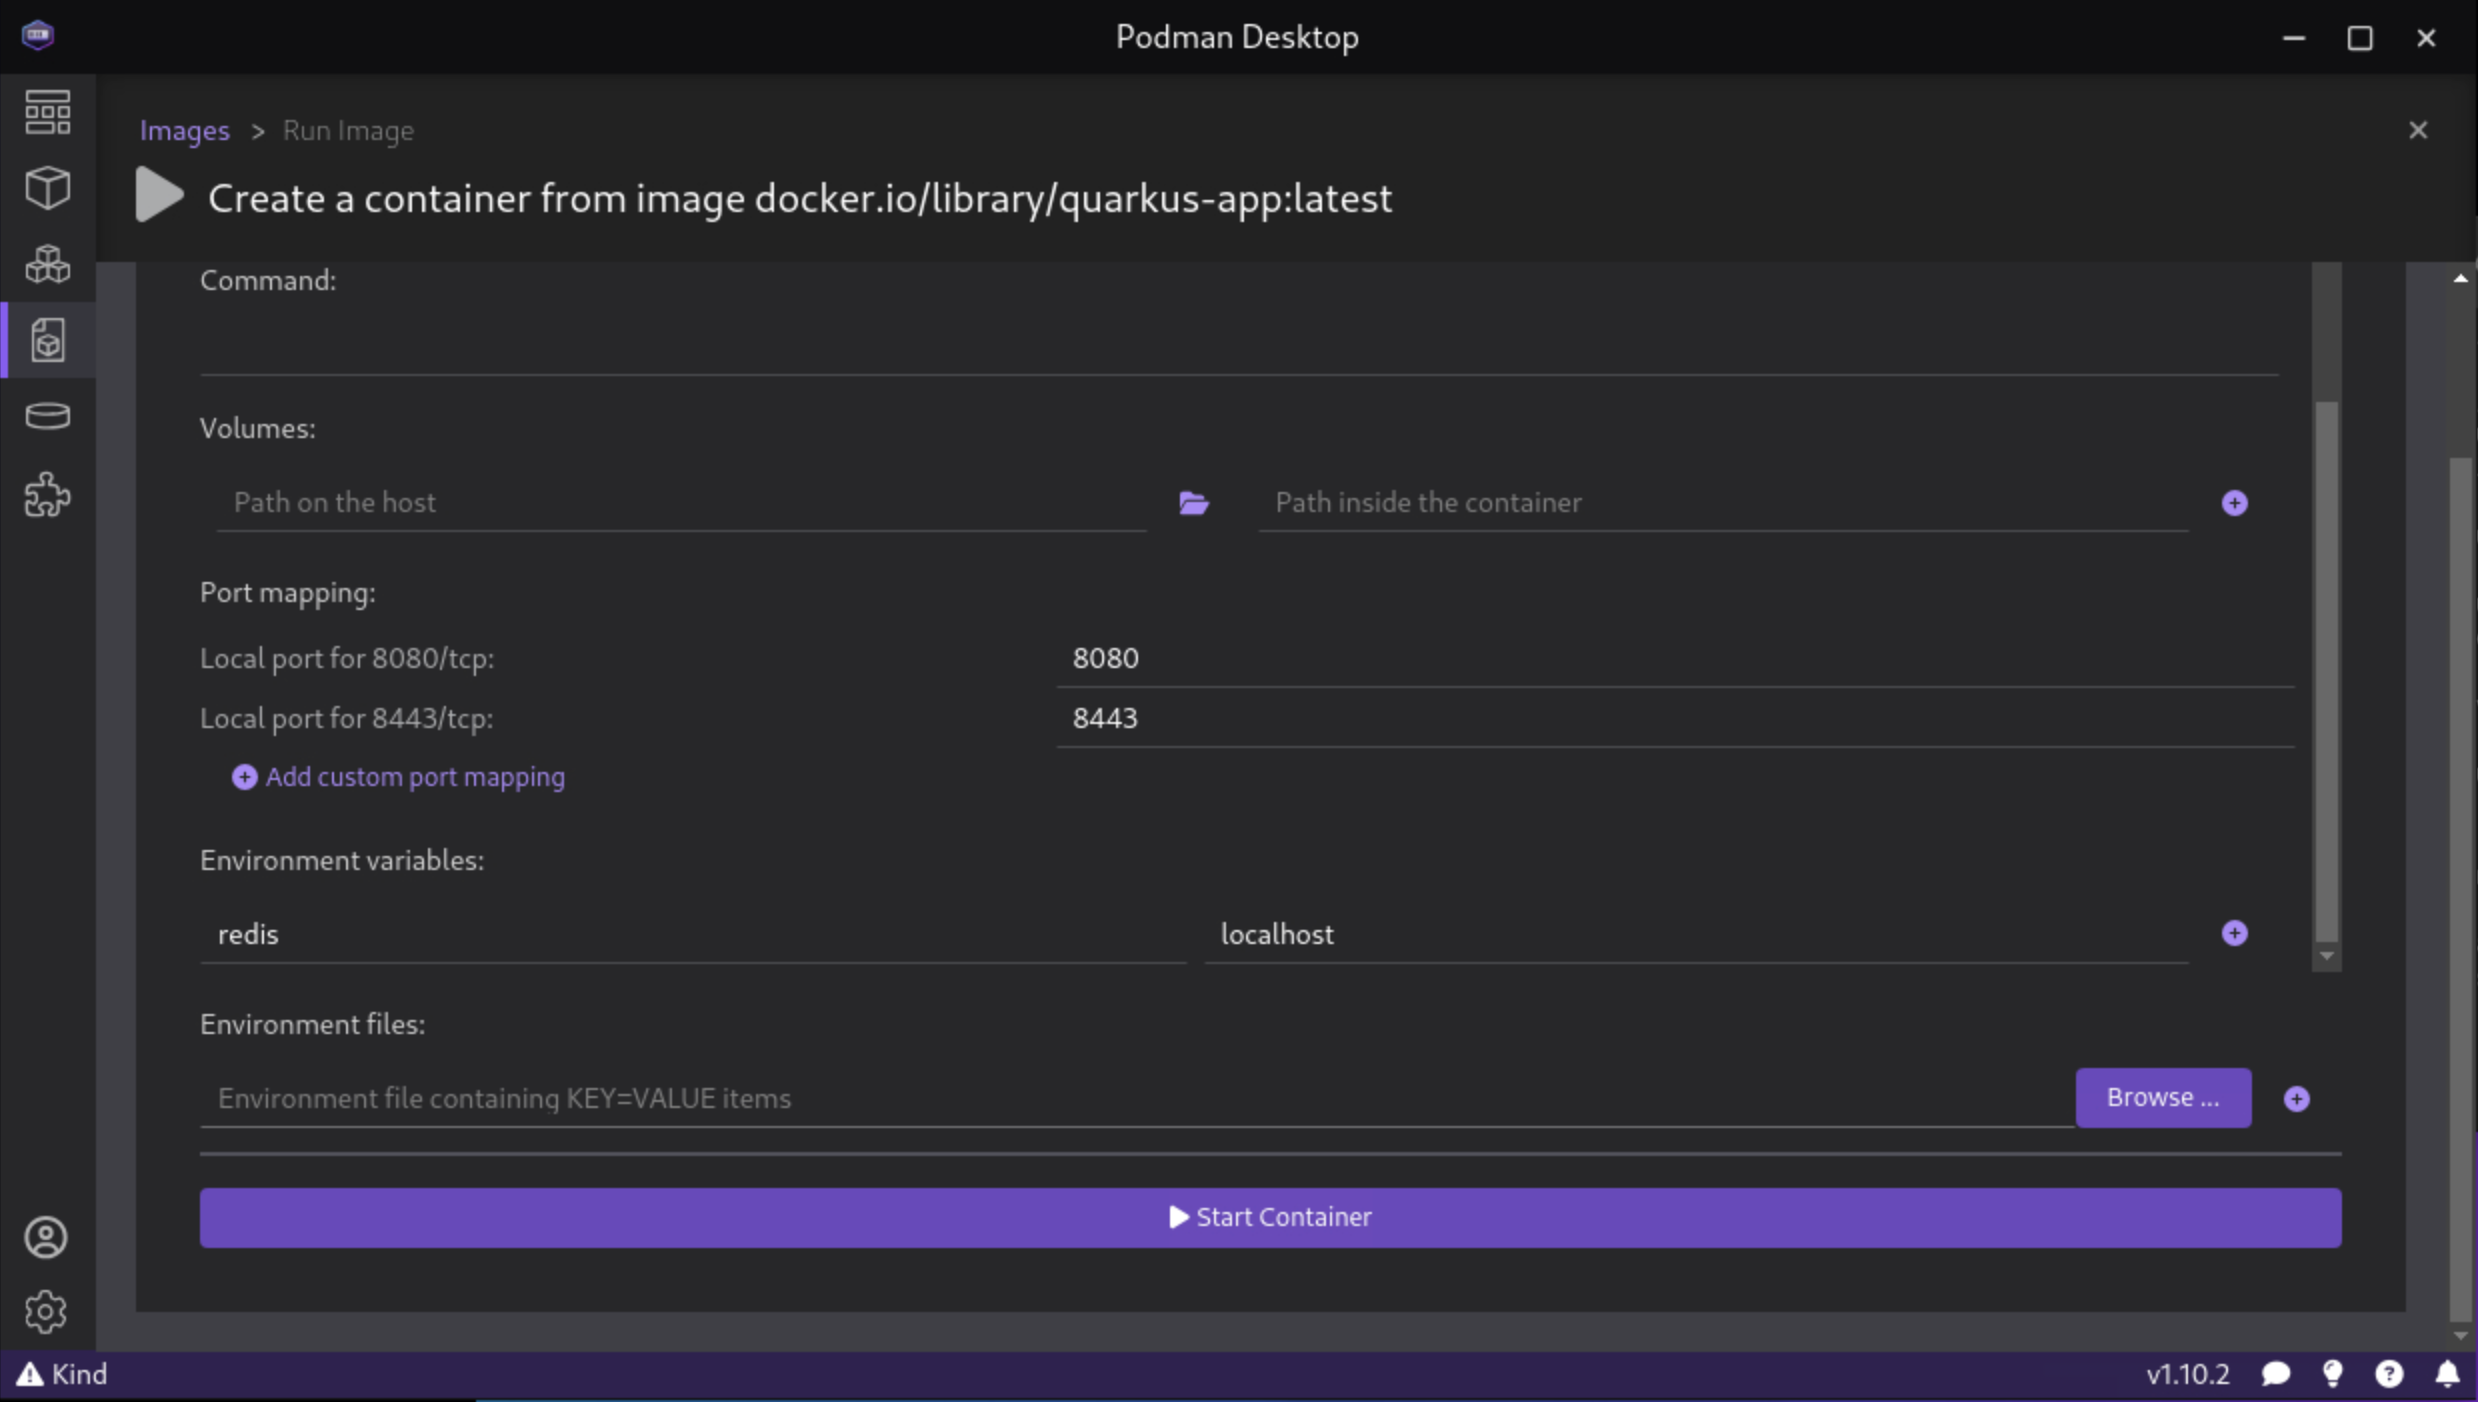
The Quarkus application is by default configured to look for a Redis instance on localhost already, so you don’t actually need to set the environment variable this time. Just create a new container with name quarkus-app, and continue with the instructions below.
|
In the Containers section of Podman Desktop, select both the quarkus-app and redis containers using the checkboxes. Now, click on the Create pod button from the top right corner menu to initiate the pod creation process.

A new window will appear, allowing you to configure basic pod parameters. Provide a meaningful name for the pod, such as summit-pod. Once satisfied, click the Create Pod button.
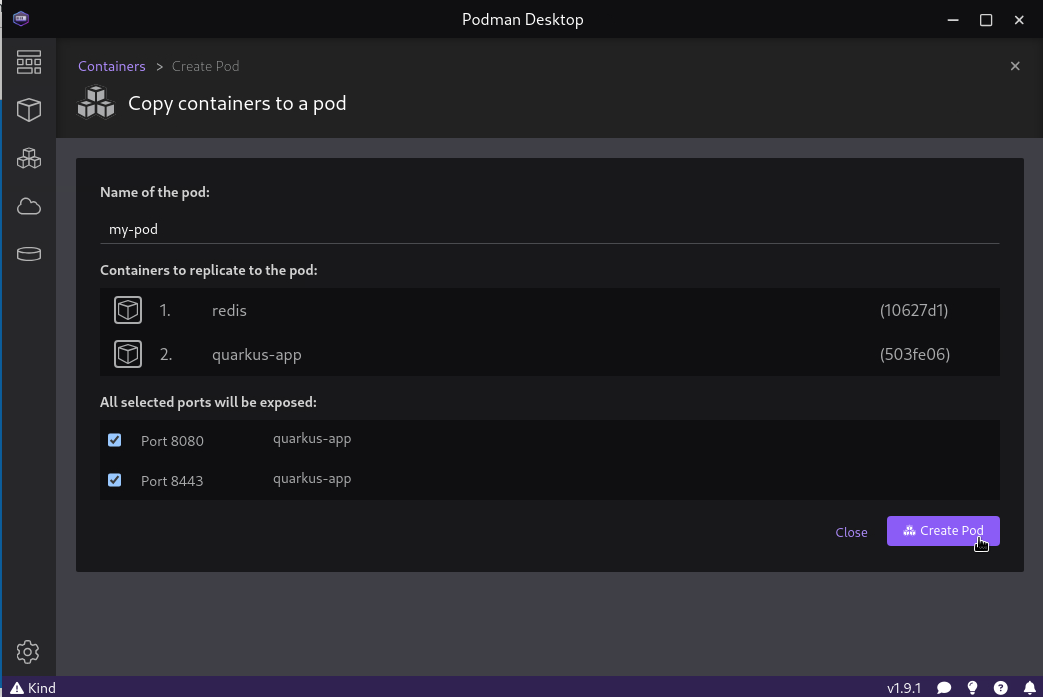
You’ll notice that you only have the option to expose the Quarkus container. Due to the pod’s internal networking, it’s not necessary to expose the Redis port externally for this application, as they can communicate using localhost.
|
Podman Desktop will now stop the existing containers and create a new pod that encapsulates the selected containers. To view the pod’s details and manage its lifecycle, navigate to the Pods section in the Podman Desktop interface.
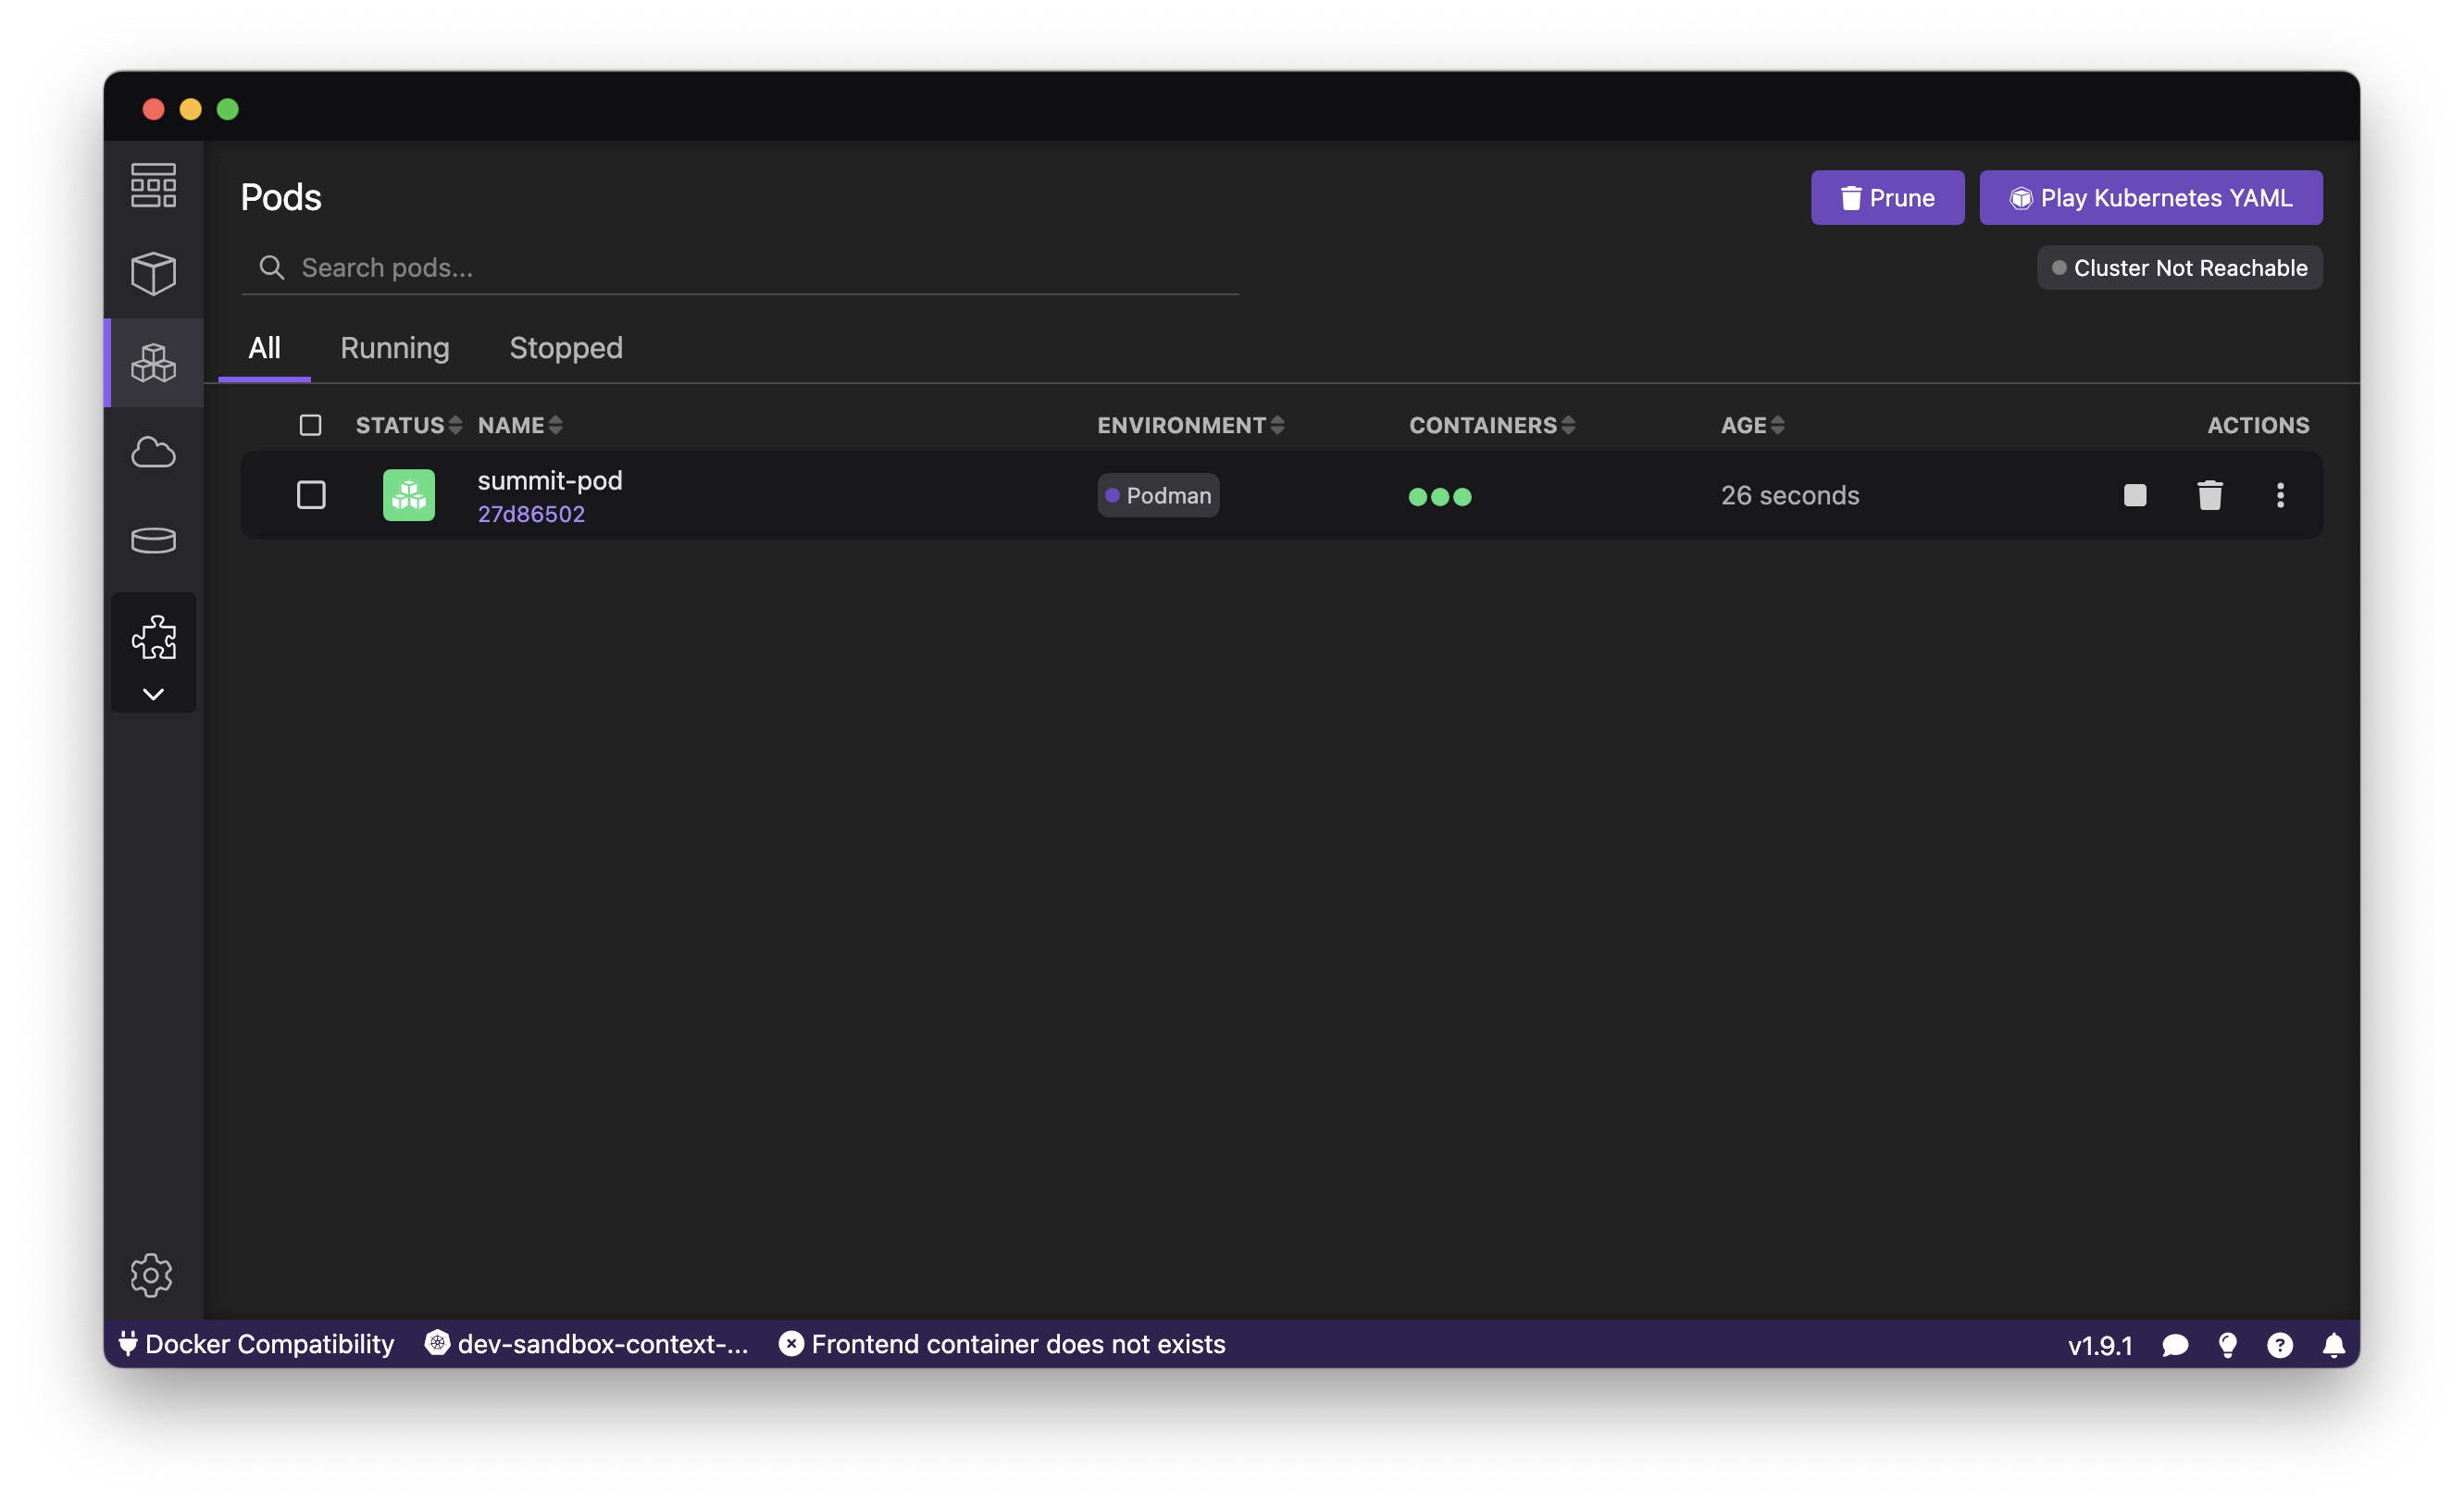
Once selected, you can view the individual container logs within the pod, their Kubernetes manifest, view the application’s exposed port in the browser, or directly deploy the pod to a local or remote Kubernetes cluster.
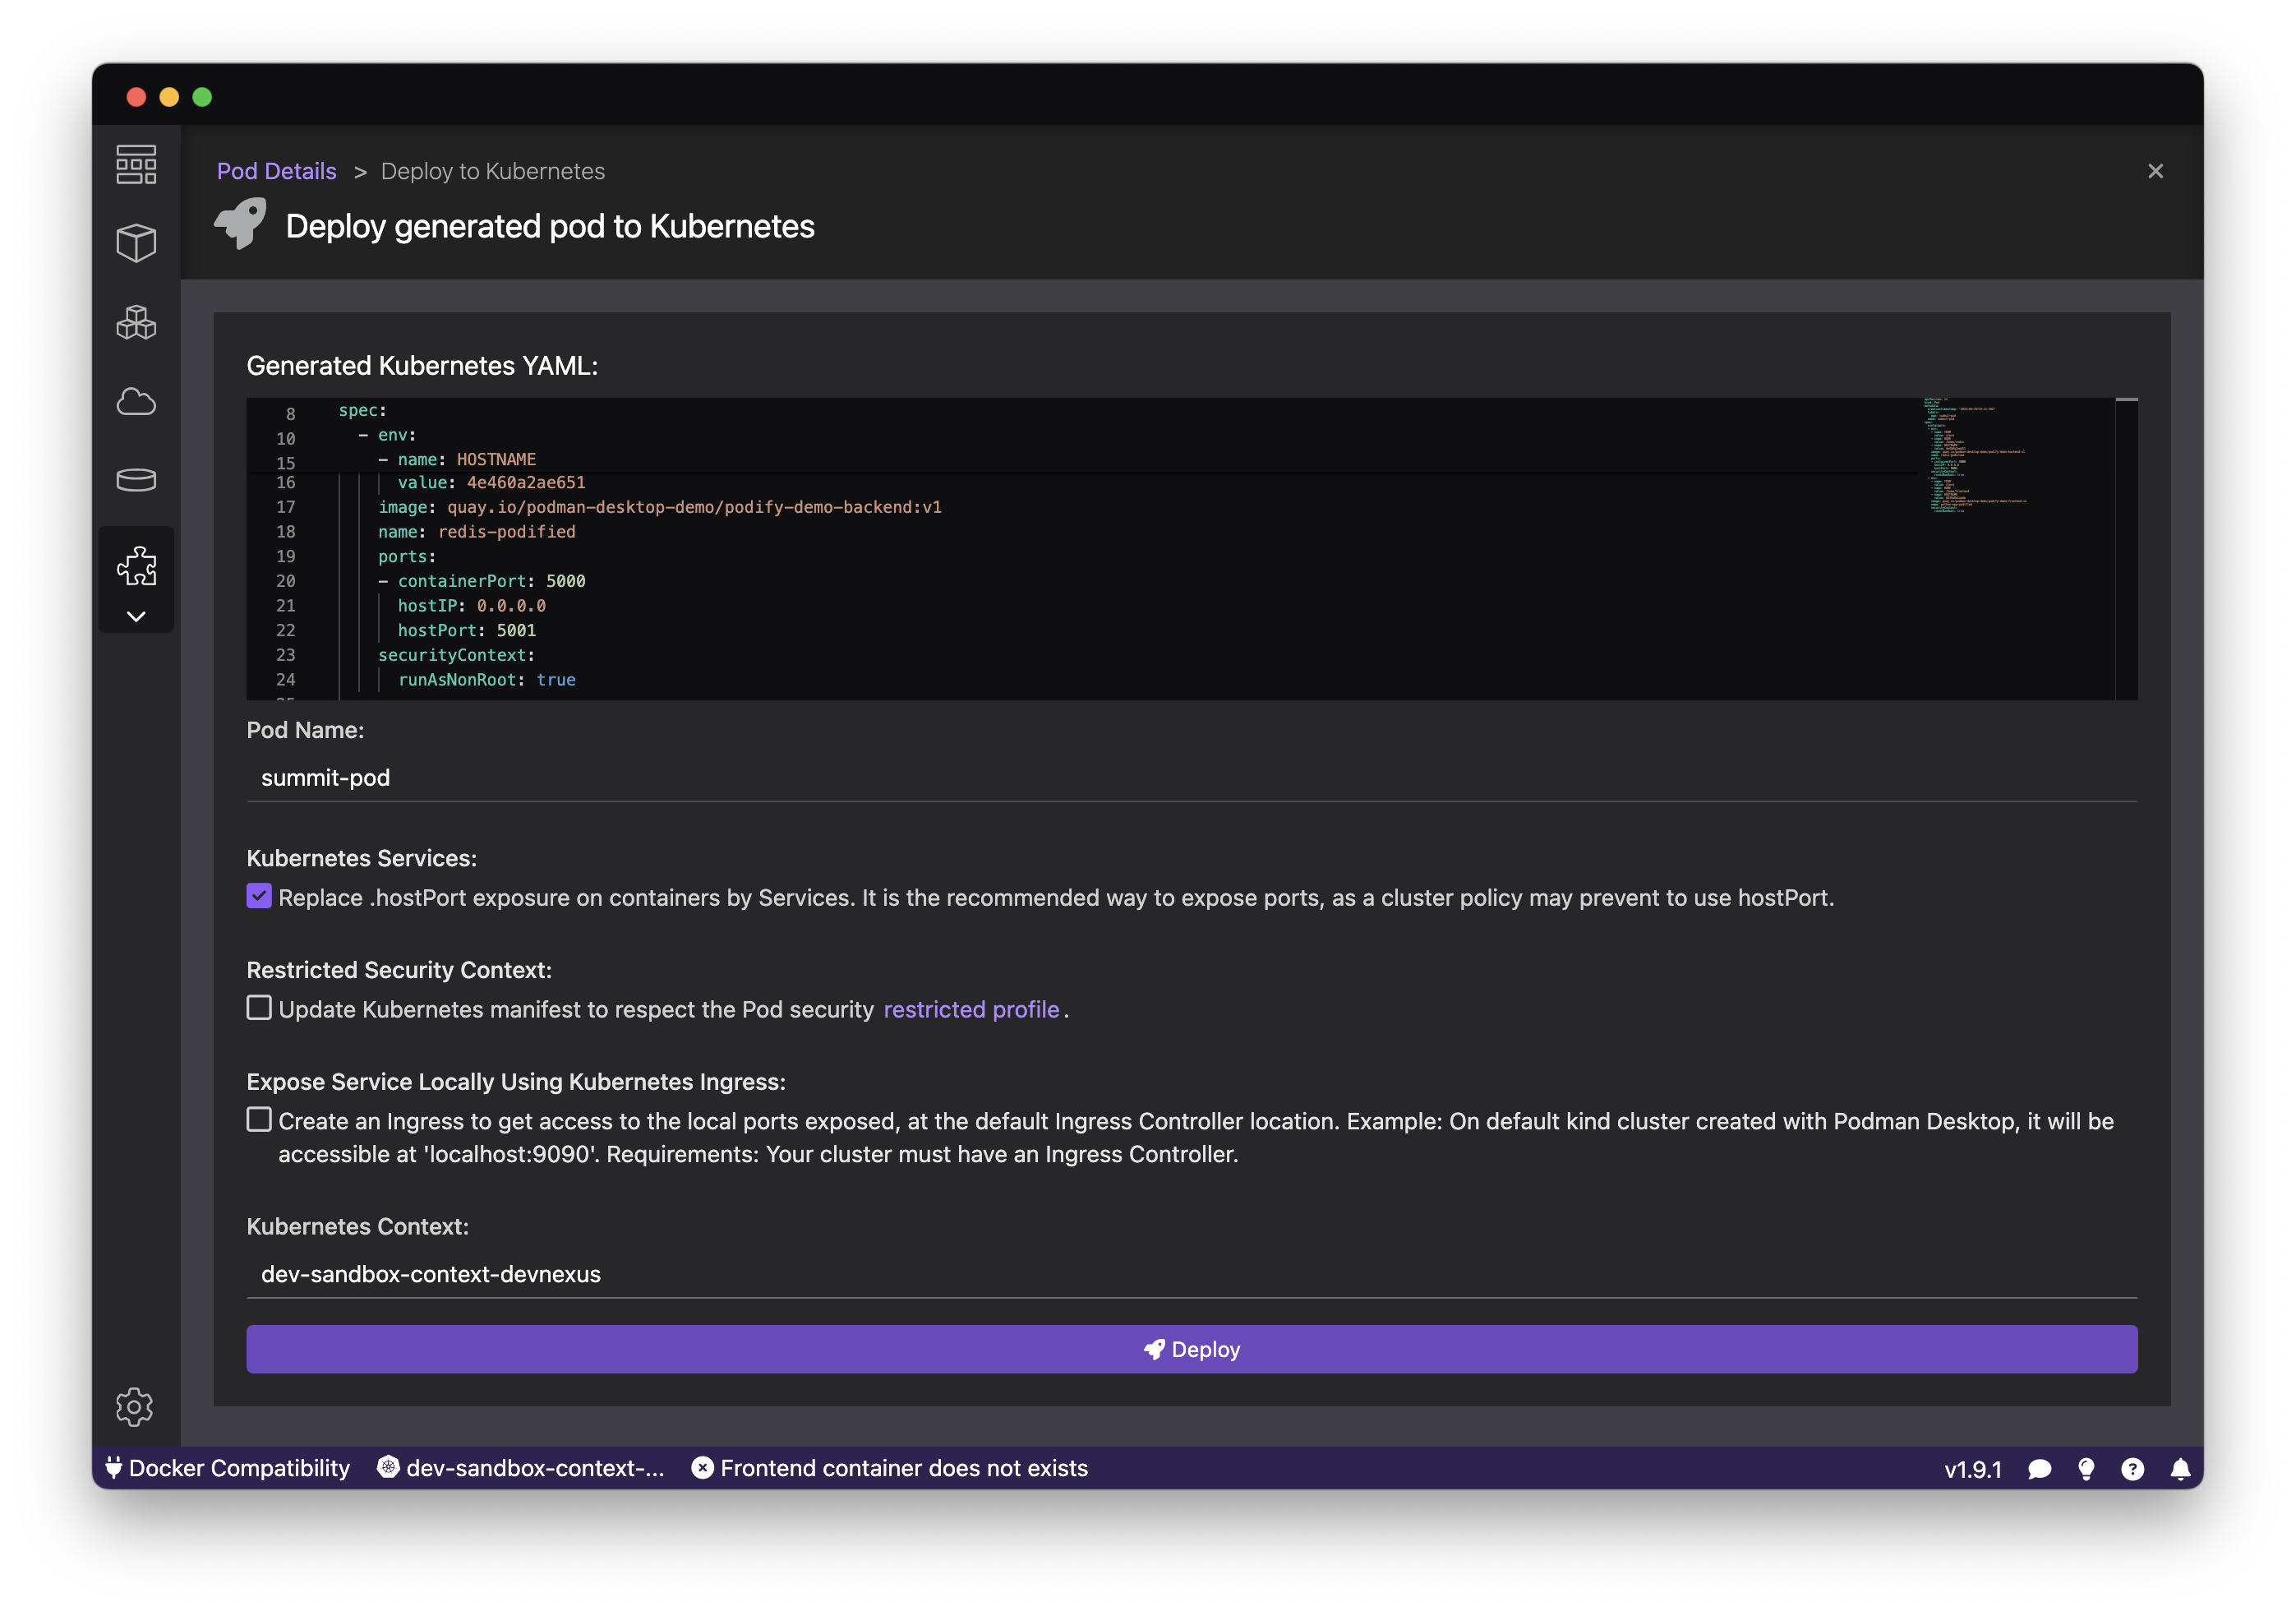
Next Steps
Congratulations! You’ve gained an understanding of Podman Desktop’s "Podify" feature and its role in creating efficient and manageable pods. In the next step, we’ll dive into deploying this pod to a Kubernetes cluster and explore advanced features of Podman Desktop that empower you to streamline your containerized application development process.