Building Images in Podman Desktop
Fantastic, let’s start the Podman Desktop tutorial with the most basic step in the inner loop development process: building container images. We’ll also cover authenticating to registries amd pulling images.
Demo Application
For this exercise, we’ll be using a basic Java web application based on the SuperSonic, Subatomic Quarkus stack. Quarkus is a Kubernetes-native Java framework designed for building high-performance and scalable microservices. The application uses a Redis cache to store the number of times we’ve visited the webpage. This is a simple microservice, but it’s a good example of a multi-container application.

Getting Started with Local Development
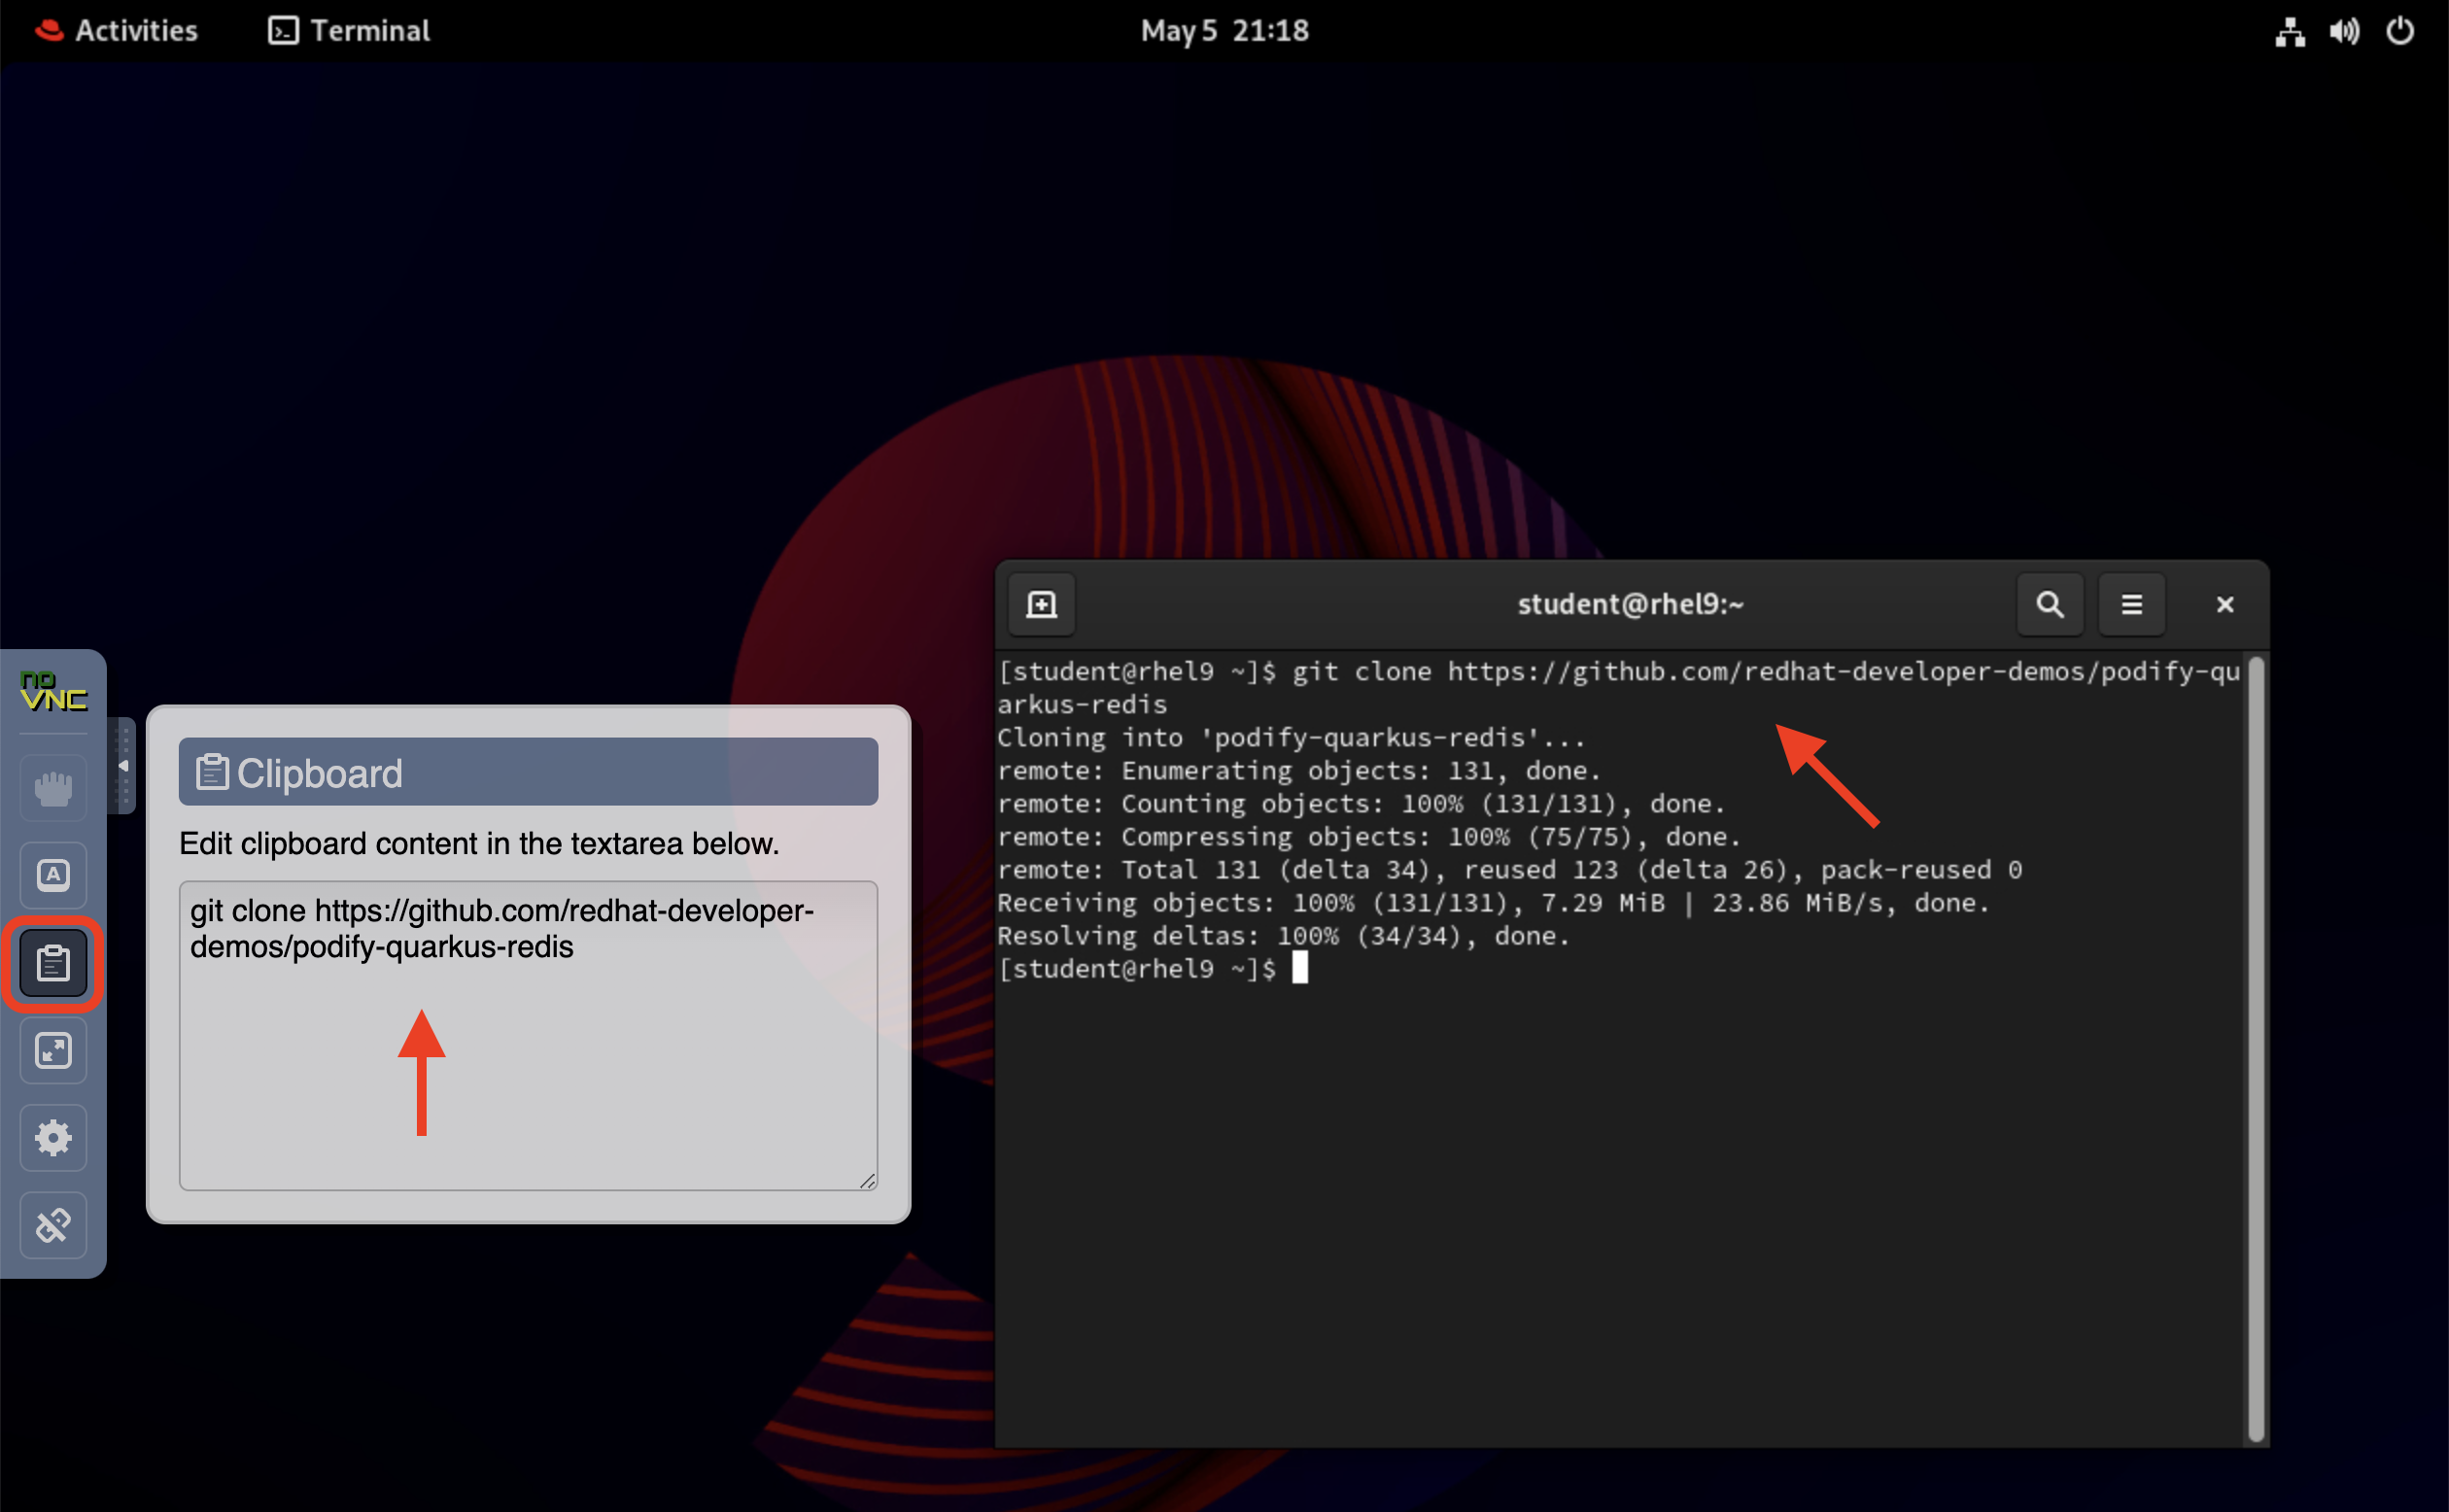
Let’s start off with downloading the source code for the demo application, found here on GitHub.
While you could clone the repository to a local machine using GitHub Desktop, today let’s use the command line to clone the repository. Open up the terminal (click on activities in the top left, then type 'terminal'), and then use the noVNC menu to copy these commands to your clipboard, and paste/execute them in the terminal.
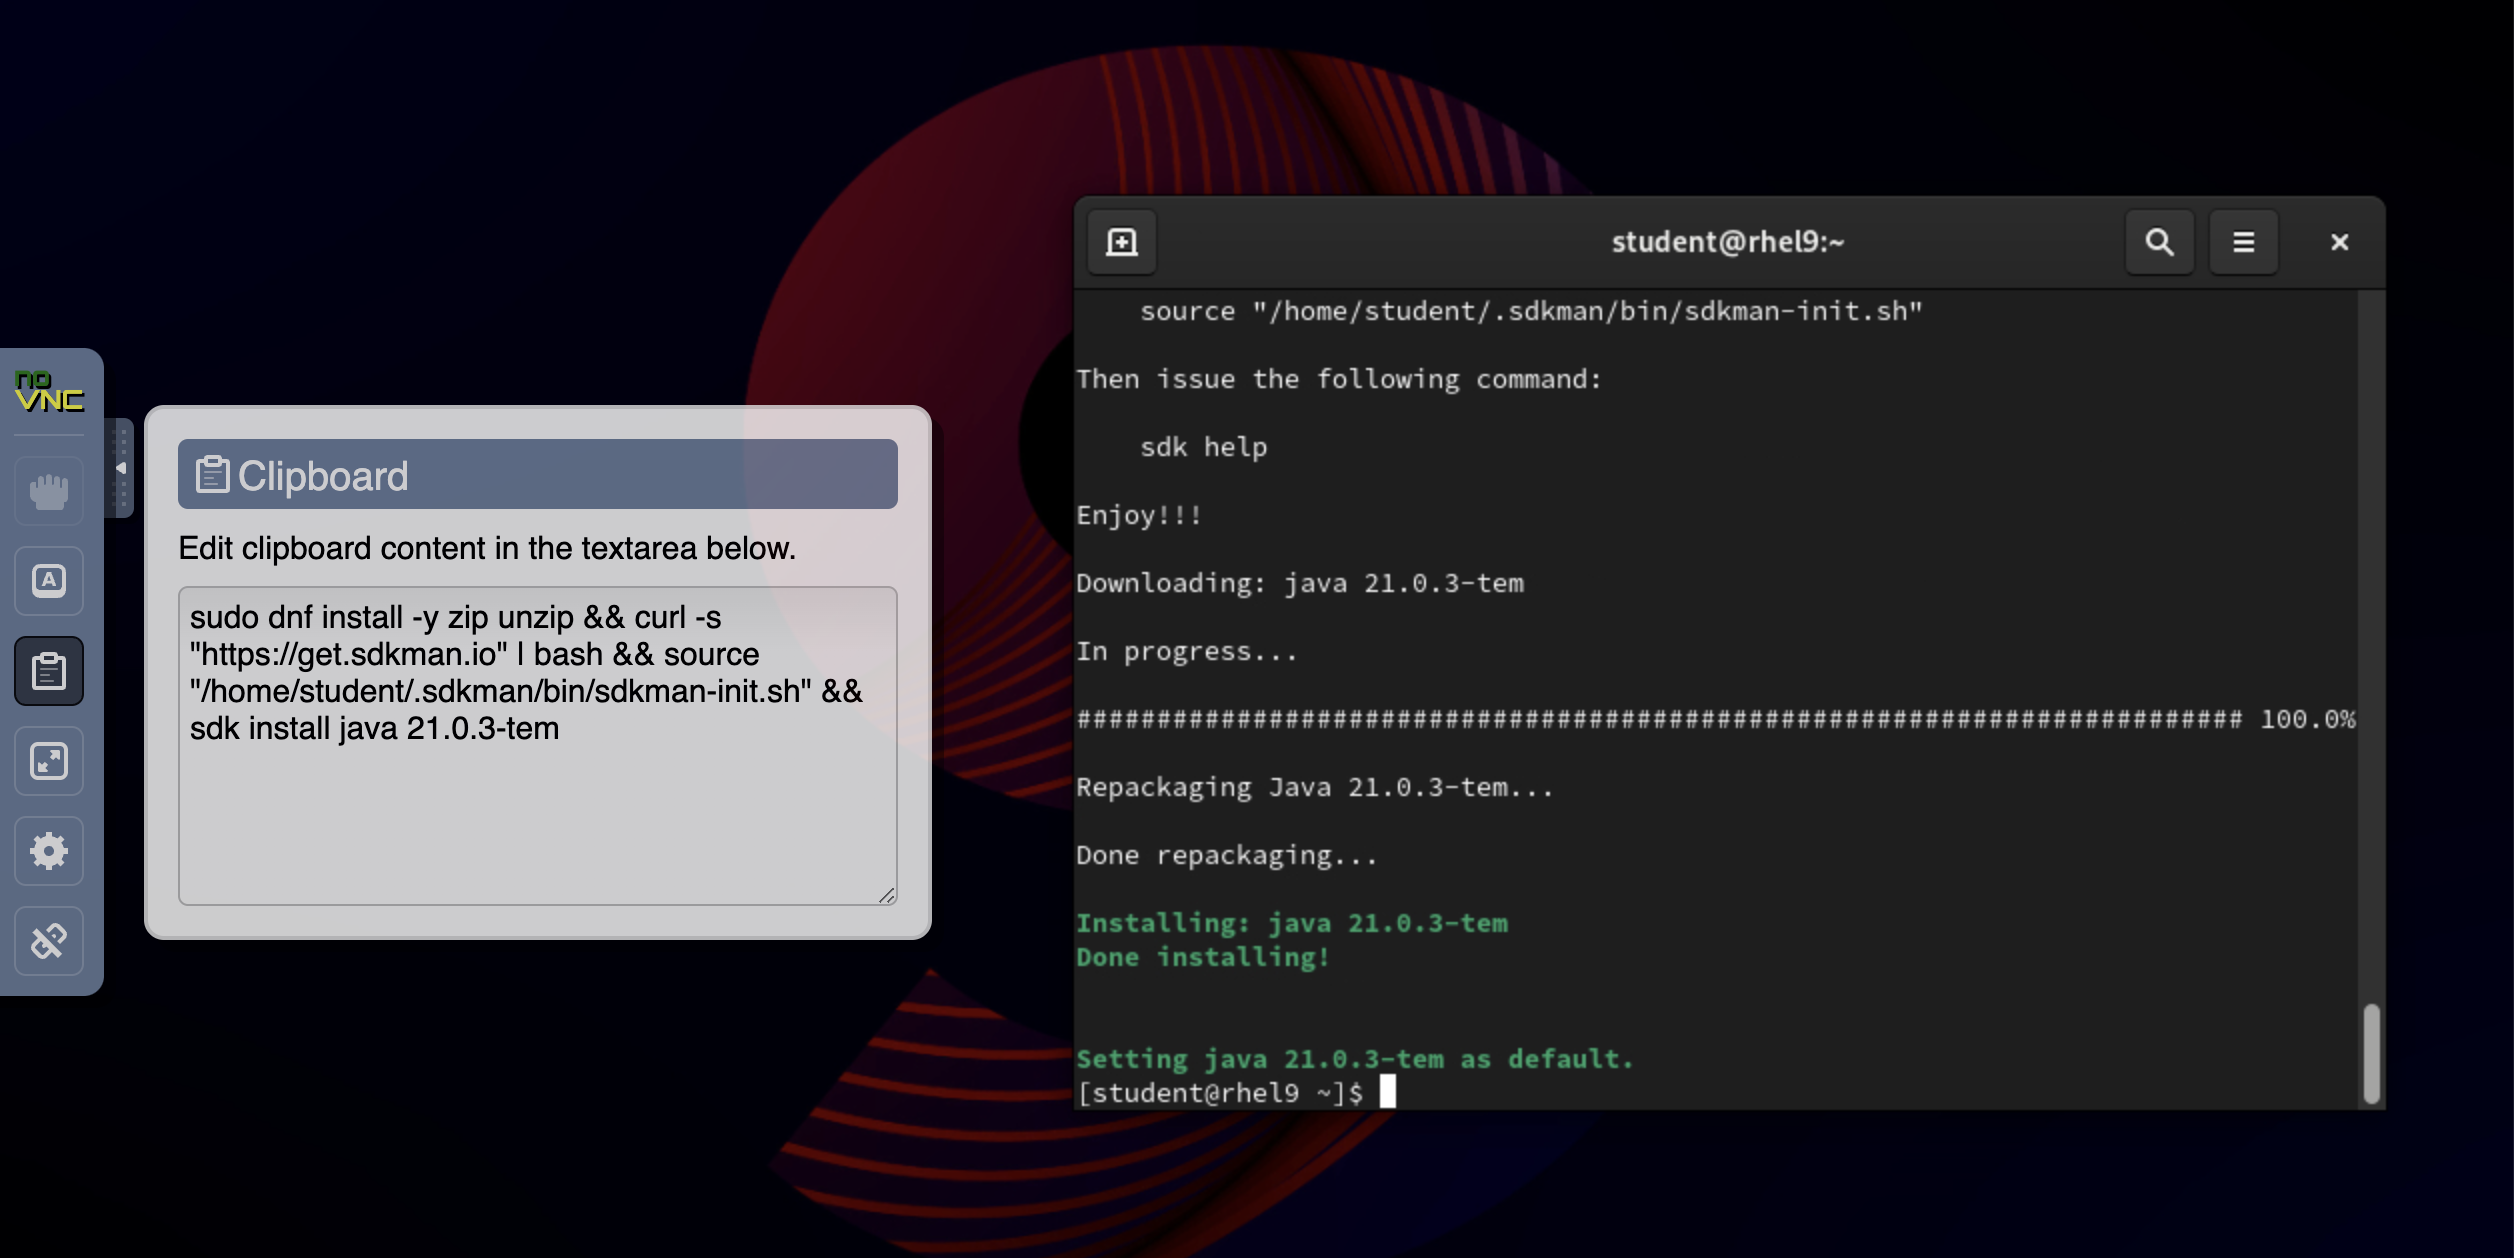
Since this is a Java application, we’ll need to install a Java OpenJDK version. Copy and paste the following commands to install SDKMAN! and then the Eclipse Adoptium Temurin build of OpenJDK 21, for which Red Hat provides Enterprise Support. If you’re interested in reading more about Red Hat’s involvement in Java, there are a wealth of resources on developers.redhat.com/java.
Let’s install SDKMAN and OpenJDK. Copy & paste the following set of commands and let them run their course.
sudo dnf install -y zip unzip && curl -s "https://get.sdkman.io" | bash && source "/home/student/.sdkman/bin/sdkman-init.sh" && sdk install java 21.0.6-temIf everything went well, you will see a message saying "Done installing!" and your installed version of Java is set as the default.
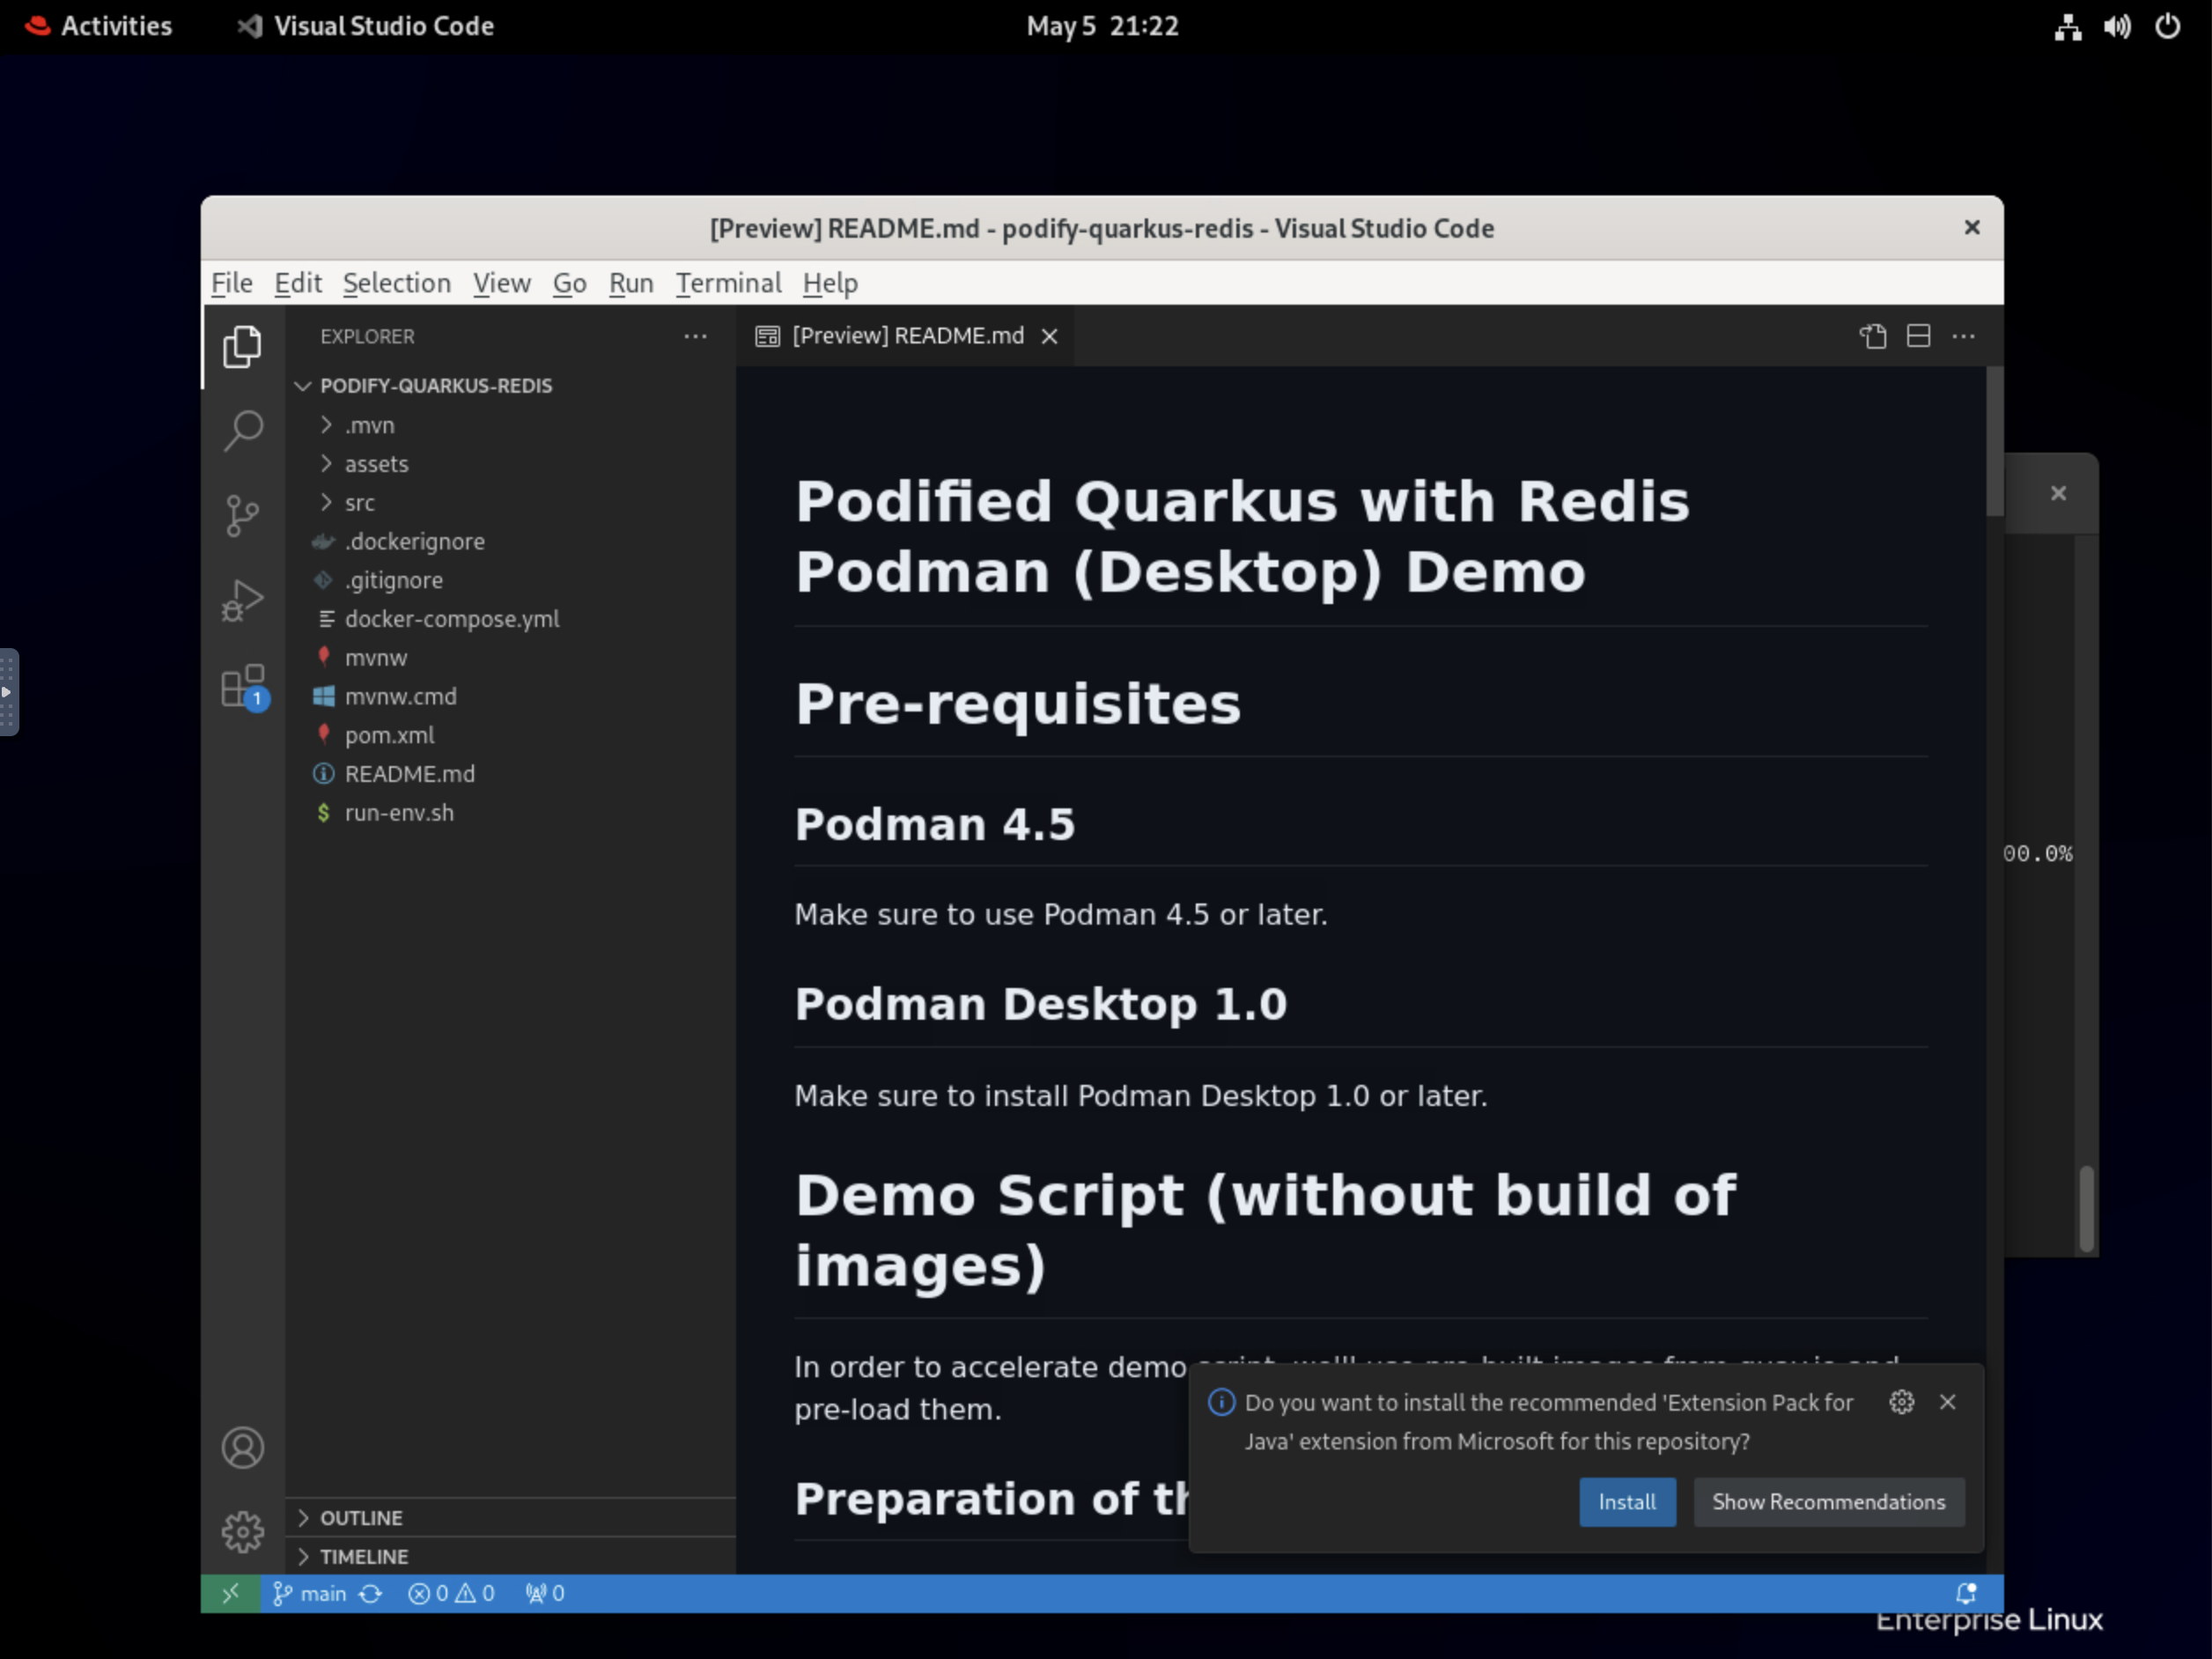
Now, let’s open up the project in our VS Code instance and take a look at the source code of the demo application, found in the podify-quarkus-redis directory.
cd podify-quarkus-redis && code .
If VS Code asks to trust the authors of the files, go ahead and click "Yes, I trust the authors". If it then asks to create a keyring password, use the same password you used to log in to your environment ({ssh_password}). Also, VS Code will ask you to install the Extension Pack for Java. This is optional but it will greatly help the readability and usability of Java in VS Code so feel free to install it.
|
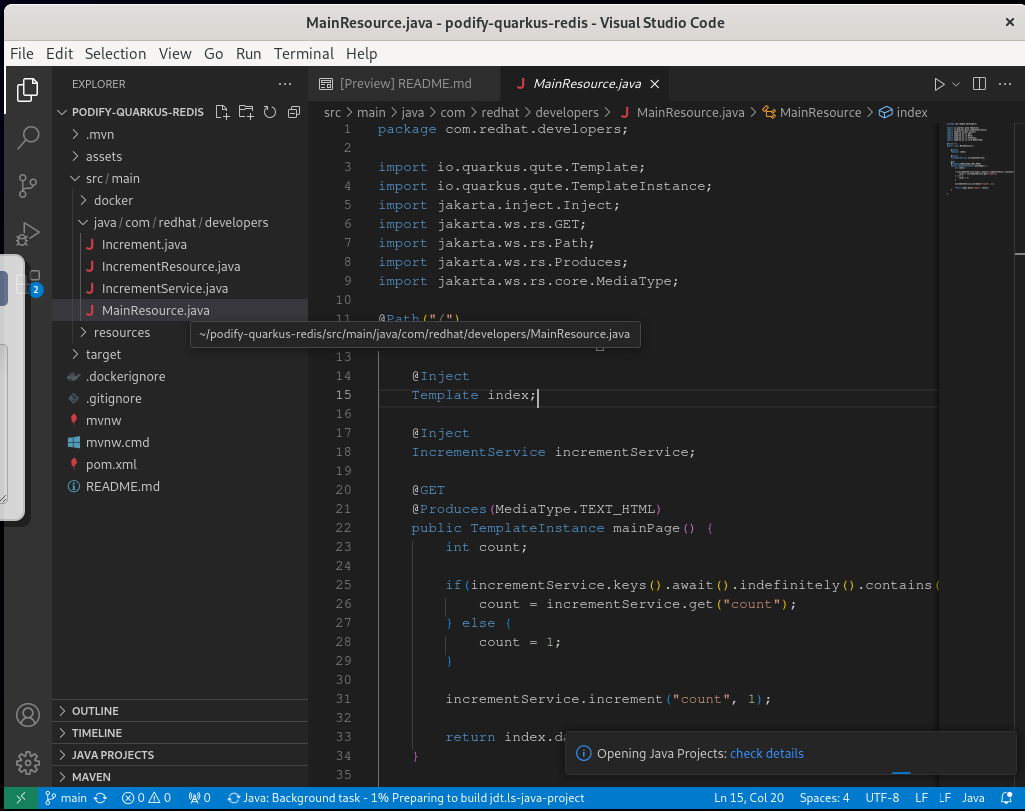
Once you’re ready, go to the file explorer (top option in the left menu). If you’re familiar with Java and Maven, you’ll see a standard file structure (src/main/java) and a pom.xml. Feel free to explore the code to familiarize yourself with the project structure. The back-end logic can be found in the src/main/java/ folder. The front-end resources are located in the src/main/resources/templates and src/main/resources/META-INF/resources folders.
The typical developer workflow starts by testing the application locally, so let’s start there. With Quarkus, Java development with rapid feedback loops becomes much easier. It allows you to start the application in "Dev Mode", enabling testing without having to compile, package, and deploy the app.
| Quarkus Dev Mode looks for a DOCKER_HOST environment variable that points to a container daemon process to enable Dev Services (more about this below). Before proceeding, run the following command to set the "DOCKER_HOST": |
systemctl --user enable podman.socket --now && export DOCKER_HOST=unix://$(podman info --format '{{.Host.RemoteSocket.Path}}')Let’s go ahead and start Dev Mode. In the same terminal we were using previously, type (or copy) the following command:
~/podify-quarkus-redis/mvnw quarkus:dev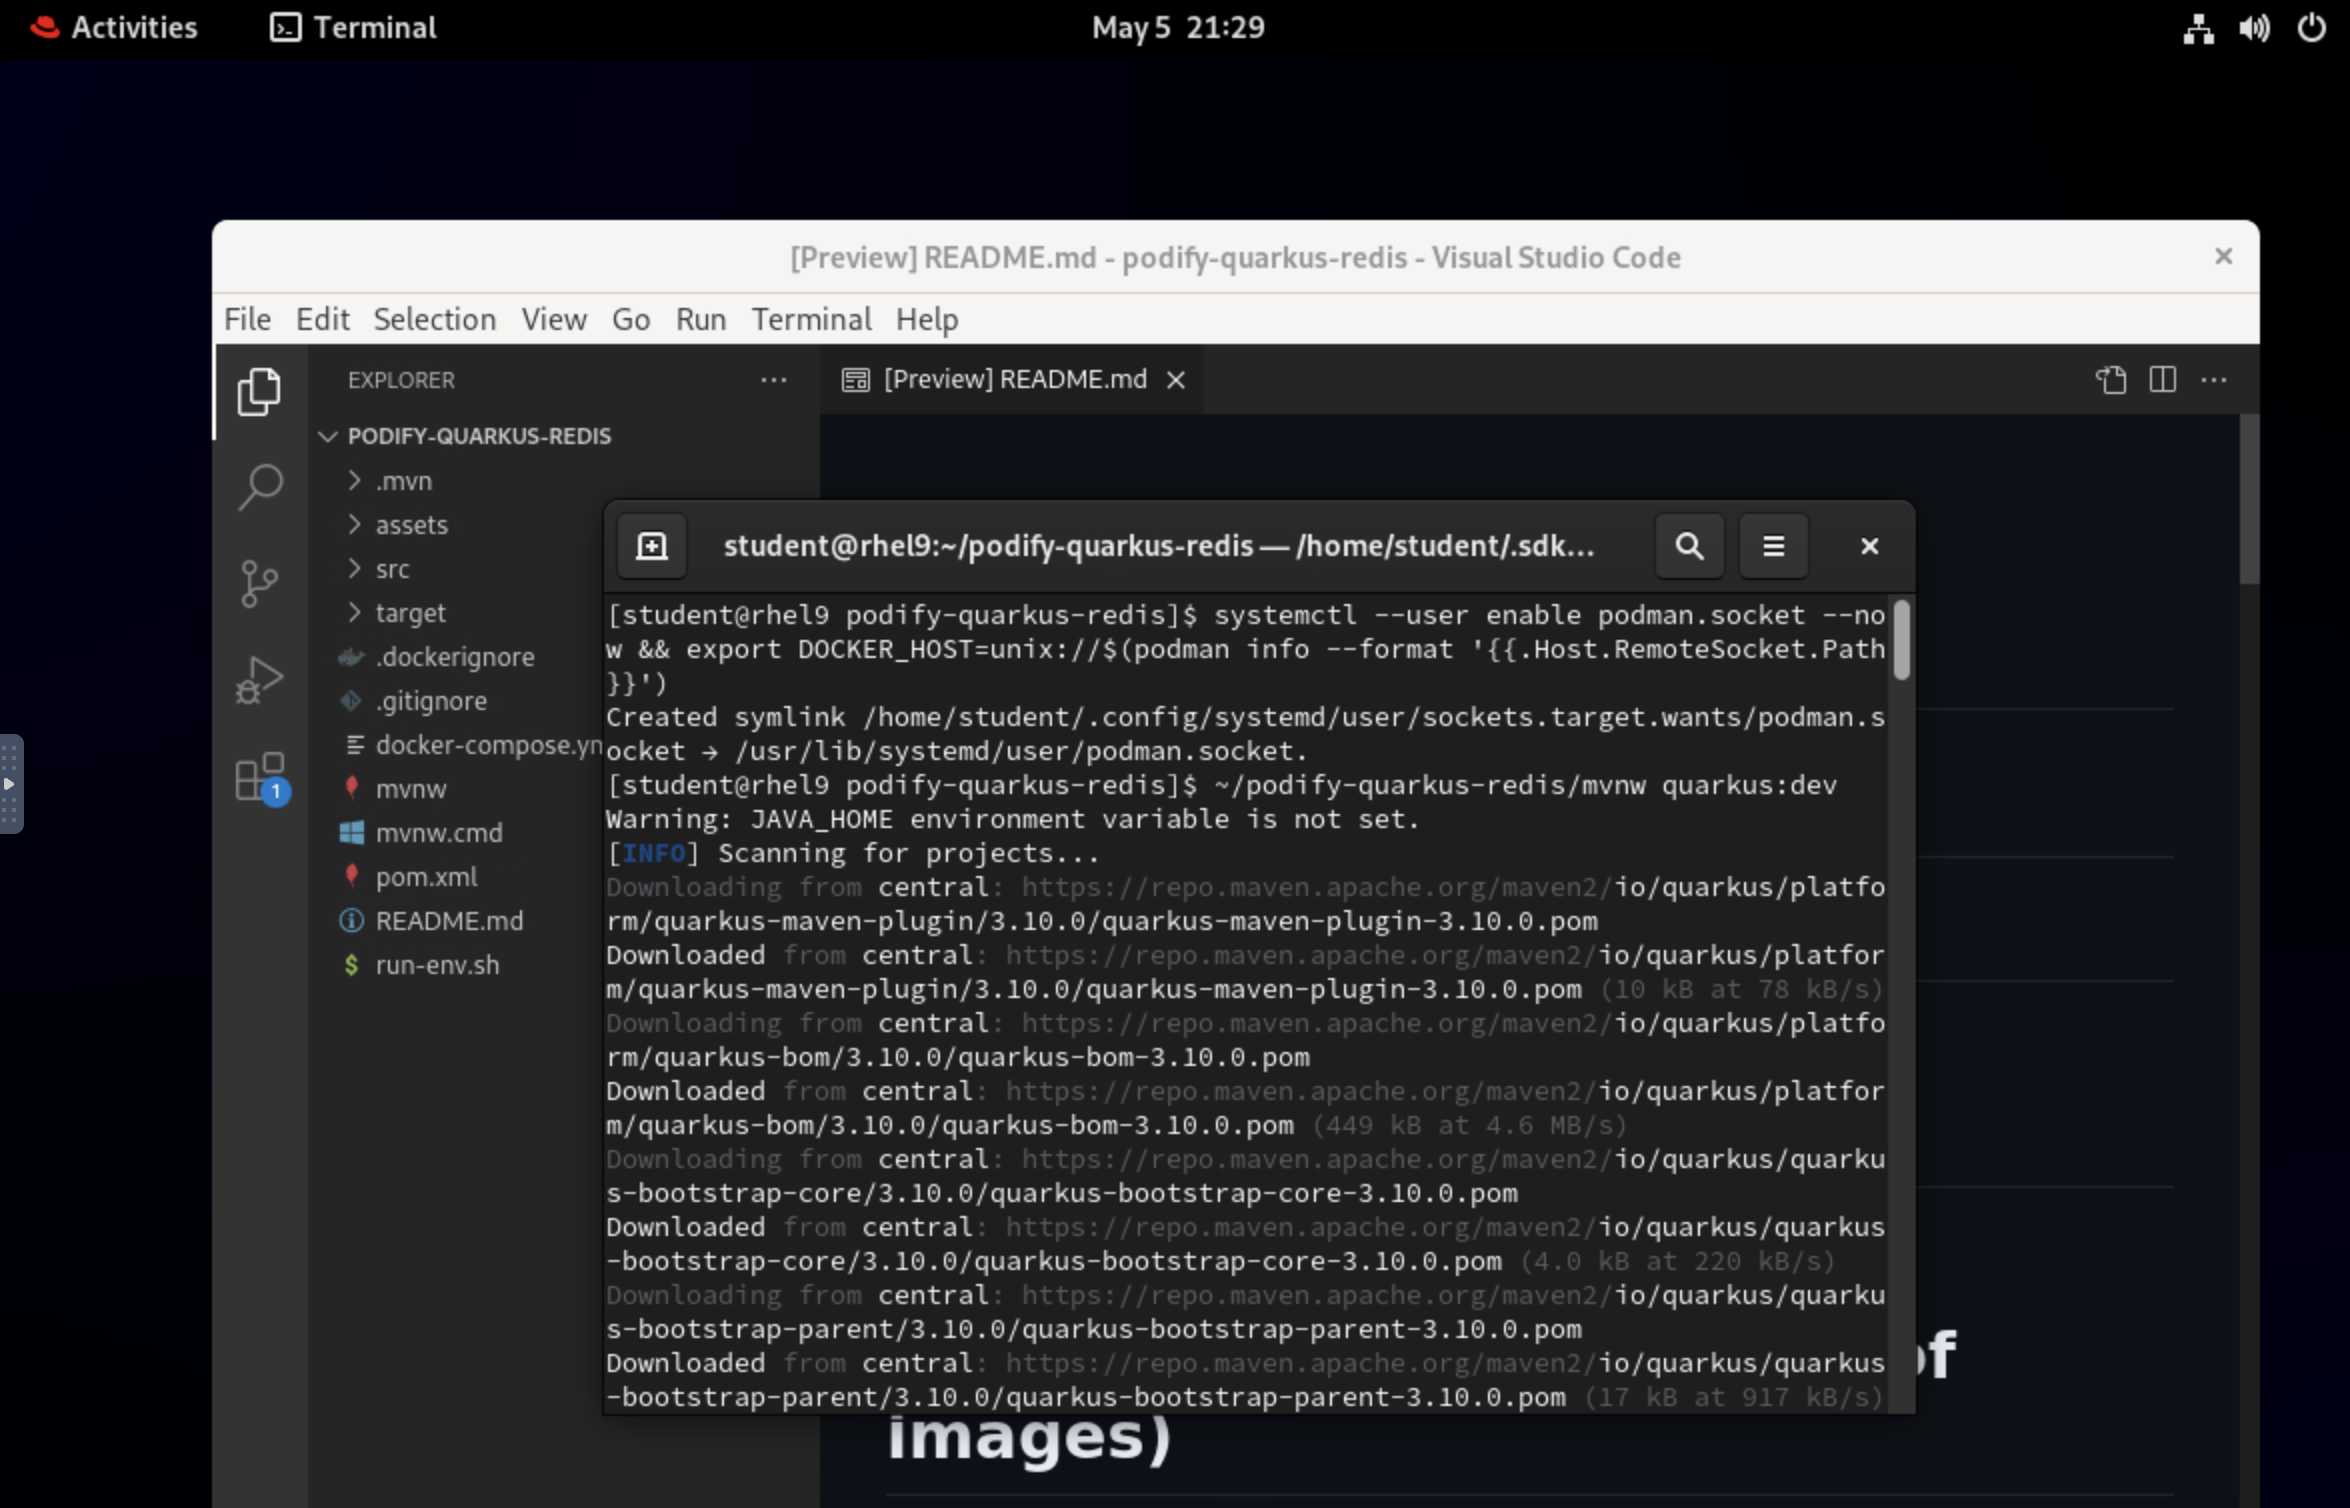
Wait a few moments for the application to start up. You’ll see logs scroll on the screen and eventually a log message that says something like "Live Coding activated" and "Listening on: http://localhost:8080".
| You might be prompted to accept contributing anonymous build time data with the Quarkus community. The answer is up to you :) |

Open up a Firefox instance and navigate to http://localhost:8080. Fantastic! Our app is already running. Feel free to modify the code and refresh the browser, and you’ll see the changes being picked up on the fly without recompilation, thanks to the Quarkus Dev Mode.

| If you paid close attention to the logs when Quarkus Dev Mode started, you might have noticed that Quarkus also started up a Redis "Dev Service". Dev Services is a powerful feature in Quarkus that automatically starts up external services the app relies on, such as databases or messaging systems, in a container. It then automatically wires these container-based services to the application. In this case, since our application relies on Redis for caching the counter, Quarkus started up a Redis container without any manual configuration required. |
We can verify that this really happened. Open the Podman Desktop application and go to the Containers view. You should see the Redis container with a randomly assigned container name, and docker.io/library/redis:7 in the Images column.
| You might also notice a 'testcontainers' instance. This is part of the Quarkus Dev Services (which leverages the TestContainers project) and will automatically stop and remove Dev Services when they’re not needed anymore. |

Great! We’re done developing our application, so let’s stop the Dev Mode and proceed with containerizing it. Go back to your terminal and use the shortcut Ctrl+C to stop the process.
| Make sure the application is stopped, otherwise you might run into port conflicts later on. |
Let’s build our application first with Maven:
~/podify-quarkus-redis/mvnw packageMeanwhile, go back to Podman Desktop. You’ll notice that the Dev Services containers have disappeared. As expected, the Quarkus Dev Services / TestContainers functionality cleans up after itself when the containers are no longer needed.
Viewing the Containerfile (aka Dockerfile)
Quarkus projects come with a few opinionated Dockerfiles by default. You can find them in the src/main/docker folder.
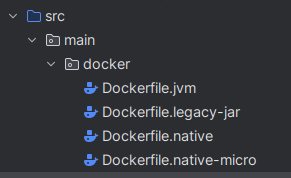
Go ahead and open Dockerfile.jvm and scroll down past the commented out initial section. Let’s examine the Dockerfile.jvm instructions:
-
Base Image:
-
FROM registry.access.redhat.com/ubi9/openjdk-21:latest(Starts with an OpenJDK base image supplied, built and verified by Red Hat)
-
-
App Configuration, Source and Startup commands:
-
ENV LANGUAGE='en_US:en'(Set environment variable "LANGUAGE") -
COPY --chown=185 …(Copies build artifacts into the image and sets the ownership of the files) -
EXPOSE 8080(Advertise what port the application runs on) -
USER 185(Switches to non-root user) -
ENV …(Sets more environment variables) -
ENTRYPOINT [ "/opt/jboss/container/java/run/run-java.sh" ](Defines container startup command)
-
| The Dockerfile.jvm is used for a 'classic' Java build with the application packaged as a .jar archive. You can also compile the Quarkus application to a native binary, in which case you could use the Dockerfile.native or Dockerfile.native-micro images which are much smaller since they don’t have a Java Virtual Machine (JVM) built in. More info can be found here. |
Building the Container Image
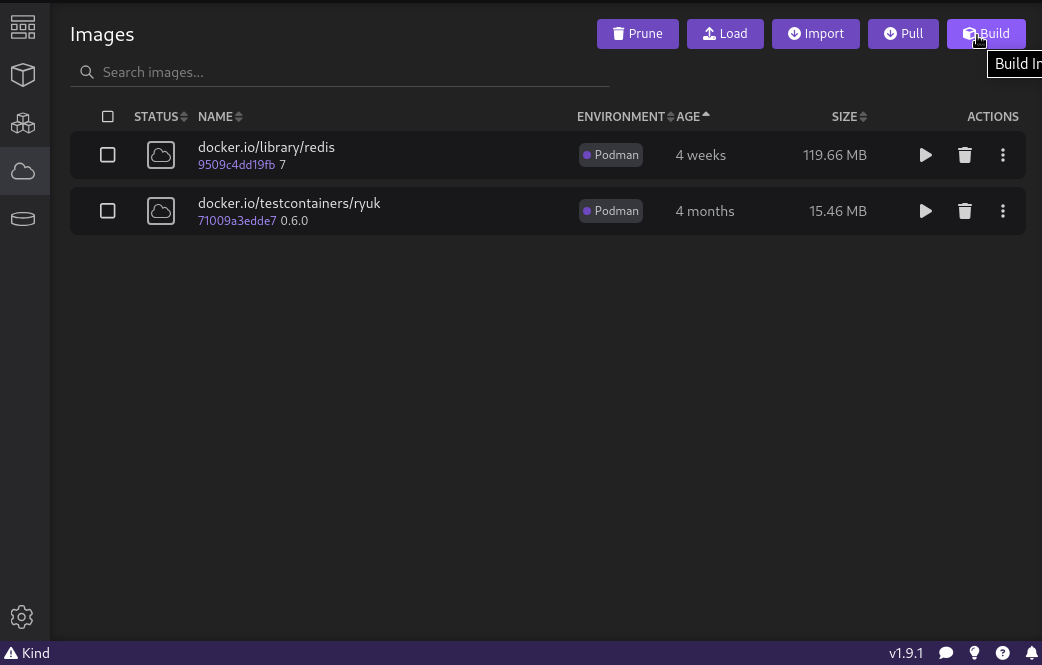
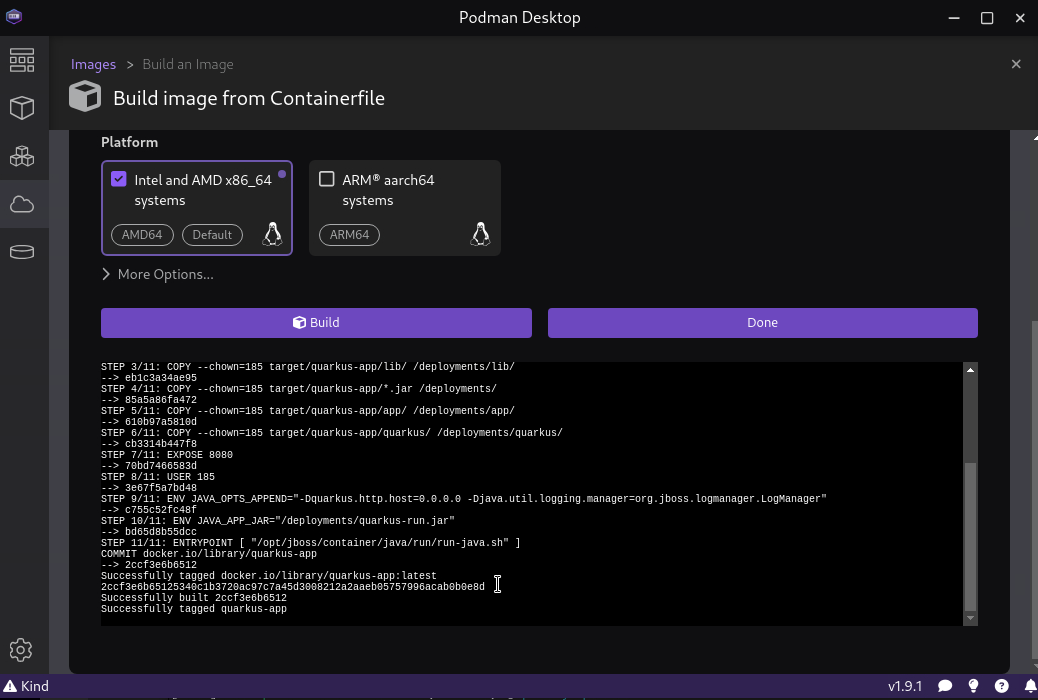
Now that we’ve taken a look at the source code and the Containerfile, in our case called Dockerfile.jvm, let’s build the container image from within Podman Desktop. From the Images section, click the Build button in the top right corner.
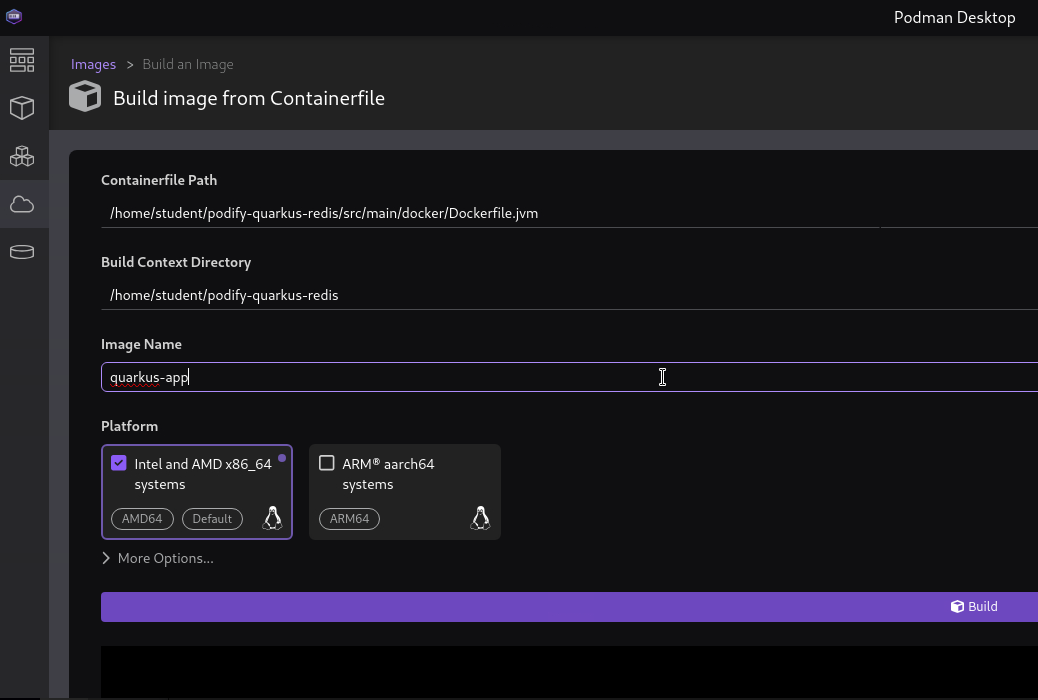
This will open a new window where we can specify the Containerfile, the build context, and image name. For the Containerfile Path, browse to the Dockerfile.jvm (home/student/podify-quarkus-redis/src/main/docker/Dockerfile.jvm) and select it. Set the build directory to the path of the podify-quarkus-redis directory: /home/student/podify-quarkus-redis, and set quarkus-app for the image name.
| The build context is the directory where the source code is located, and the Containerfile (Dockerfile) is the recipe for building the container image. We can use Podman Desktop to easily rename/retag the image later, so don’t worry too much about the image name for now. |
After clicking Build, Podman Desktop will start building the container image, and you can view the build logs in the bottom pane. This will take a few minutes, as it’s downloading the base image, installing dependencies, copying the source code, etc.
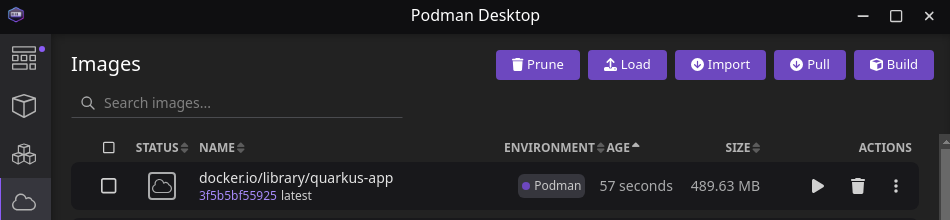
Once the build is complete, you should see the new quarkus-app image in the Images section of Podman Desktop. You’ll see the default image short name here, which we’ll retag for our registry in the next section.
Optional: Pulling the Quarkus App Image
If you’d like to skip the build process from above, you can pull the quay.io/rhdevelopers/quarkus-redis image from a public registry. This is the same image we just built, but it’s already available for use. Head to the Images section, and click the Pull button in the top right corner.
quay.io/rhdevelopers/quarkus-redis
| Due to its popularity, Podman uses the Docker Hub registry to pull images by default. However, you can authenticate other registries in the Podman Desktop Settings > Registries, or set defaults via the Podman registry configuration file. |
Pulling the Redis Image
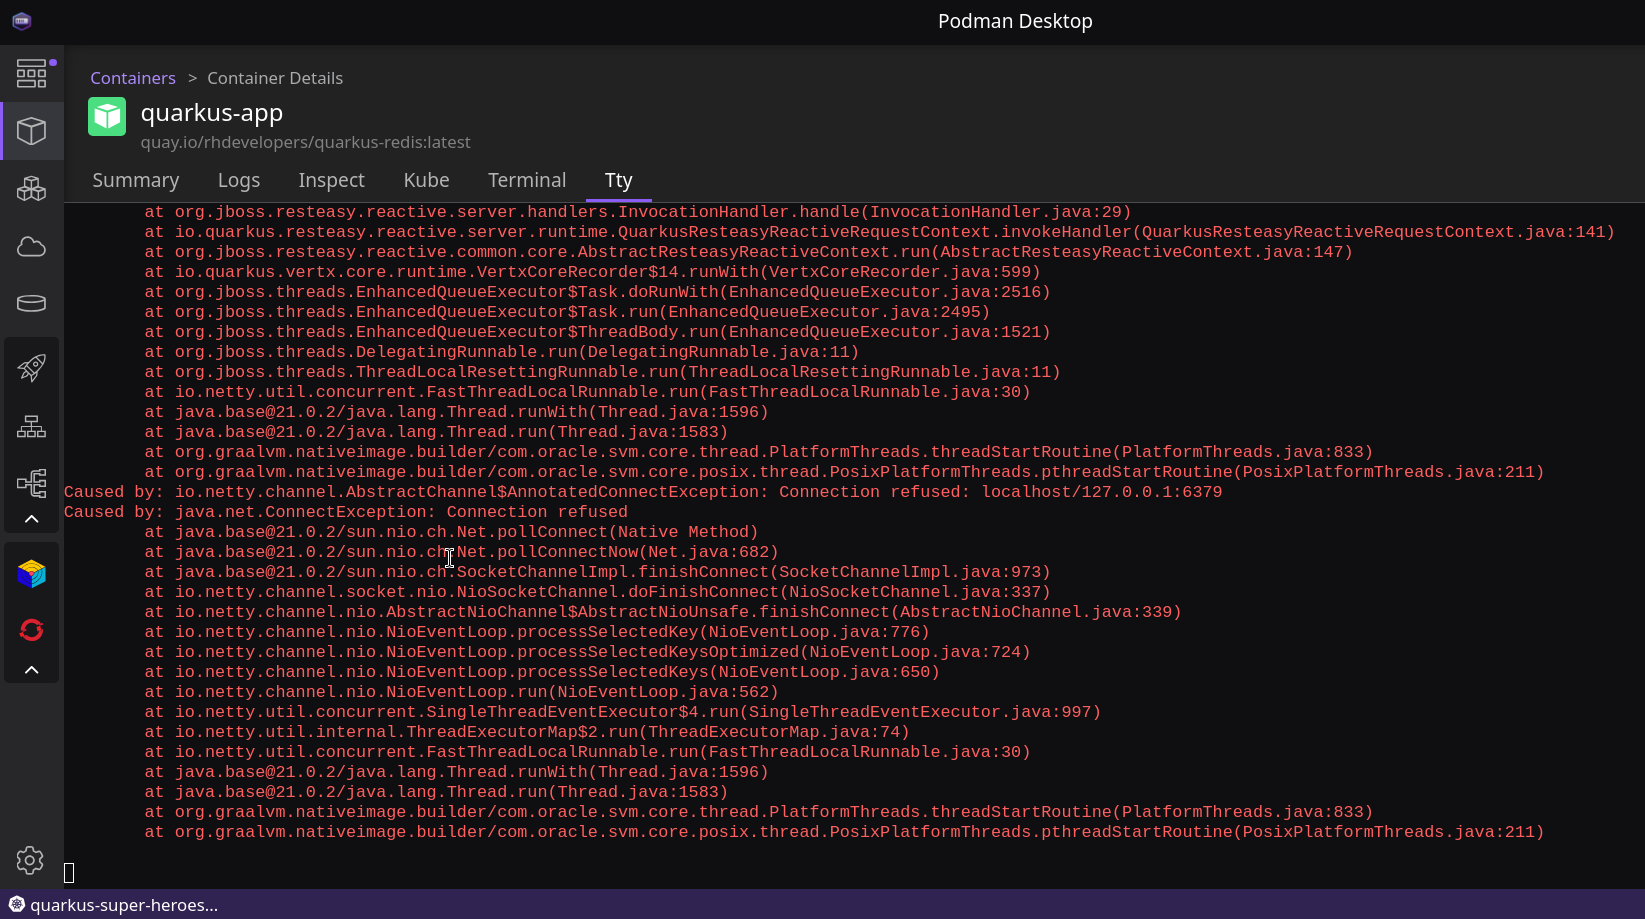
As we’ve seen from the previous section, our application uses Redis for caching the visit counter. Redis is a popular choice for caching in containerized applications. The Quarkus application has a hard dependency on the Redis service, so if the Redis service isn’t available, the app would misbehave as you can see in the startup logs below when the Redis container isn’t running.
Fortunately we can run a Redis container next to our Quarkus application. Let’s pull a pre-built Redis image from Quay.io by clicking the Pull button from the top right corner menu. We’ll be pulling Redis image that has been built with the Red Hat UBI base image with Redis installed on top.
quay.io/podman-desktop-demo/podify-demo-backend:v1
The Containerfile used to build the Redis image is available in the podman-desktop-demo/primary-podify-demo/back directory, but can also be found here.
|