Scaling Apps
Background: Deployment Configurations and Replication Controllers
While Services provide routing and load balancing for Pods, which may go in and out of existence, ReplicationControllers (RC) are used to specify and then ensure the desired number of Pods (replicas) are in existence. For example, if you always want your application server to be scaled to 3 Pods (instances), a ReplicationController is needed. Without an RC, any Pods that are killed or somehow die/exit are not automatically restarted. ReplicationControllers are how OpenShift "self heals".
A DeploymentConfiguration (DC) defines how something in OpenShift should be deployed. From the deployments documentation:
Building on replication controllers, OpenShift adds expanded support for the software development and deployment lifecycle with the concept of deployments. In the simplest case, a deployment just creates a new replication controller and lets it start up pods. However, OpenShift deployments also provide the ability to transition from an existing deployment of an image to a new one and also define hooks to be run before or after creating the replication controller.
In almost all cases, you will end up using the Pod, Service, ReplicationController and DeploymentConfiguration resources together. And, in almost all of those cases, OpenShift will create all of them for you.
There are some edge cases where you might want some Pods and an RC without a DC or a Service, and others, so feel free to ask us about them after the labs.
Exercise: Exploring Deployment-related Objects
Now that we know the background of what a ReplicationController and
DeploymentConfig are, we can explore how they work and are related. Take a
look at the DeploymentConfig (DC) that was created for you when you told
OpenShift to stand up the parksmap image:
oc get dcNAME REVISION DESIRED CURRENT TRIGGERED BY
parksmap 1 1 1 config,image(parksmap:1.3.0)To get more details, we can look into the ReplicationController (RC).
Take a look at the ReplicationController (RC) that was created for you when
you told OpenShift to stand up the parksmap image:
oc get rcNAME DESIRED CURRENT READY AGE
parksmap-1 1 1 0 4hThis lets us know that, right now, we expect one Pod to be deployed
(Desired), and we have one Pod actually deployed (Current). By changing
the desired number, we can tell OpenShift that we want more or less Pods.
OpenShift’s HorizontalPodAutoscaler effectively monitors the CPU usage of a set of instances and then manipulates the RCs accordingly.
You can learn more about the CPU-based Horizontal Pod Autoscaler here
Exercise: Scaling the Application
Let’s scale our parksmap "application" up to 2 instances. We can do this with
the scale command. You could also do this by incrementing the Desired Count in the OpenShift web console. Pick one of these methods; it’s your choice.
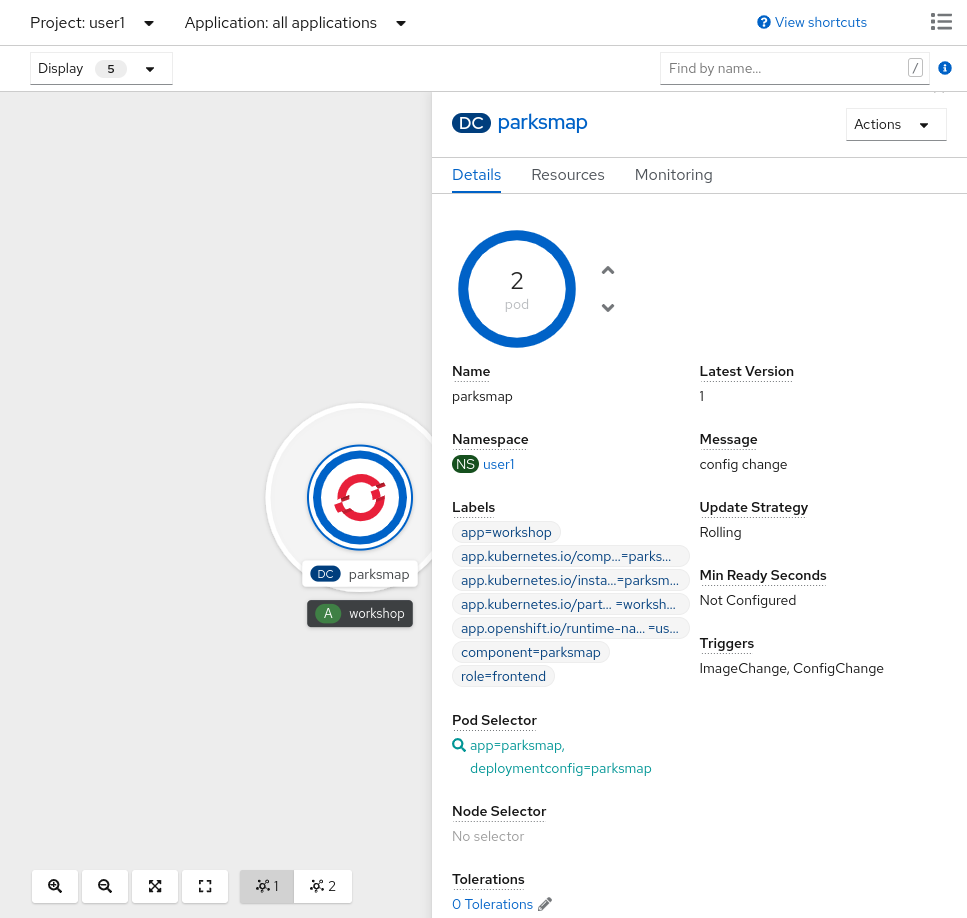
oc scale --replicas=2 dc/parksmapYou can also scale up to two pods in the Developer Perspective. From the Topology view, first click the parksmap deployment config and select the Details tab:

Next, click the ^ icon next to the Pod visualization to scale up to 2 pods.

To verify that we changed the number of replicas, issue the following command:
oc get rcNAME DESIRED CURRENT READY AGE
parksmap-1 2 2 0 4hYou can see that we now have 2 replicas. Let’s verify the number of pods with
the oc get pods command:
oc get podsNAME READY STATUS RESTARTS AGE
parksmap-1-deploy 0/1 Completed 0 59m
parksmap-1-gxbgq 1/1 Running 0 59m
parksmap-1-j2lw9 1/1 Running 0 31mAnd lastly, let’s verify that the Service that we learned about in the previous lab accurately reflects two endpoints:
oc describe svc parksmapYou will see something like the following output:
Name:              parksmap
Namespace:         lab-getting-started-starter-workshop-apb-test-user1
Labels:            app=workshop
                   app.kubernetes.io/component=parksmap
                   app.kubernetes.io/instance=parksmap
                   app.kubernetes.io/part-of=workshop
                   component=parksmap
                   role=frontend
Annotations:       openshift.io/generated-by: OpenShiftWebConsole
Selector:          app=parksmap,deploymentconfig=parksmap
Type:              ClusterIP
IP:                172.30.22.209
Port:              8080-tcp  8080/TCP
TargetPort:        8080/TCP
Endpoints:         10.128.2.90:8080,10.131.0.40:8080
Session Affinity:  None
Events:            <none>
Another way to look at a Service's endpoints is with the following:
oc get endpoints parksmapAnd you will see something like the following:
NAME       ENDPOINTS                           AGE
parksmap   10.128.2.90:8080,10.131.0.40:8080   45m
Your IP addresses will likely be different, as each pod receives a unique IP within the OpenShift environment. The endpoint list is a quick way to see how many pods are behind a service.
You can also see that both Pods are running in the Developer Perspective:
Overall, that’s how simple it is to scale an application (Pods in a Service). Application scaling can happen extremely quickly because OpenShift is just launching new instances of an existing image, especially if that image is already cached on the node.
Application "Self Healing"
Because OpenShift’s RCs are constantly monitoring to see that the desired number of Pods actually are running, you might also expect that OpenShift will "fix" the situation if it is ever not right. You would be correct!
Since we have two Pods running right now, let’s see what happens if we
"accidentally" kill one. Run the oc get pods command again, and choose a Pod
name. Then, do the following:
oc delete pod parksmap-1-2fp7t && oc get podspod "parksmap-1-2fp7t" deleted
NAME READY STATUS RESTARTS AGE
parksmap-1-bwwkw 0/1 ContainerCreating 0 3s
parksmap-1-deploy 0/1 Completed 0 47m
parksmap-1-qfn7l 1/1 Running 0 46mDid you notice anything? One container has been deleted, and there’s a new container already being created.
Also, the names of the Pods are slightly changed. That’s because OpenShift almost immediately detected that the current state (1 Pod) didn’t match the desired state (2 Pods), and it fixed it by scheduling another Pod.
Additionally, OpenShift provides rudimentary capabilities around checking the liveness and/or readiness of application instances. If the basic checks are insufficient, OpenShift also allows you to run a command inside the container in order to perform the check. That command could be a complicated script that uses any installed language.
Based on these health checks, if OpenShift decided that our parksmap
application instance wasn’t alive, it would kill the instance and then restart
it, always ensuring that the desired number of replicas was in place.
More information on probing applications is available in the Application Health section of the documentation and later in this guide.
Exercise: Scale Down
Before we continue, go ahead and scale your application down to a single instance. Feel free to do this using whatever method you like.
Don’t forget to scale down back to 1 instance your parksmap component as otherwise you might experience some weird behavior in later labs. This is due to how the application has been coded and not to OpenShift itself.
|