PostgreSQL as Database
So before we deploy the code we need a Database right? For the sake of simplicity let’s deploy PostgreSQL using some simple commands. Maybe in your real deployment you would use an external instance.
Deploying PostgreSQL on OpenShift
Before proceeding log in your cluster using oc login with a normal user no need for special permissions.
|
In order to run our application, we need a namespace, let’s create one:
export PROJECT_NAME=%USERNAME%-fruit-service-postgresql
oc new-project ${PROJECT_NAME}
In order for the application to work properly we must first deploy a PostgreSQL database, like this:
oc new-app -e POSTGRESQL_USER=luke -e POSTGRESQL_PASSWORD=secret -e POSTGRESQL_DATABASE=FRUITSDB \
  centos/postgresql-10-centos7 --as-deployment-config=true --name=postgresql-db -n ${PROJECT_NAME}
Now let’s add some labels to the database deployment object:
oc label dc/postgresql-db app.kubernetes.io/part-of=fruit-service-app -n ${PROJECT_NAME} && \
  oc label dc/postgresql-db app.openshift.io/runtime=postgresql --overwrite=true -n ${PROJECT_NAME}
Check the database is running:
oc get pod -n ${PROJECT_NAME}You should see something like this:
NAME                        READY   STATUS      RESTARTS   AGE
postgresql-db-1-deploy      0/1     Completed   0          2d6h
postgresql-db-1-n585q 1/1 Running 0 2d6h|
You can also run this command to check the name of the POD: |
Deploying the code on OpenShift
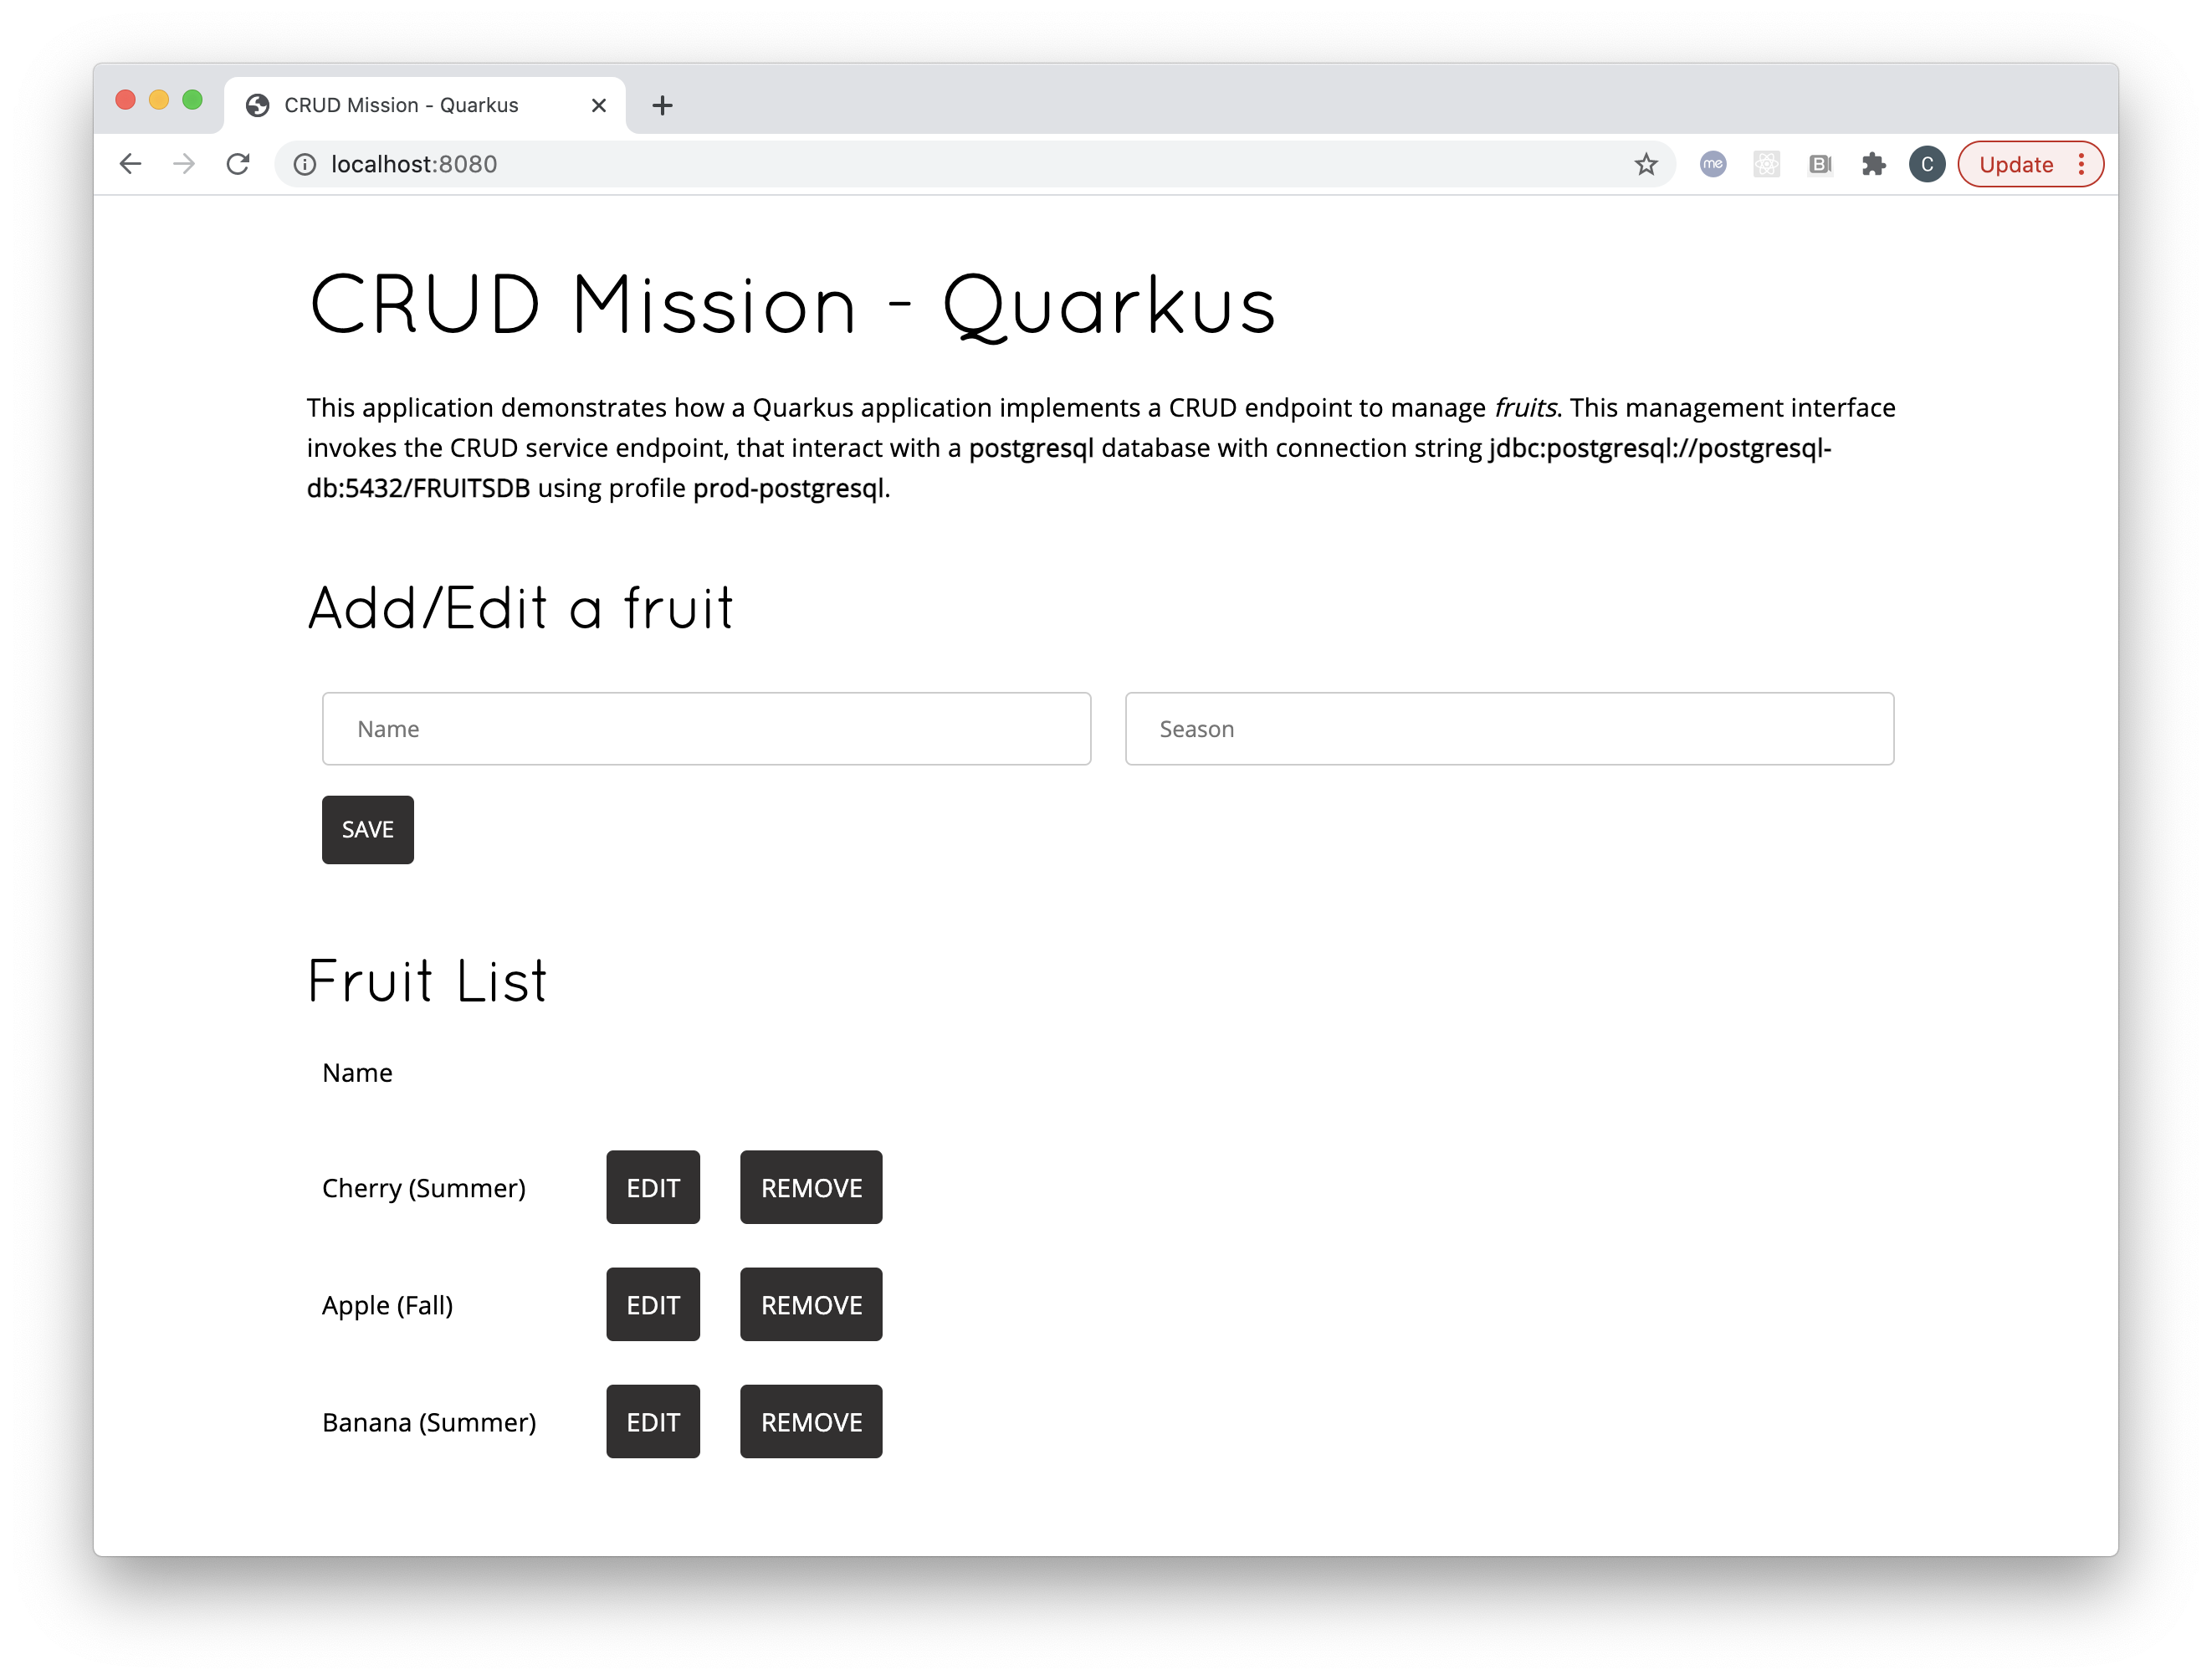
mvn clean package -Dquarkus.kubernetes.deploy=true -DskipTests -Dquarkus.profile=prod-postgresqlMove to the OpenShift web console and from Topology in the Developer perspective click on the route link as in the picture.
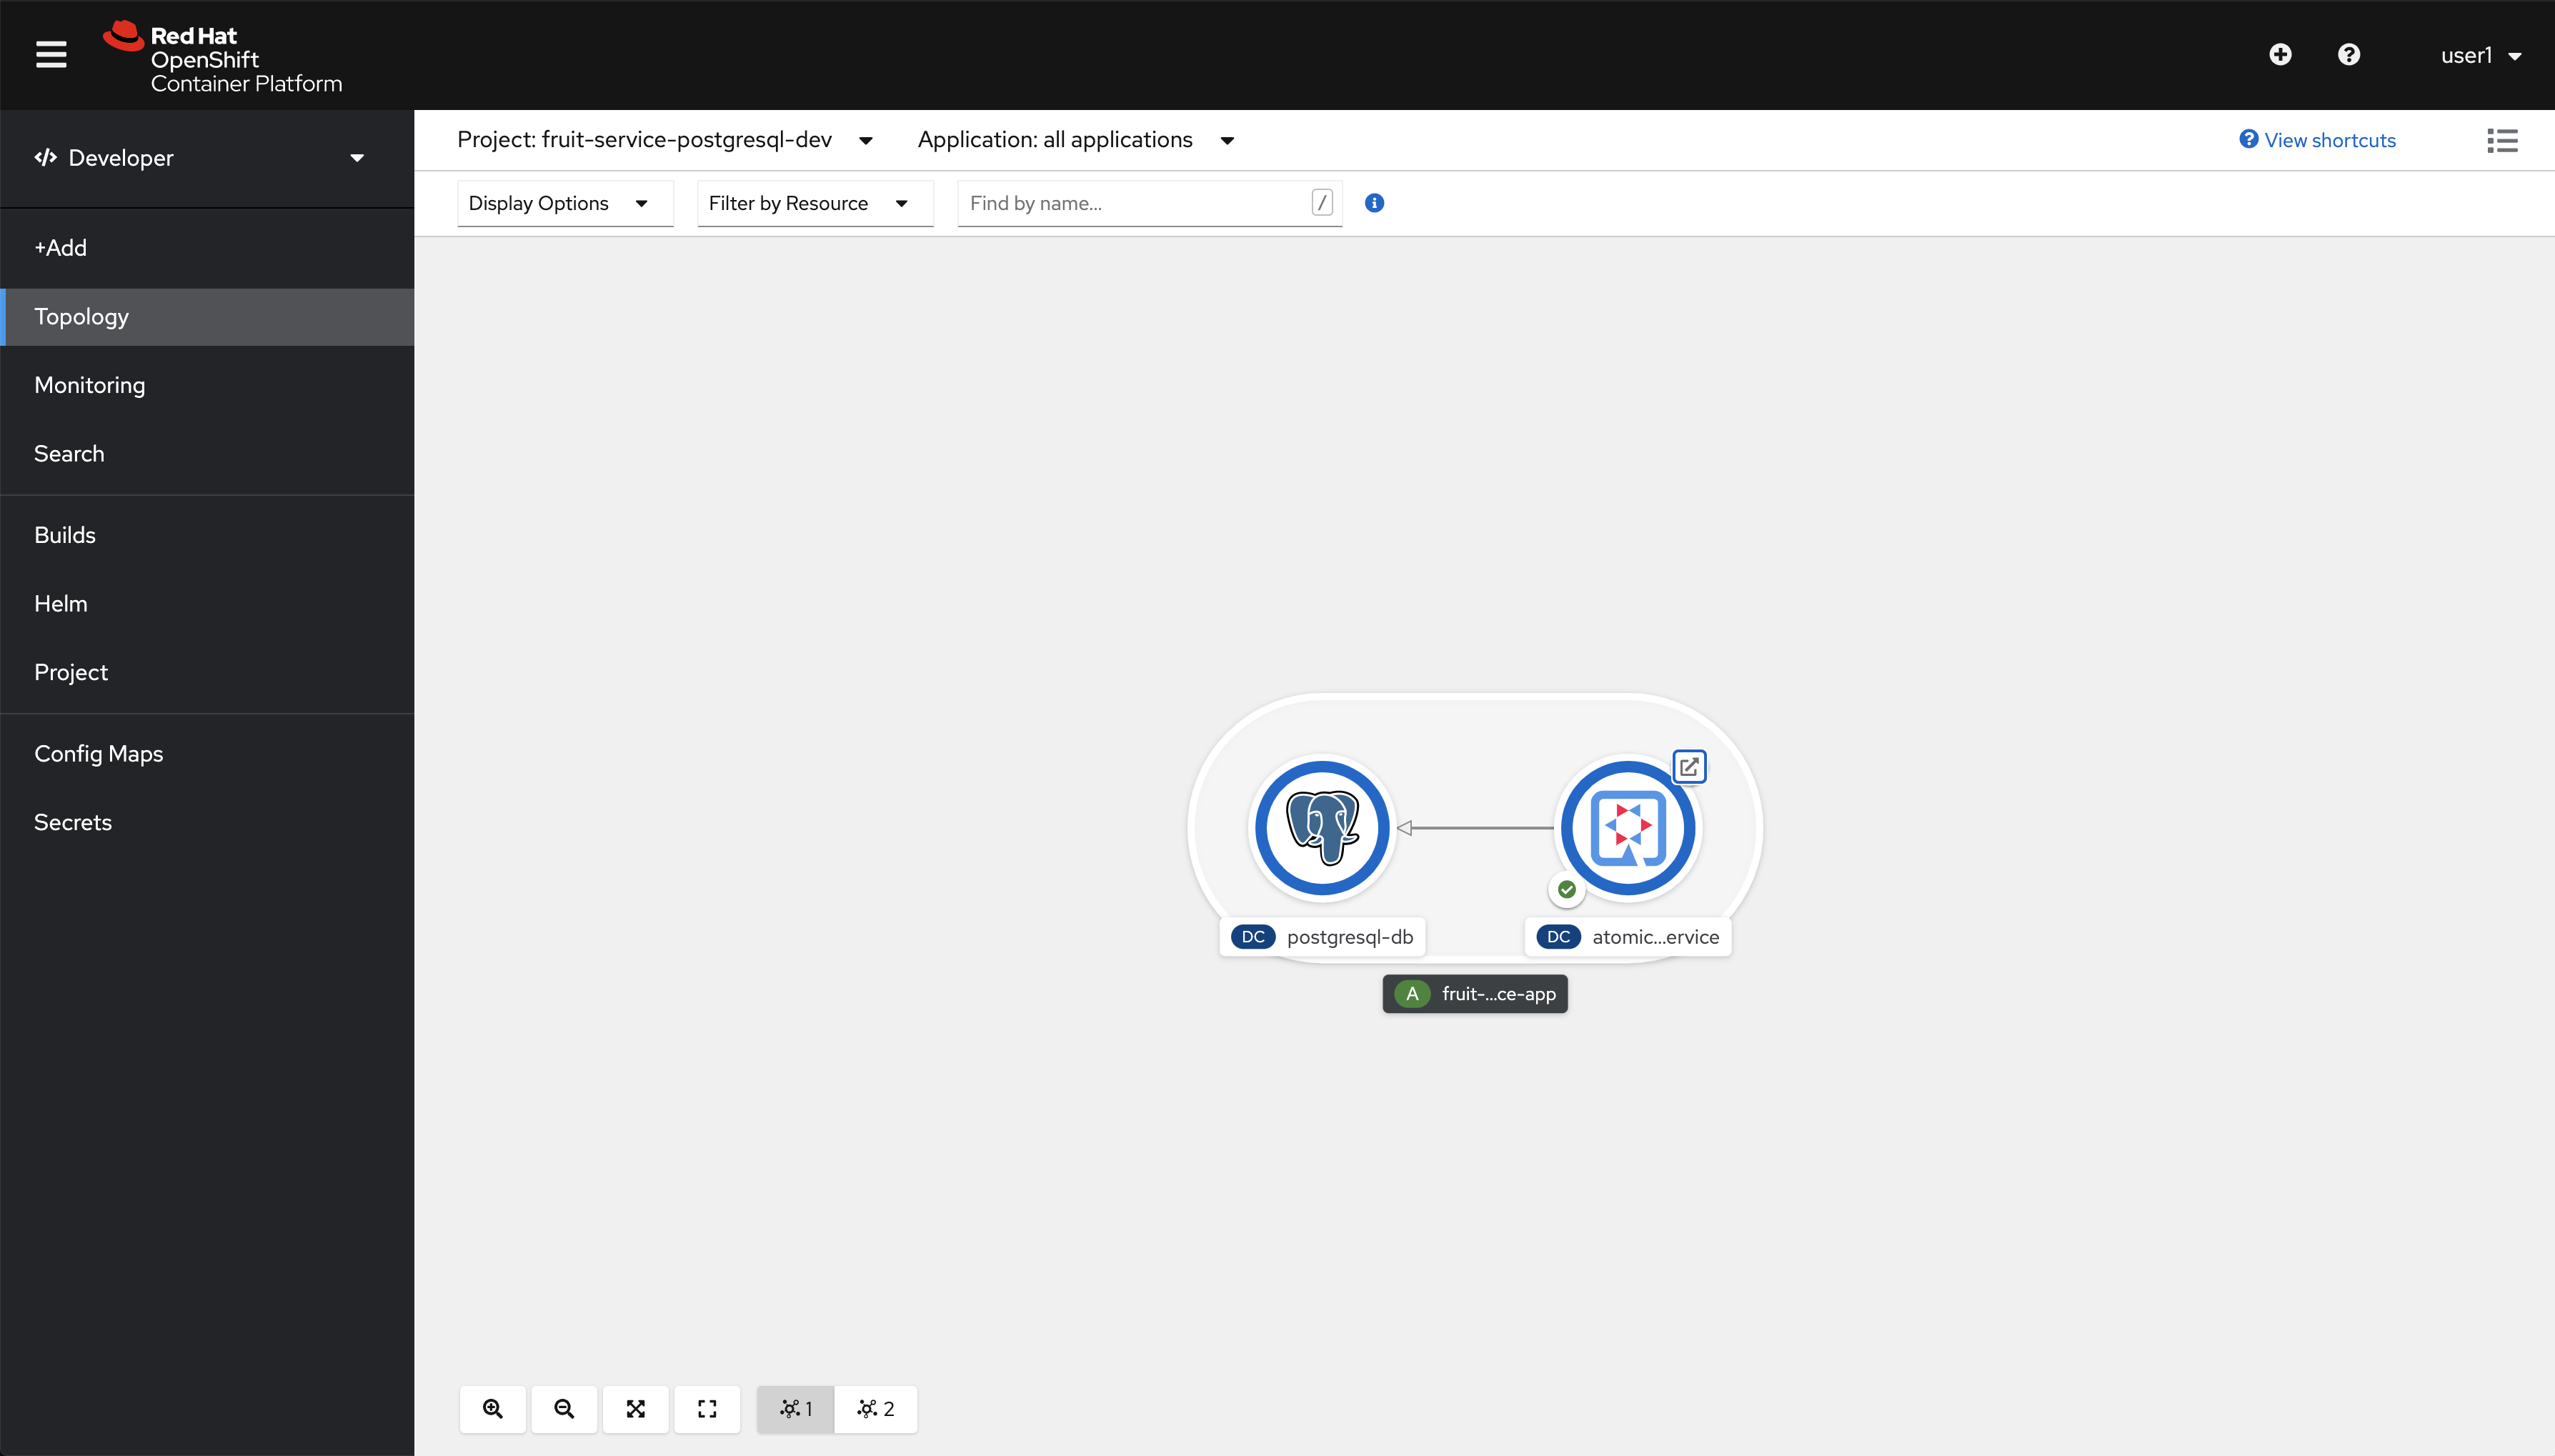
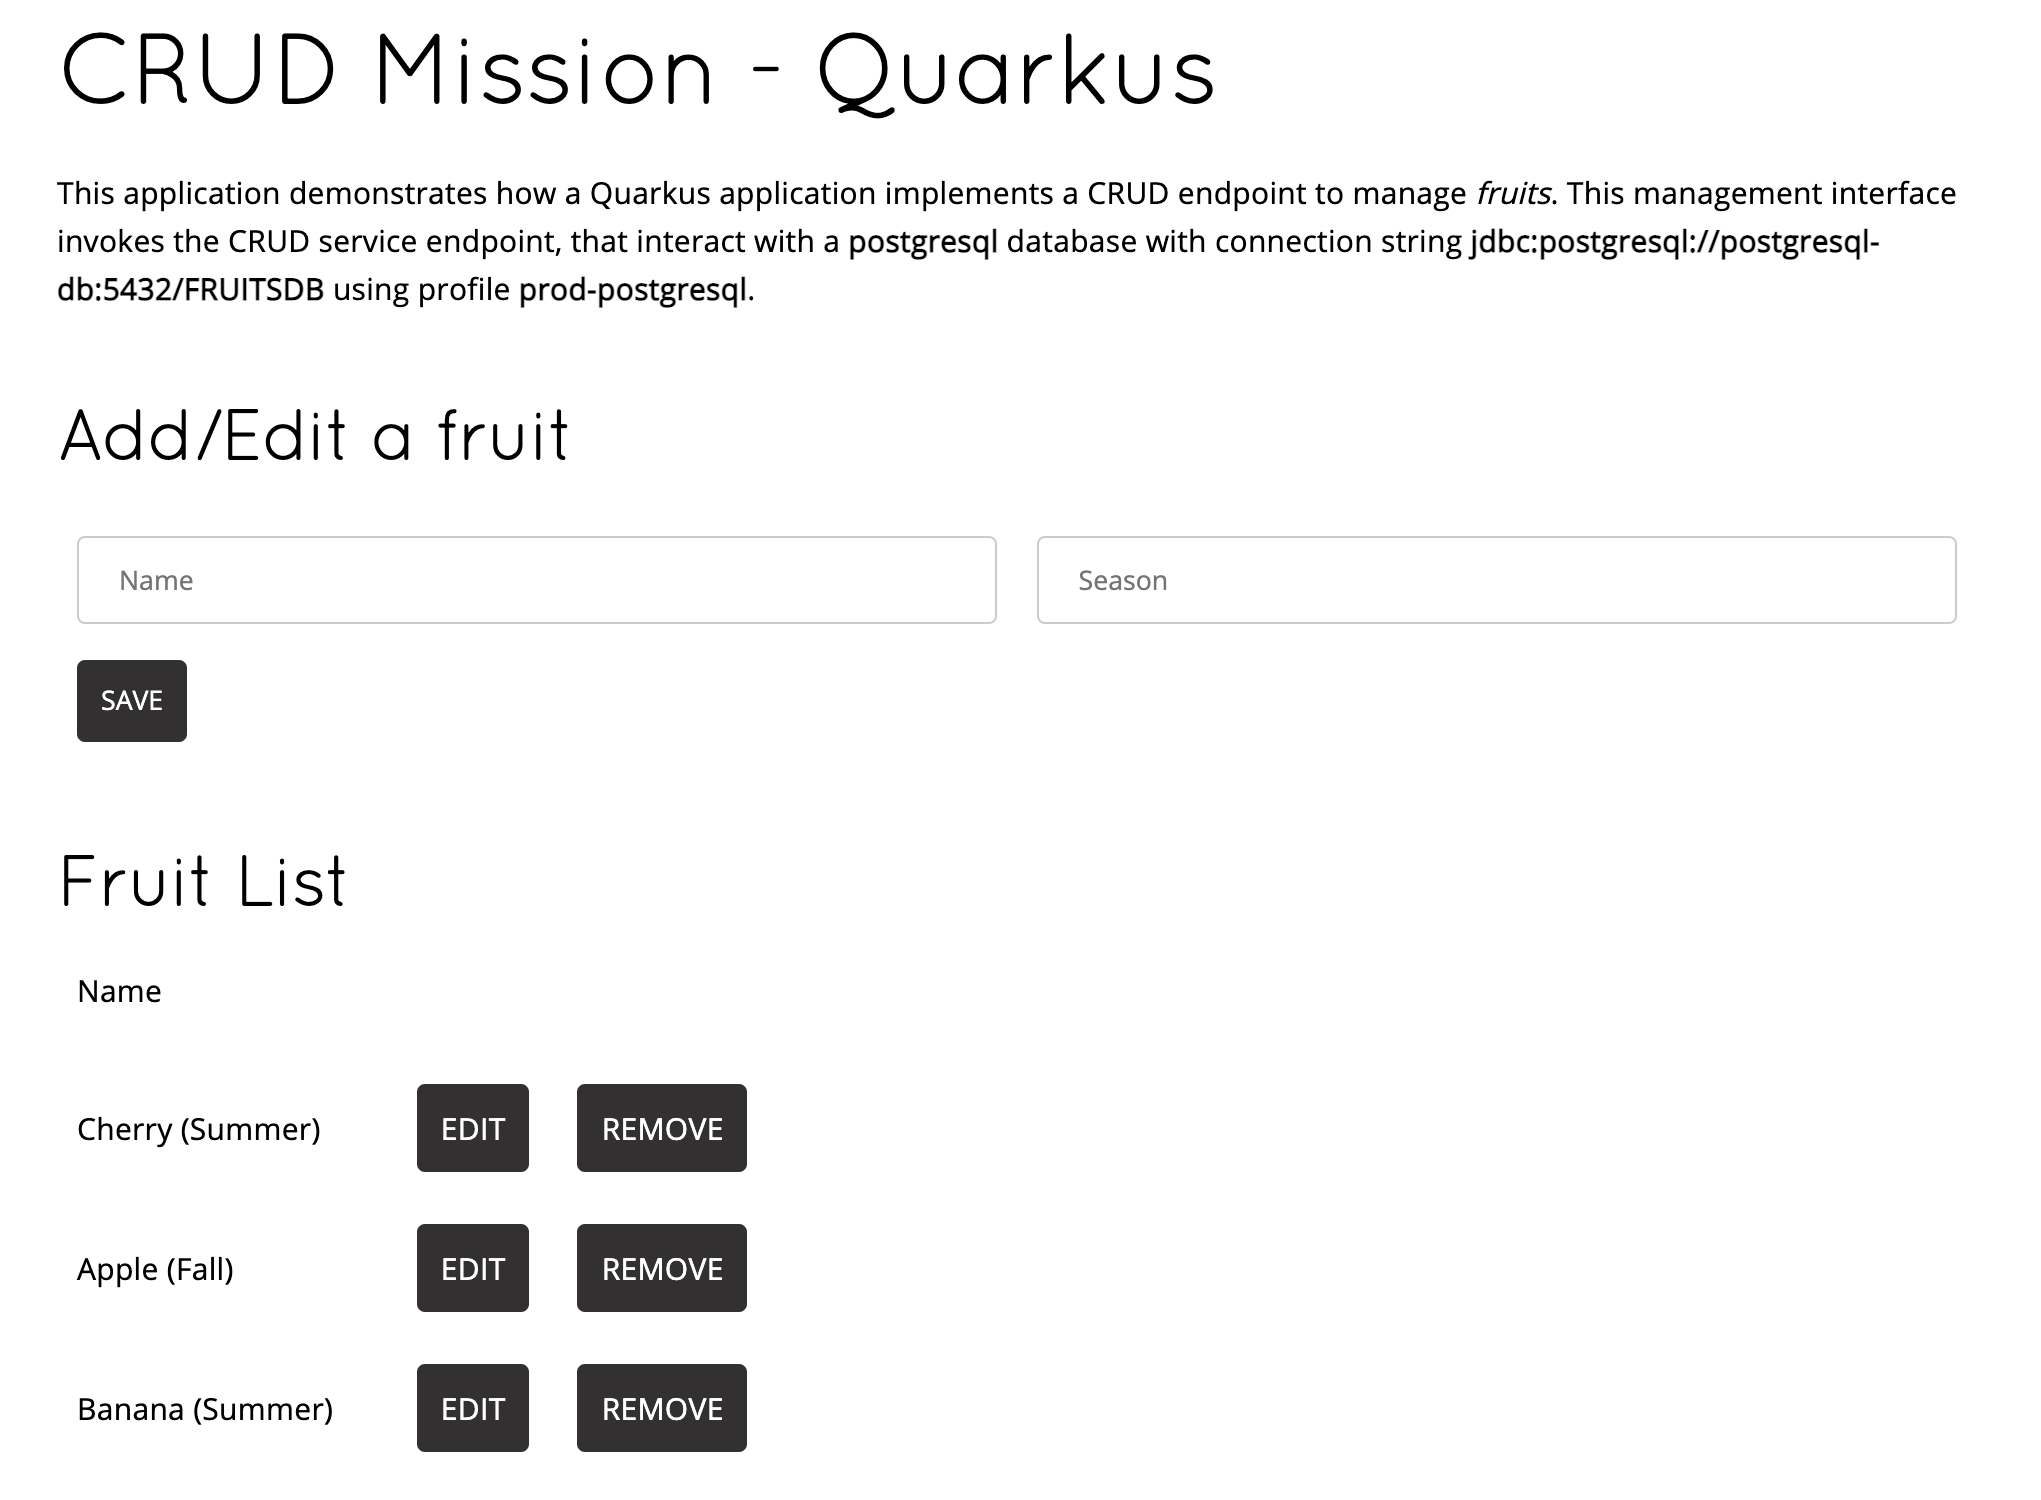
You should see this.
Extending the inner-loop with Telepresence
|
Permissions needed
This needs to be run by a |
| Telepresence will modify the network so that Services in Kubernetes are reachable from your laptop and vice versa. |
The next command will result in the deployment for our application being scaled down to zero and the network altered so that traffic to it ends up in your laptop in port 8080.
You’ll be asked for sudo password, this is normal, telepresence needs to be able to modify networking rules so that you can see Kubernetes Services as local.
|
export TELEPRESENCE_USE_OCP_IMAGE=NO
oc project ${PROJECT_NAME}
telepresence --swap-deployment atomic-fruit-service --expose 8080
Eventually you’ll se something like this:
...
T: Forwarding remote port 8080 to local port 8080.
T: Guessing that Services IP range is ['172.30.0.0/16']. Services started after this point will be inaccessible if are outside this range; restart telepresence
T: if you can't access a new Service.
T: Connected. Flushing DNS cache.
T: Setup complete. Launching your command.
The default interactive shell is now zsh.
To update your account to use zsh, please run `chsh -s /bin/zsh`.
For more details, please visit https://support.apple.com/kb/HT208050.
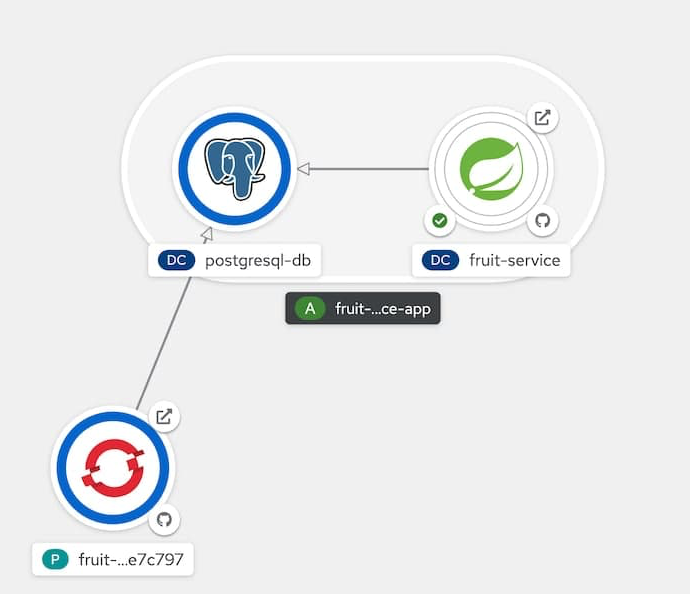
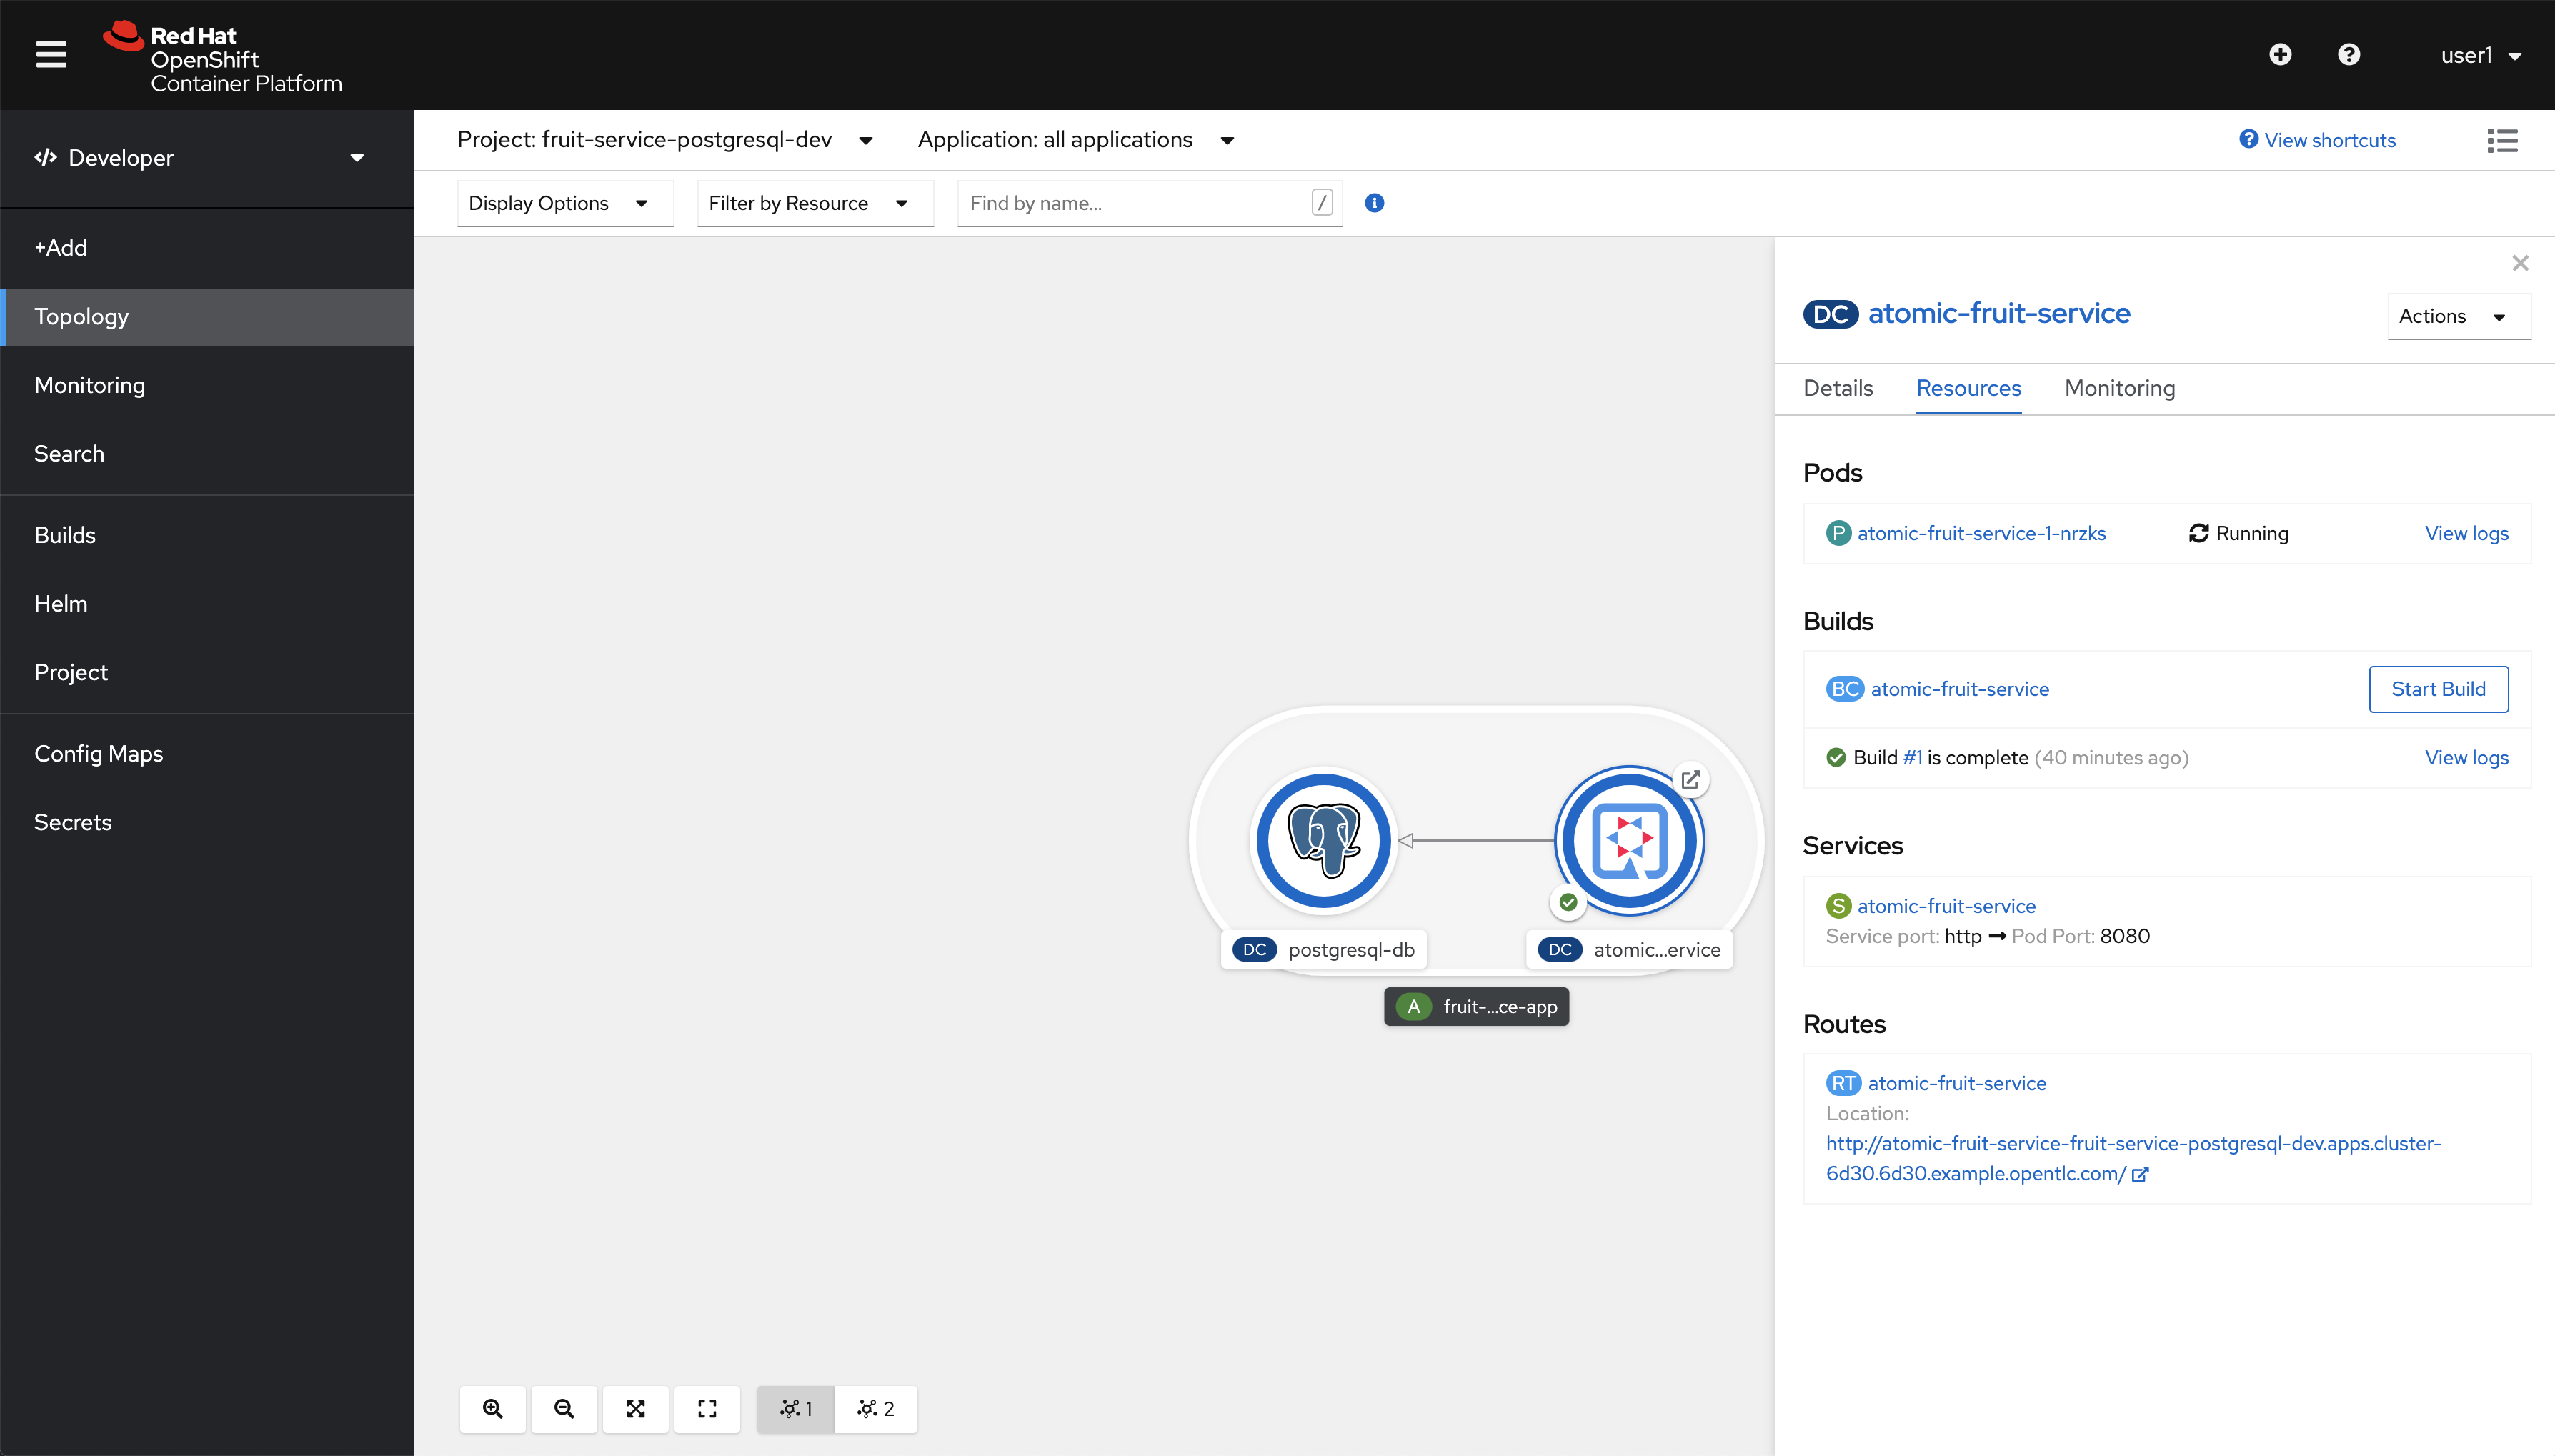
@fruit-service-postgresql-dev/api-cluster-6d30-6d30-example-opentlc-com:6443/user1|bash-3.2$In the Topology view you should see this.
Our deployment has been scaled down to zero and substituted by a pod generated by Telepresence.
|
|
Run from another terminal: You should receive which looks bad but it’s actually good, this means that the DNS Service name local to Kubernetes can be resolved from your computer and that the port |
Now let’s run our code locally but connected to the database (and/or other consumed services). To do so run this command from another terminal:
export PROJECT_NAME=%USERNAME%-fruit-service-postgresql
DB_USER=luke DB_PASSWORD=secret mvn quarkus:dev -Dquarkus.profile=prod-postgresql
Now open a browser and point to http://localhost:8080
You can edit, save, delete to test the functionalities implemented by FruitResource and debug locally.
|
You should see this:
| You can also use the external route and get the same result. |
Now you can go to the terminal running the code locally and stop the process with Ctrl+C.
Also go to the terminal window where Telepresence is running locally and type exit, you should see something similar to this:
...
@fruit-service-postgresql-dev/api-cluster-6d30-6d30-example-opentlc-com:6443/user1|bash-3.2$ exit
exit
T: Your process has exited.
T: Exit cleanup in progress
T: Cleaning up Pod
Extending the inner-loop with Quarkus remote development
If you use Quarkus there’s another method to extend the inner-loop to your cluster, it’s called Remote Development Mode. The idea is simple, run your code in the cluster while being able to replace classes/files that you change locally in your IDE automatically.
There are two parts in this setup:
-
The server side, where the code runs in a container
-
The client side, where you connect to the server side and files are watched and uploaded whenever changes are detected
A couple of things to take into account regarding the server side:
-
The normal
JARis substituted by amutableorfastJAR, that can be updated/reloaded live -
An environment variable
QUARKUS_LAUNCH_DEVMODEneeds to be set totrue
In order to use remote development we need to update the appllication.properties file, please add these two lines at the top of the file.
|
# REMOTE DEV
quarkus.package.type=mutable-jar
quarkus.live-reload.password=changeit2
Now, delete the current deployment, then deploy it again but this time with remote development mode enabled. Please, run the following commands in order to do so:
|
Pay close attention to these system properties we’re setting to deploy our code in remote development mode:
|
oc delete dc/atomic-fruit-service -n ${PROJECT_NAME}
mvn clean package -DskipTests -Dquarkus.kubernetes.deploy=true -Dquarkus.profile=prod-postgresql \
  -Dquarkus.container-image.build=true \
  -Dquarkus.openshift.env-vars.quarkus-launch-devmode.value=true \
  -Dquarkus.openshift.env-vars.quarkus-profile.value=prod-postgresql
You should see this:
...
[INFO] [io.quarkus.container.image.openshift.deployment.OpenshiftProcessor] Successfully pushed image-registry.openshift-image-registry.svc:5000/fruit-service-postgresql-dev/atomic-fruit-service@sha256:13c3781e82fa20b664bcc9e3c21a7a51d57c7a140c8232da66aa03ba73ff9b69
[INFO] [io.quarkus.container.image.openshift.deployment.OpenshiftProcessor] Push successful
[INFO] [io.quarkus.kubernetes.deployment.KubernetesDeployer] Deploying to openshift server: https://api.cluster-6d30.6d30.example.opentlc.com:6443/ in namespace: fruit-service-postgresql-dev.
[INFO] [io.quarkus.kubernetes.deployment.KubernetesDeployer] Applied: Secret fruits-db.
[INFO] [io.quarkus.kubernetes.deployment.KubernetesDeployer] Applied: Service atomic-fruit-service.
[INFO] [io.quarkus.kubernetes.deployment.KubernetesDeployer] Applied: ImageStream atomic-fruit-service.
[INFO] [io.quarkus.kubernetes.deployment.KubernetesDeployer] Applied: ImageStream openjdk-11.
[INFO] [io.quarkus.kubernetes.deployment.KubernetesDeployer] Applied: BuildConfig atomic-fruit-service.
[INFO] [io.quarkus.kubernetes.deployment.KubernetesDeployer] Applied: DeploymentConfig atomic-fruit-service.
[INFO] [io.quarkus.kubernetes.deployment.KubernetesDeployer] Applied: Route atomic-fruit-service.
[INFO] [io.quarkus.kubernetes.deployment.KubernetesDeployer] The deployed application can be accessed at: http://atomic-fruit-service-fruit-service-postgresql-dev.apps.cluster-6d30.6d30.example.opentlc.com
[INFO] [io.quarkus.deployment.QuarkusAugmentor] Quarkus augmentation completed in 96673ms
[INFO] ------------------------------------------------------------------------
[INFO] BUILD SUCCESS
[INFO] ------------------------------------------------------------------------
[INFO] Total time:  01:43 min
[INFO] Finished at: 2021-02-09T13:51:33+01:00
[INFO] ------------------------------------------------------------------------
Let’s check that the deployment is setup correctly for remote development. Be patient here, give it some seconds before you see something, you may even need to run it again.
| Dont forget to stop the command by typing Ctrl+C |
oc logs -f dc/atomic-fruit-service | grep -i profile| The important thing is that profile prod-postgresql and live coding have been activated. |
Eventually you’ll see this. It just takes some seconds, be patient.
... [io.quarkus] (Quarkus Main Thread) Profile prod-postgresql activated. Live Coding activated.We need the external route to our service, we’ll save the value in ROUTE_URL to use it later.
export ROUTE_URL="http://$(oc get route/atomic-fruit-service -o jsonpath='{.spec.host}')"Now we have to connect to our application running in remote dev mode, we’ll do it like this.
./mvnw quarkus:remote-dev \
  -Dquarkus.live-reload.url=${ROUTE_URL} \
  -Dquarkus.profile=prod-postgresql
You should see something similar to this:
|
[INFO] Scanning for projects...
[INFO]
[INFO] ------------< com.redhat.atomic.fruit:atomic-fruit-service >------------
[INFO] Building atomic-fruit-service 1.0-SNAPSHOT
[INFO] --------------------------------[ jar ]---------------------------------
[INFO]
[INFO] --- quarkus-maven-plugin:1.10.5.Final:remote-dev (default-cli) @ atomic-fruit-service ---
[INFO] Using 'UTF-8' encoding to copy filtered resources.
[INFO] Copying 5 resources
[INFO] Nothing to compile - all classes are up to date
Listening for transport dt_socket at address: 5005
2021-02-10 11:38:53,921 INFO [org.jbo.threads] (main) JBoss Threads version 3.1.1.Final
2021-02-10 11:38:54,138 INFO [io.qua.kub.dep.KubernetesDeployer] (build-11) Only the first deployment target (which is 'openshift') selected via "quarkus.kubernetes.deployment-target" will be deployed
2021-02-10 11:38:54,329 INFO [org.hib.Version] (build-10) HHH000412: Hibernate ORM core version 5.4.26.Final
2021-02-10 11:38:54,400 WARN [io.qua.arc.pro.BeanArchives] (build-5) Failed to index boolean: Class does not exist in ClassLoader QuarkusClassLoader:Deployment Class Loader
[INFO] Checking for existing resources in: /Users/cvicensa/Projects/openshift/redhat-scholars/java-inner-loop-dev-guide/apps/quarkus-app/src/main/kubernetes.
[INFO] Adding existing Secret with name: fruits-db.
2021-02-10 11:38:56,848 INFO [io.qua.dep.QuarkusAugmentor] (main) Quarkus augmentation completed in 3265ms
2021-02-10 11:38:59,792 INFO [io.qua.ver.htt.dep.dev.HttpRemoteDevClient] (Remote dev client thread) Sending lib/deployment/appmodel.dat
2021-02-10 11:38:59,867 INFO [io.qua.ver.htt.dep.dev.HttpRemoteDevClient] (Remote dev client thread) Sending quarkus-run.jar
2021-02-10 11:38:59,952 INFO [io.qua.ver.htt.dep.dev.HttpRemoteDevClient] (Remote dev client thread) Sending app/atomic-fruit-service-1.0-SNAPSHOT.jar
2021-02-10 11:38:59,989 INFO [io.qua.ver.htt.dep.dev.HttpRemoteDevClient] (Remote dev client thread) Sending lib/deployment/build-system.properties
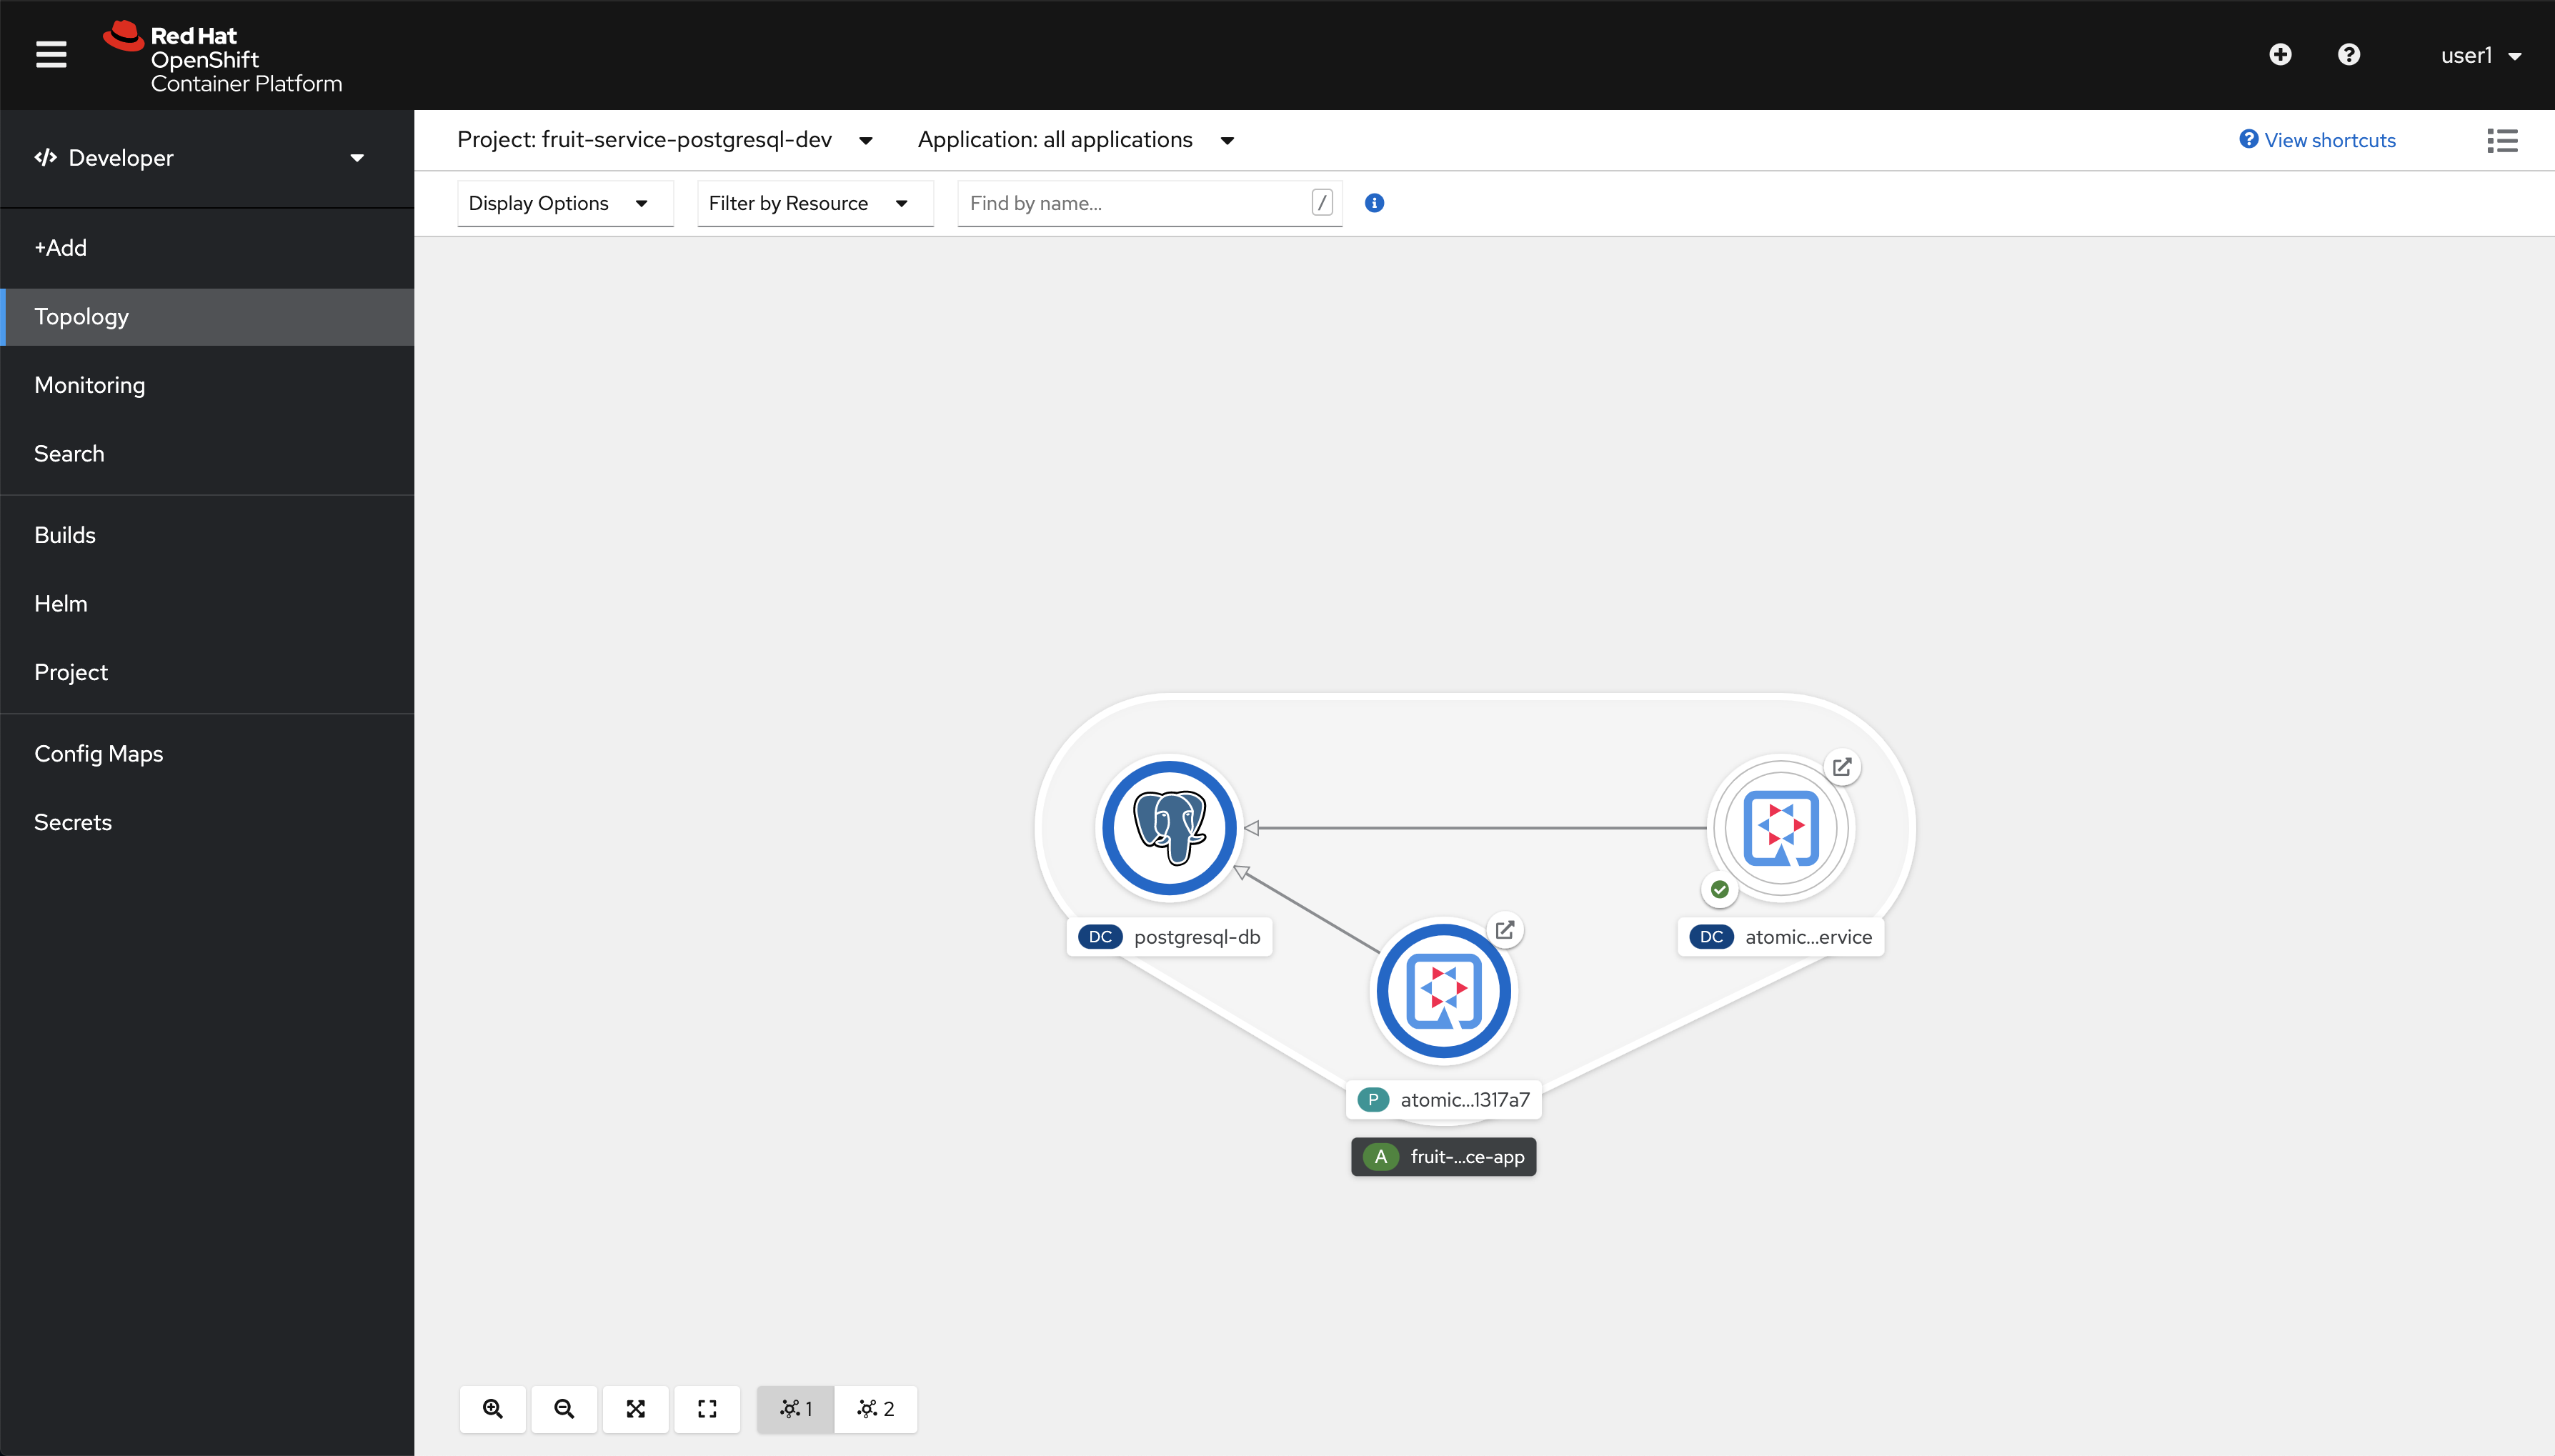
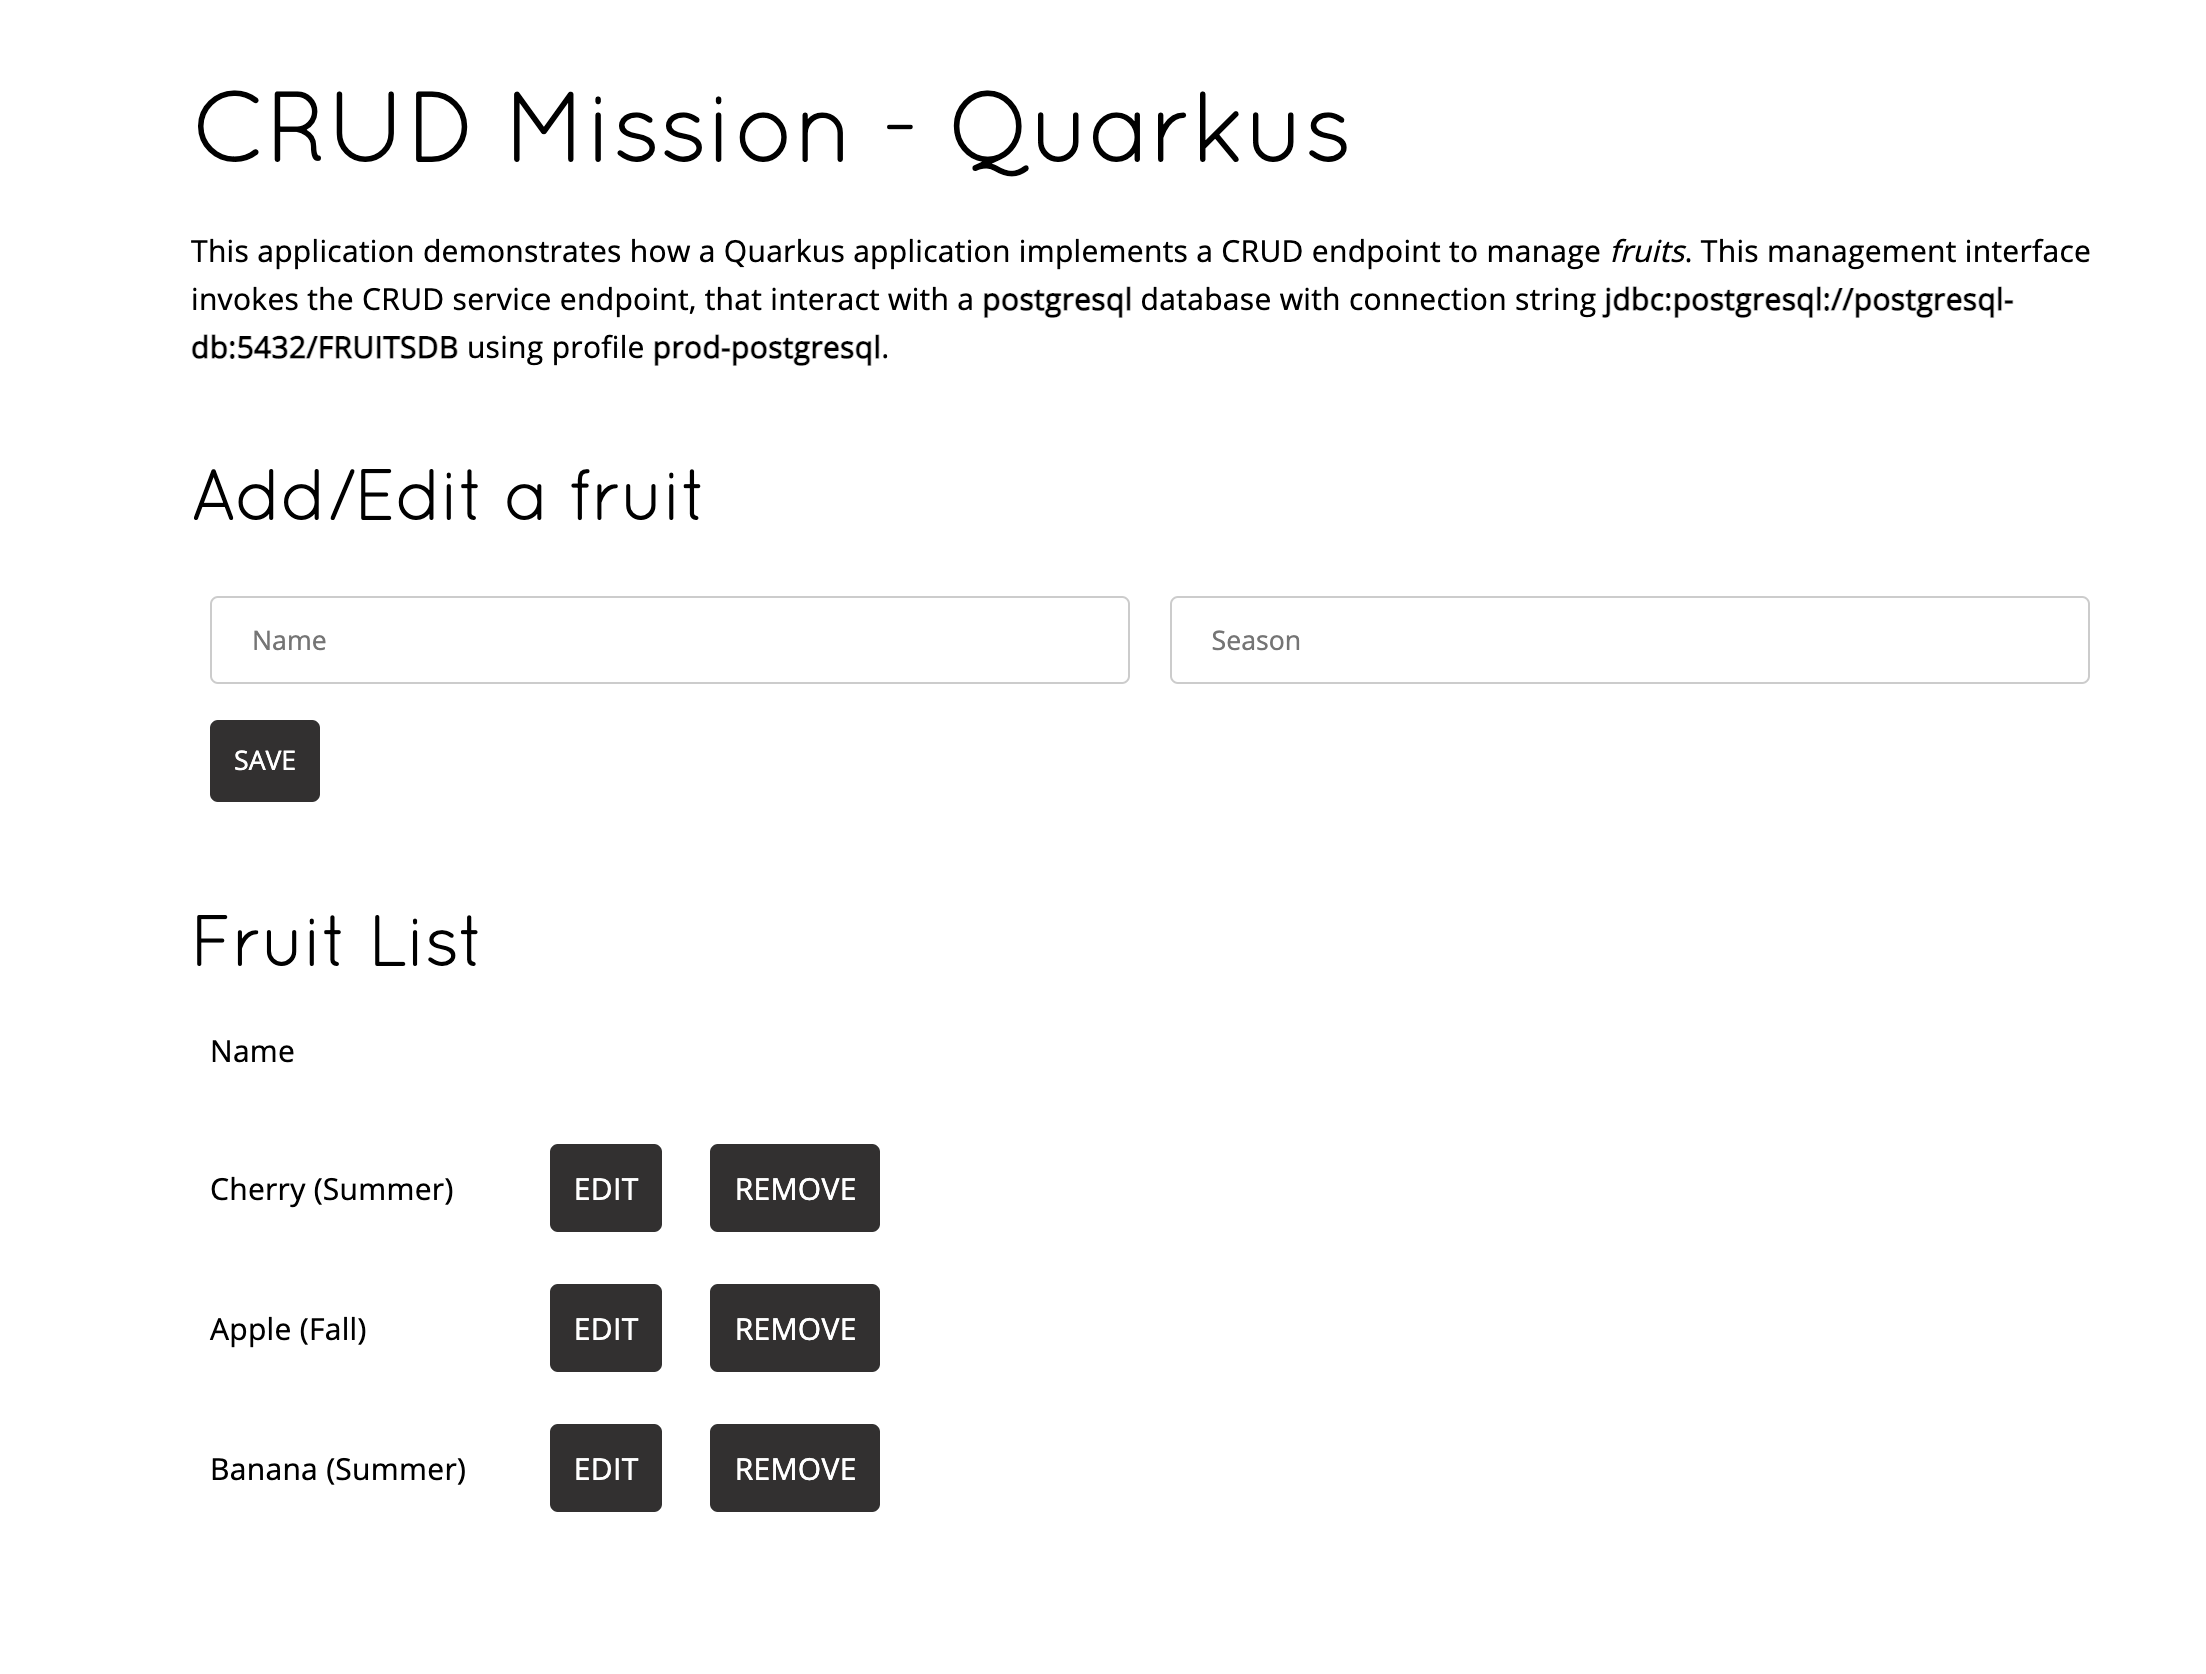
2021-02-10 11:39:00,030 INFO [io.qua.ver.htt.dep.dev.HttpRemoteDevClient] (Remote dev client thread) Connected to remote serverIf you go to the web console you should see this.
Let’s give it a try, shall we?
Open ${ROUTE_URL} in a browser, you should see this.
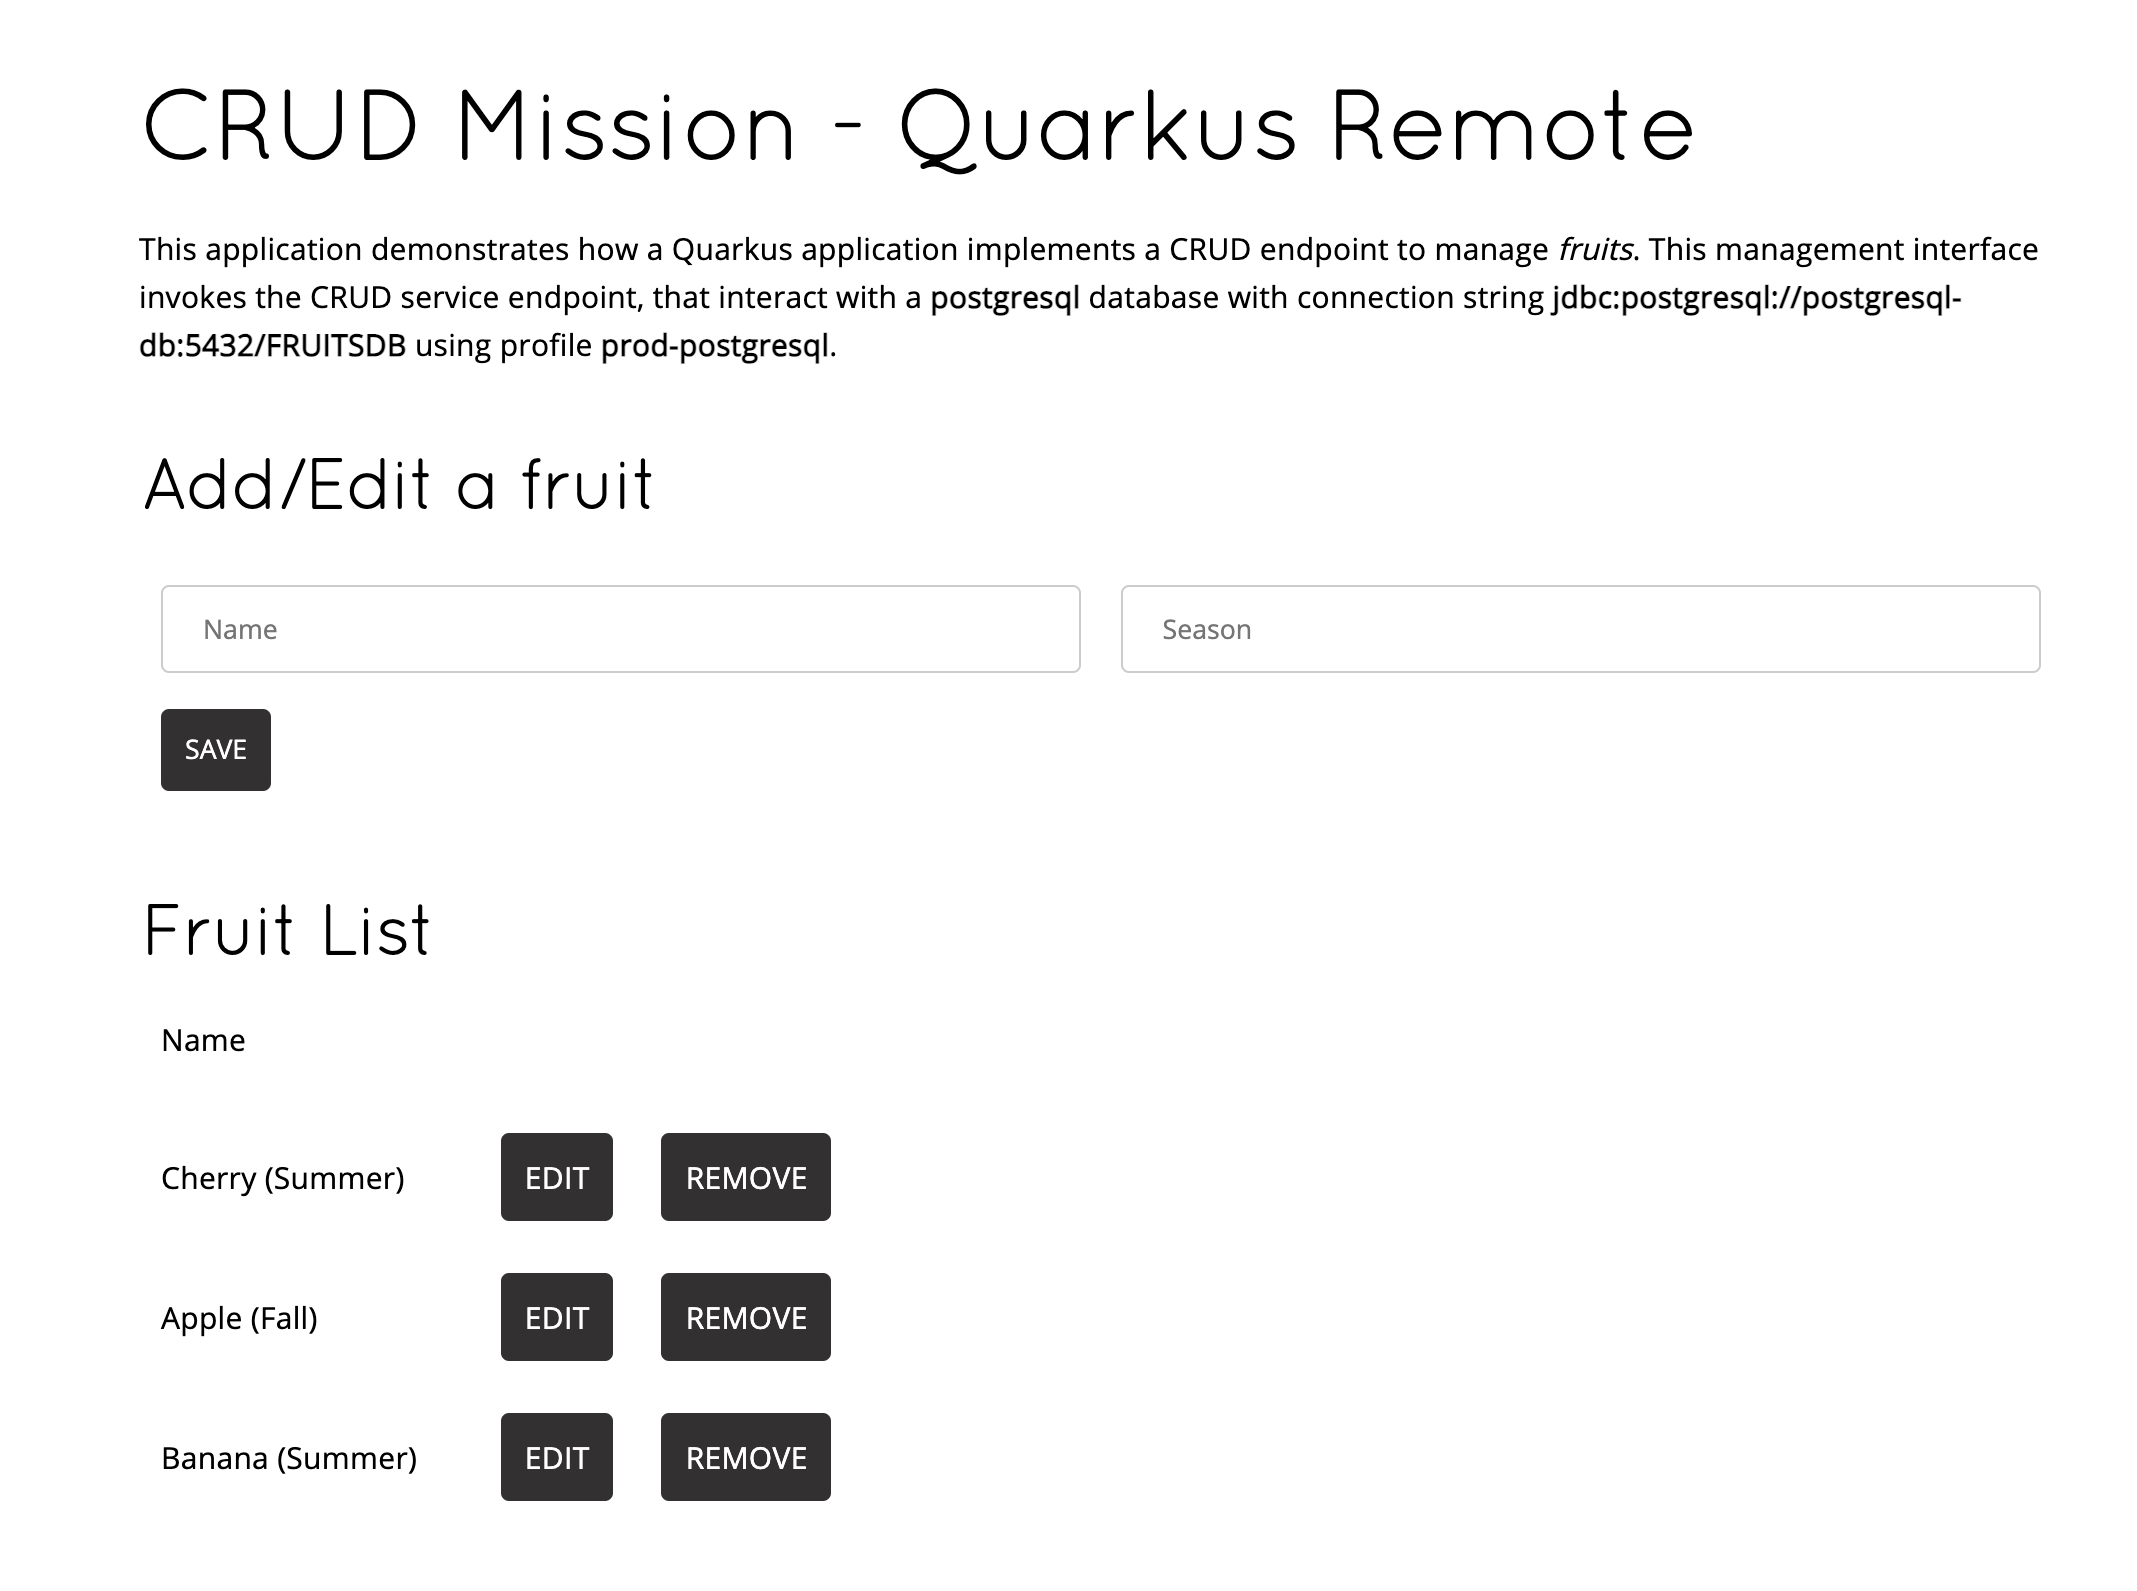
Now go to the editor find src/main/resources/templates/index.html and replace this:
<h1>CRUD Mission - Quarkus</h1>With this:
<h1>CRUD Mission - Quarkus Remote</h1>Changes are automatically detected and sent to the remote application. Check the terminal, you should see these new lines:
2021-02-10 12:21:45,266 INFO  [io.qua.dep.dev.RuntimeUpdatesProcessor] (Remote dev client thread) File change detected: /Users/cvicensa/Projects/openshift/redhat-scholars/java-inner-loop-dev-guide/apps/quarkus-app/src/main/resources/templates/index.html
2021-02-10 12:21:45,678 INFO  [io.qua.kub.dep.KubernetesDeployer] (build-17) Only the first deployment target (which is 'openshift') selected via "quarkus.kubernetes.deployment-target" will be deployed
2021-02-10 12:21:47,092 INFO  [io.qua.dep.QuarkusAugmentor] (Remote dev client thread) Quarkus augmentation completed in 1769ms
2021-02-10 12:21:47,106 INFO  [io.qua.dep.dev.RuntimeUpdatesProcessor] (Remote dev client thread) Hot replace total time: 1.852s
2021-02-10 12:21:48,896 INFO  [io.qua.ver.htt.dep.dev.HttpRemoteDevClient] (Remote dev client thread) Sending dev/app/templates/index.html
2021-02-10 12:21:48,964 INFO  [io.qua.ver.htt.dep.dev.HttpRemoteDevClient] (Remote dev client thread) Sending quarkus-run.jar
2021-02-10 12:21:49,006 INFO  [io.qua.ver.htt.dep.dev.HttpRemoteDevClient] (Remote dev client thread) Sending app/atomic-fruit-service-1.0-SNAPSHOT.jar
2021-02-10 12:21:49,044 INFO  [io.qua.ver.htt.dep.dev.HttpRemoteDevClient] (Remote dev client thread) Sending lib/deployment/build-system.properties
Go back to the UI of our application and refresh change
| Don’t forget that whenever you change a file locally the app is rebuilt and relevant elements and uploaded and refreshed |
| Once you’re done with the remote development mode don’t forget to comment the lines we added before, as in the next exceprt. |
# REMOTE DEV
#quarkus.package.type=mutable-jar
#quarkus.live-reload.password=changeit2
Binary deploy S2I
Finally, imagine that after debugging your code locally you want to redeploy on OpenShift in a similar way but without using the OpenShift extension. Well, this is possible by leveraging Source to Image (S2I) let’s have a look to the BuildConfigs in our project.
Once you have deployed your code using the OpenShift plugin one BuildConfig has been created for you (atomic-fruit-service in this case). But if you had started from the scratch you could have created that BuildConfig by hand and use the technique we’re explaining here.
|
So first of all let’s get the BCs (BuildConfigs) in our namespace:
oc get bc -n ${PROJECT_NAME}You should get this:
NAME                   TYPE     FROM     LATEST
atomic-fruit-service   Source   Binary   1
Let’s read some details:
oc get bc/atomic-fruit-service -o yaml -n ${PROJECT_NAME}We have copied the relevants parts below to focus on the important part of the BC YAML.
Focus on spec→source→type ⇒ Binary this means that in order to build image spec→output→to→name you need to provide a binary file, a JAR file in this case.
|
apiVersion: build.openshift.io/v1
kind: BuildConfig
metadata:
  labels:
    app.kubernetes.io/name: atomic-fruit-service
    app.kubernetes.io/part-of: fruit-service-app
    app.kubernetes.io/version: 1.0-SNAPSHOT
    app.openshift.io/runtime: quarkus
    department: fruity-dept
  name: atomic-fruit-service
  namespace: fruit-service-postgresql-dev
  ...
spec:
  nodeSelector: null
  output:
    to:
      kind: ImageStreamTag
      name: atomic-fruit-service:1.0-SNAPSHOT
  postCommit: {}
  resources: {}
  runPolicy: Serial
  source:
    binary: {}
    type: Binary
  strategy:
    sourceStrategy:
      from:
        kind: ImageStreamTag
        name: openjdk-11:latest
    type: Source
status:
...
Let’s package our application with the right profile and build an image with it:
mvn clean package -DskipTests -Dquarkus.kubernetes.deploy=false -Dquarkus.profile=prod-postgresqlAfter a successful build, let’s start the build of the image in OpenShift:
We have to include target/atomic-fruit-service-1.0-SNAPSHOT-runner.jar and the contents of target/lib/ in a zip file and start a new build with it.
|
zip atomic-fruit-service.zip target/lib/* target/atomic-fruit-service-1.0-SNAPSHOT-runner.jar
oc start-build atomic-fruit-service --from-archive=./atomic-fruit-service.zip -n ${PROJECT_NAME}
rm atomic-fruit-service.zip
As you can see in the output the JAR file is uploaded and a new Build is started.
Uploading archive file "atomic-fruit-service.zip" as binary input for the build ...

Uploading finished
build.build.openshift.io/fruit-service-3 started
And let’s have a look to the logs while the build is happening:
oc logs -f bc/atomic-fruit-service -n ${PROJECT_NAME}Log output from the current build (only relevant lines):
It all starts with Receiving source from STDIN as archive so the image is built from a binary file within OpenShift as we checked out before.
|
Receiving source from STDIN as archive ...
Caching blobs under "/var/cache/blobs".
...
Storing signatures
Generating dockerfile with builder image registry.access.redhat.com/ubi8/openjdk-11@sha256:7921ba01d91c5598595dac9a9216e45cd6b175c22d7d859748304067d2097fae
STEP 1: FROM registry.access.redhat.com/ubi8/openjdk-11@sha256:7921ba01d91c5598595dac9a9216e45cd6b175c22d7d859748304067d2097fae
STEP 2: LABEL "io.openshift.build.image"="registry.access.redhat.com/ubi8/openjdk-11@sha256:7921ba01d91c5598595dac9a9216e45cd6b175c22d7d859748304067d2097fae"       "io.openshift.build.source-location"="/tmp/build/inputs"       "io.openshift.s2i.destination"="/tmp"
STEP 3: ENV OPENSHIFT_BUILD_NAME="atomic-fruit-service-4"     OPENSHIFT_BUILD_NAMESPACE="fruit-service-postgresql-dev"
STEP 4: USER root
STEP 5: COPY upload/src /tmp/src
STEP 6: RUN chown -R 185:0 /tmp/src
STEP 7: USER 185
STEP 8: RUN /usr/local/s2i/assemble
INFO S2I source build with plain binaries detected
INFO Copying binaries from /tmp/src to /deployments ...
target/
target/atomic-fruit-service-1.0-SNAPSHOT-runner.jar
target/lib/
target/lib/antlr.antlr-2.7.7.jar
...
STEP 9: CMD /usr/local/s2i/run
STEP 10: COMMIT temp.builder.openshift.io/fruit-service-postgresql-dev/atomic-fruit-service-4:31d1775e
Getting image source signatures
...
Writing manifest to image destination
Storing signatures
--> cd6e79768eb
cd6e79768ebfd82c7617a115f558e16e9a8bd3a2eeb8be9ae605c8e48ef9b75f

Pushing image image-registry.openshift-image-registry.svc:5000/fruit-service-postgresql-dev/atomic-fruit-service:1.0-SNAPSHOT ...
Getting image source signatures
...
Writing manifest to image destination
Storing signatures
Successfully pushed image-registry.openshift-image-registry.svc:5000/fruit-service-postgresql-dev/atomic-fruit-service@sha256:497f0886ac1d9c5610ec20ea4f899e9617fb549eda28342905ff6369c5af4b2d
Push successful
You can now test the new image as we have done before!