Using Buildah with Containerfiles
20 MINUTE EXERCISE

Though we’ve fixed the issue with quay.io/bfarr/container-workshop-httpd:0.0.6 by using the buildah native command line tools to fix it, there are are still additional steps we could take to make this image even more resilient against attack or exploit. Two core issues are:
-
The web server is running on privileged port 80 in the container. Better to have this run on a non-privileged port above 1024 (such as 8080)
-
Running as a specific user can be problematic as that user can implicitly have privileges afforded to them via
sudo(either at runtime or in the ongoing maintenance of the container). It would be better if we could run the container as the unknown or "anonymous" user
We also have no record of how our previous fix was applied. Though we could store cli commands in a shell script, a better option popularized by container tools like docker is the Dockerfile (or, more generically, Containerfile) way of defining new containers.
Let’s investigate the quay.io/bfarr/container-workshop-httpd:0.0.6 's Containerfile to see if we can address the points above
Lets start building our Containerfile
A Containerfile defines one (or more) base images and a number operations to perform in those images to create a new image.
-
In a normal user terminal, change into this newly created directory
cd /home/%USER%/container-workshop/secure-container
-
An empty file has been initialised called Containerfile which we will use to edit, open this in the editor.
/usr/lib/code-server/bin/code-server -r /home/%USER%/container-workshop/secure-container/Containerfile
-
The empty Containerfile should appear in the editor window. We’ll be slowly adding to this Containerfile bit by bit
-
Copy the lines below, open the
Containerfile, use CTRL+a (or CMD+a on MacOS) to select all the lines of theContainerfileand paste to replace with the contents below. The highlighted lines are the lines that we’re addingFROM registry.access.redhat.com/ubi7 (1) USER root (2)1 FROMis the base container that this container will start from.ubi7stands for "Universal Base Image". It will serve as a secure basis for the rest of our container. See more information on ubi below2 USERindicates that we want to operate as therootuser for all the commands that follow, until anotherUSERdirective is found
-
To get a sense of what we’ve done, let’s build a container from this Containerfile using
buildah. Run the following command:buildah bud \(1) -f Containerfile \(2) -t localhost/secure-container \(3) /home/%USER%/container-workshop/secure-container (4)1 budindicates that buildah should operate from aContainerfile(orDockerfile)2 -findicates a the name of the Containerfile that should be used (in this instance, the one that just created)3 -tnames the tag that should be given to the resultant image4 The final parameter is the directory in which the command should be run
-
You should see output something like this:
Trying to pull registry.access.redhat.com/ubi7:latest...
Getting image source signatures
Checking if image destination supports signatures
Copying blob 1cc60fbe16bd done
Copying blob ffb0ffdba2a9 done
Copying config 5d69408f88 done
Writing manifest to image destination
Storing signatures
STEP 2/2: USER root
COMMIT localhost/secure-container (1)
Getting image source signatures
Copying blob 63c0270243d0 skipped: already exists
Copying blob cbd5a225fe2d skipped: already exists
Copying blob 5f70bf18a086 done
Copying config 1bfdcbed3c done
Writing manifest to image destination
Storing signatures
--> 1bfdcbed3c8
Successfully tagged localhost/secure-container:latest
1bfdcbed3c8de9b6ff4379510d90b49728c99d3b6a73f804aae4761aced129ad
1 Notice that the COMMITcommand is implicit and reminiscent of the buildah native command that we issued
-
Let’s take a look inside the container we’ve just created and check to see if we need to address the bash vulnerability
podman run \
  --rm \
  -it \
  localhost/secure-container \
  bash (1)
1 This argument, always on the other side of the container image to run, represents the command that should be run in the container. When this command exits, the container will exit. Normally containers have a default command, but we haven’t configured that (yet, see later in the lab). For now we’re telling the container to run bashas the sustaining or "root" process of the container[root@0c388bc22ff6 /]#
-
Let’s take a look at the version of
bashthat’s runningyum info bashShould yield:
Loaded plugins: ovl, product-id, search-disabled-repos, subscription-manager

This system is not receiving updates. You can use subscription-manager on the host to register and assign subscriptions.

ubi-7                                                                                                                                                            | 3.8 kB  00:00:00
ubi-7-rhah                                                                                                                                                       | 3.7 kB  00:00:00
ubi-7-server-extras-rpms                                                                                                                                         | 3.7 kB  00:00:00
ubi-7-server-optional-rpms                                                                                                                                       | 3.8 kB  00:00:00
ubi-server-rhscl-7-rpms                                                                                                                                          | 3.8 kB  00:00:00
(1/15): ubi-7/x86_64/updateinfo                                                                                                                                  |   92 B  00:00:00
(2/15): ubi-7/x86_64/primary_db                                                                                                                                  | 800 kB  00:00:00
(3/15): ubi-7-rhah/x86_64/updateinfo                                                                                                                             |   92 B  00:00:00
(4/15): ubi-7-rhah/x86_64/primary_db                                                                                                                             | 2.5 kB  00:00:00
(5/15): ubi-7-server-extras-rpms/x86_64/updateinfo                                                                                                               |   92 B  00:00:00
(6/15): ubi-7-server-extras-rpms/x86_64/primary_db                                                                                                               | 6.8 kB  00:00:00
(7/15): ubi-7-server-optional-rpms/x86_64/updateinfo                                                                                                             |   92 B  00:00:00
(8/15): ubi-7-server-optional-rpms/x86_64/primary_db                                                                                                             |  14 kB  00:00:00
(9/15): ubi-7/x86_64/group                                                                                                                                       |  124 B  00:00:01
(10/15): ubi-server-rhscl-7-rpms/x86_64/updateinfo                                                                                                               |   92 B  00:00:00
(11/15): ubi-server-rhscl-7-rpms/x86_64/primary_db                                                                                                               | 396 kB  00:00:00
(12/15): ubi-7-rhah/x86_64/group                                                                                                                                 |  124 B  00:00:00
(13/15): ubi-7-server-extras-rpms/x86_64/group                                                                                                                   |  124 B  00:00:00
(14/15): ubi-server-rhscl-7-rpms/x86_64/group                                                                                                                    |  124 B  00:00:00
(15/15): ubi-7-server-optional-rpms/x86_64/group                                                                                                                 |  124 B  00:00:01
Installed Packages
Name        : bash
Arch        : x86_64
Version     : 4.2.46
Release     : 34.el7
Size        : 3.5 M
Repo        : installed
From repo   : anaconda
Summary     : The GNU Bourne Again shell
URL         : http://www.gnu.org/software/bash
License     : GPLv3+
Description : The GNU Bourne Again shell (Bash) is a shell or command language
            : interpreter that is compatible with the Bourne shell (sh). Bash
            : incorporates useful features from the Korn shell (ksh) and the C shell
            : (csh). Most sh scripts can be run by bash without modification.
Be sure to exit the container to get back to the host
exit
Notice that the version (highlighted), is the same version that we installed in the previous exercise with the dnf install command via buildah. Why didn’t we have to patch bash? While Shellshock is by now an old CVE, this demonstrates more broadly the value of starting your container with one of Red Hat’s Universal Base Images. These images are updated every quarter, their internal packages patched by Red Hat to fix all known CVEs. For more in depth information on the UBI program see here
Running Commands in a Containerfile
Our image is a good start, but it doesn’t yet have a webserver on it; this is something we’re going to have to install. As we’ve seen, the UBI base has yum installed in it. So instead of using buildah native commands we can instead add directives to the Containerfile to RUN commands within the Container as it’s being built.
-
Copy the lines below, open the
Containerfile, use CTRL+a (or CMD+a on MacOS) to select all the lines of theContainerfileand paste to replace with the contents below. The highlighted lines are the lines that we’re addingFROM registry.access.redhat.com/ubi7 USER root RUN yum install -y httpd && yum update -y && yum clean all (1)1 The RUNdirective allows us to run a command as the user currently selected by theUSERdirective. In this instance we chain a bunch of yum commands together to install our httpd server, ensure that all our packages are up to date (there may have been CVE patches since the last publishing of the ubi base image), and cleanup any temporary files (as we don’t want these bloating the size of our final image)
-
Now from the terminal run the following command to build our container
buildah bud \
  -f Containerfile \
  -t localhost/secure-container \
  /home/%USER%/container-workshop/secure-container
-
This should yield output similar[1] to the following:
STEP 1: FROM registry.access.redhat.com/ubi7
STEP 2: USER root
STEP 3: RUN yum install -y httpd && yum update -y && yum clean all
Loaded plugins: ovl, product-id, search-disabled-repos, subscription-manager

This system is not receiving updates. You can use subscription-manager on the host to register and assign subscriptions.

Resolving Dependencies
--> Running transaction check
---> Package httpd.x86_64 0:2.4.6-97.el7_9 will be installed
--> Processing Dependency: httpd-tools = 2.4.6-97.el7_9 for package: httpd-2.4.6-97.el7_9.x86_64
--> Processing Dependency: system-logos >= 7.92.1-1 for package: httpd-2.4.6-97.el7_9.x86_64
--> Processing Dependency: /etc/mime.types for package: httpd-2.4.6-97.el7_9.x86_64
--> Processing Dependency: libapr-1.so.0()(64bit) for package: httpd-2.4.6-97.el7_9.x86_64
--> Processing Dependency: libaprutil-1.so.0()(64bit) for package: httpd-2.4.6-97.el7_9.x86_64
--> Running transaction check
---> Package apr.x86_64 0:1.4.8-7.el7 will be installed
---> Package apr-util.x86_64 0:1.5.2-6.el7 will be installed
---> Package httpd-tools.x86_64 0:2.4.6-97.el7_9 will be installed
---> Package mailcap.noarch 0:2.1.41-2.el7 will be installed
---> Package redhat-logos.noarch 0:70.7.0-1.el7 will be installed
--> Finished Dependency Resolution

Dependencies Resolved

================================================================================
 Package              Arch           Version                Repository     Size
================================================================================
Installing:
 httpd                x86_64         2.4.6-97.el7_9         ubi-7         1.2 M
Installing for dependencies:
 apr                  x86_64         1.4.8-7.el7            ubi-7         104 k
 apr-util             x86_64         1.5.2-6.el7            ubi-7          92 k
 httpd-tools          x86_64         2.4.6-97.el7_9         ubi-7          93 k
 mailcap              noarch         2.1.41-2.el7           ubi-7          31 k
 redhat-logos         noarch         70.7.0-1.el7           ubi-7          13 M

Transaction Summary
================================================================================
Install  1 Package (+5 Dependent packages)

Total download size: 15 M
Installed size: 18 M
Downloading packages:
warning: /var/cache/yum/x86_64/7Server/ubi-7/packages/apr-1.4.8-7.el7.x86_64.rpm: Header V3 RSA/SHA256 Signature, key ID fd431d51: NOKEY
Public key for apr-1.4.8-7.el7.x86_64.rpm is not installed
--------------------------------------------------------------------------------
Total                                              4.2 MB/s |  15 MB  00:03
Retrieving key from file:///etc/pki/rpm-gpg/RPM-GPG-KEY-redhat-release
Importing GPG key 0xFD431D51:
 Userid     : "Red Hat, Inc. (release key 2) <security@redhat.com>"
 Fingerprint: 567e 347a d004 4ade 55ba 8a5f 199e 2f91 fd43 1d51
 Package    : redhat-release-server-7.9-6.el7_9.x86_64 (@anaconda/7.9)
 From       : /etc/pki/rpm-gpg/RPM-GPG-KEY-redhat-release
Importing GPG key 0x2FA658E0:
 Userid     : "Red Hat, Inc. (auxiliary key) <security@redhat.com>"
 Fingerprint: 43a6 e49c 4a38 f4be 9abf 2a53 4568 9c88 2fa6 58e0
 Package    : redhat-release-server-7.9-6.el7_9.x86_64 (@anaconda/7.9)
 From       : /etc/pki/rpm-gpg/RPM-GPG-KEY-redhat-release
Running transaction check
Running transaction test
Transaction test succeeded
Running transaction
  Installing : apr-1.4.8-7.el7.x86_64                                       1/6
  Installing : apr-util-1.5.2-6.el7.x86_64                                  2/6
  Installing : httpd-tools-2.4.6-97.el7_9.x86_64                            3/6
  Installing : redhat-logos-70.7.0-1.el7.noarch                             4/6
  Installing : mailcap-2.1.41-2.el7.noarch                                  5/6
  Installing : httpd-2.4.6-97.el7_9.x86_64                                  6/6
  Verifying  : httpd-tools-2.4.6-97.el7_9.x86_64                            1/6
  Verifying  : mailcap-2.1.41-2.el7.noarch                                  2/6
  Verifying  : apr-1.4.8-7.el7.x86_64                                       3/6
  Verifying  : apr-util-1.5.2-6.el7.x86_64                                  4/6
  Verifying  : httpd-2.4.6-97.el7_9.x86_64                                  5/6
  Verifying  : redhat-logos-70.7.0-1.el7.noarch                             6/6

Installed:
  httpd.x86_64 0:2.4.6-97.el7_9

Dependency Installed:
  apr.x86_64 0:1.4.8-7.el7                  apr-util.x86_64 0:1.5.2-6.el7
  httpd-tools.x86_64 0:2.4.6-97.el7_9       mailcap.noarch 0:2.1.41-2.el7
  redhat-logos.noarch 0:70.7.0-1.el7

Complete!
Loaded plugins: ovl, product-id, search-disabled-repos, subscription-manager

This system is not receiving updates. You can use subscription-manager on the host to register and assign subscriptions.

No packages marked for update
Loaded plugins: ovl, product-id, search-disabled-repos, subscription-manager

This system is not receiving updates. You can use subscription-manager on the host to register and assign subscriptions.

Cleaning repos: ubi-7 ubi-7-rhah ubi-7-server-extras-rpms
              : ubi-7-server-optional-rpms ubi-server-rhscl-7-rpms
STEP 4: COMMIT localhost/secure-container
Getting image source signatures
Copying blob 01d2fb866535 skipped: already exists
Copying blob 9e12a51e507a skipped: already exists
Copying blob 2c4e14cad8b6 done
Copying config 7ca1aec798 done
Writing manifest to image destination
Storing signatures
--> 7ca1aec798c
7ca1aec798cefd27597d423beb41087afd112c5915d1cdea34269a46665866f9
Copying files from the old container into the new secure container
So far we have got a container image that is able to run a generic apache site, but how do we customize this to run our specific site? This is where another Container file directive, COPY comes in.
In this section we’re going to get a little help from the buildah native commands to retrieve our custom content from our old container
quay.io/bfarr/container-workshop-httpd. Then we’re going to show how we can use COPY and the Containerfile to get those assets onto our container
-
First let’s leverage
buildahto pull our custom website files onto our host. We’ll need to mount the container and since we’re not a root user we’re going to first need to issuebuildah unshare[root@ansible-1 ~]#
-
Next we’ll run the next few commands to mount the old insecure container
Normally a team would already have custom content handy on the host already. In this instance we’re wanting to show off
buildaha little more but it is a reasonably typical practice to copy files from one container image to another, particularly in build scenarios where assets are built in one container and copied to another. This use case is out of the scope of this workshop however.WORKING_CONTAINER_OLD=$(buildah from quay.io/bfarr/container-workshop-httpd)WORKING_CONTAINER_OLD_IMAGE_MOUNT=$(buildah mount ${WORKING_CONTAINER_OLD})
-
Now we don’t want very many files from the old container, we only want the files involved with our guestbook website. We can pull them out and into our
Containerfileworking directory by running the following commandscp ${WORKING_CONTAINER_OLD_IMAGE_MOUNT}/var/www/cgi-bin/log-visitor.sh /home/%USER%/container-workshop/secure-containercp ${WORKING_CONTAINER_OLD_IMAGE_MOUNT}/var/www/html/hello.html /home/%USER%/container-workshop/secure-containercp ${WORKING_CONTAINER_OLD_IMAGE_MOUNT}/etc/httpd/conf/httpd.conf /home/%USER%/container-workshop/secure-container
-
At this point you should see the three files appear in the
secure-containerdirectory.ls /home/%USER%/container-workshop/secure-container
-
Now that we’ve retrieved the files, we can exit the
buildah unsharesessionexit[%USER%@ansible-1 ~]$ -
Copy the lines below, open the
Containerfile, use CTRL+a (or CMD+a on MacOS) to select all the lines of theContainerfileand paste to replace with the contents below. The highlighted lines are the lines that we’re addingFROM registry.access.redhat.com/ubi7 USER root RUN yum install -y httpd && yum update -y && yum clean all COPY hello.html /var/www/html (1) COPY log-visitor.sh /var/www/cgi-bin COPY httpd.conf /etc/httpd/conf/httpd.conf RUN chmod 755 /var/www/cgi-bin/log-visitor.sh (2)1 The COPYdirective moves files from the current working directory on the host and copies them to the specified location in the container image (in this case/var/www/html). This is analogous to what we did before with thebuildah mountcommands2 To ensure our cgi-bin script has execute privileges it’s generally good practice to use a RUNdirective to use thechmodcommand to ensure this.
Improving Container Security
Now that we have the basics of our new image, let’s attempt to address some of the security concerns we mentioned at the start.
Privileged Ports
One issue we mentioned is that the webserver in our original image is attempting to bind to a privileged port. Furthmore, since we’re no longer planning to run the apache server as root this is not possible.
For our apache webserver we’re going to need to change its default configuration file. In the last section we already copied the httpd.conf out of the (old) container. Now we can edit it locally before we copy it back in
-
To edit the apache server configuration, click on the
httpd.conffile to edit it in VSCode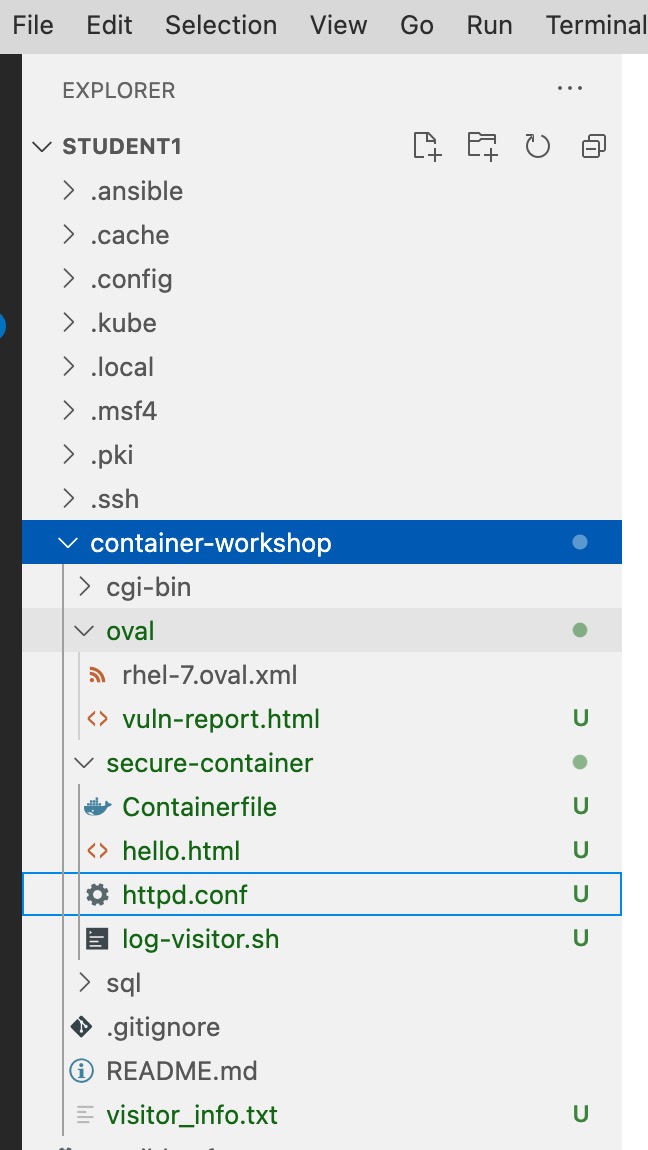
-
Use CTRL+f (or CMD+f) to search for the
Listendirective near the start of thehttpd.conf
-
Change this line so that it matches the highlighted line so that the server listens on port 8080 (instead of 80)
#
ServerRoot "/etc/httpd"

#
# Listen: Allows you to bind Apache to specific IP addresses and/or
# ports, instead of the default. See also the <VirtualHost>
# directive.
#
# Change this to Listen on specific IP addresses as shown below to
# prevent Apache from glomming onto all bound IP addresses.
#
# Listen 12.34.56.78:80
Listen 8080

#
# Dynamic Shared Object (DSO) Support
#
-
We don’t want the configuration to specify that our web server should run as
root. Remove (or comment out) the lines that are struckthrough in yourhttpd.conf# # If you wish httpd to run as a different user or group, you must run # httpd as root initially and it will switch. # # User/Group: The name (or #number) of the user/group to run httpd as. # It is usually good practice to create a dedicated user and group for # running httpd, as with most system services. # User root Group root # User apache # Group apache # 'Main' server configuration
-
Next let’s rebuild the container so that it includes the edits we just made to
httpd.conflocallybuildah bud \ -f Containerfile \ -t localhost/secure-container \ /home/%USER%/container-workshop/secure-container
-
This should yield output similar to before but appended with the following (
…represents content that has been omitted)STEP 1: FROM registry.access.redhat.com/ubi7 ... STEP 4: COPY hello.html /var/www/html STEP 5: COPY log-visitor.sh /var/www/cgi-bin STEP 6: COPY httpd.conf /etc/httpd/conf/httpd.conf STEP 7: RUN chmod 755 /var/www/cgi-bin/log-visitor.sh STEP 8: COMMIT localhost/secure-container Getting image source signatures Copying blob 132ca6509b35 skipped: already exists Copying blob 1eaba82ed886 skipped: already exists Copying blob cc1db2cbf9f1 done Copying config 2e4e3518ba done Writing manifest to image destination Storing signatures --> 2e4e3518bab 2e4e3518babb0c918576f55399ae533191db263959d2d3e244f07a05bc228131
Running as an "Arbitrary User"
To futher limit the attack surface of containers, Kubernetes products such as OpenShift by default run containers with an arbitrarily assigned user. This effectively overrides the USER directive of the Containerfile. Explanation and reasons for this can be found here.
When a container is run with an arbitrary user, the only thing that we are guaranteed is that the user will be part of the root group. This fact will become important in a minute. First let’s take a look at what happens to our current version of the container when we attempt to run as a random user
-
We can already run our container image with an arbitrary user using the
-uflag withpodman run. Let’s attempt to run our container.podman run \ --rm \ -u $((1000 + ${RANDOM})) \(1) -p 8080:8080/tcp \ --name my-web-server \ localhost/secure-container \ /usr/sbin/httpd -DFOREGROUND1 -uallows us to override the user the container should be run as. In this case we’re using${RANDOM}[2] offset by 1000 (to prevent collisions with existing users in the container)
-
You’ll notice that it fails with this error message
AH00558: httpd: Could not reliably determine the server's fully qualified domain name, using 10.0.2.100. Set the 'ServerName' directive globally to suppress this message (13)Permission denied: AH00058: Error retrieving pid file /run/httpd/httpd.pid AH00059: Remove it before continuing if it is corrupted.The issue here is that by default an arbitrary user won’t have access to most of the files that the webserver needs to run. This is where the fact that our arbitrary user will always be part of the
rootgroup (gid:0) will come in handy. We need to make sure that therootgroup is assigned to the files and folders that the webserver needs and that the group has appropriate permissions.The process for doing this might be one of trial and error if you’re not familiar with the software that you’re attempting to run in the container. In this case we know exactly which directories need to be adjusted. Let’s return to the
Containerfile
-
Copy the lines below, open the
Containerfile, use CTRL+a (or CMD+a on MacOS) to select all the lines of theContainerfileand paste to replace with the contents below. The highlighted lines are the lines that we’re addingFROM registry.access.redhat.com/ubi7 USER root RUN yum install -y httpd && yum update -y && yum clean all COPY hello.html /var/www/html COPY log-visitor.sh /var/www/cgi-bin COPY httpd.conf /etc/httpd/conf/httpd.conf RUN chmod 755 /var/www/cgi-bin/log-visitor.sh RUN chown -R 1001:0 /run/httpd && chmod -R g=u /run/httpd (1) RUN chown -R 1001:0 /var/log/httpd/ && chmod -R g=u /var/log/httpd/ (2) USER 10011 chownhere recursively puts the/run/httpddirectory and anything in it under the ownership of therootgroup (gid:0) and thenchmodrecursively sets group permissions to match existing user permissions2 chownhere recursively puts the/var/log/httpddirectory and anything in it under the ownership of therootgroup (gid:0) and thenchmodrecursively sets group permissions to match existing user permissions
Final Touches
Our container is in pretty good shape, but there are some finishing touches we should add before it’s suitable to be run in the wild.
For starters, it’s a little annoying that we have to manually specify the httpd command (and the -DFOREGROUND option) every time in order to get the container to run as we intended.
podman run \
--rm \
-u $((1000 + ${RANDOM})) \
-p 8080:8080/tcp
--name my-web-server \
localhost/secure-container \
/usr/sbin/httpd -DFOREGROUNDFor this we can add a directive to our Containerfile called CMD which tells the container runtime which command should be executed to start the container[3]
The other thing that would be good to advertise is the port that the container listens on at runtime (now 8080). There is a directive for this as well called EXPOSE. This does not actually publish the port but rather serves as documentation between the person who builds the image and those that run it (or, as we’ll see, a container orchestration platform such as Kubernetes)
-
Copy the lines below, open the
Containerfile, use CTRL+a (or CMD+a on MacOS) to select all the lines of theContainerfileand paste to replace with the contents below. The highlighted lines are the lines that we’re addingFROM registry.access.redhat.com/ubi7 USER root RUN yum install -y httpd && yum update -y && yum clean all COPY hello.html /var/www/html COPY log-visitor.sh /var/www/cgi-bin COPY httpd.conf /etc/httpd/conf/httpd.conf RUN chmod 755 /var/www/cgi-bin/log-visitor.sh RUN chown -R 1001:0 /run/httpd && chmod -R g=u /run/httpd RUN chown -R 1001:0 /var/log/httpd/ && chmod -R g=u /var/log/httpd/ EXPOSE 8080/tcp (1) USER 1001 CMD /usr/sbin/httpd -DFOREGROUND (2)1 as with port forwarding in podman runwe can specify the protocol (tcp)2 This is the same command we were running manually with podman run
-
Build the container
buildah bud \
  -f Containerfile \
  -t localhost/secure-container \
  /home/%USER%/container-workshop/secure-container
-
This should yield output similar to before but appended with the following (… represents content that has been omitted)
STEP 1: FROM registry.access.redhat.com/ubi7
...
STEP 9: RUN chown -R 1001:0 /var/log/httpd/ && chmod -R g=u /var/log/httpd/
STEP 10: EXPOSE 8080/tcp
STEP 11: USER 1001
STEP 12: CMD /usr/sbin/httpd -DFOREGROUND
STEP 13: COMMIT localhost/secure-container
Getting image source signatures
Copying blob 01d2fb866535 skipped: already exists
Copying blob 9e12a51e507a skipped: already exists
Copying blob 03c598179387 done
Copying config 8d4a377b07 done
Writing manifest to image destination
Storing signatures
--> 8d4a377b076
8d4a377b0765f588561fa9f842a6c19459431c4f360bf0baac2d8a623983a5f5
-
Run the container again to test it (notice the differences in the command)
podman run \
    --rm \
    -u $((1000 + ${RANDOM})) \
    -d \
    -P \(1)
    --name my-web-server \
    localhost/secure-container (2)
1 the -Pflag leverages theEXPOSEdirectives from theContainerfileand forwards all exposed ports to random ports on the host2 notice that no command is provided on the command line
-
You’ll notice that we can no longer hit the webserver at port 8081 (or it’s at least very unlikely that we can) and instead we need to find out the port that podman assigned on the host. Capture that with this command:
HOST_PORT=$(podman ps \(1)
    -f name=my-web-server \(2)
    --format json | jq -r ".[0].Ports[0].host_port") (3)
1 The output of this string of commands will give us the port on the host that is forwarded to our exposed container port 2 This returns only information for containers with the name my-web-server3 --formatreturns extended information in JSON format which we pipe to thejqcommand to quickly parse the JSON for the field we’re after
-
Next, we’re pretty-print the url of our guestbook so that we can paste it into our Browser Preview window
echo "http://localhost:${HOST_PORT}/hello.html"
-
Copy the echo’ed string into the Browser Preview window
If you hover over the string in the terminal window with your mouse you might be prompted to CTRL-click (or CMD-click on Mac OSX) to open the link in your browser. This will not work because it will open the URL in your browser instead of in the Browser Preview of your VSCode host instance.

-
You should now see your guestbook
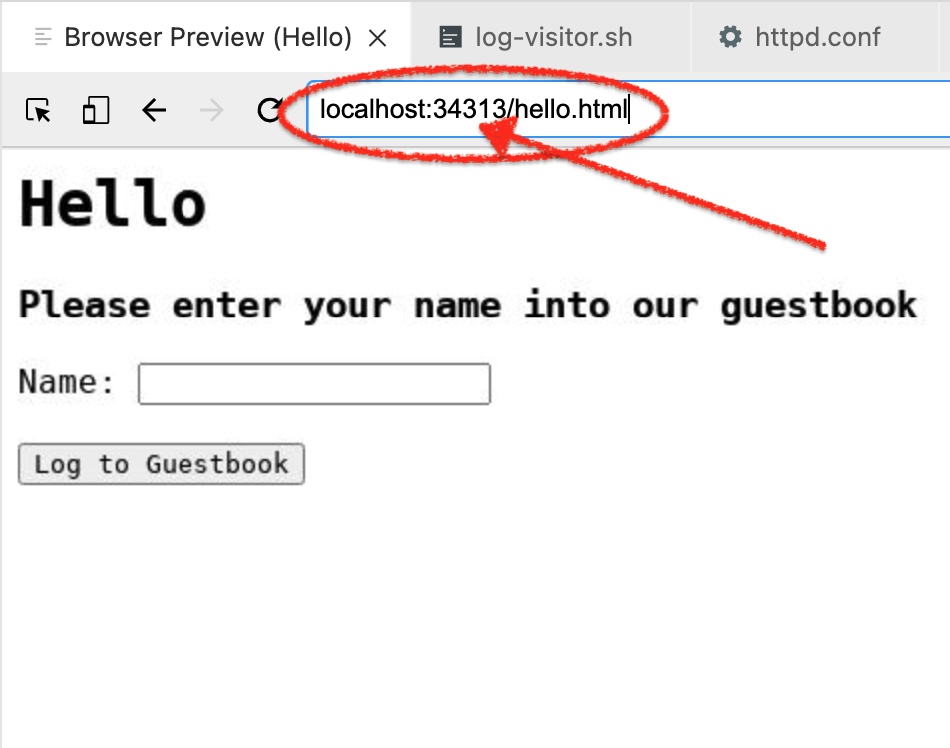 Figure 1. Guestbook, but now at an arbitrary port
-
Finally, go ahead and "sign" the guestbook by entering your name (such as "Alice") and pressing
Log to Guestbook. When you do so, you should see the following page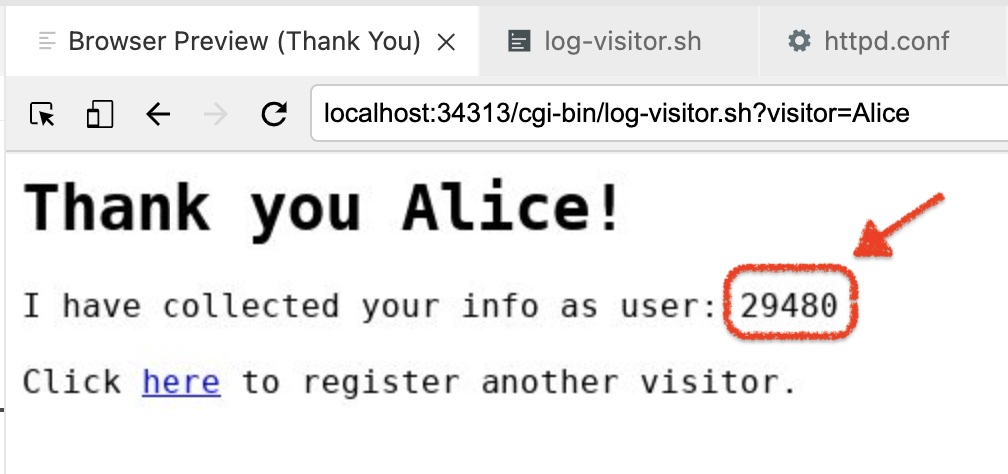 Figure 2. Notice the random uid (yours will vary)
Congratulations! You’ve built a secure container from the ground up. Next we’ll look at ways of getting our container out there in the world using Kubernetes.