CH2 ConsoleQuickStarts
2.1 ConsoleQuickStart Basic Usage
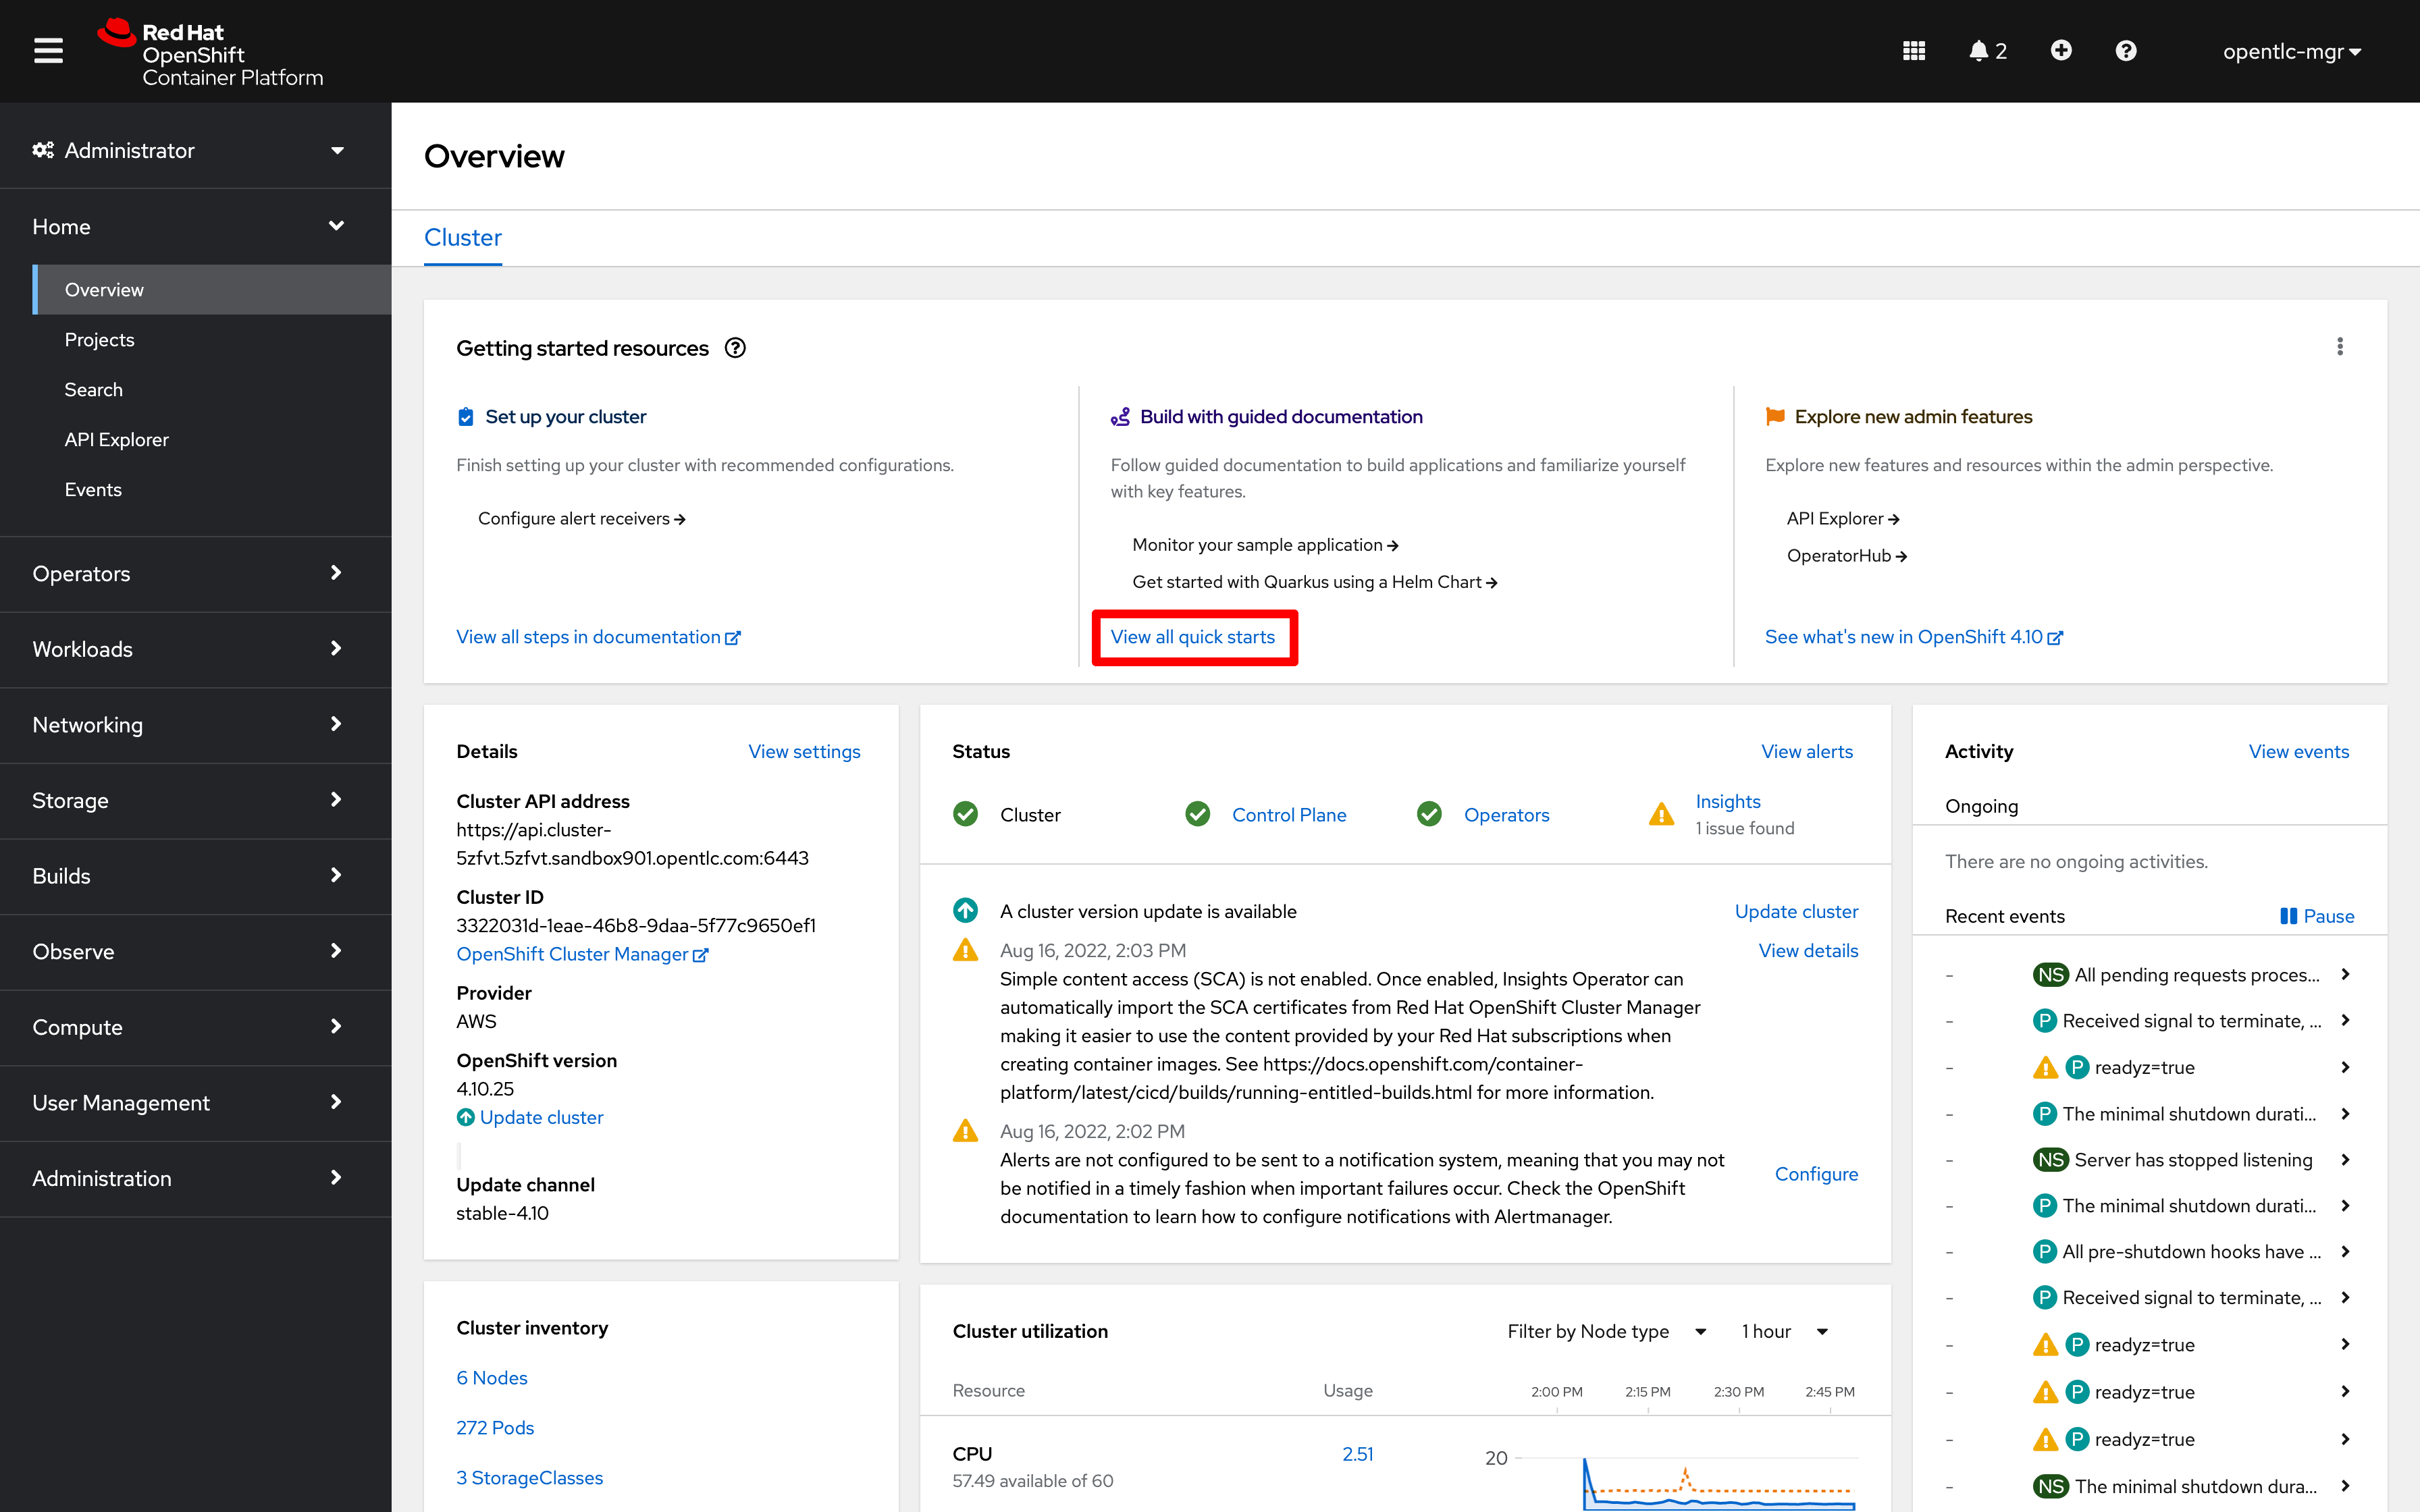
The ConsoleQuickStart custom resource provides a convienient way to offer guided experiences and usage documentation within the OpenShift Console.
-
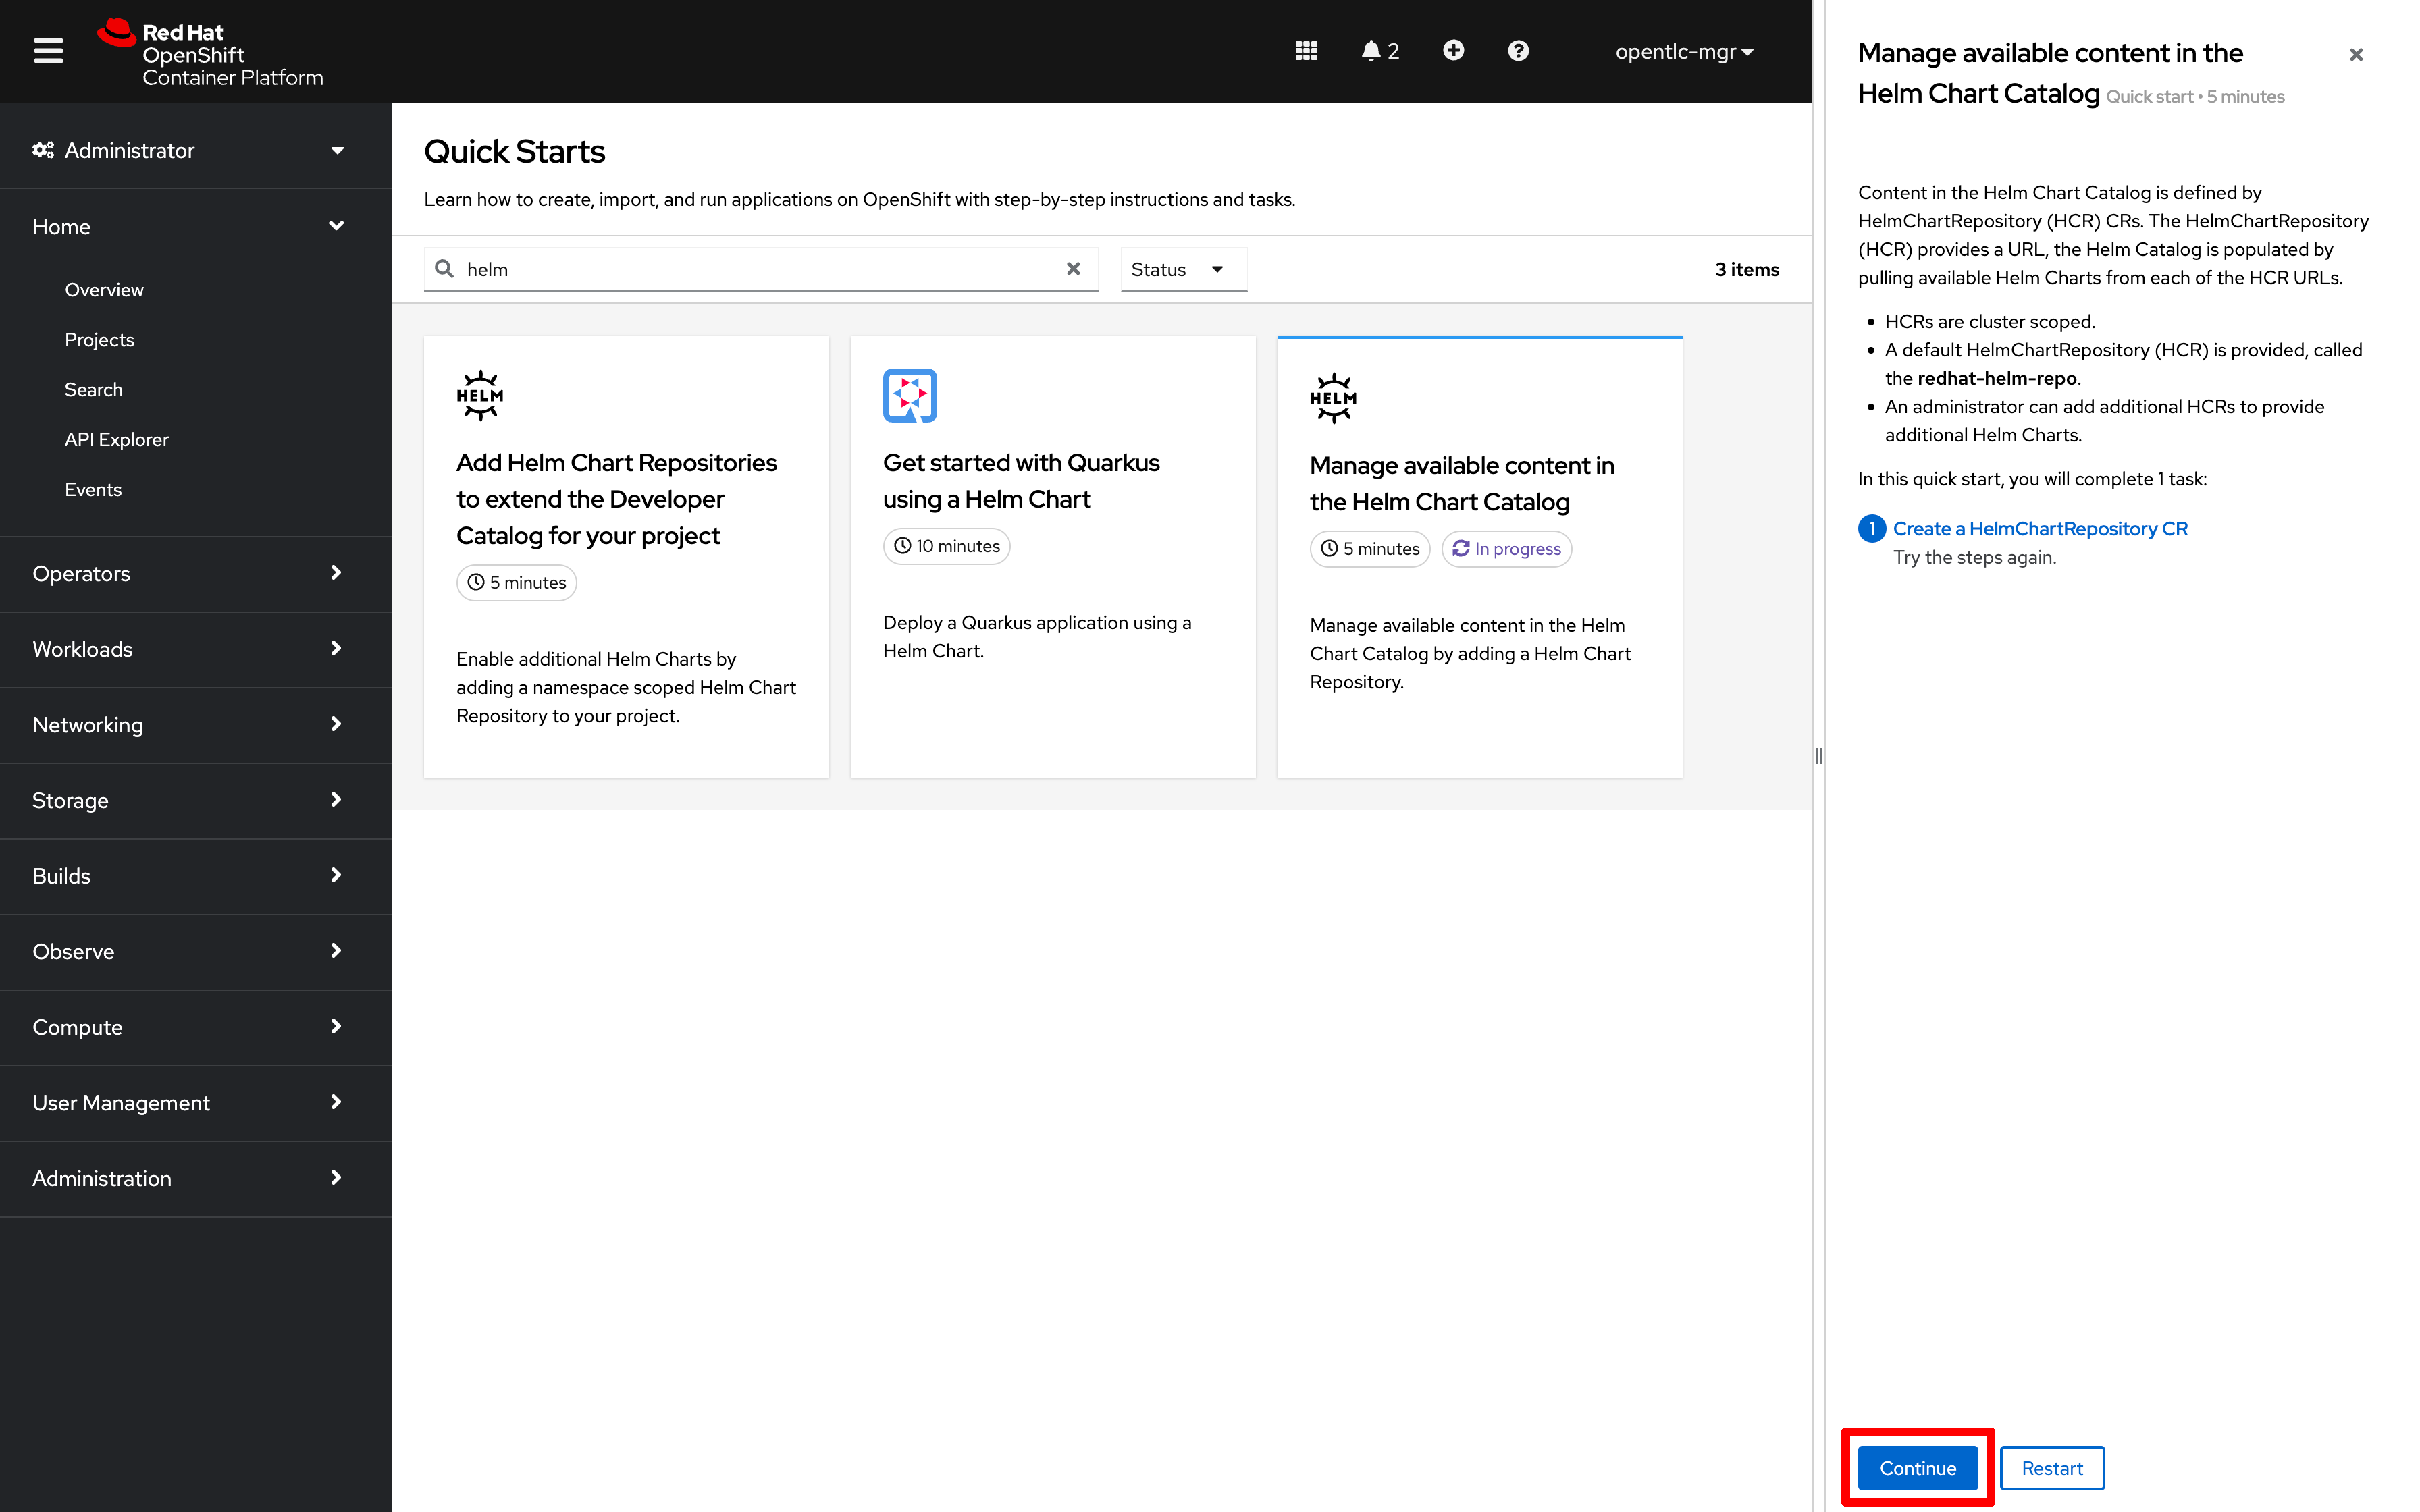
From the Overview page, Choose the "View all quick starts" link within the "Getting started resources" section
-
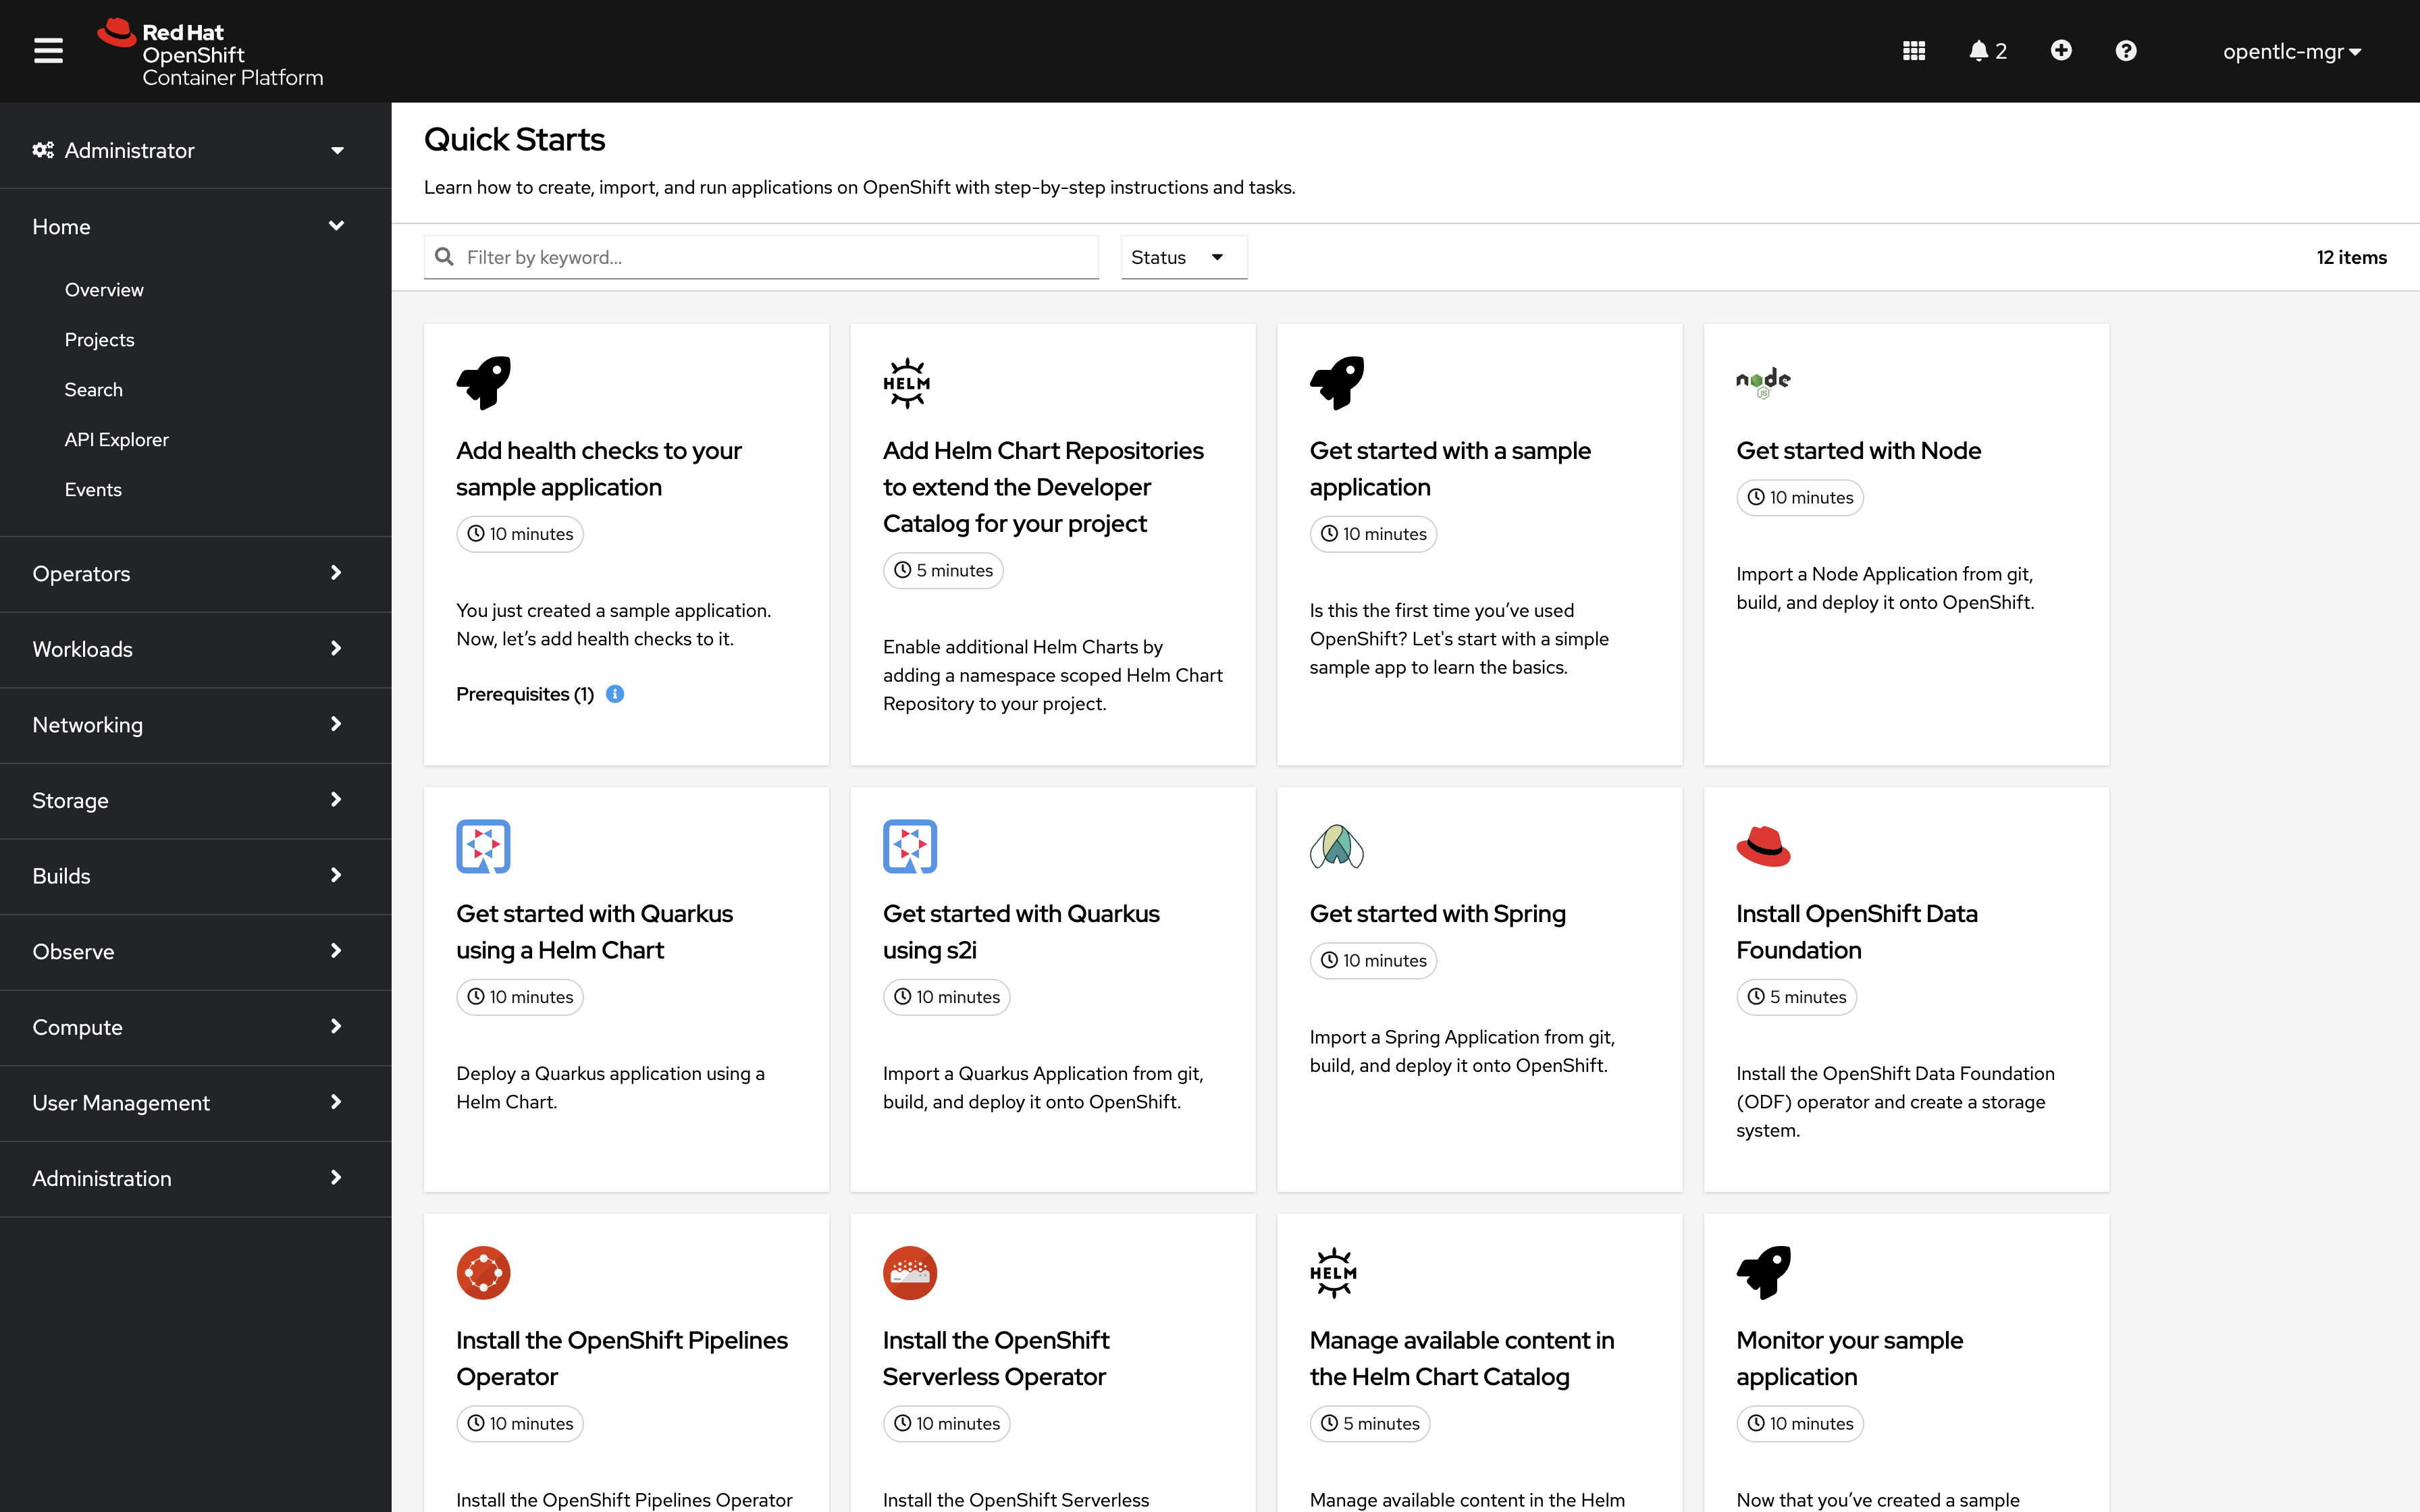
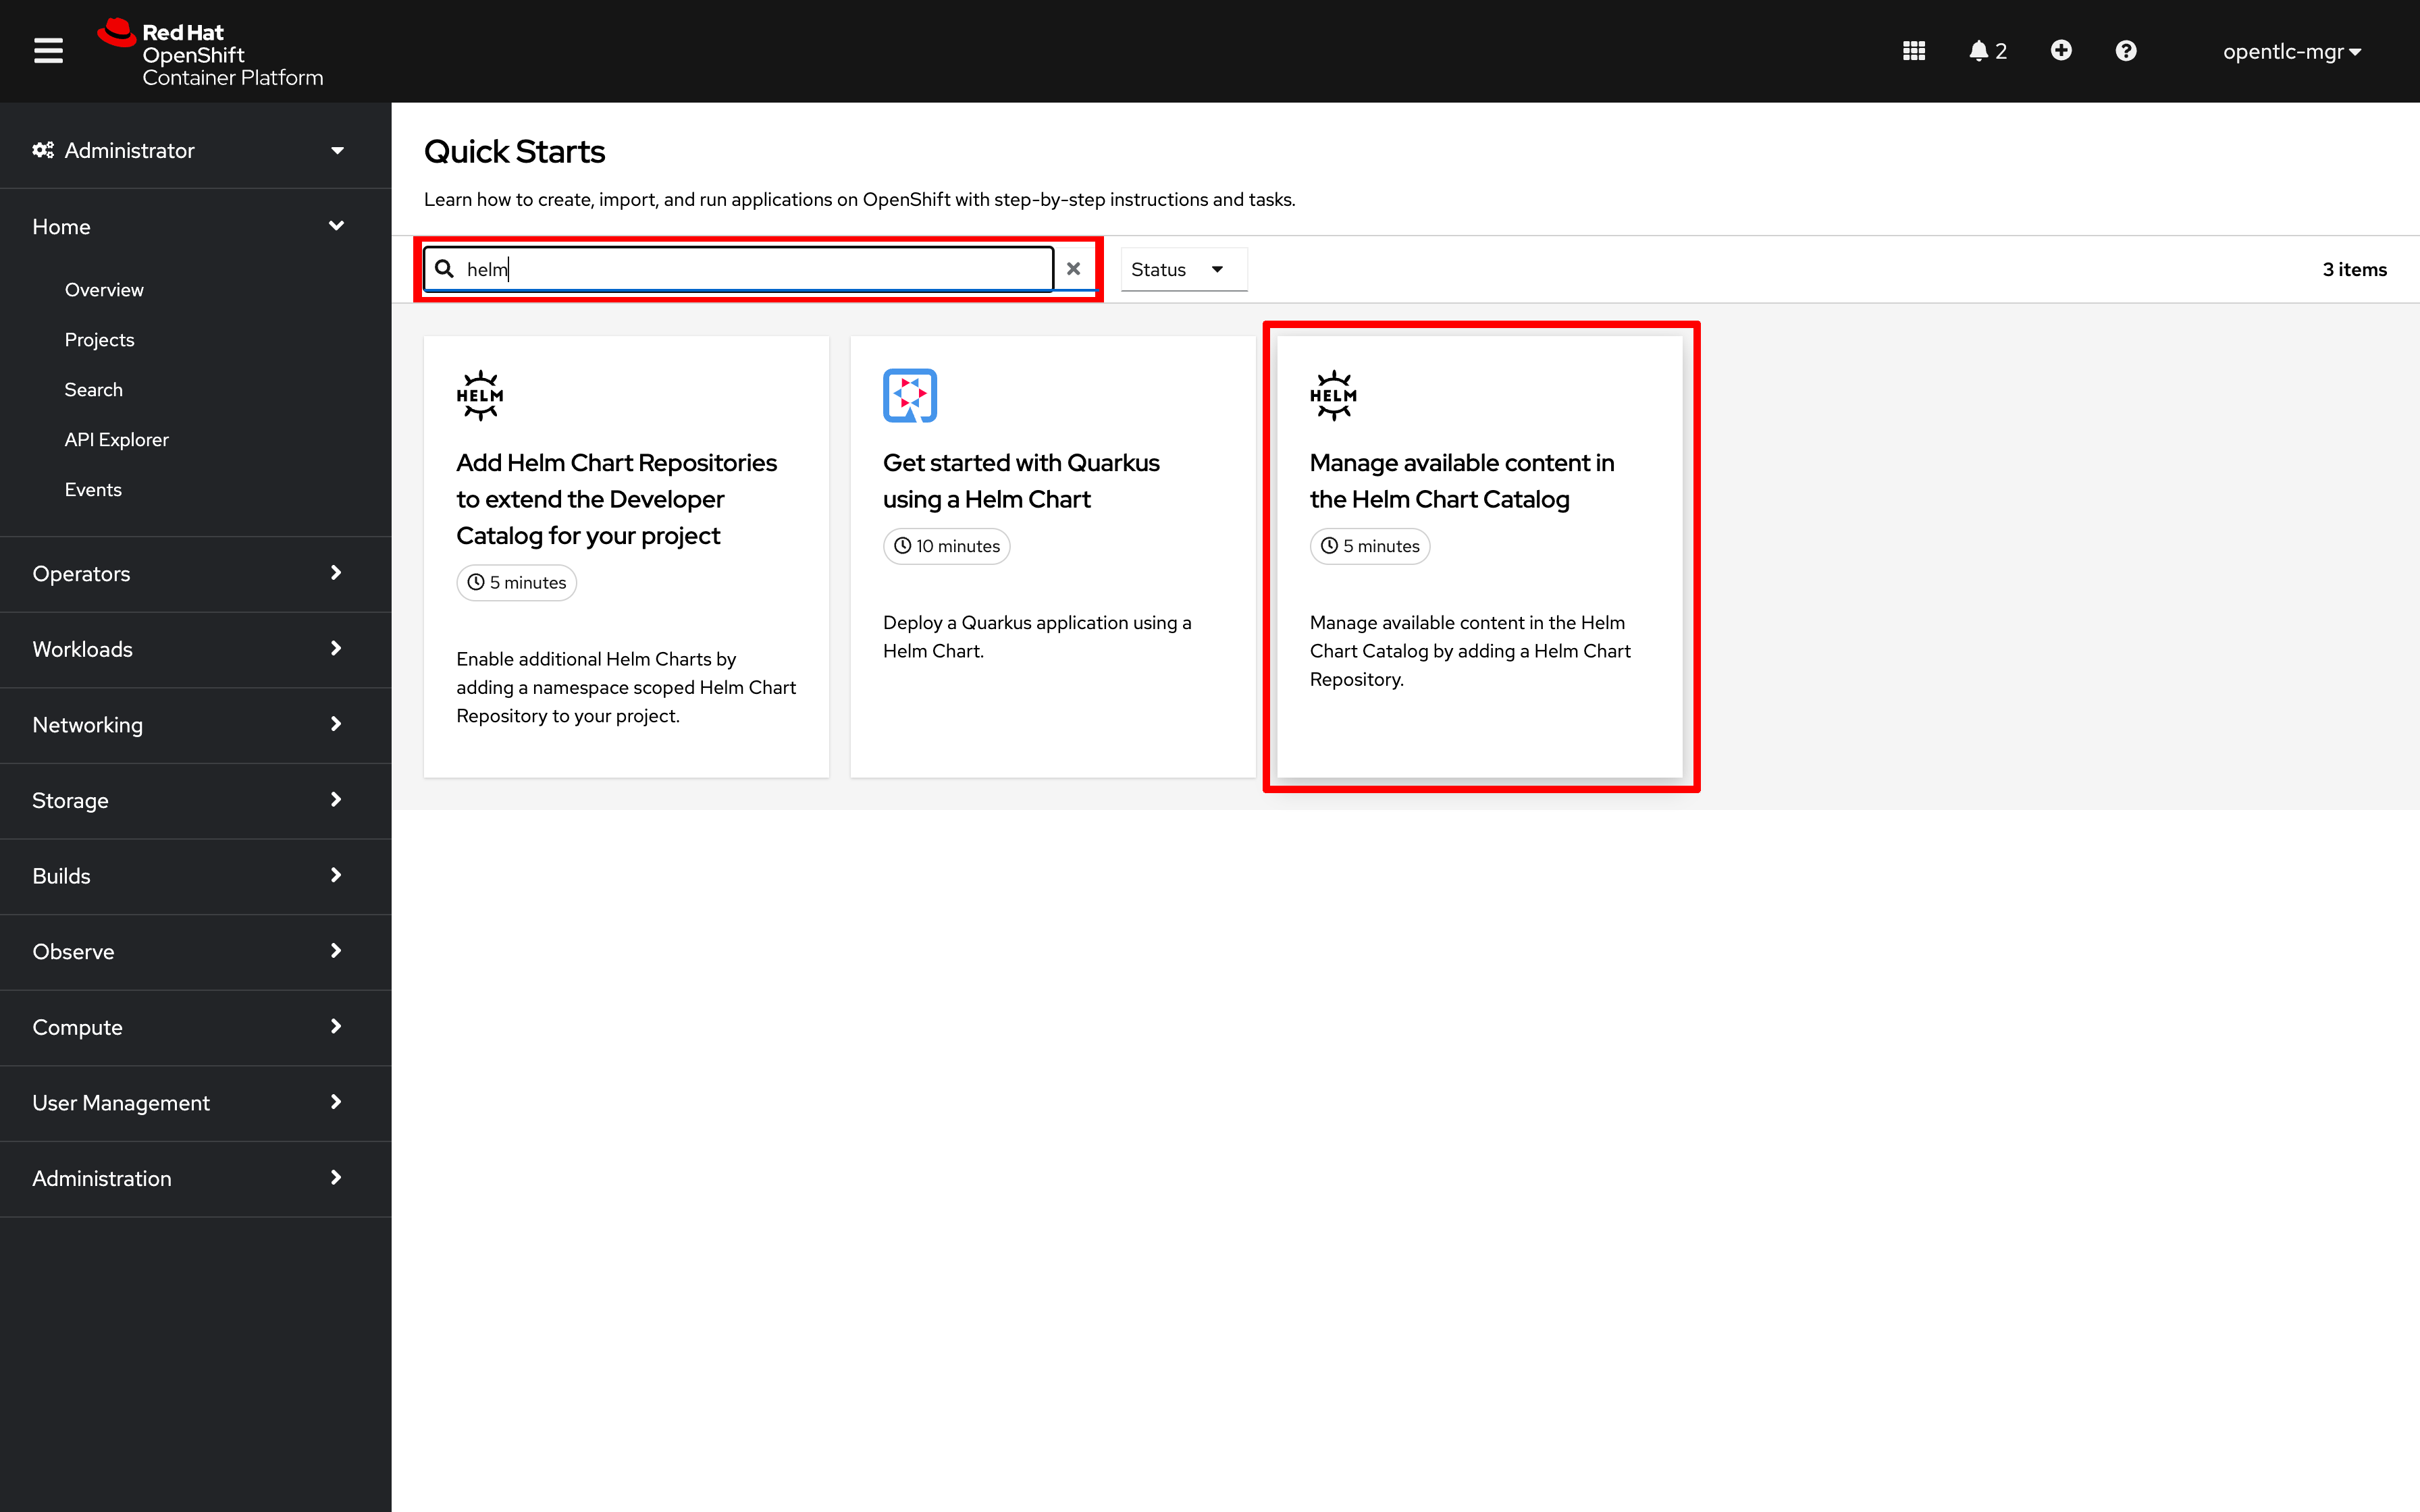
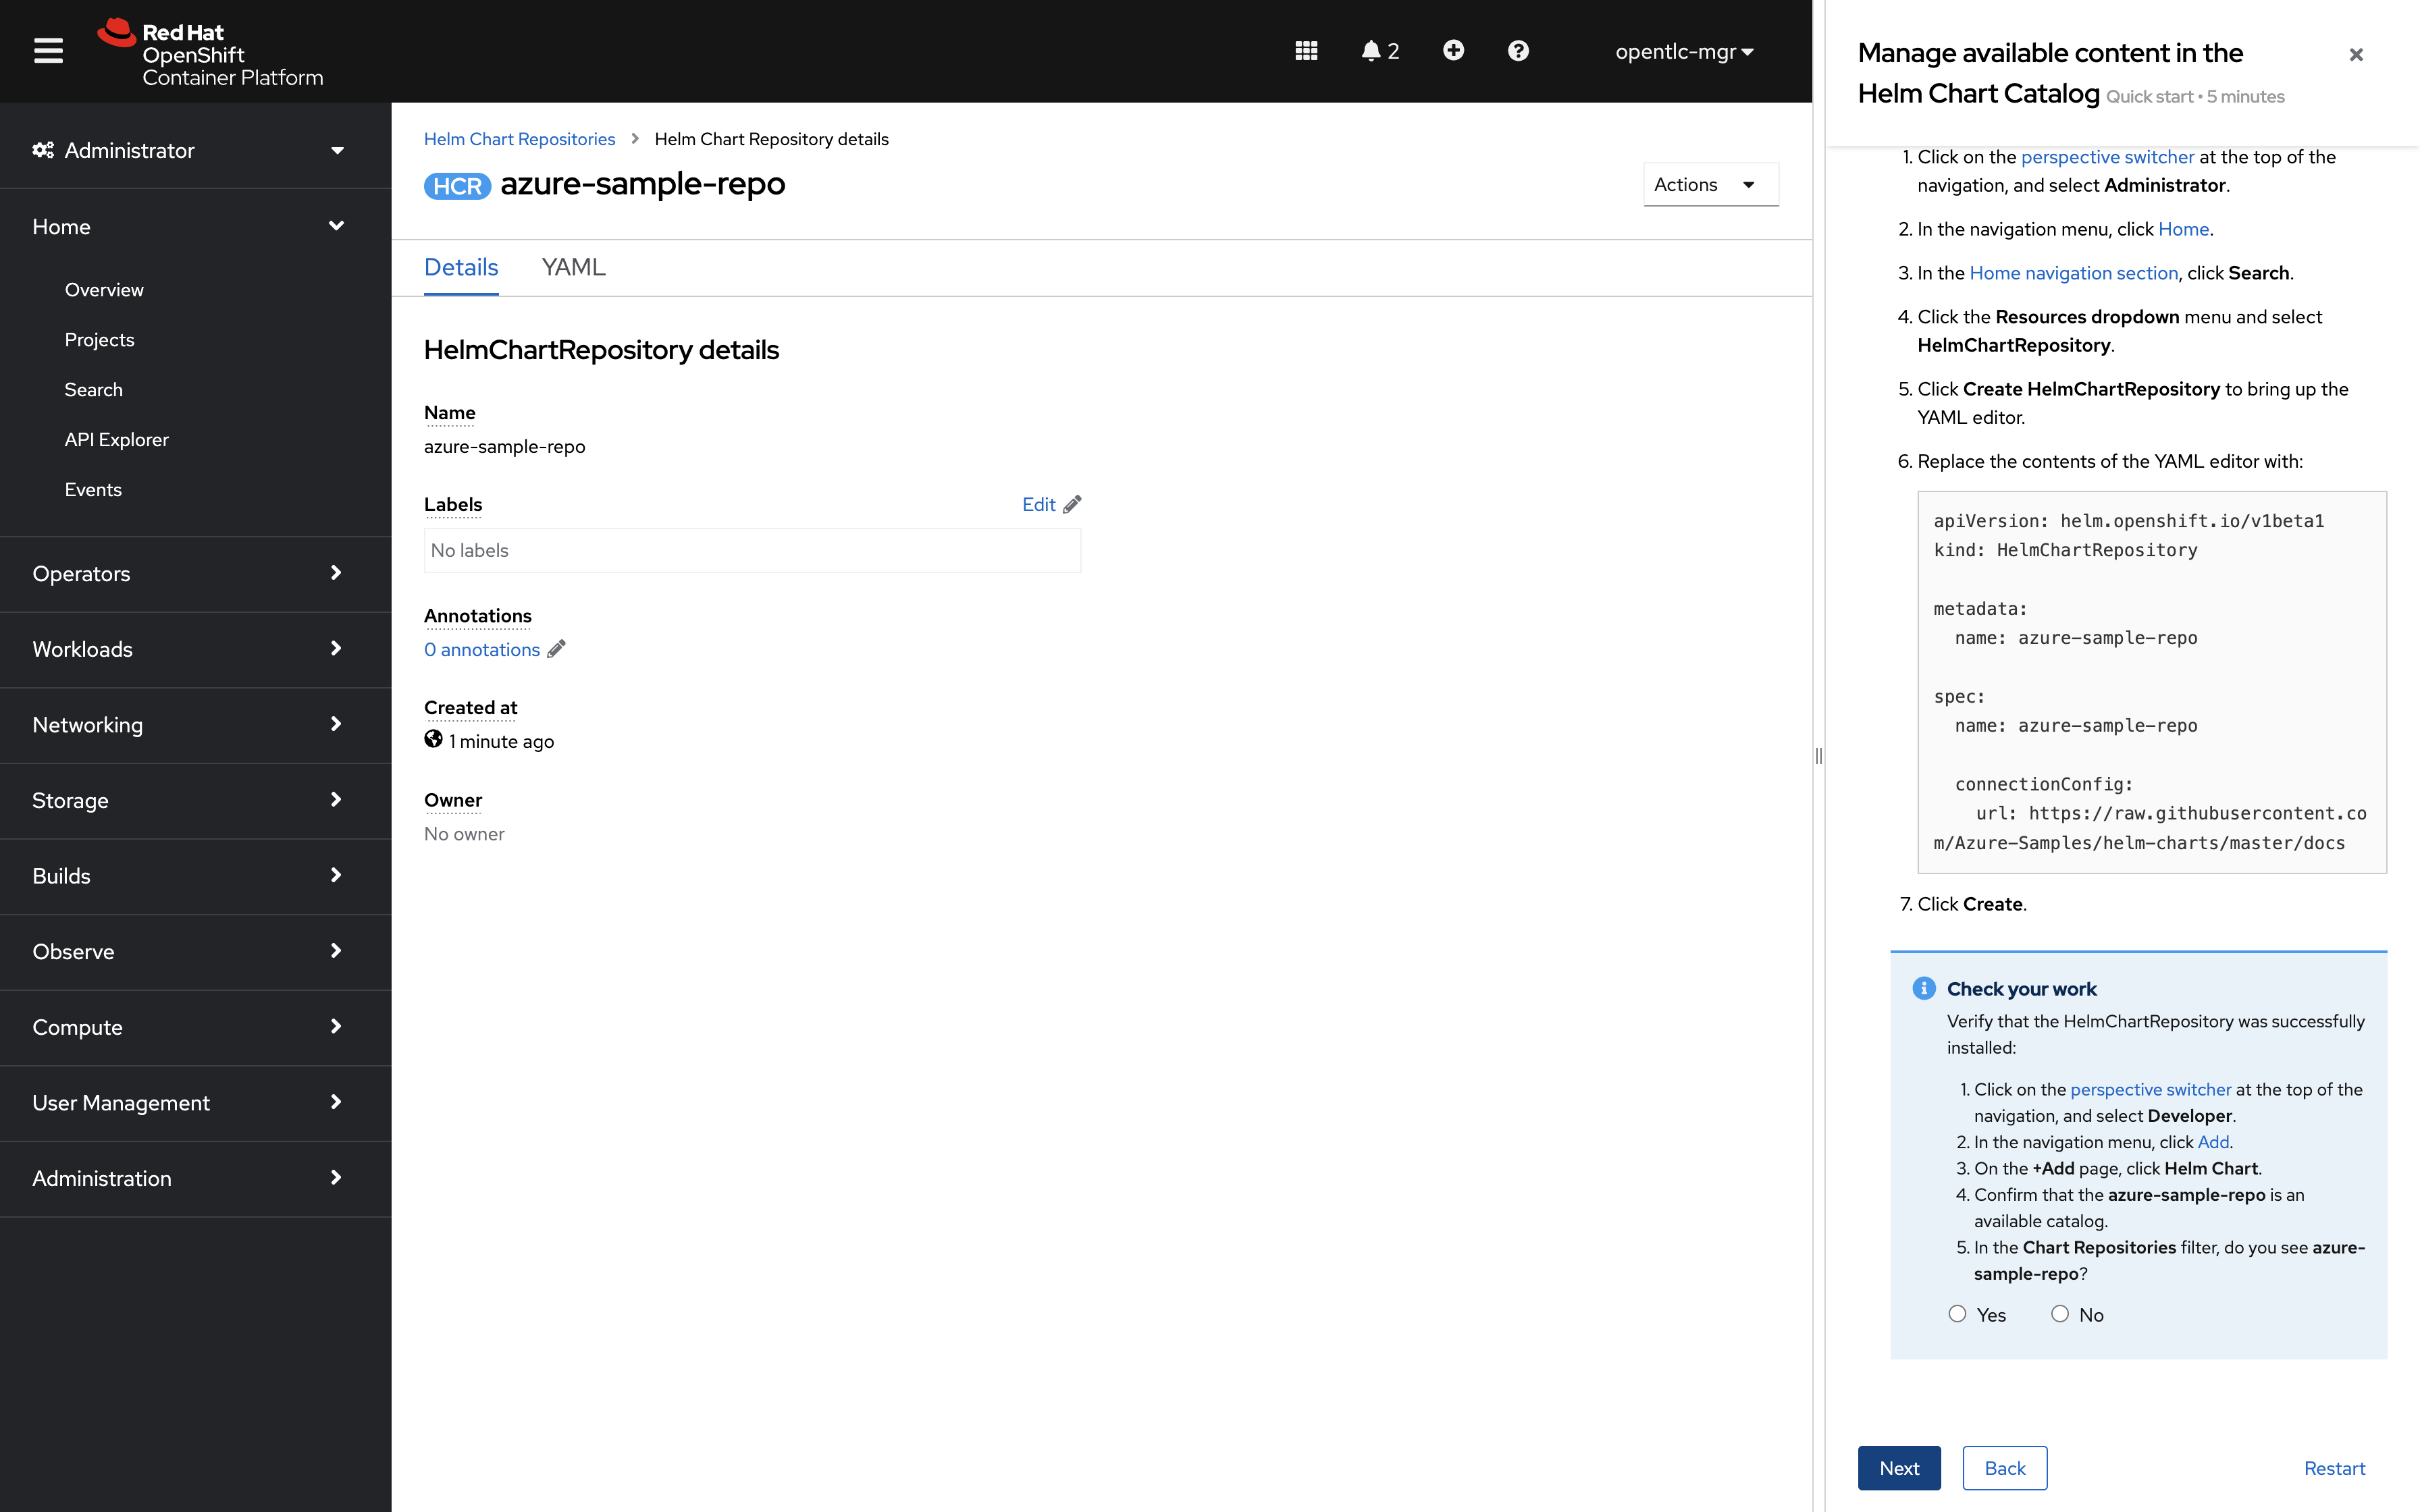
Search quickstarts for "Helm", then select the tile labeled "Manage available content in the Helm Chart Catalog"
-
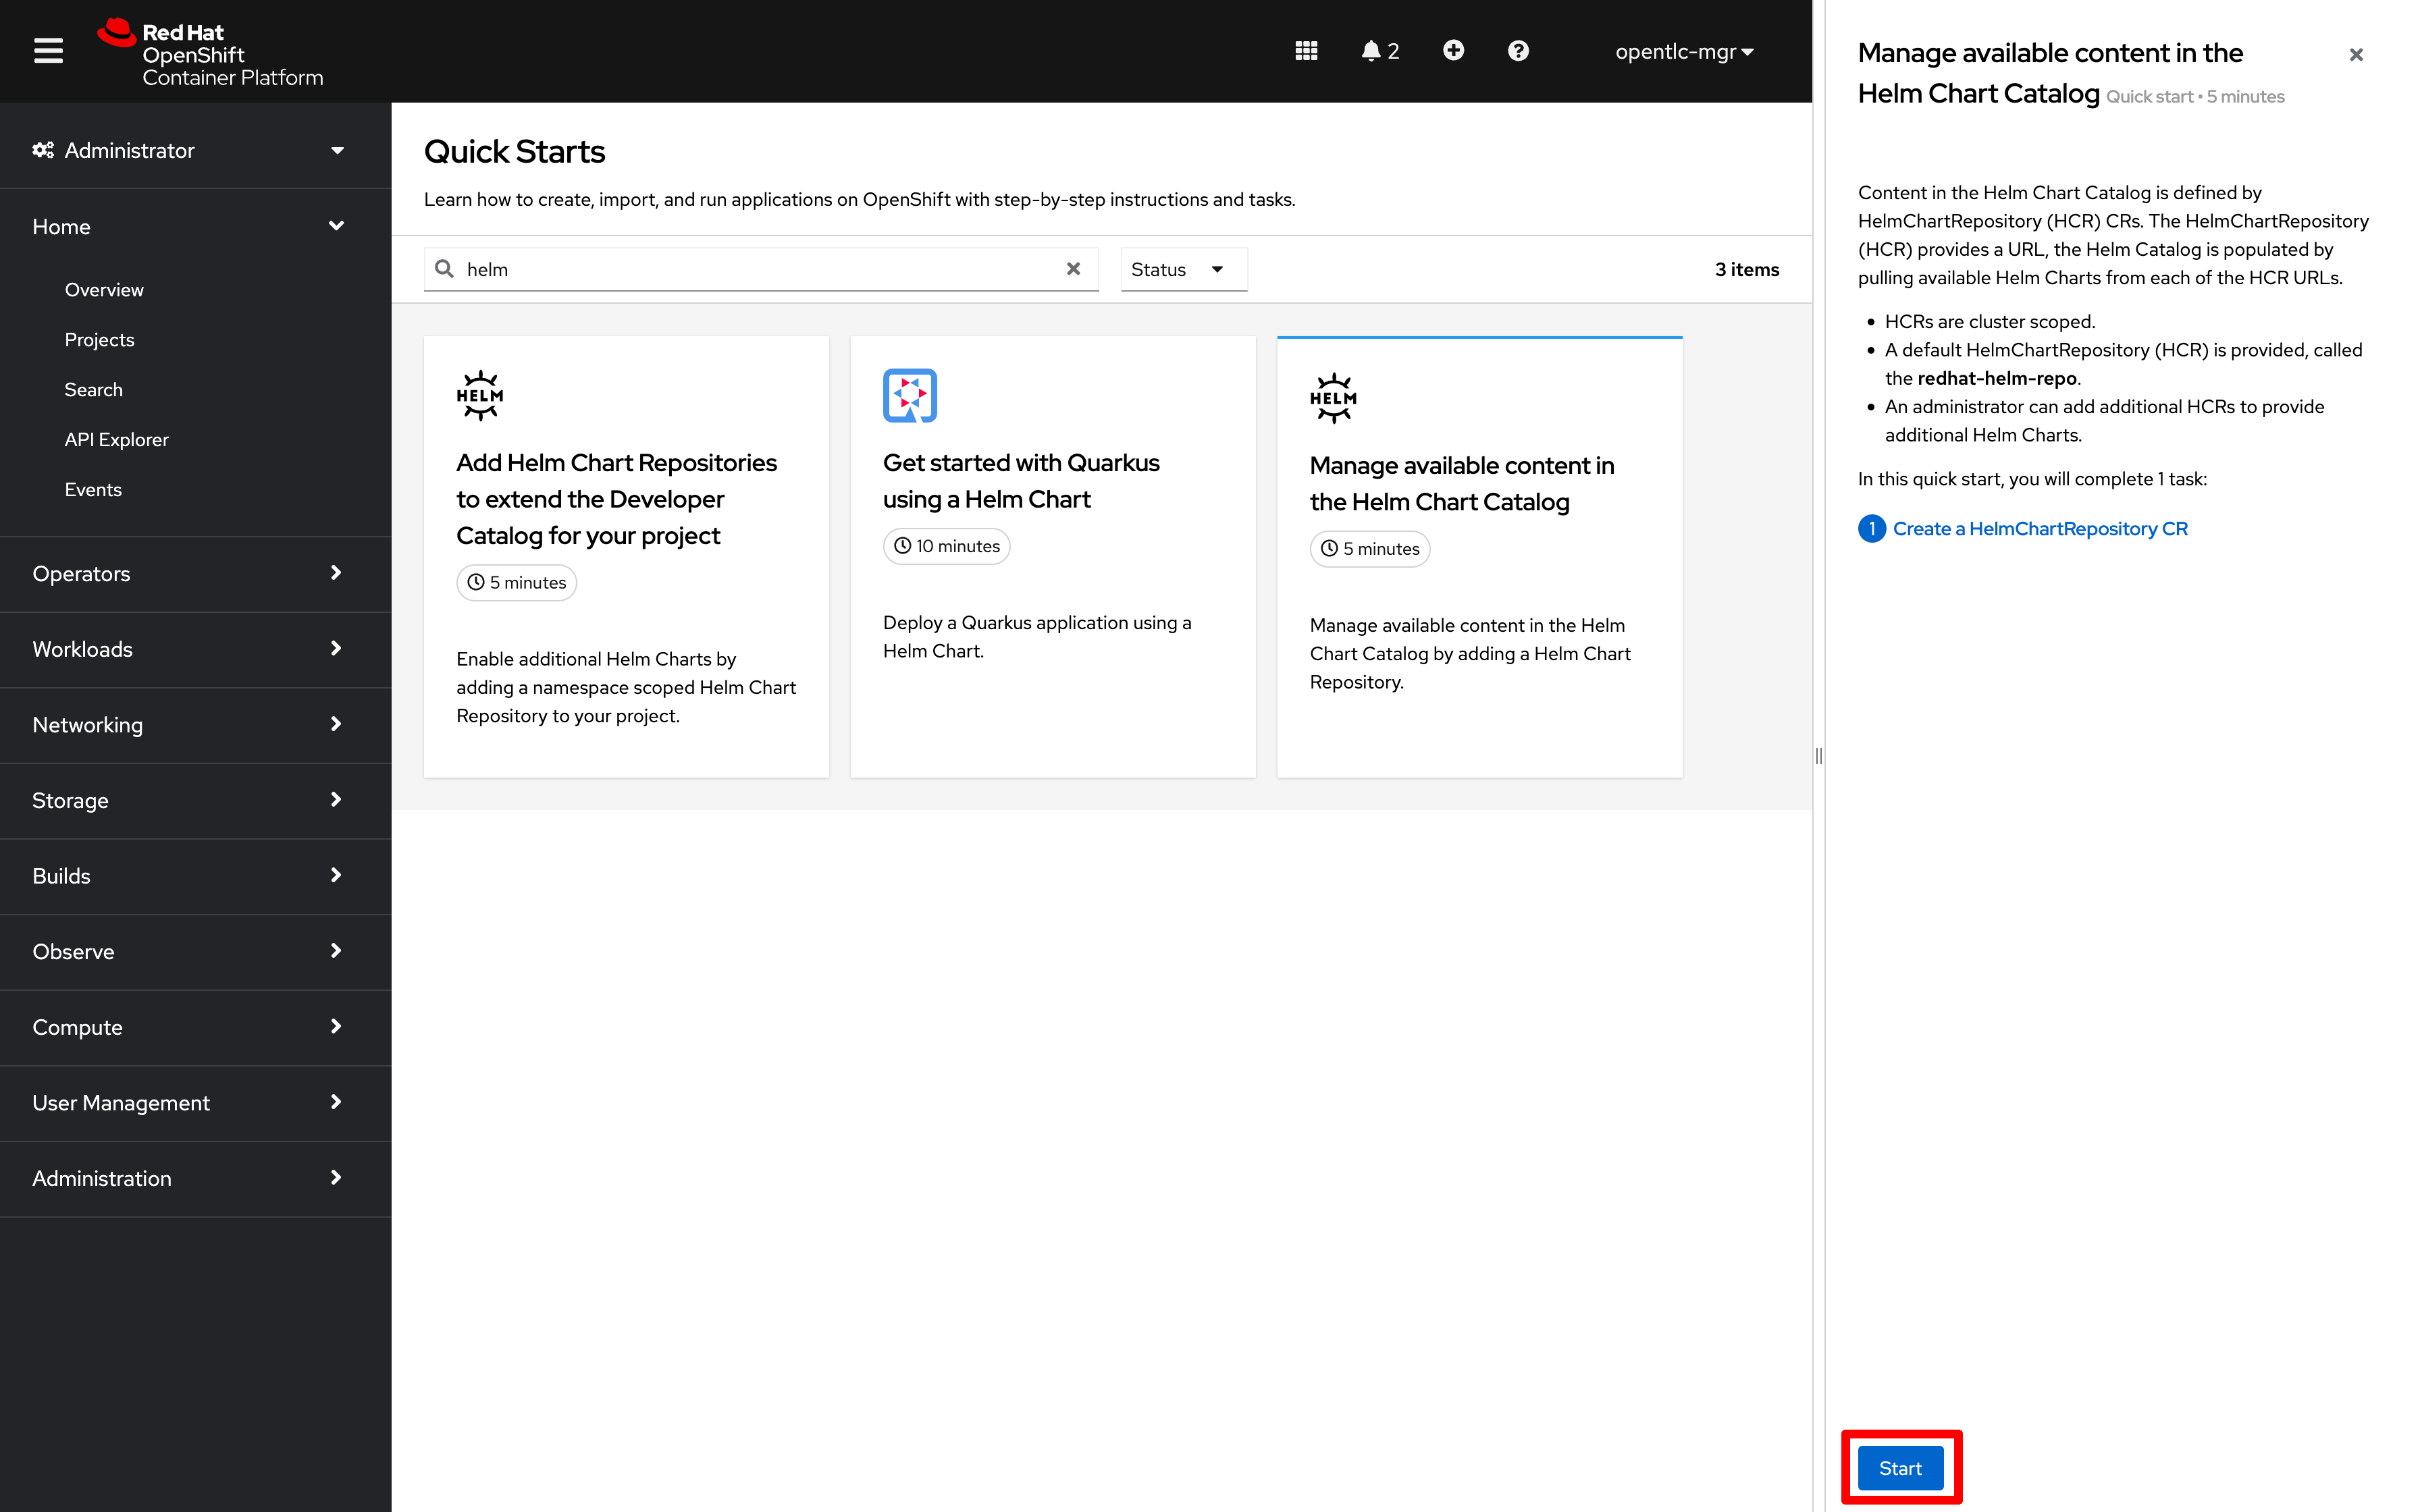
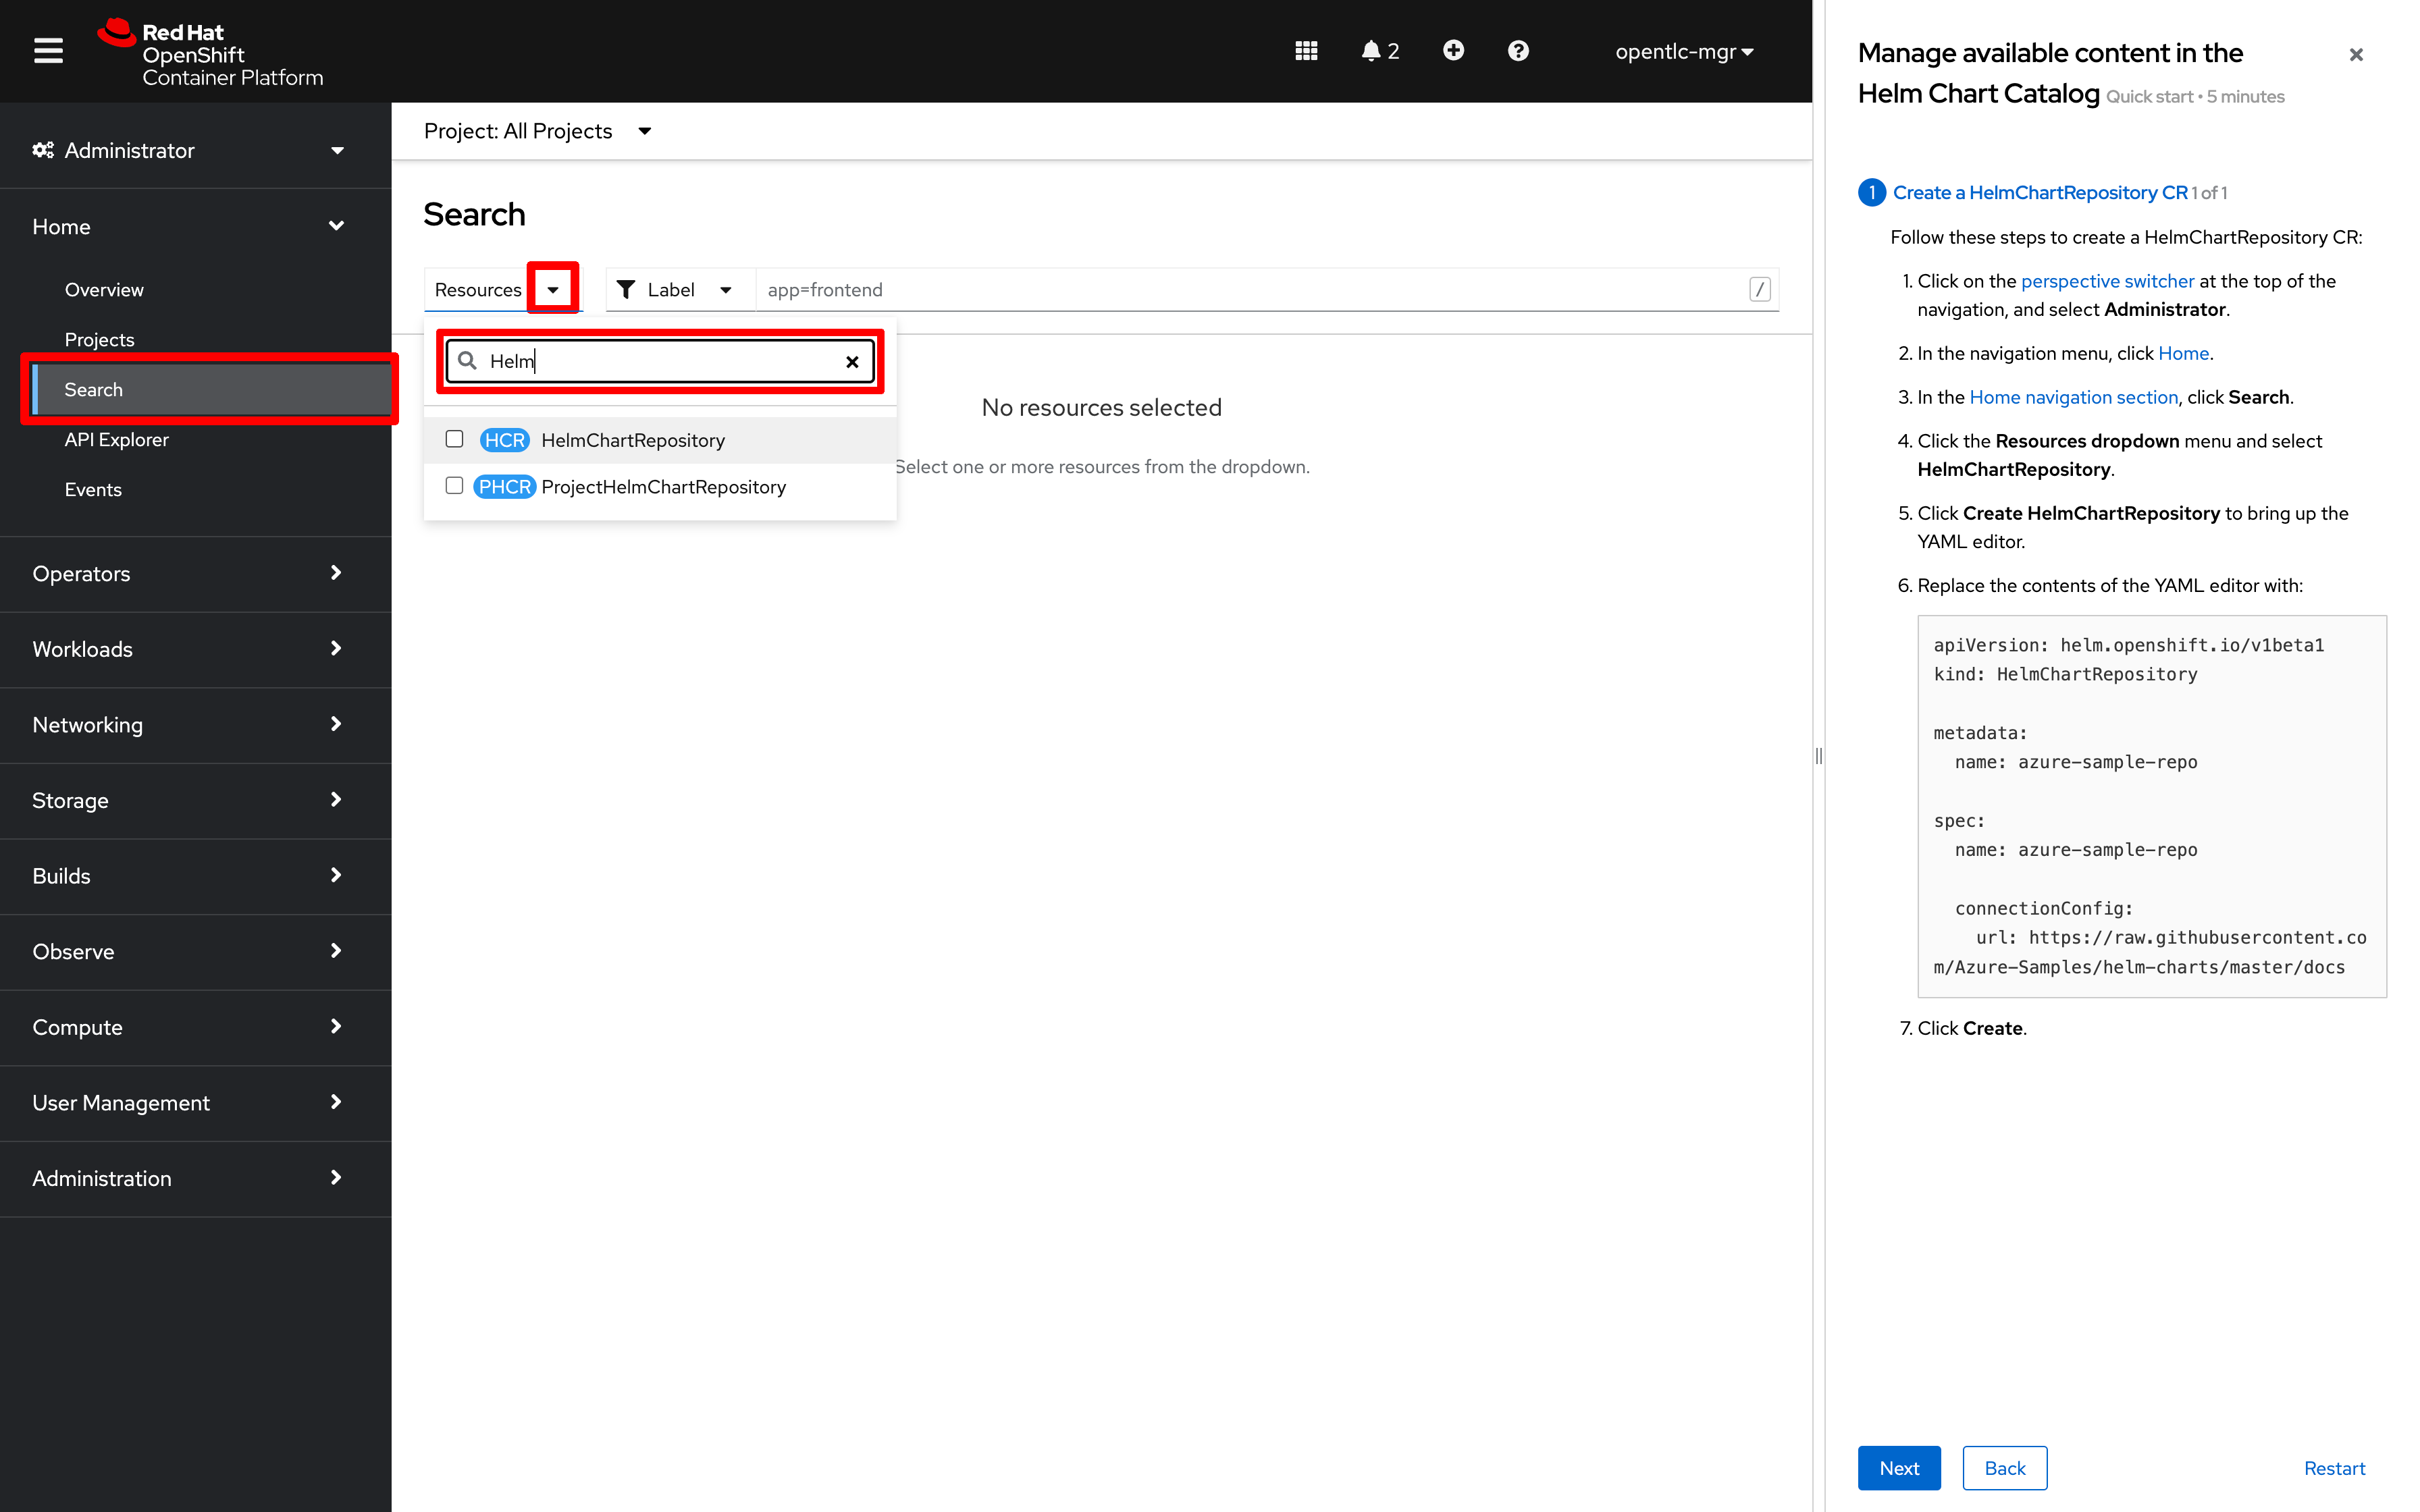
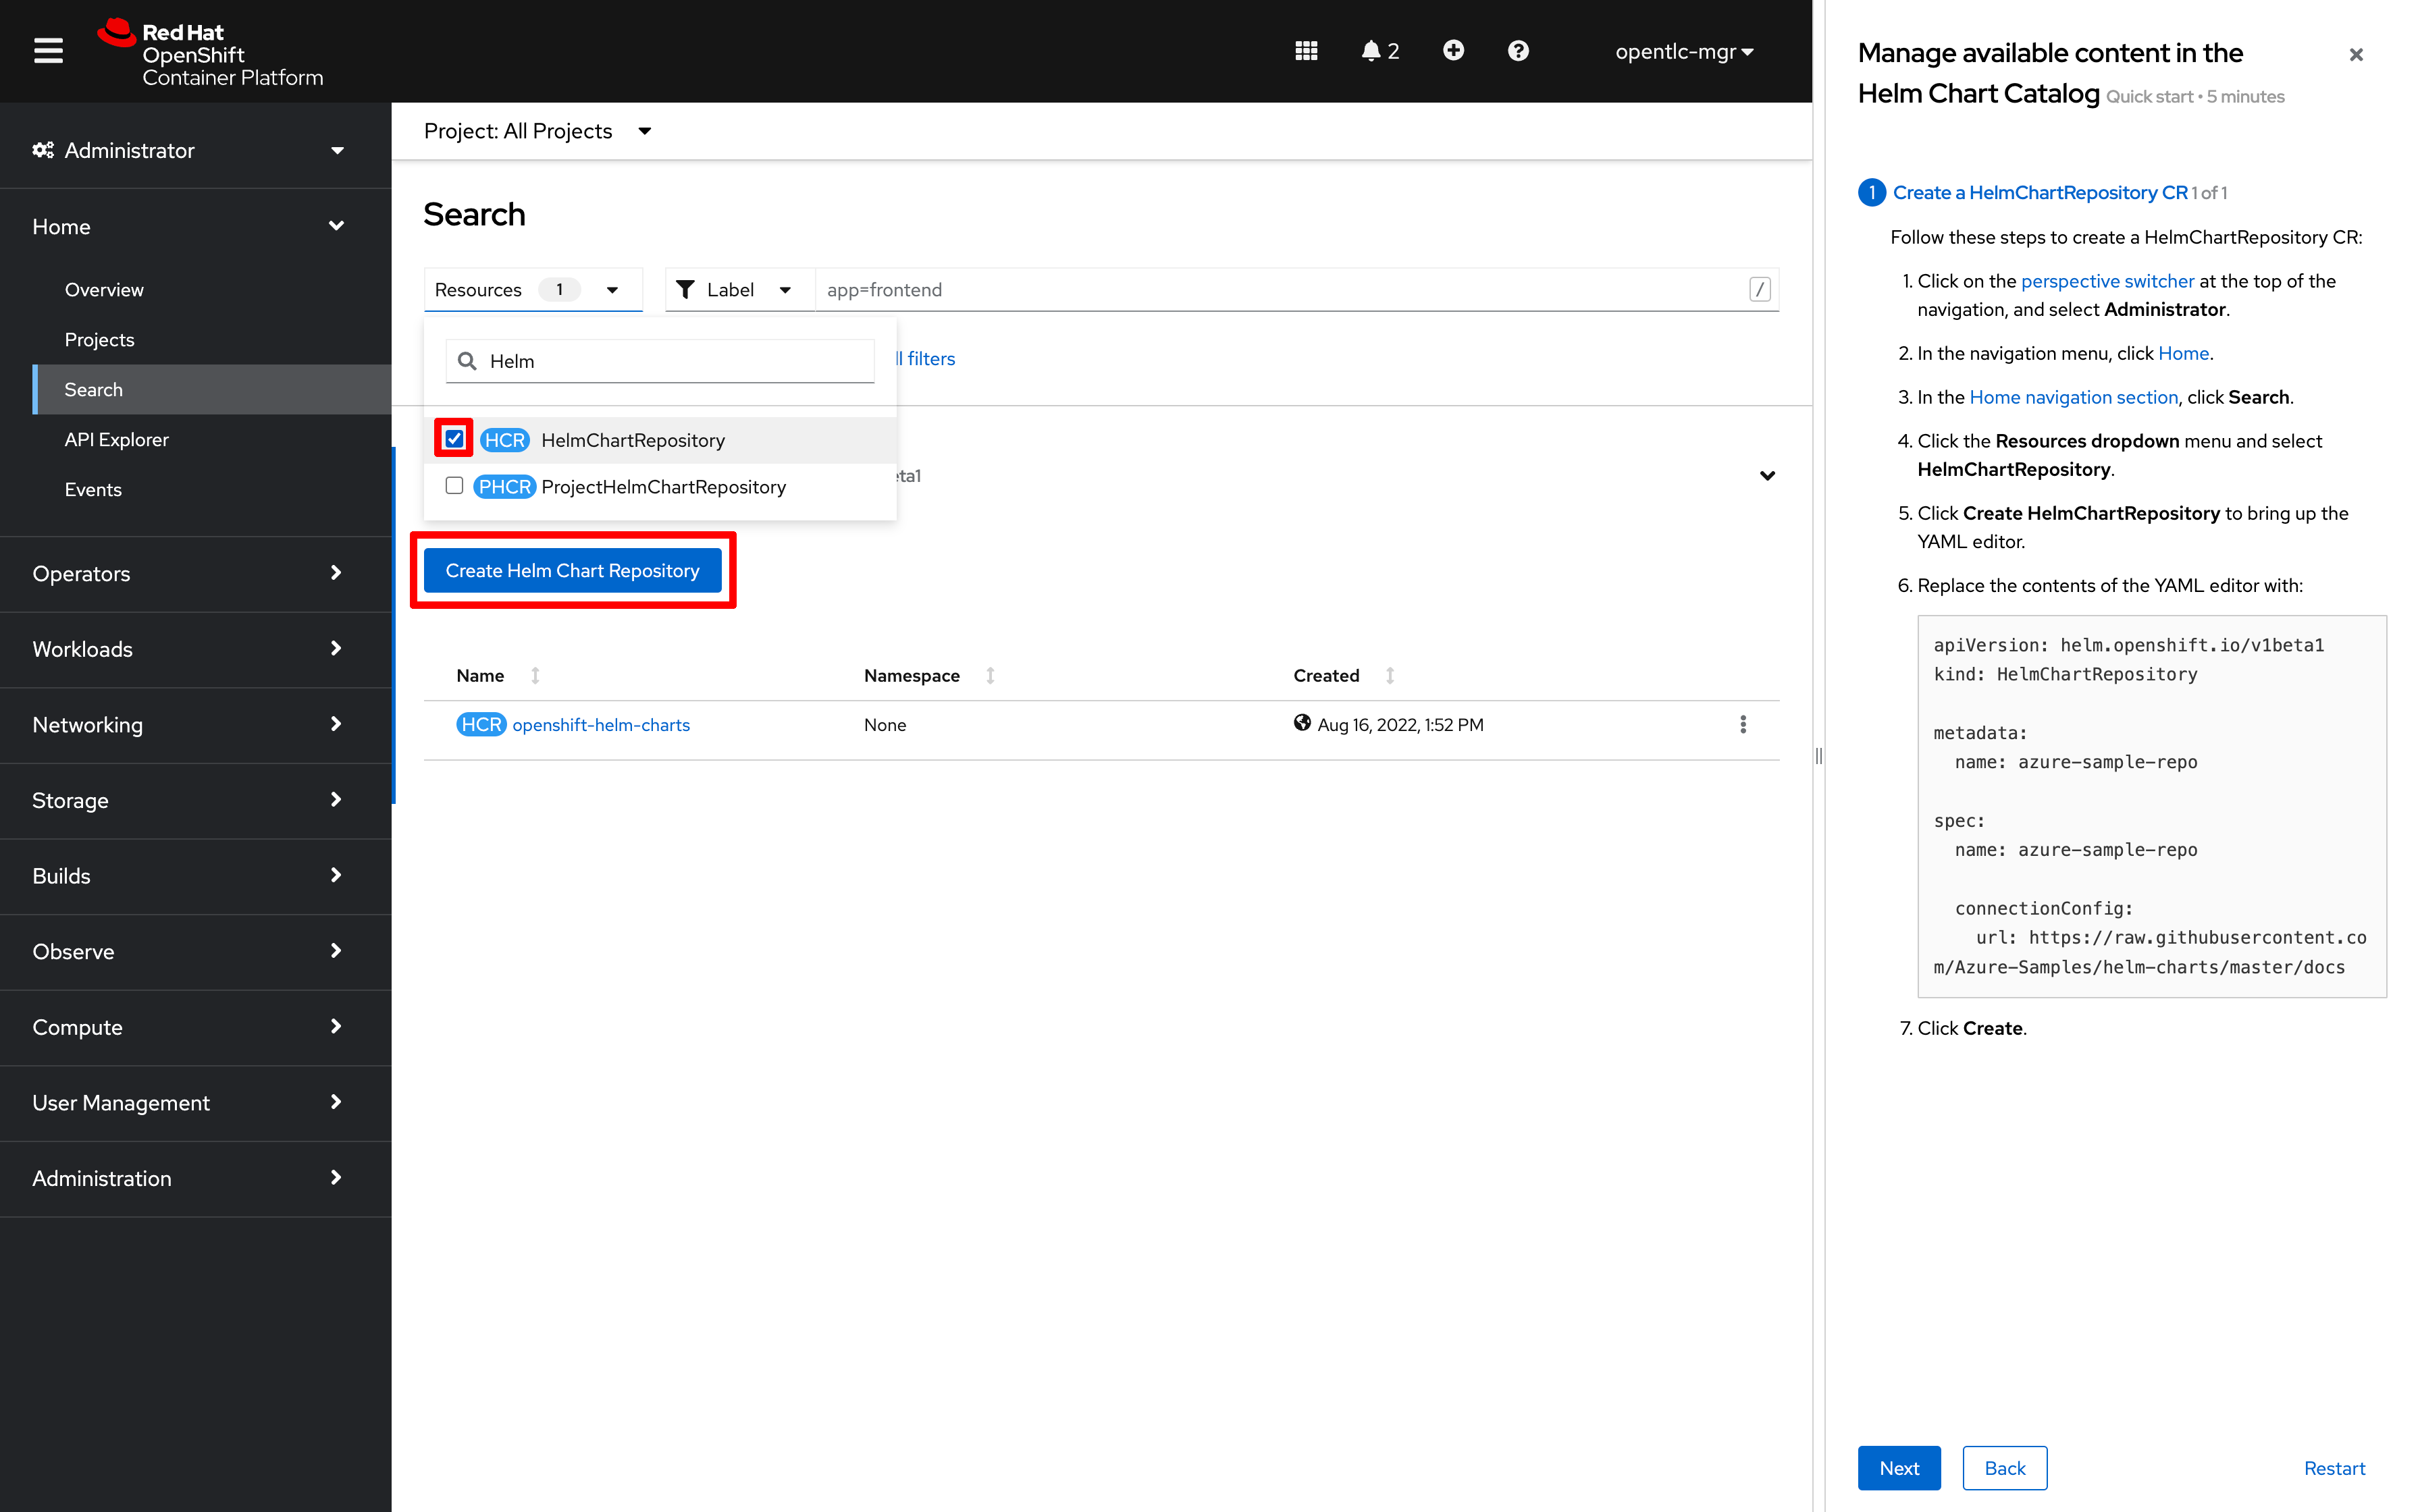
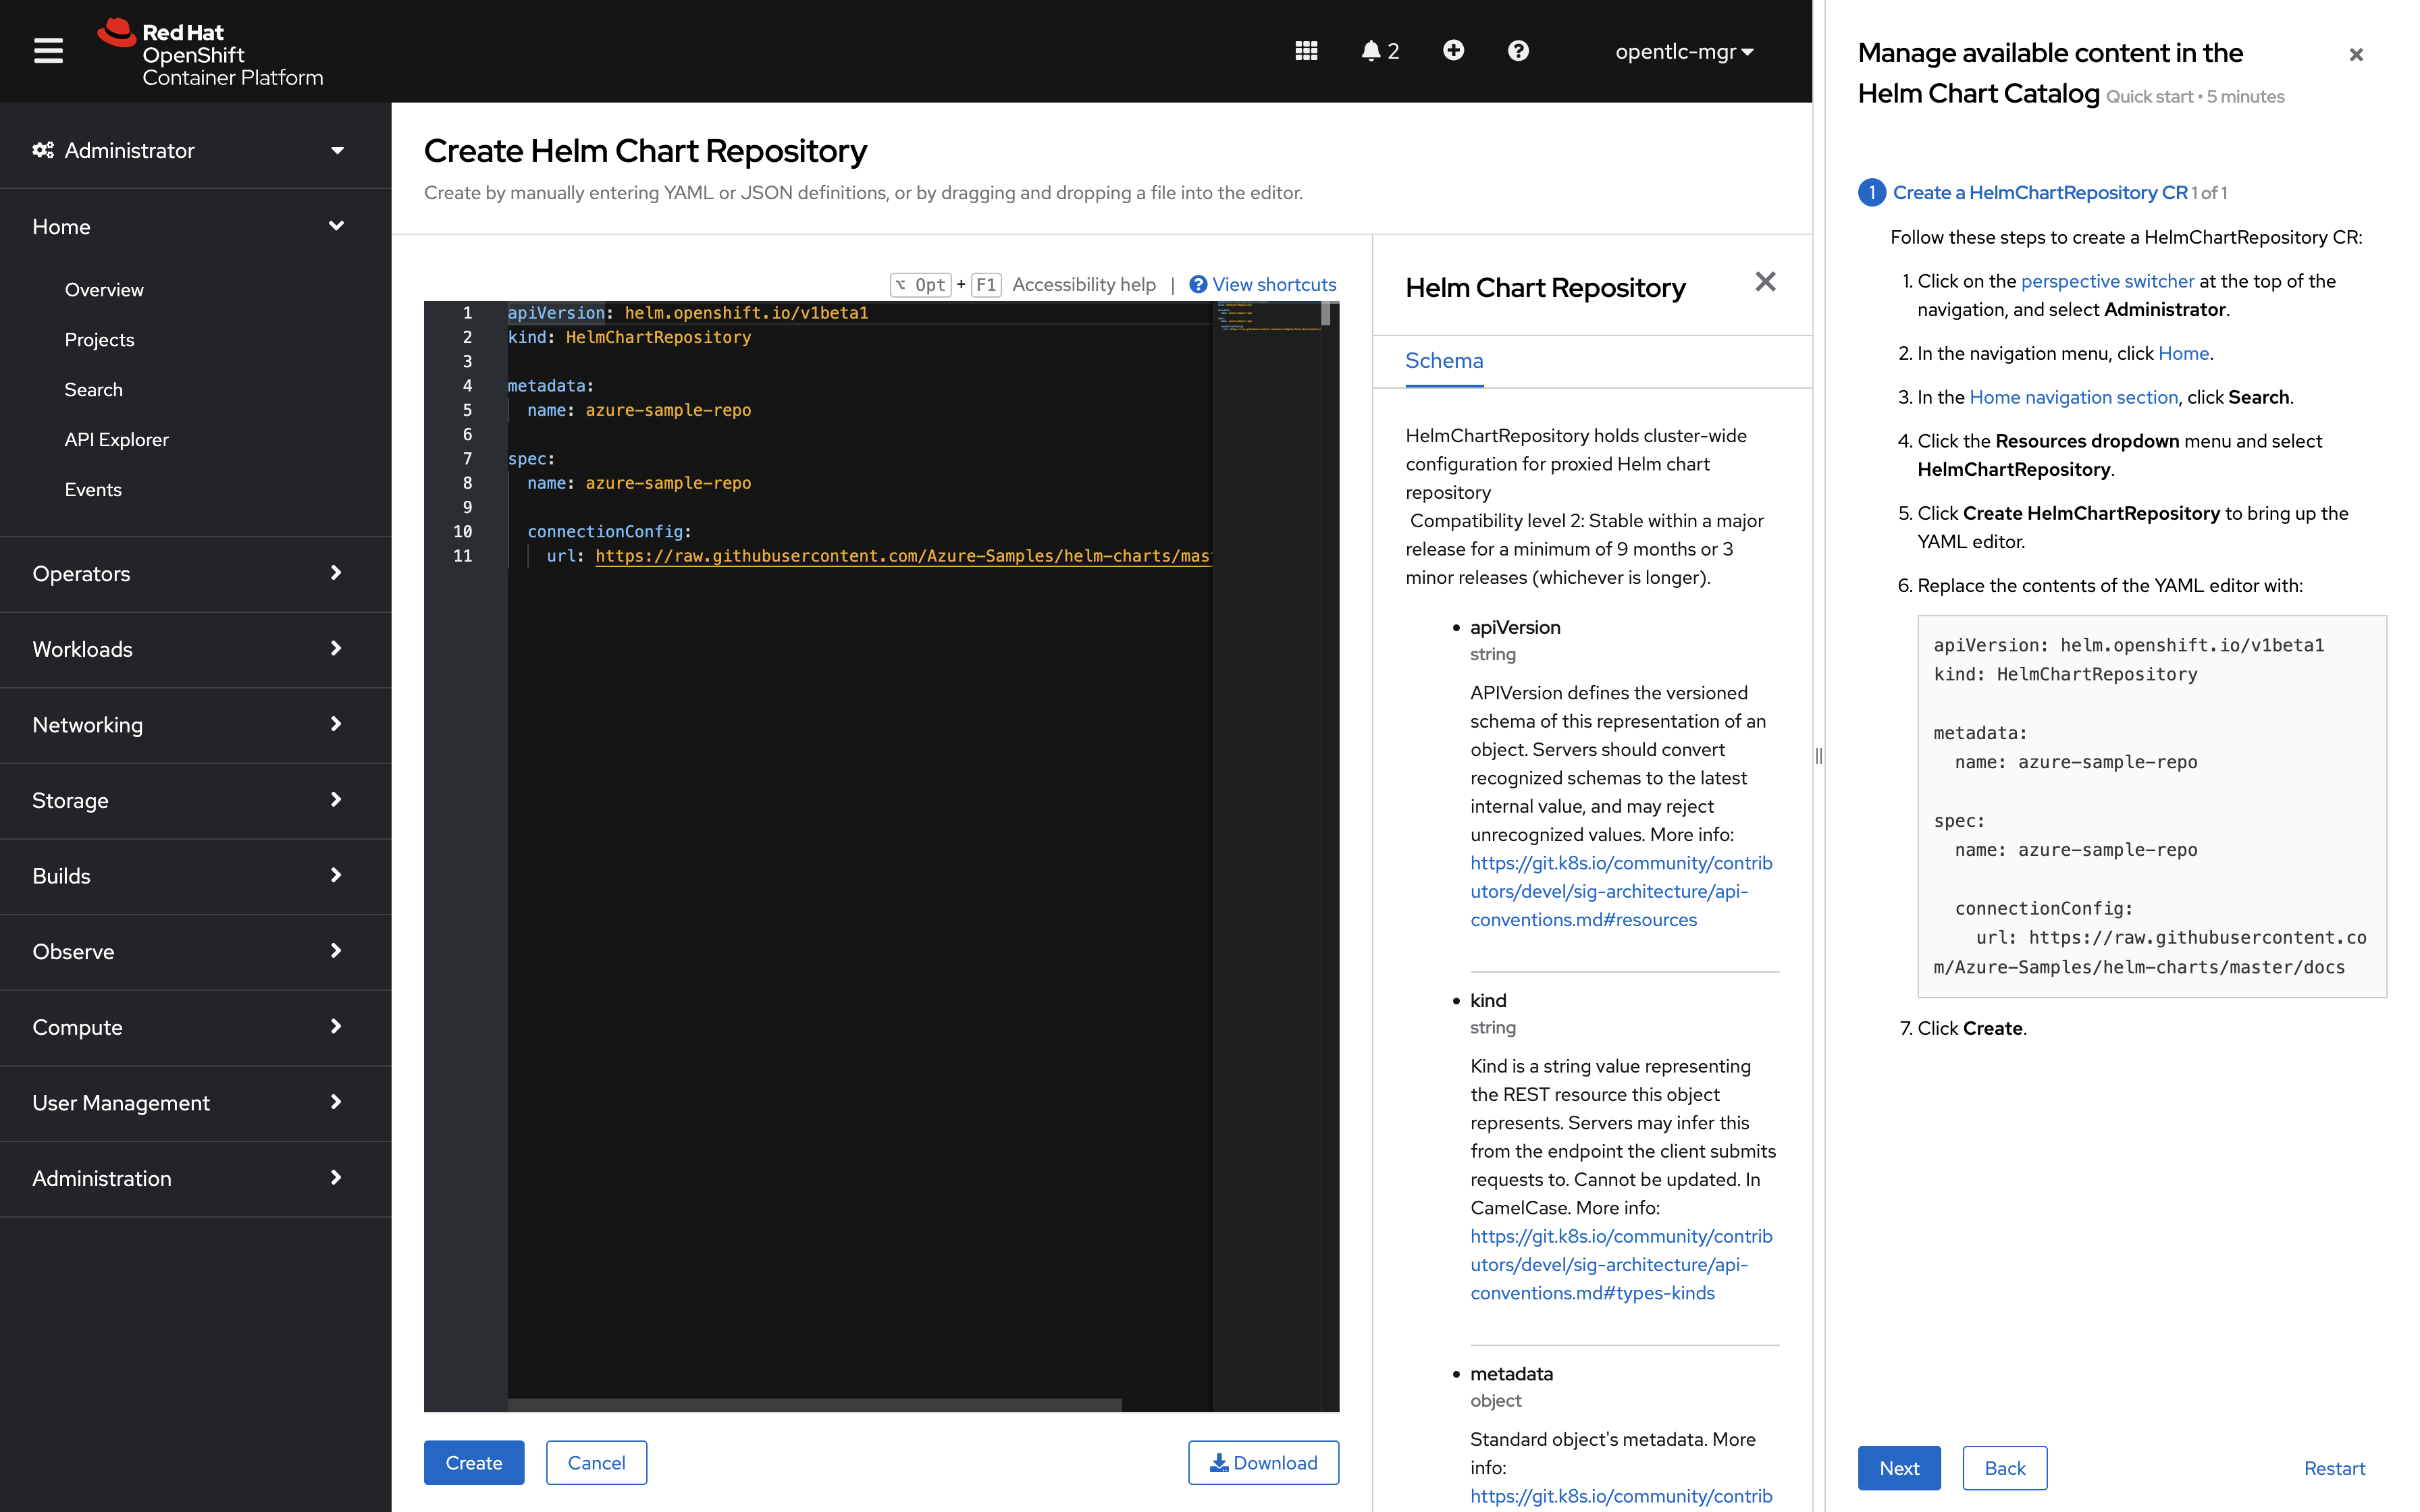
Follow along with the quickstart instructions to install the azure charts cluster-wide
-
After completing each instruction in the quickstart guide, click "Next". Then, follow the "Check your work" section to validate your work
-
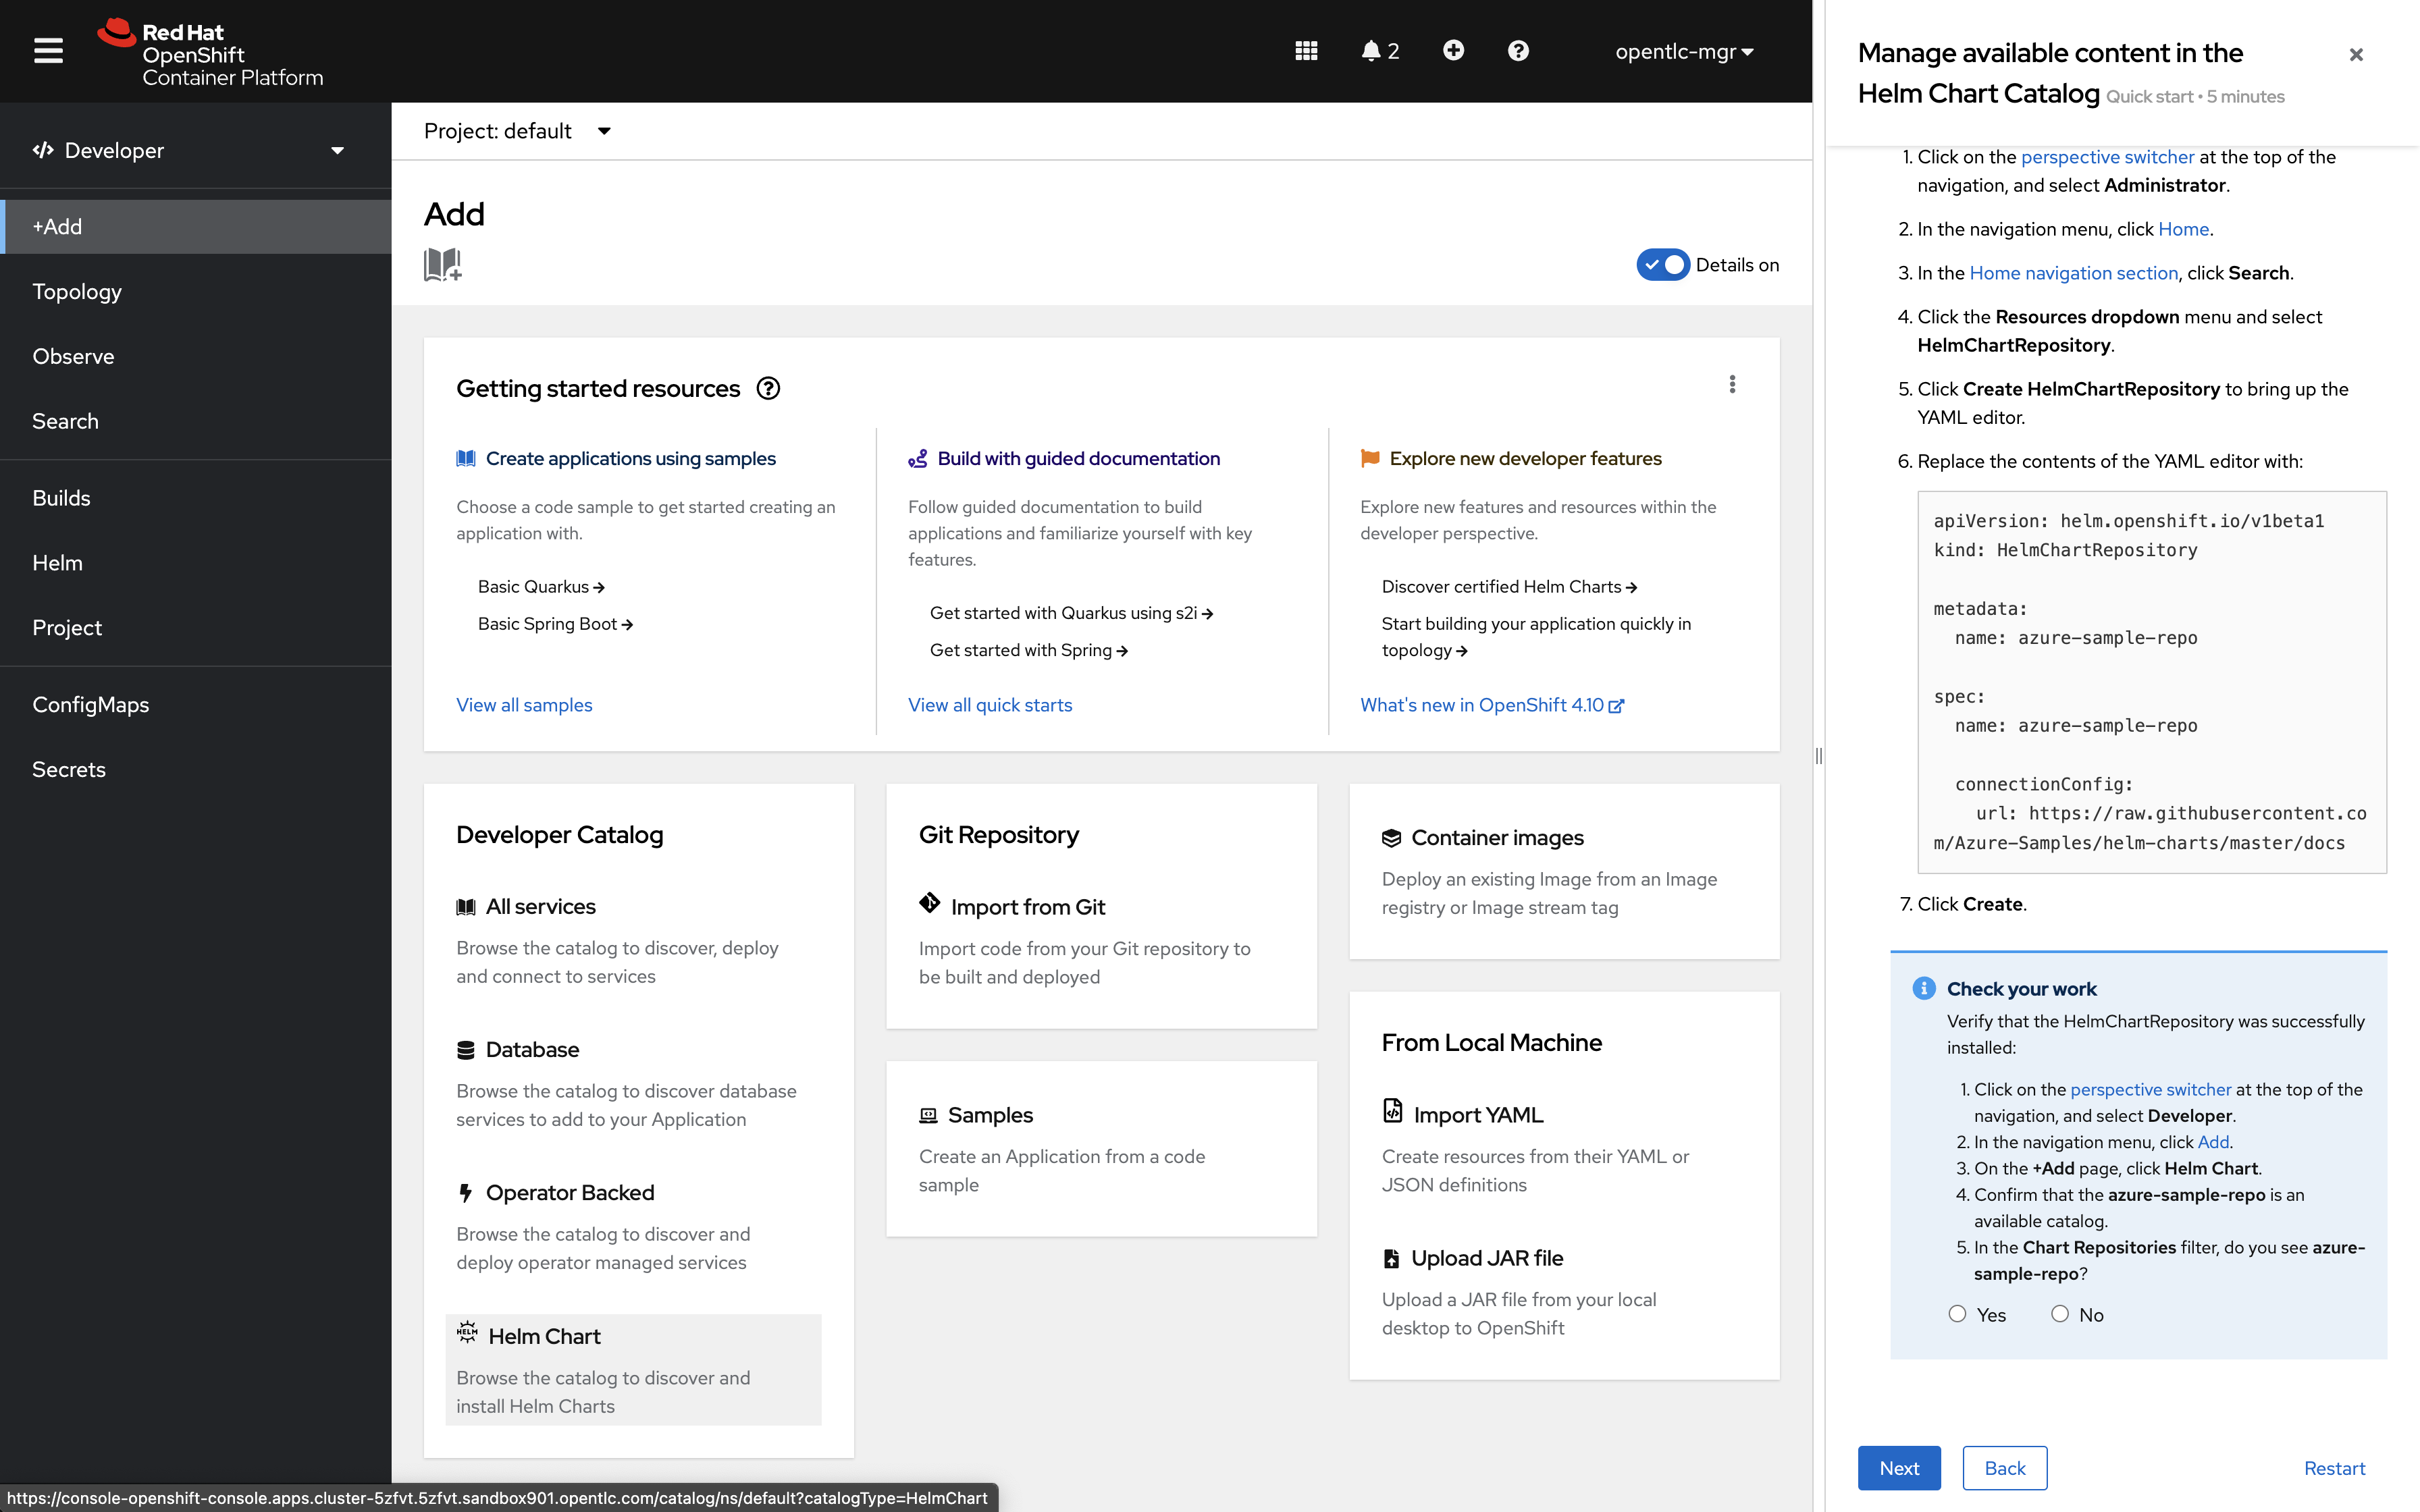
Select a project from the list, or create a new one.
-
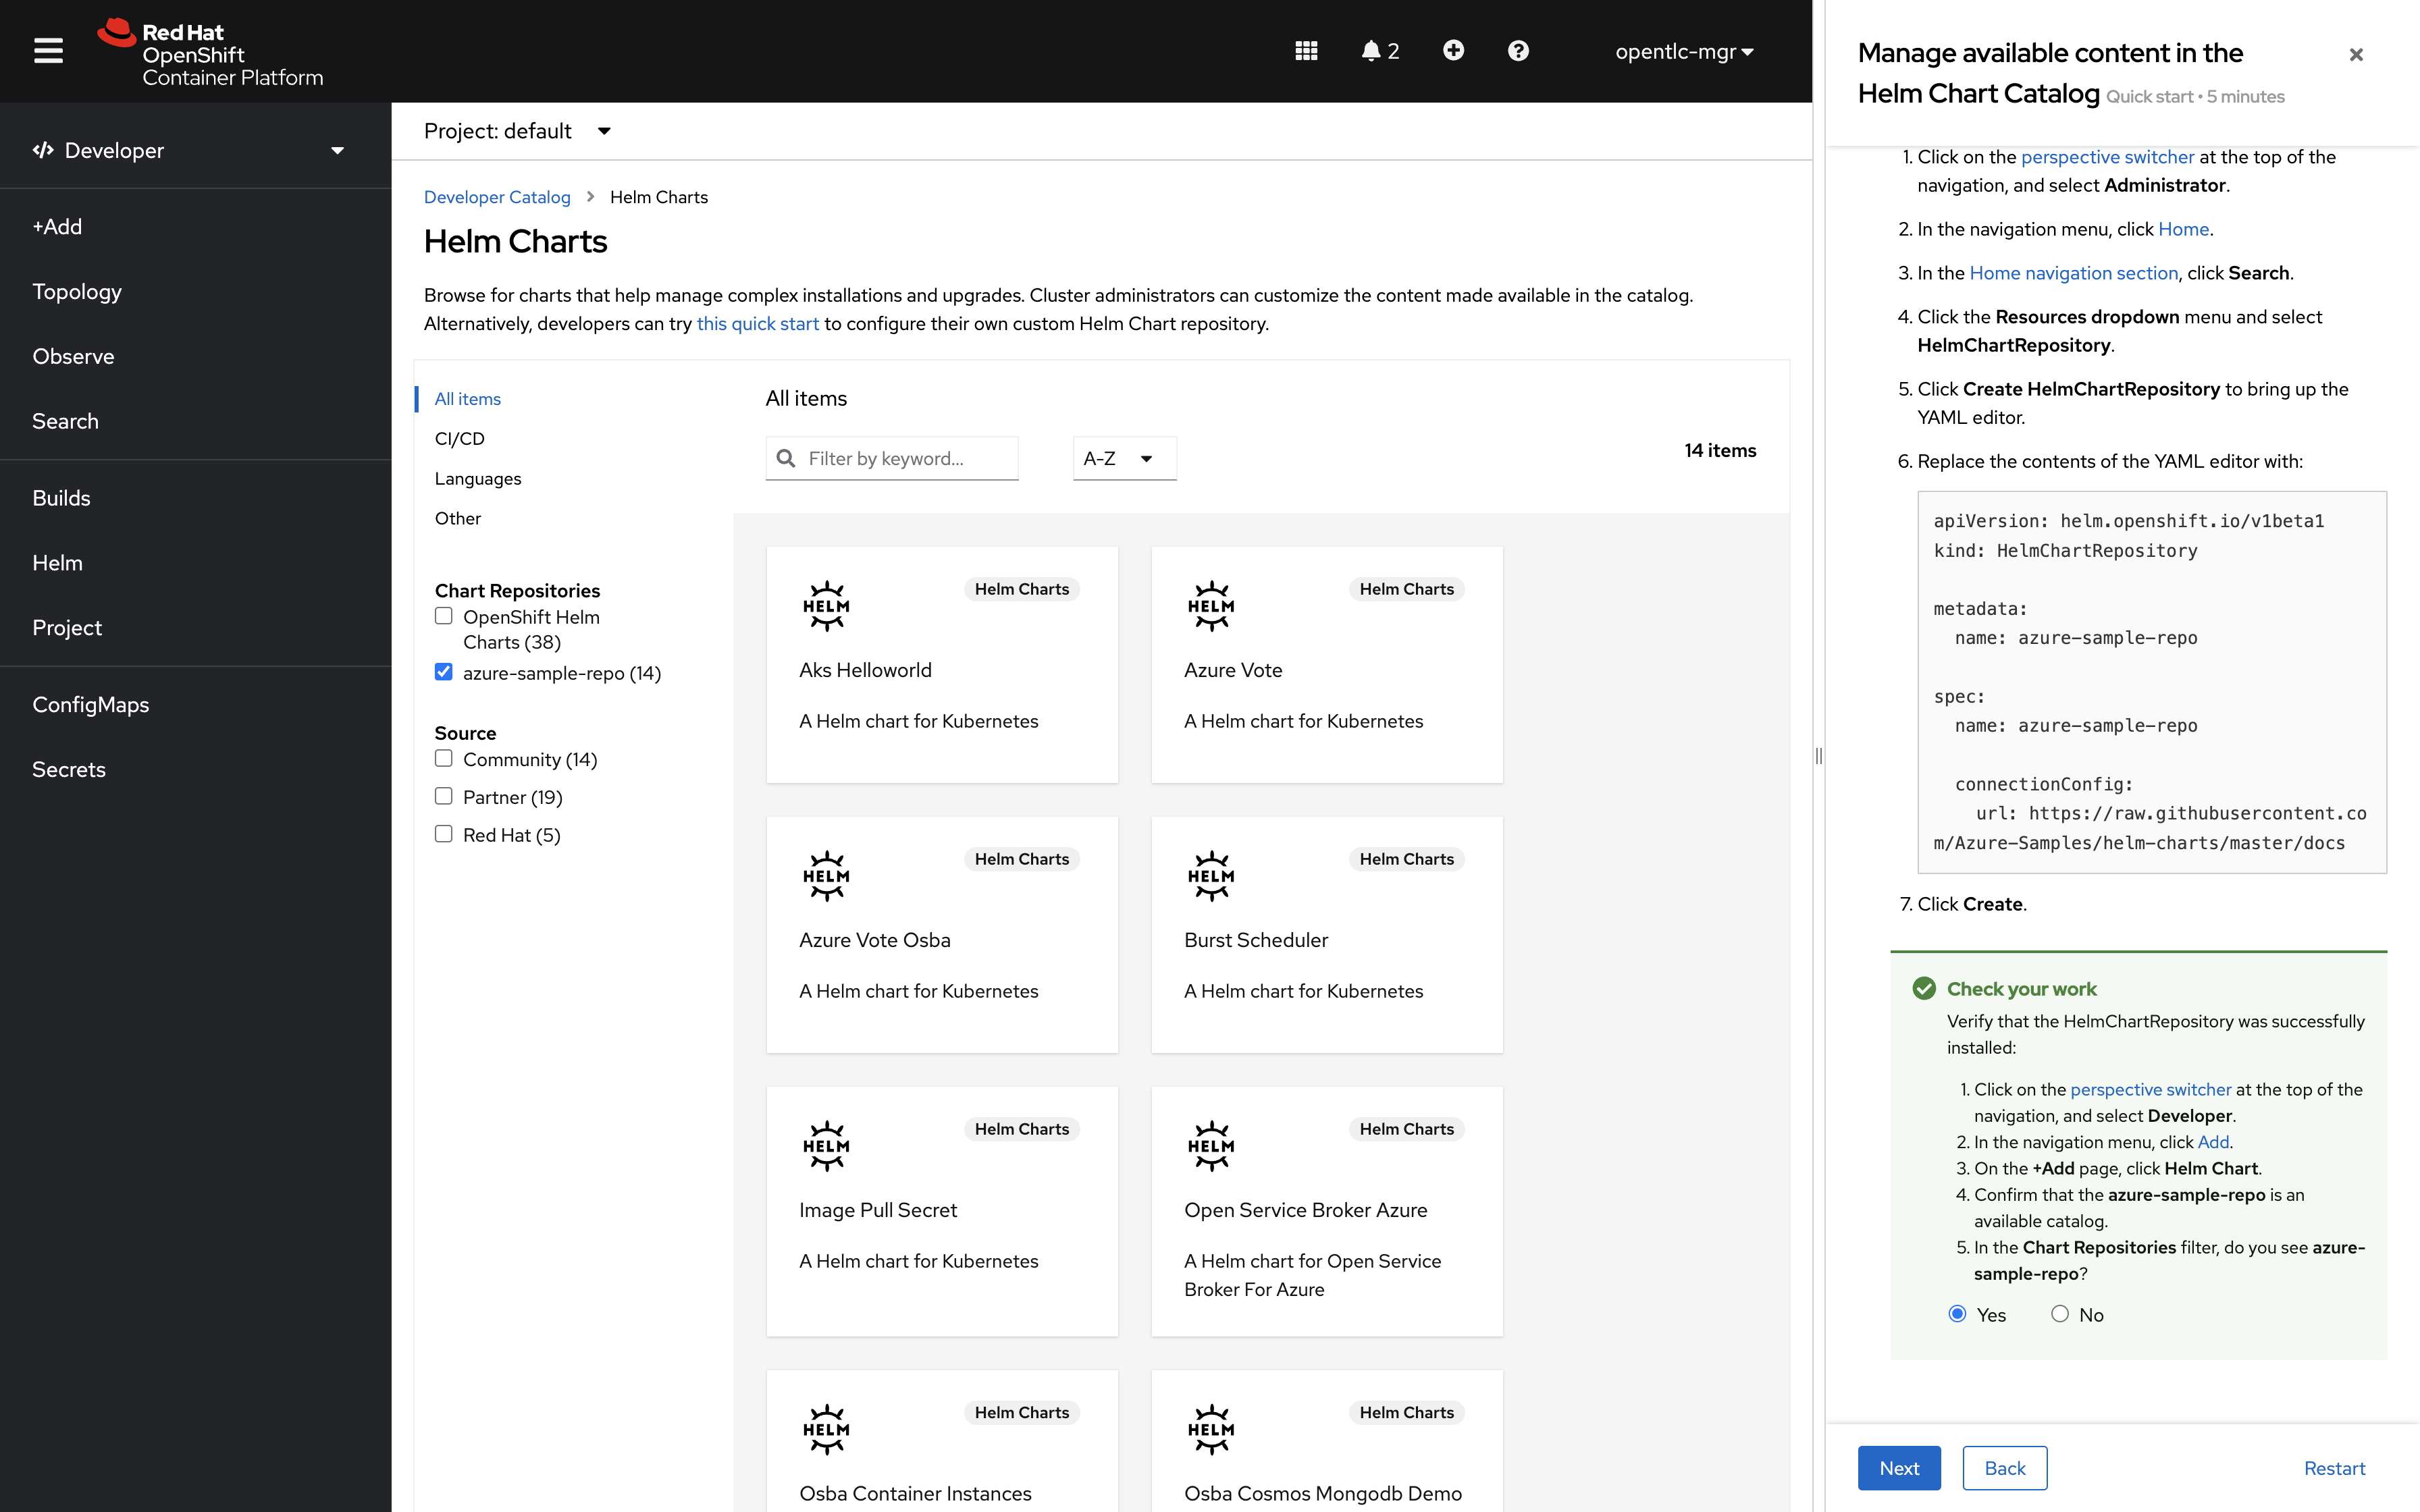
Follow the prompts to check your work and confirm that Azure helm charts are available in the "+Add" Menu.
-
Click "Next" when you are satisified with the results. Then click
Closeto complete the QuickStart
2.2 Disabling Defaults QuickStarts
Image a situation where we wanted our team to have access to the Bitnami Helm repos, but we don’t want to clutter up the menu for other developers by making this content available cluster-wide. ProjectHelmChart resources are the perfect solution when you need per-project or per-team usage of Helm repositories on a cluster.
In this section, we will learn how to modify an existing ConsoleQuickStart resource with new instructions. The resulting ConsoleQuickStart resource should install the Bitnami Helm repo (instead of the Azure helm repository).
-
Use an admin account to create a new project namespace for this test:
oc new-project summit-connect -
Search for Resource type
ConsoleQuickStarts -
Select the item named
install-helmchartrepo-ns -
Generate a patch file that will hide quickstarts from our 'disabled' list:
cat <<EOF > /tmp/patch.yaml spec: customization: quickStarts: disabled: - install-helmchartrepo-ns EOF -
Send the configuration patch to the console cluster operator:
oc patch consoles.operator.openshift.io cluster --type merge --patch-file /tmp/patch.yaml
2.3 QuickStart Modifications
-
Download a copy of the
install-helmchartrepo-nsquickstart:oc get ConsoleQuickStart/install-helmchartrepo-ns -o yaml > helm-qs.yaml -
Update the quickstart’s included
urlattribute with the Bitnami helm repo address:https://charts.bitnami.com/bitnamised -i helm-qs.yaml -e "s/url: 'https:\/\/raw.githubusercontent.com\/Azure-Samples\/helm-charts\/master\/docs'/url: 'https:\/\/charts.bitnami.com\/bitnami\/'/" -
Update the quickstart’s name / id attribute with a unique value:
sed -i helm-qs.yaml -e "s/name: install-helmchartrepo-ns/name: install-helmchart-bitnami/" -
Upload the updated quickstart:
oc create -f helm-qs.yaml
In the next section, the reader will verify that the quickstart has been updated by running a manual test of the modified resource.
2.4 Check your work - Helm Charts per project
Follow along with the "Add Helm Chart Repositories to extend the Developer Catalog for your project" quickstart to test your modifications from the previous seciton:
-
Click on the "?" icon in the header menu, Then select "Quick Starts".
-
Search for "Helm", then select the tile labeled "Add Helm Chart Repositories to extend the Developer Catalog for your project"
-
Complete each step of the quickstart. Upon completion, you will confirm that the Bitnami helm repo has been enabled for use within the
summit-connectproject namespace