Setup
Prerequisite CLI Tools
The following CLI tools are required for running the exercises in this tutorial. Please have them installed and configured before you get started with any of the tutorial chapters.
| Tool | macOS | Fedora | Windows |
|---|---|---|---|
|
|||
|
|
||
|
|||
Minikube v1.20.0 |
|||
|
|||
|
|||
|
The following CLI tools are optional for running the exercises in this tutorial. Although they are used in the tutorial, you could use others without any problem.
| Tool | macOS | Fedora | Windows |
|---|---|---|---|
watch |
|
|
Download Tutorial Source Files
Before we start setting up the environment, let’s clone the tutorial sources and set the TUTORIAL_HOME environment variable to point to the root directory of the tutorial:
git clone https://github.com/redhat-scholars/argocd-tutorial.git gitopsexport TUTORIAL_HOME="$(pwd)/gitops"cd $TUTORIAL_HOMESetup OpenShift / Kubernetes Cluster
The profile gitops is created to run the tutorial:
Having minikube installed and in your PATH, then run:
MacOS
minikube start --memory=8192 --cpus=3 --kubernetes-version=v1.20.2 --vm-driver=virtualbox -p gitopsLinux
minikube start --memory=8192 --cpus=3 --kubernetes-version=v1.20.2 --vm-driver=kvm2 -p gitopsWindows:
minikube start --memory=8192 --cpus=3 --kubernetes-version=v1.20.2 --vm-driver=hyperv -p gitopsAnd the output must be something similar like:
😄  [gitops] minikube v1.20.0 on Darwin 11.3
✅  Created a new profile : gitops
✅  minikube profile was successfully set to gitops
😄  [default] minikube v1.20.0 on Darwin 11.3
✨  Selecting 'virtualbox' driver from user configuration (alternates: [hyperkit])
🔥  Creating virtualbox VM (CPUs=2, Memory=8192MB, Disk=50000MB) ...
🐳  Preparing Kubernetes v1.20.2 on Docker '20.10.6' ...
    ▪ apiserver.enable-admission-plugins=LimitRanger,NamespaceExists,NamespaceLifecycle,ResourceQuota,ServiceAccount,DefaultStorageClass,MutatingAdmissionWebhook
🚜  Pulling images ...
🚀  Launching Kubernetes ...
⌛  Waiting for cluster to come online ...
🏄  Done! kubectl is now configured to use "gitops"
Finally configure to use minikube internal docker as docker host:
eval $(minikube docker-env -p gitops)To run OpenShift4, you need to have one provisioned using try.openshift.com or can use any existing OpenShift4 cluster. Once you have your cluster, you can download the latest OpenShift client(oc) from here and add to your path.
oc version
You can check the OpenShift version using:
oc versionThe output should show oc version >=4.7:
Client Version: 4.7.0-202102130115.p0-c66c03f
Kubernetes Version: v1.20.2
Then login into the OpenShift cluster using oc login
Now you’re ready to install Argo CD on Kubernetes.
Argo CD Installation
In this section we will be exploring how to install Argo CD on Minikube, and how to install it on OpenShift with the OpenShift GitOps Operator.
In the minikube guide, an Argo CD upstream deployment will be installed and used.
Enable the Ingress Addon for Minikube:
minikube addons enable ingress -p gitopsCheck that the addon has been enabled:
🌟 The 'ingress' addon is enabledInstall ArgoCD and check that every pod is running properly in the argocd namespace:
kubectl create namespace argocd
kubectl apply -n argocd -f https://raw.githubusercontent.com/argoproj/argo-cd/stable/manifests/install.yaml|
It will take few mins for the ArgoCD components to be installed, you can watch the status using the command: You can use Ctrl+c to terminate the watch |
A successful deployment of ArgoCD will show the following pods:
NAME                                  READY   STATUS    RESTARTS   AGE
argocd-application-controller-0       1/1     Running   0          2m18s
argocd-dex-server-5dd657bd9-2r24r     1/1     Running   0          2m19s
argocd-redis-759b6bc7f4-bnljg         1/1     Running   0          2m19s
argocd-repo-server-6c495f858f-p5267   1/1     Running   0          2m18s
argocd-server-859b4b5578-cv2qx        1/1     Running   0          2m18s
Patch the ArgoCD service from ClusterIP to a LoadBalancer:
kubectl patch svc argocd-server -n argocd -p '{"spec": {"type": "LoadBalancer"}}'Now with the minikube service list you can check the argocd service exposed:
minikube -p gitops service list | grep argocdArgoCD is supported in OpenShift 4.7 by Red Hat OpenShift GitOps operator.
To install it, you need to follow the instructions from OpenShift GitOps installation documentation. A summary of the documentation is provided below:
|
The ability to install Operators is limited to users with the |
-
Switch to the Administrator perspective in the OpenShift web console.
-
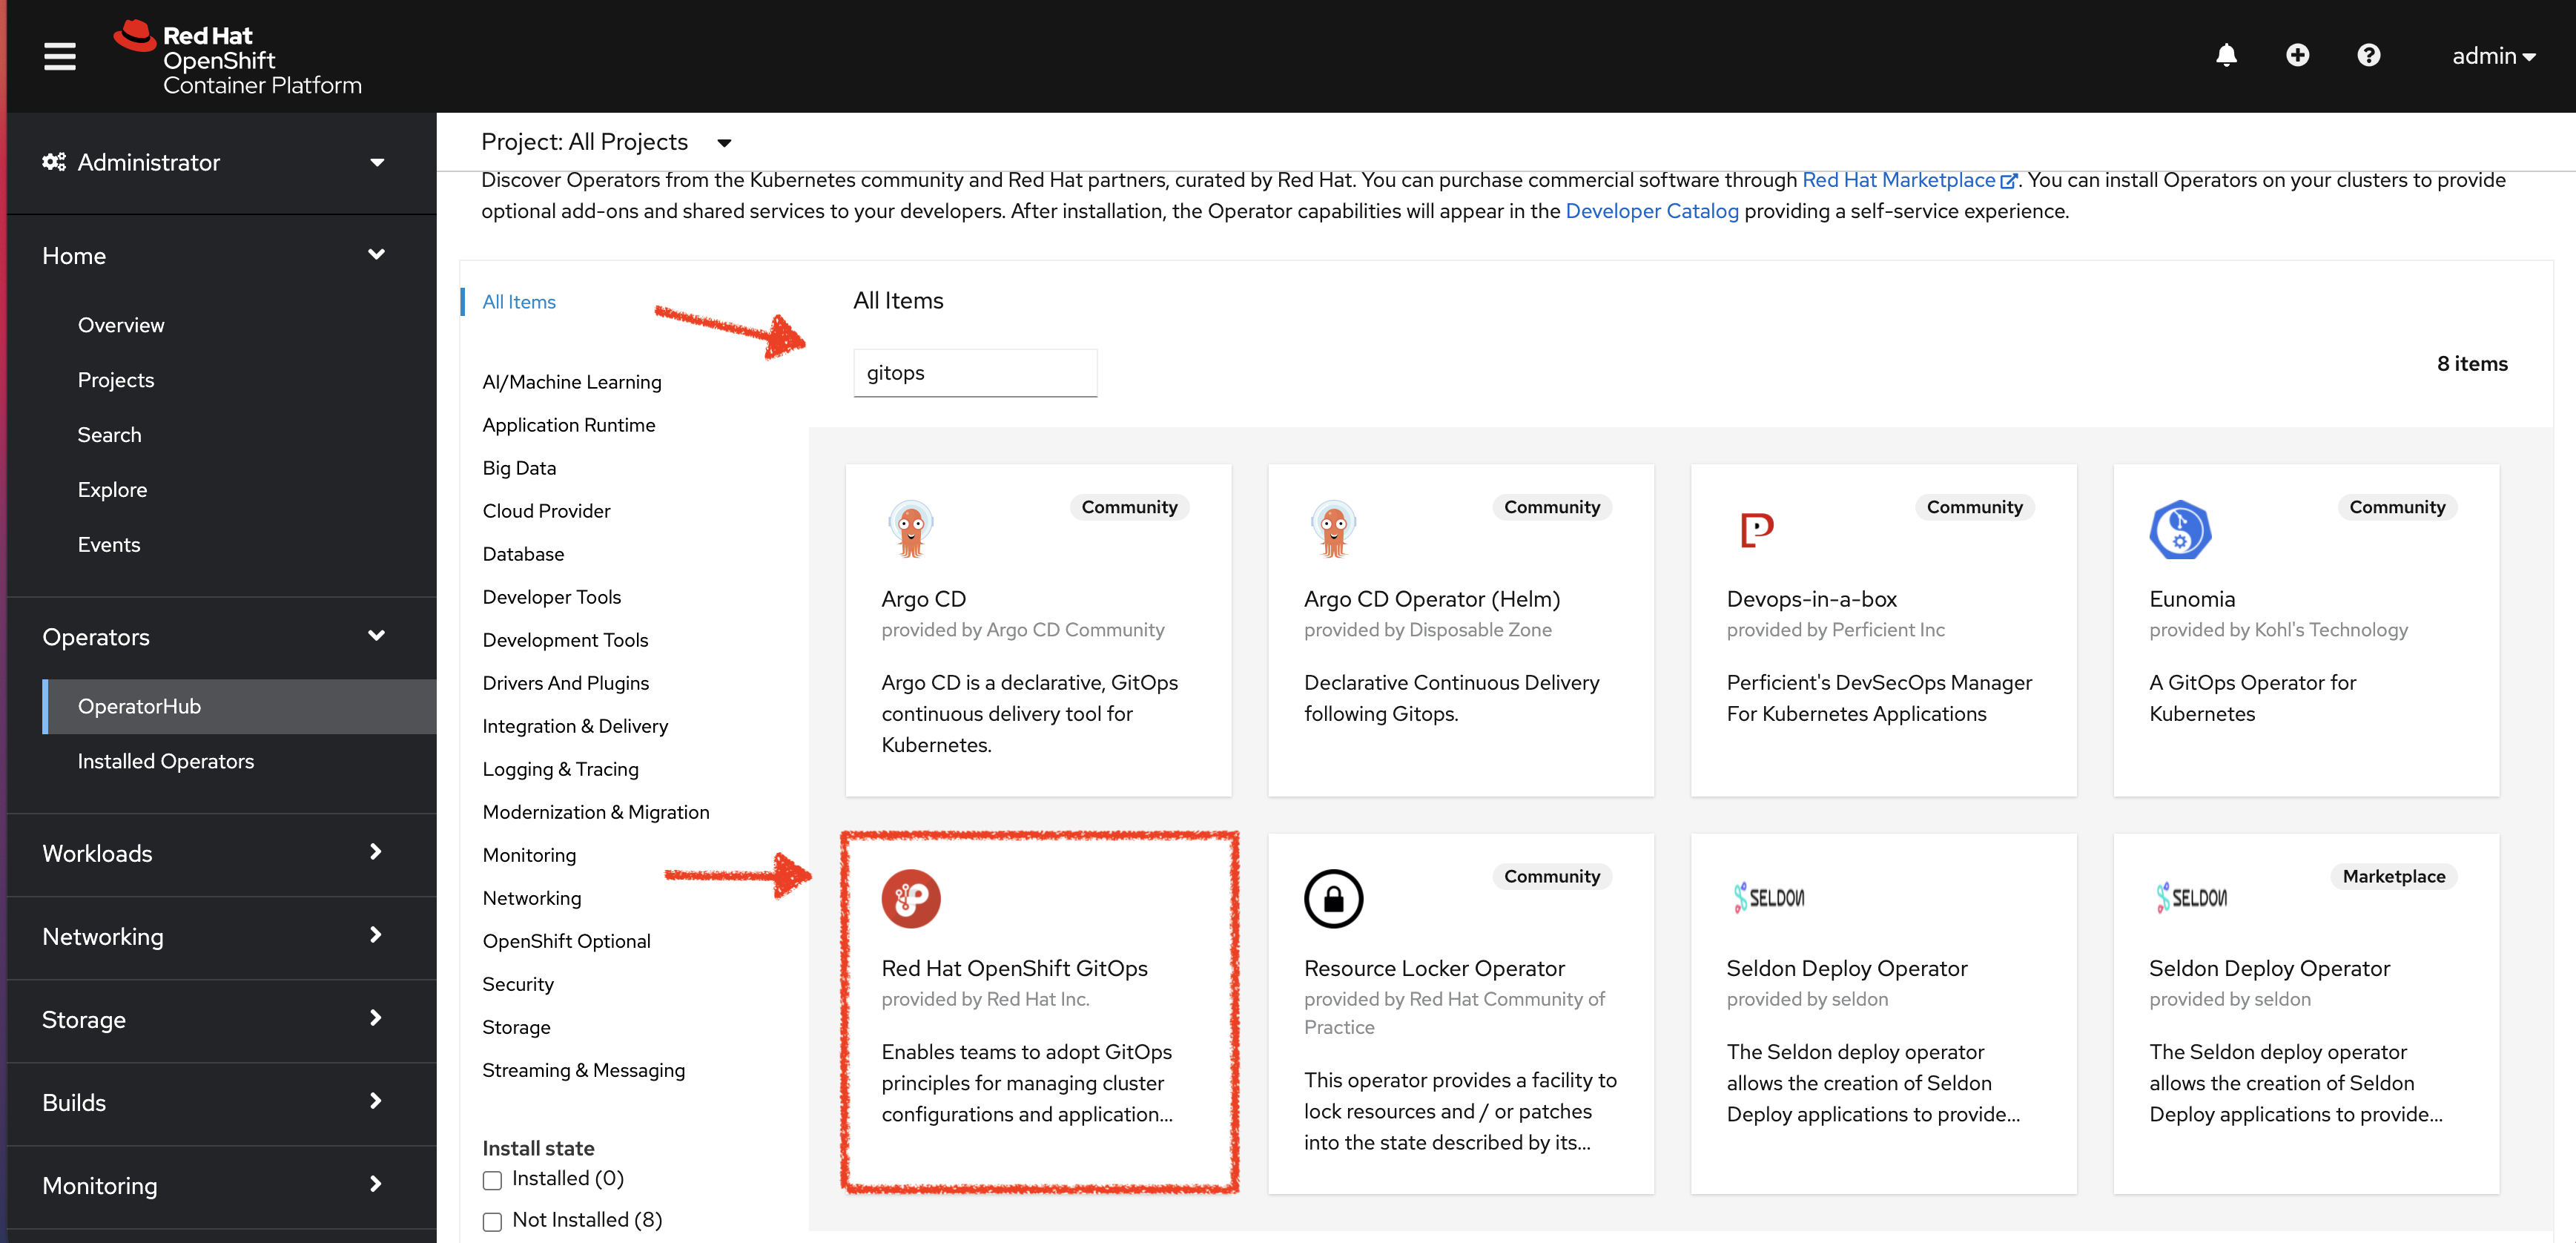
Navigate to Operators → OperatorHub using the menu on the left.
-
Search for OpenShift GitOps in OperatorHub.
-
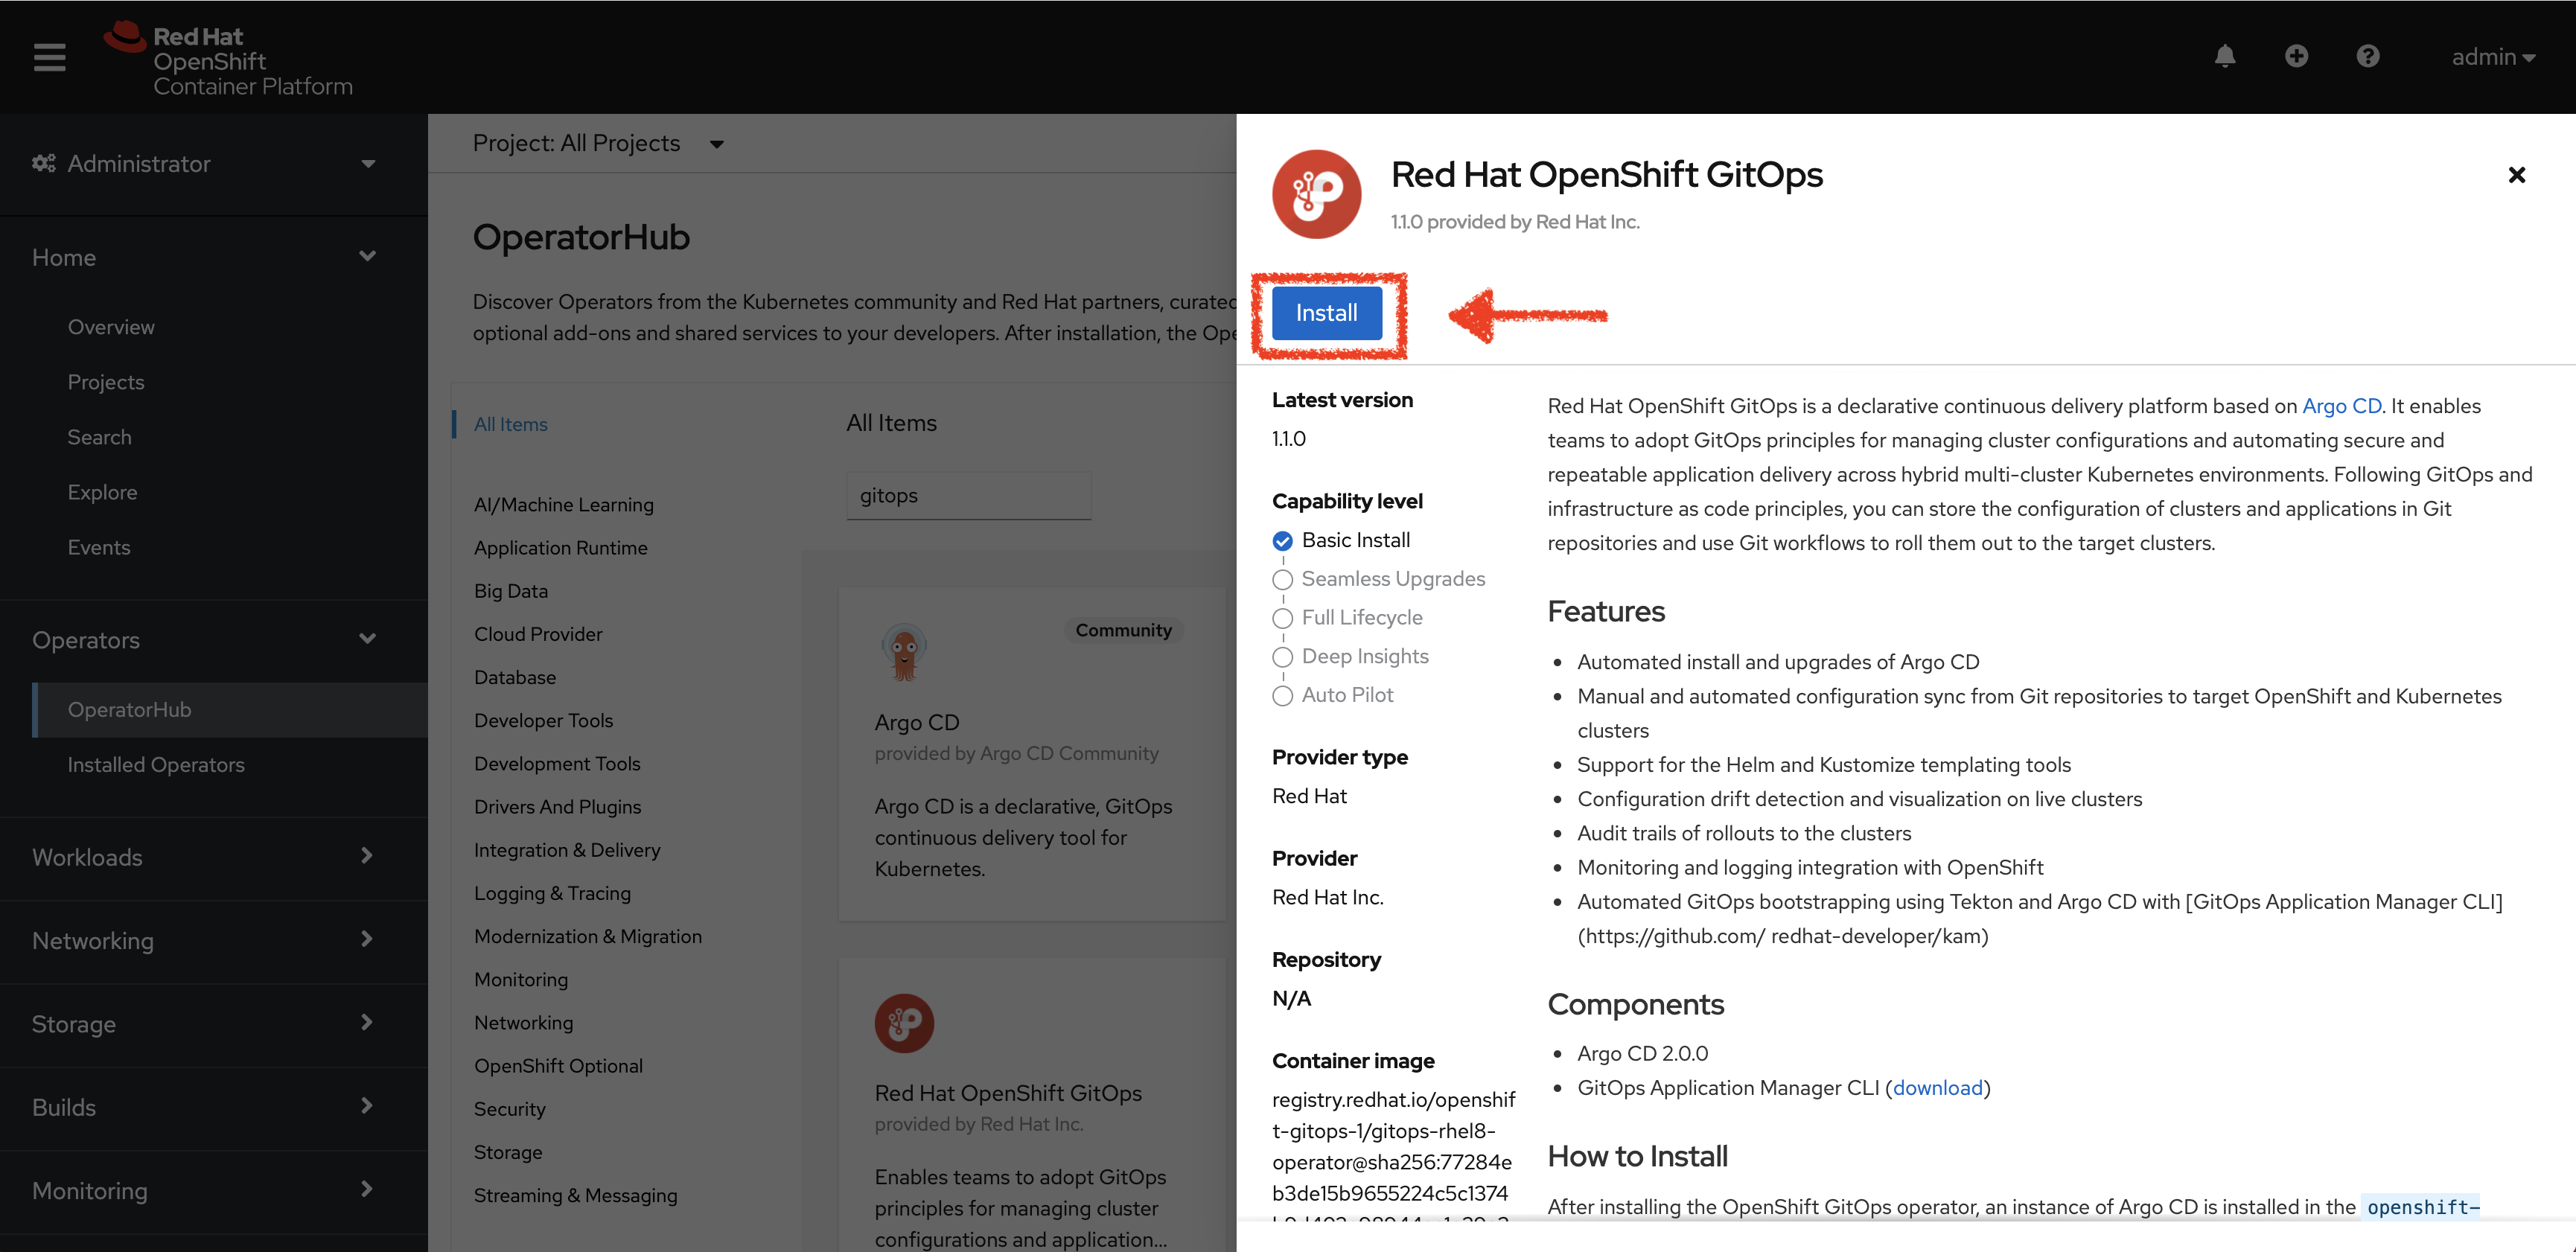
Click the Red Hat OpenShift GitOps tile.
-
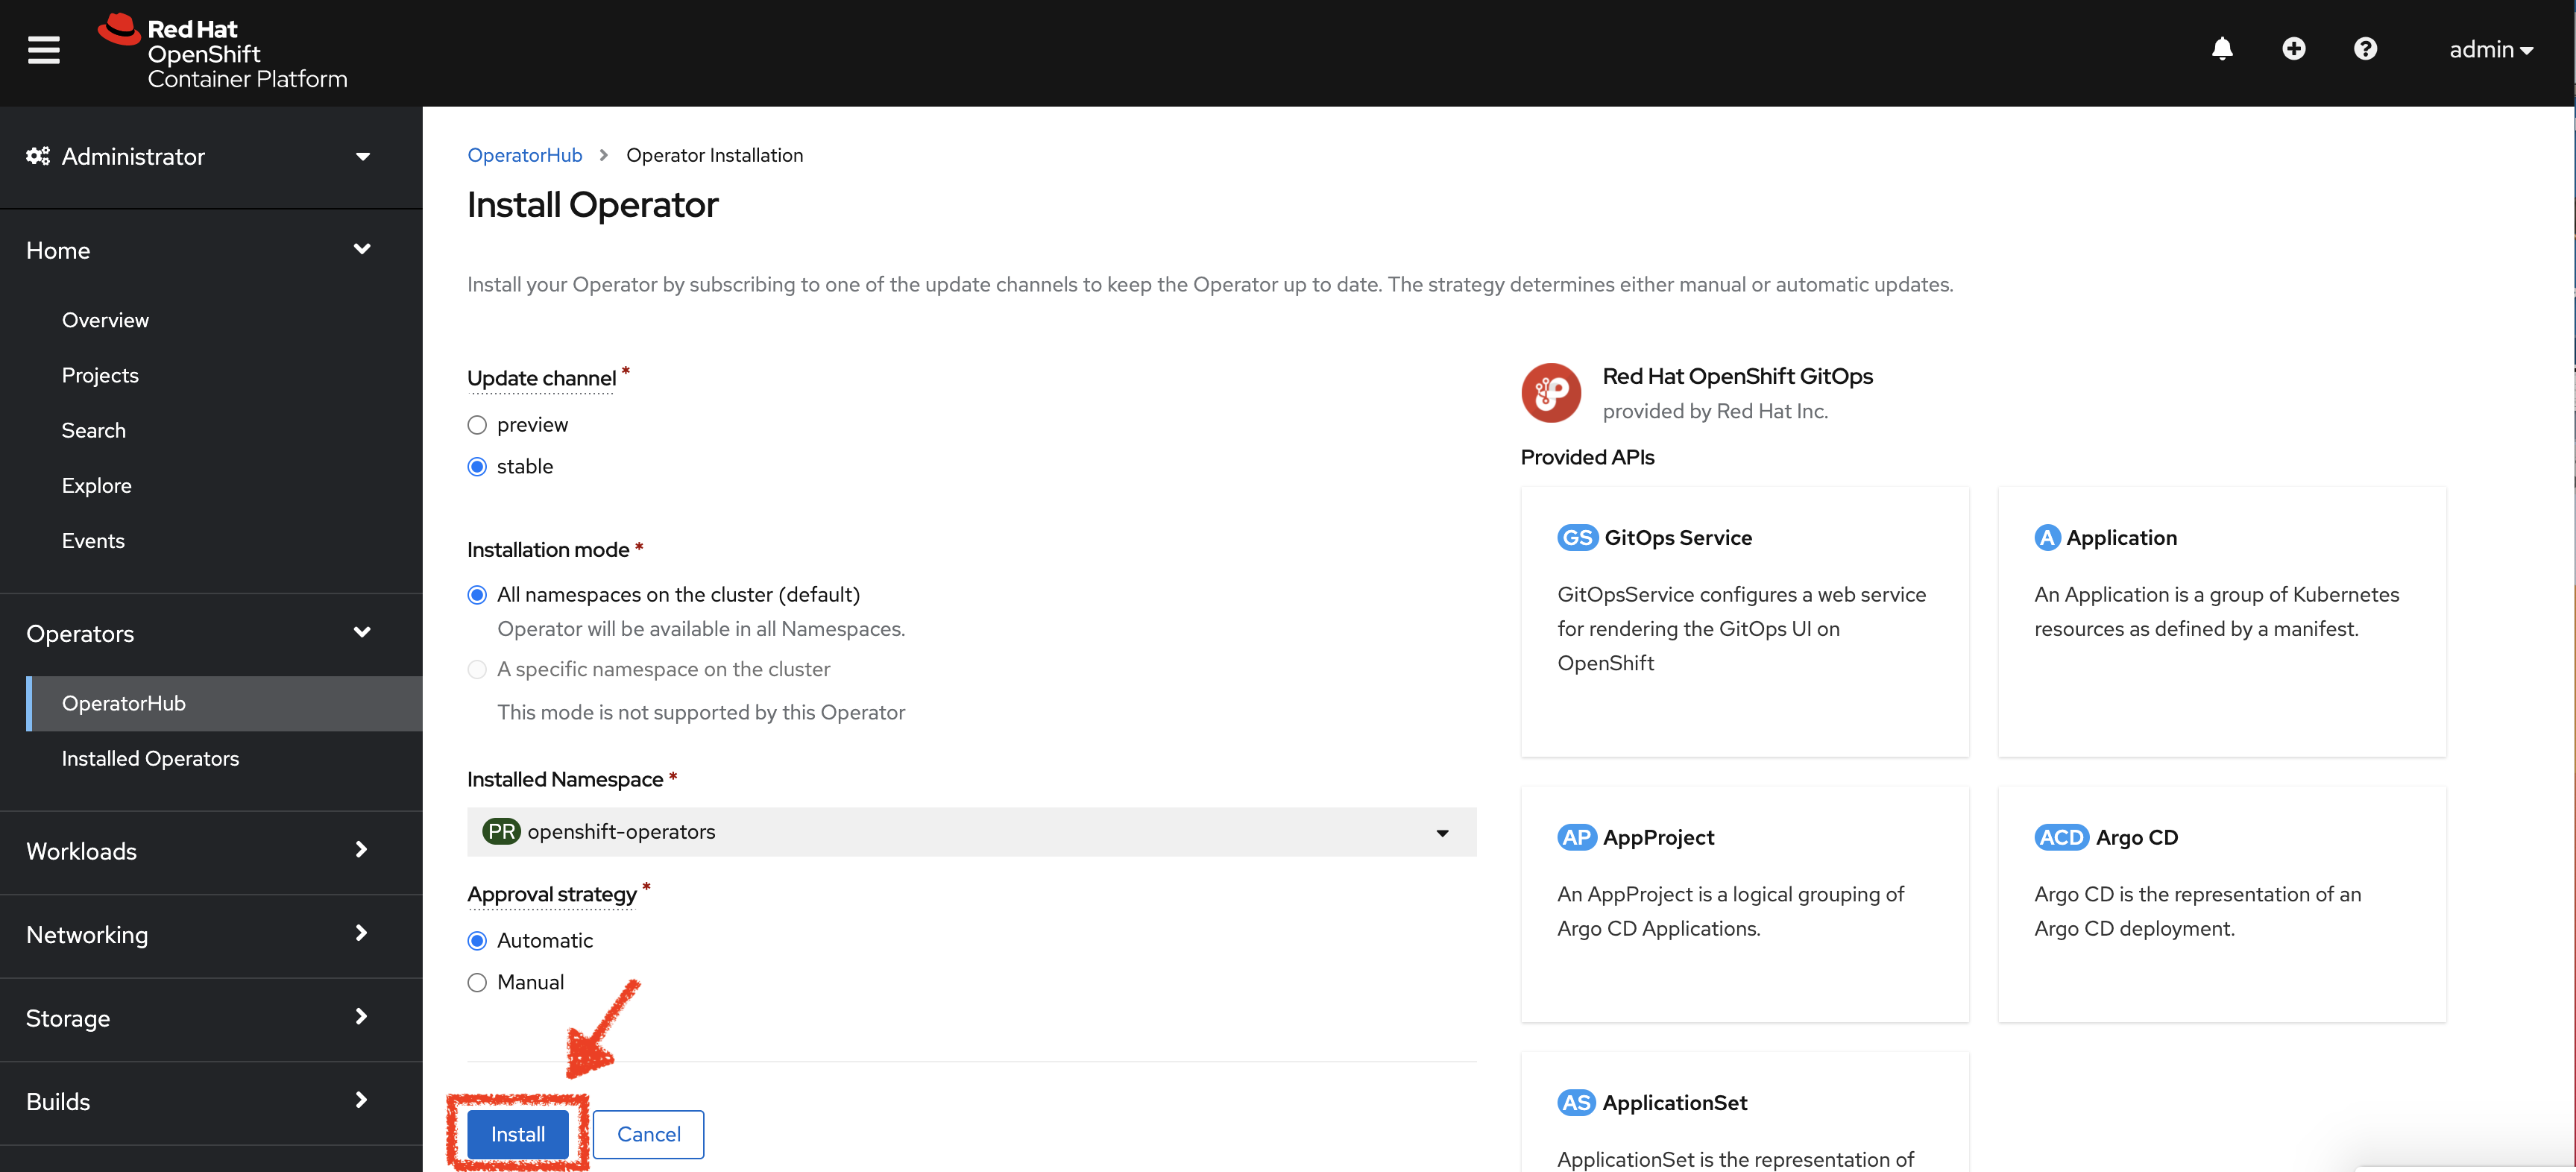
Select the Stable channel.
-
Click the Install button.
-
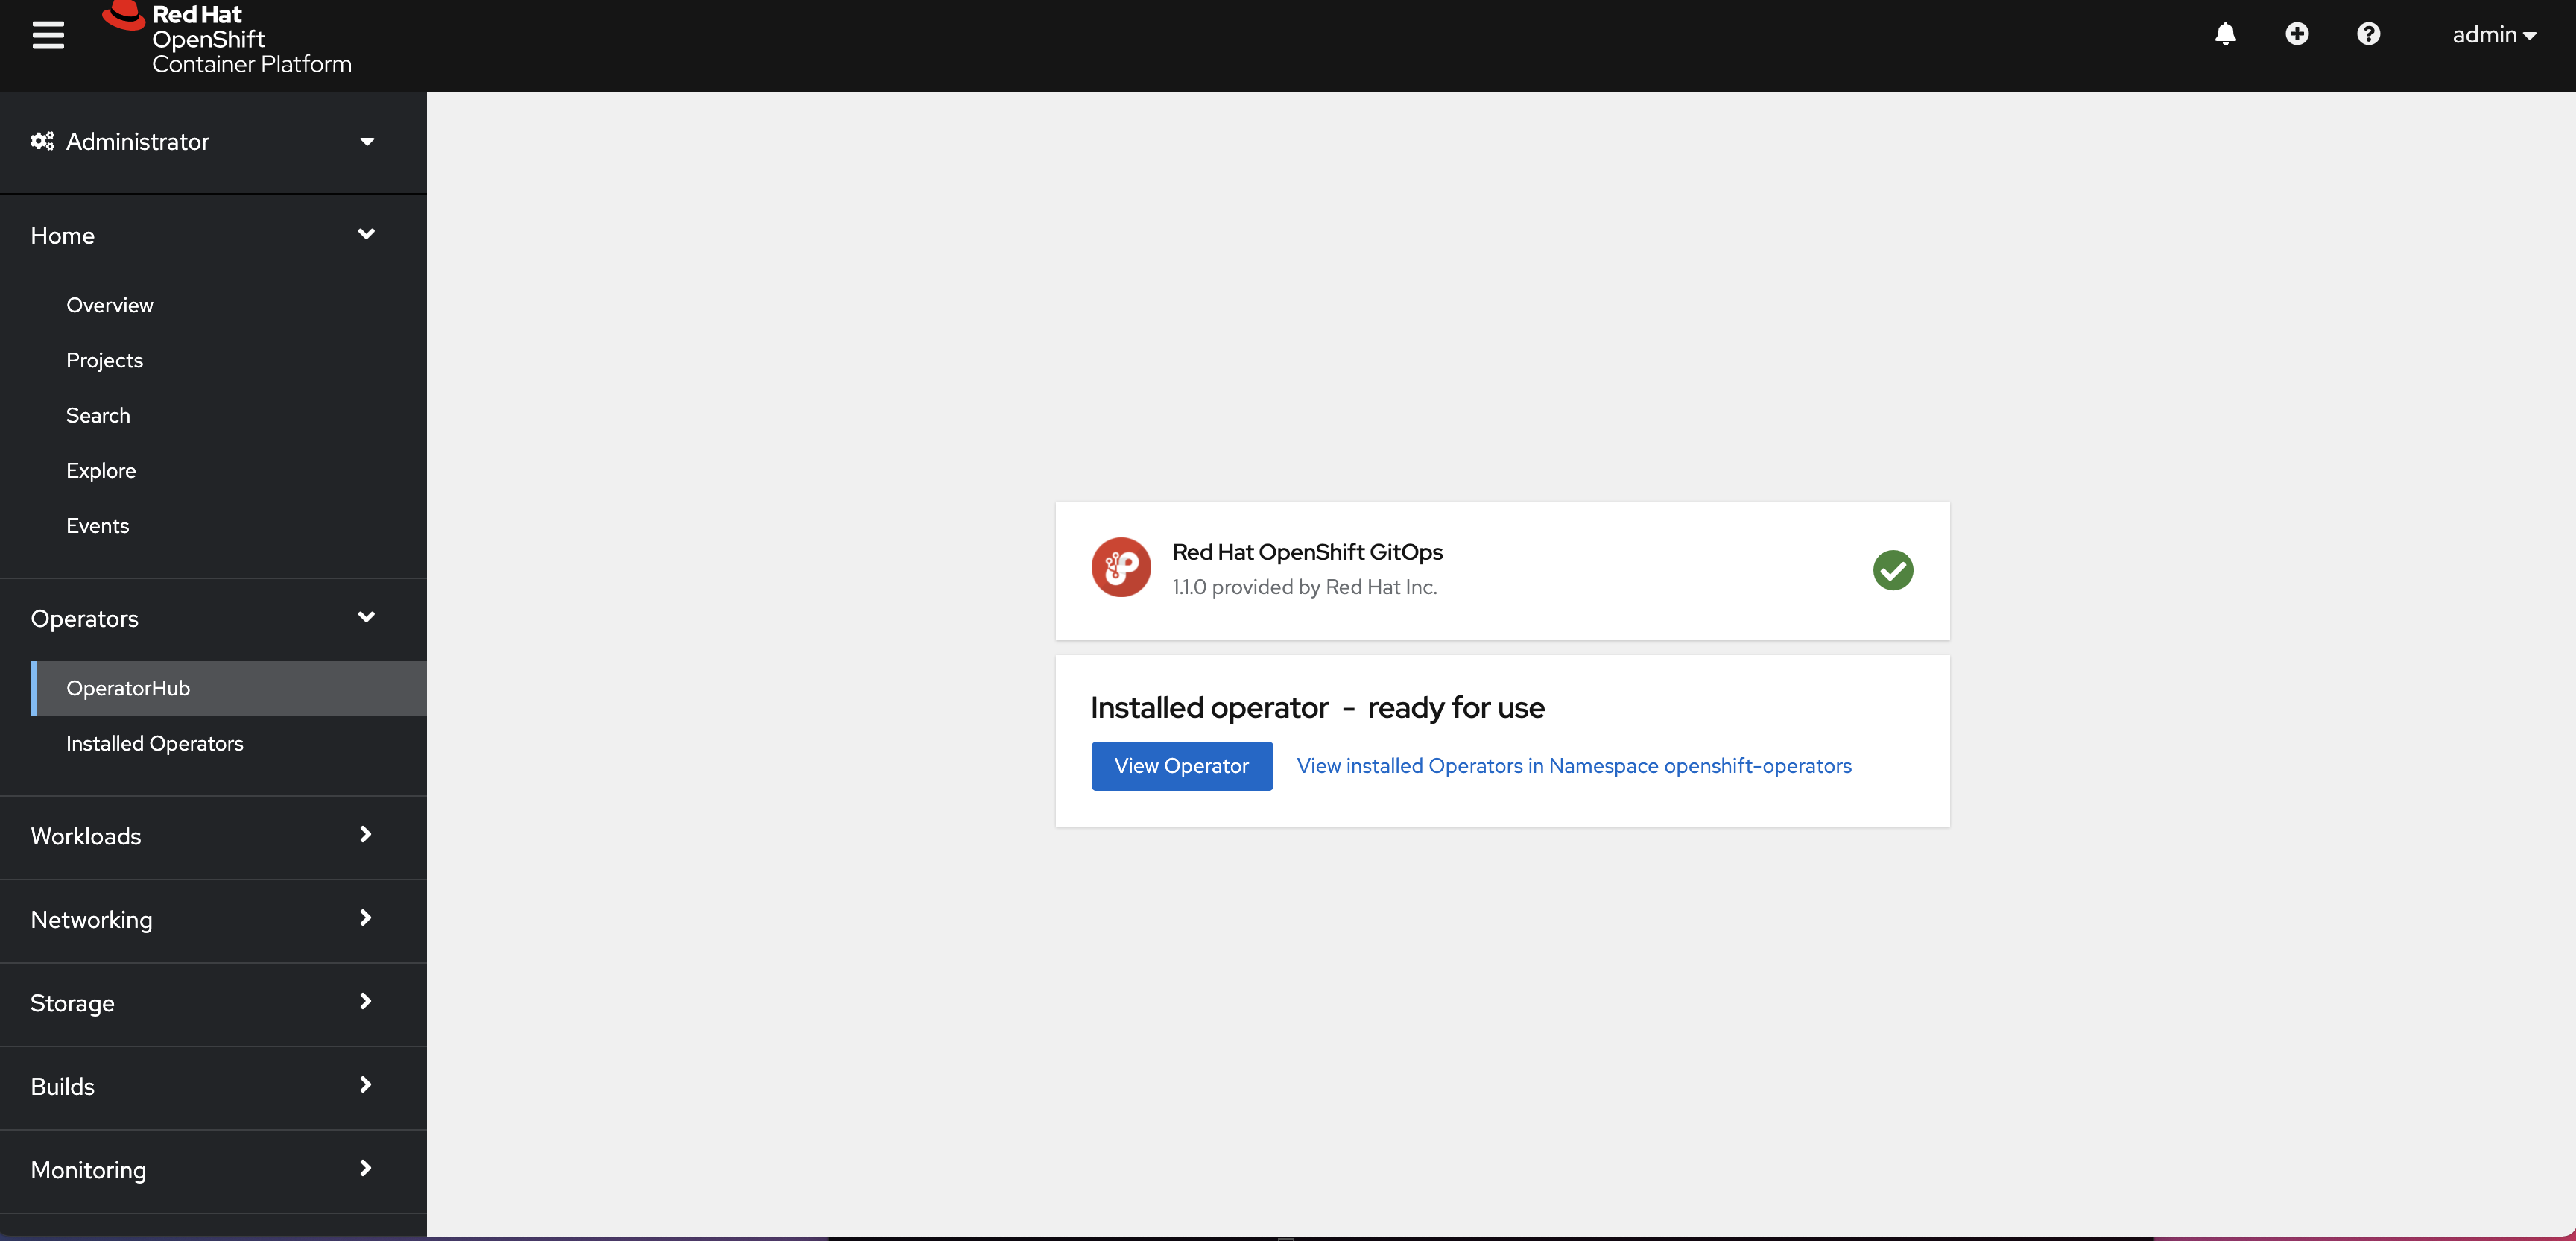
Wait for the installation process to complete.
-
Login to the cluster using the
occlient. You can copy a login command from the OpenShift web console: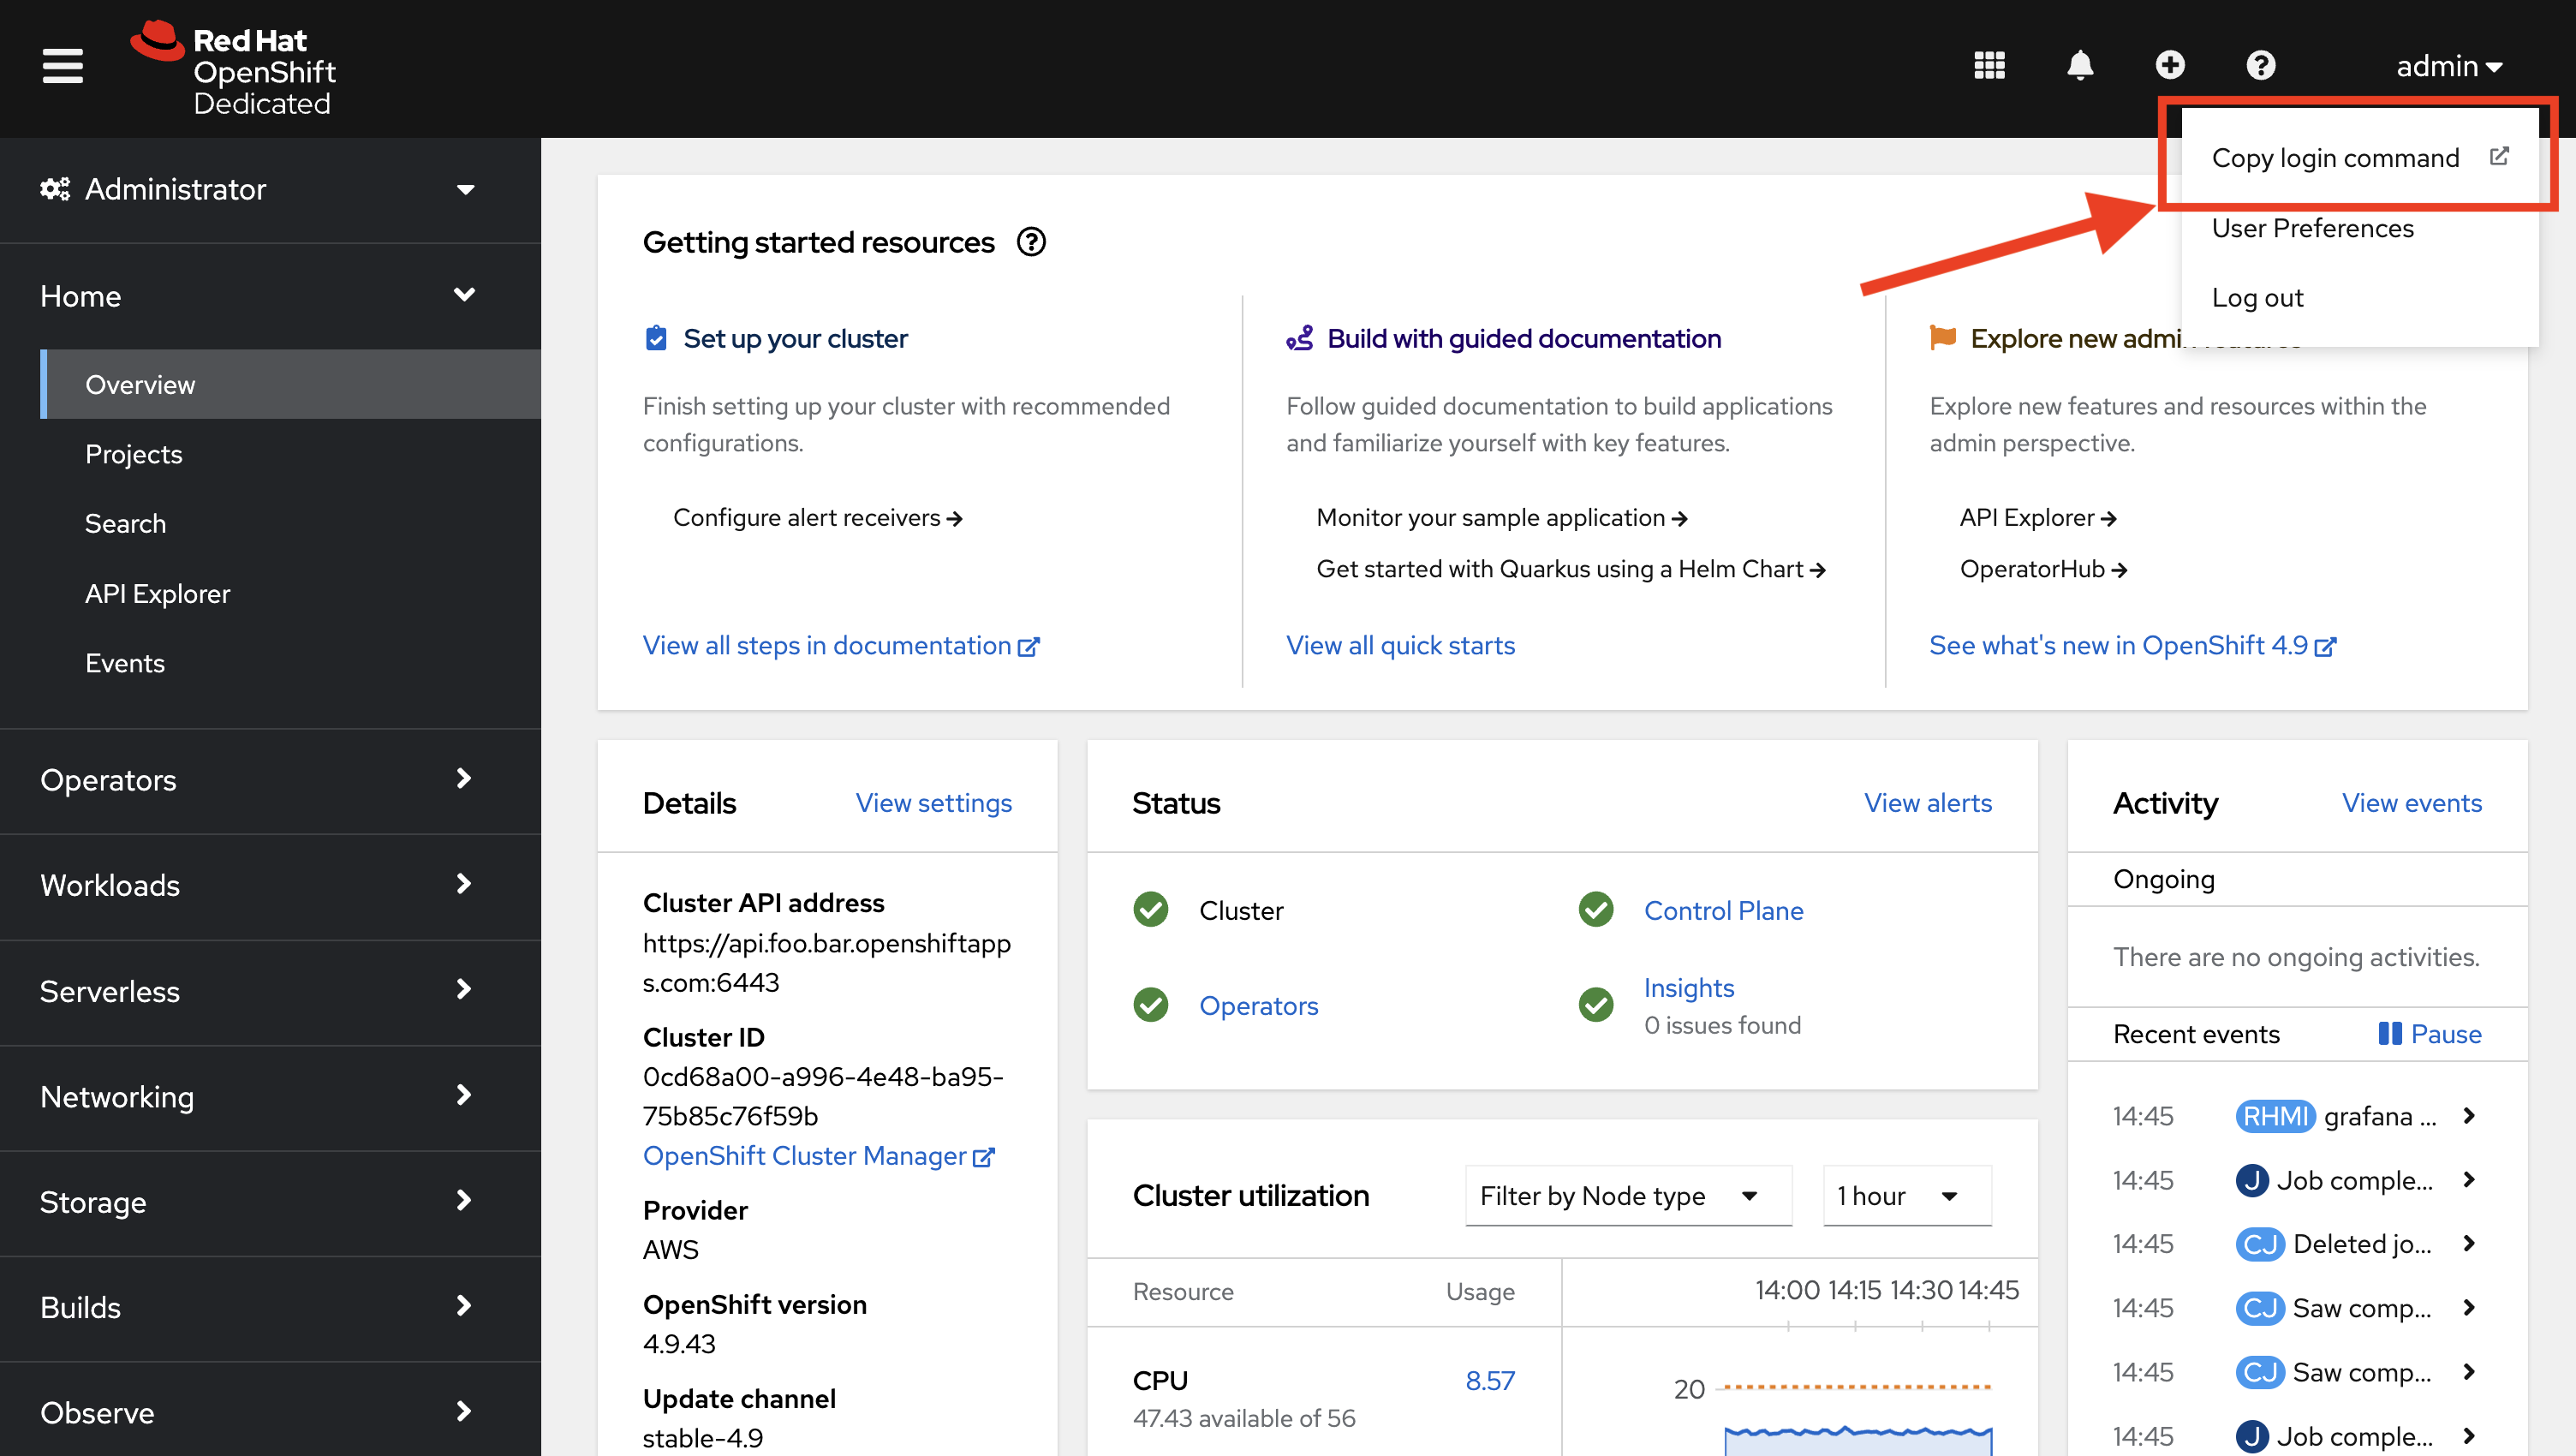
-
Verify that all the required Pods have been deployed in
openshift-gitopsnamespace using the following command:oc get pods -n openshift-gitopsThe output should show a list of Pods similar to this:
NAME READY STATUS RESTARTS AGE argocd-cluster-application-controller-6f548f74b-48bvf 1/1 Running 0 54s argocd-cluster-redis-6cf68d494d-9qqq4 1/1 Running 0 54s argocd-cluster-repo-server-85b9d68f9b-4hj52 1/1 Running 0 54s argocd-cluster-server-78467b647-8lcv9 1/1 Running 0 54s cluster-86f8d97979-lfdhv 1/1 Running 0 56s kam-7ff6f58c-2jxkm 1/1 Running 0 55s -
Verify that the Operator is listed when you issue the following command:
oc get operatorsThis should have the following output.
NAME AGE openshift-gitops-operator.openshift-operators 25m openshift-pipelines-operator-rh.openshift-operators 25m -
Give the ServiceAccount for ArgoCD the ability to manage the cluster:
oc adm policy add-cluster-role-to-user cluster-admin -z openshift-gitops-argocd-application-controller -n openshift-gitops
That’s it! You learned how to install an Operator on OpenShift using OperatorHub, and how to use administrative commands via oc adm to apply cluster roles to users.