Overview
If new to AsciiDoc refer to primer to get familiarized with AsciiDoc.
Create a New Course
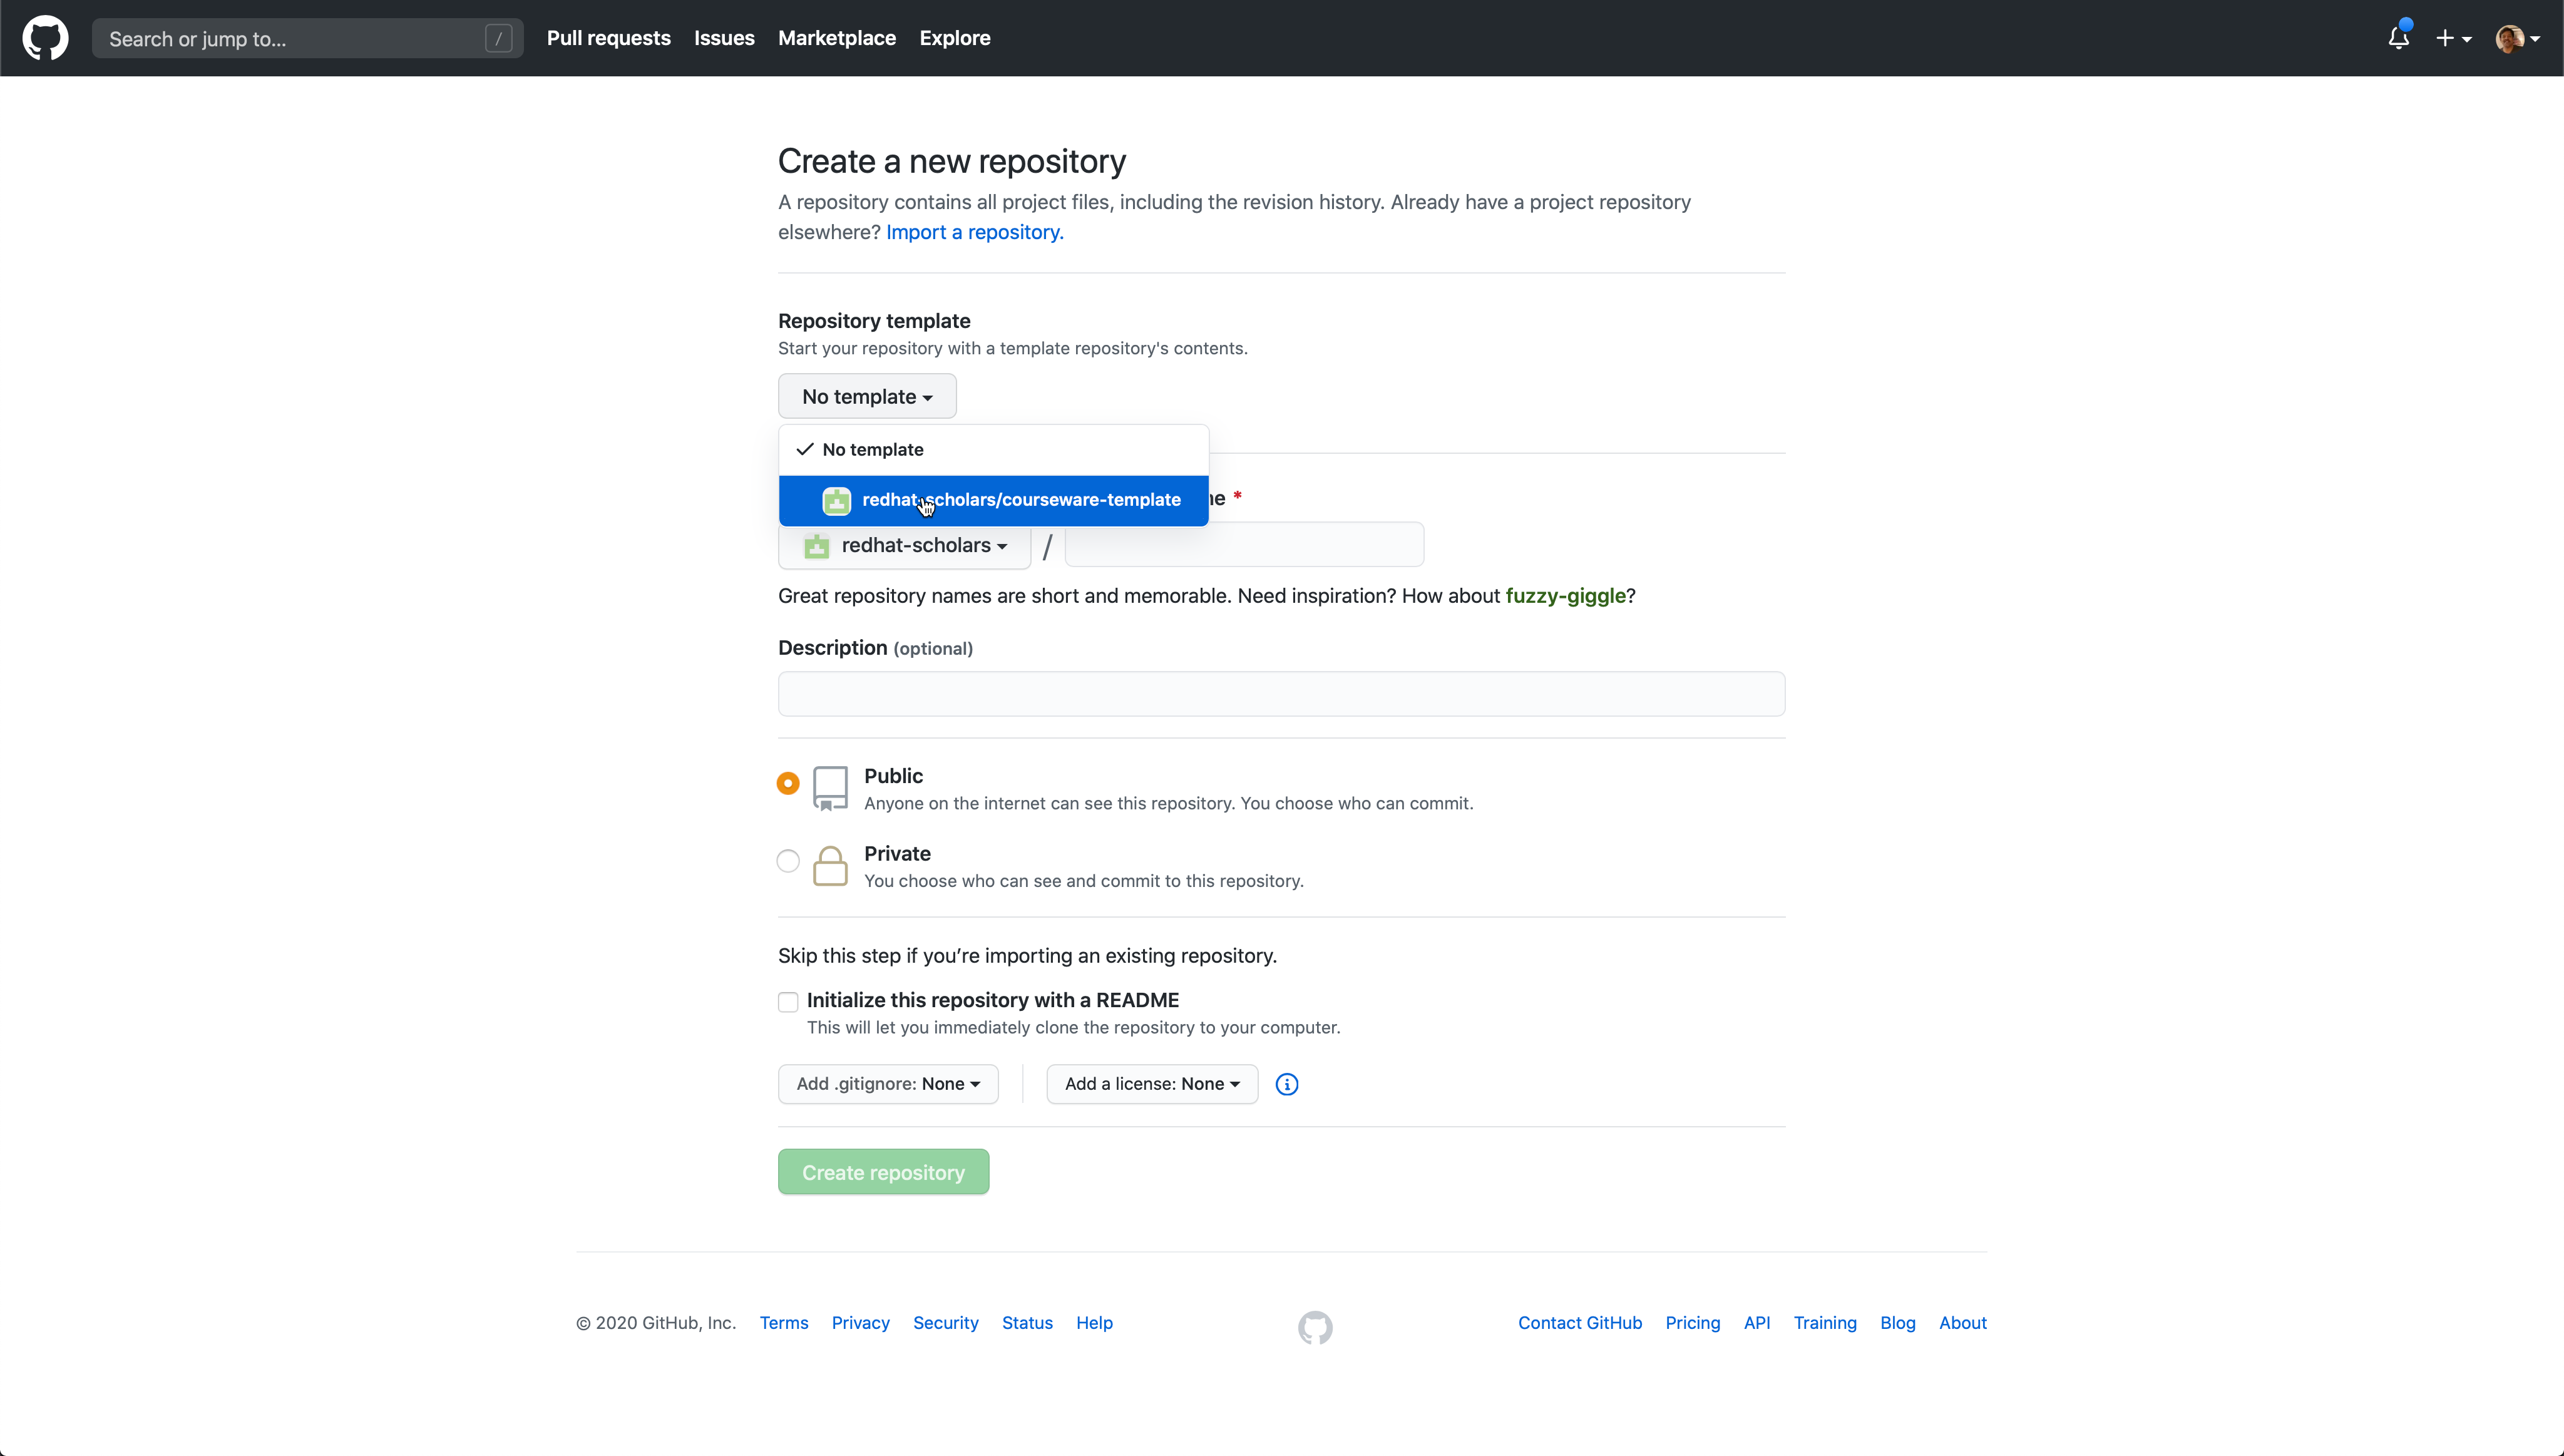
You can create new course project using GitHub template, from the https://github.com/redhat-scholars, click "New" repository and choose the template as shown:

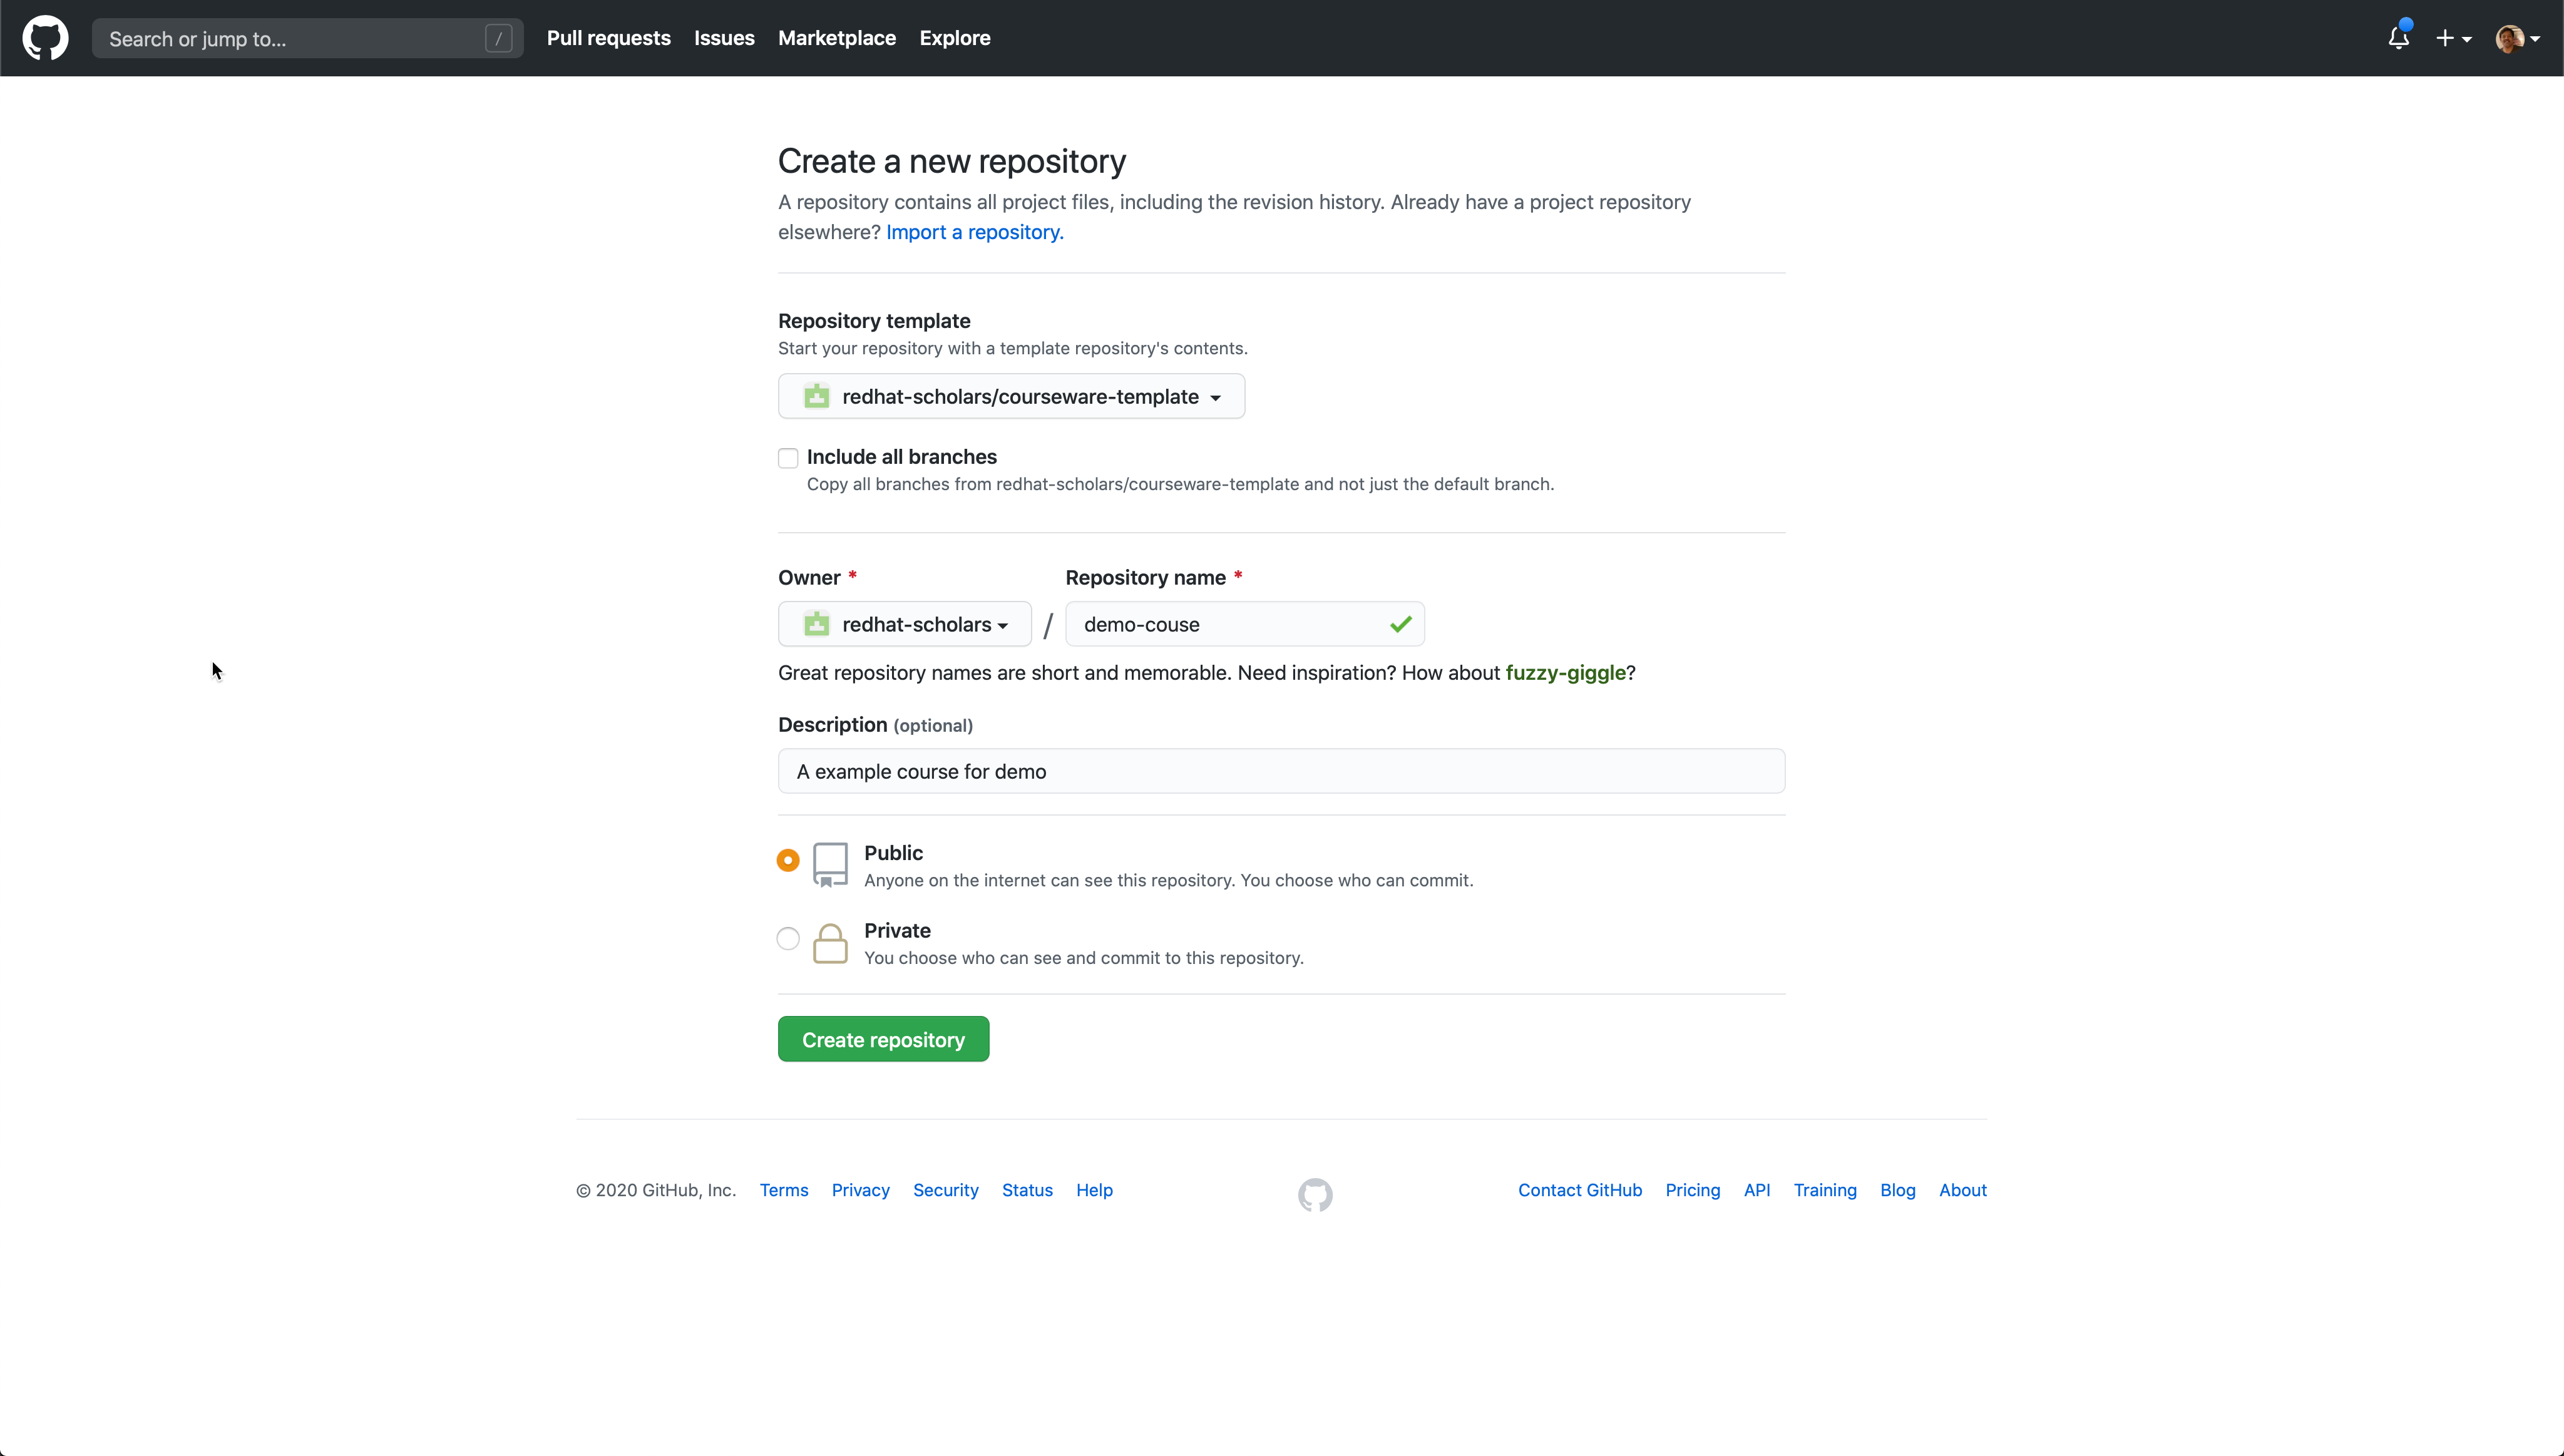
Fill the other details for the project and click create "Create Repository" to create the new project:

Course Directory Structure
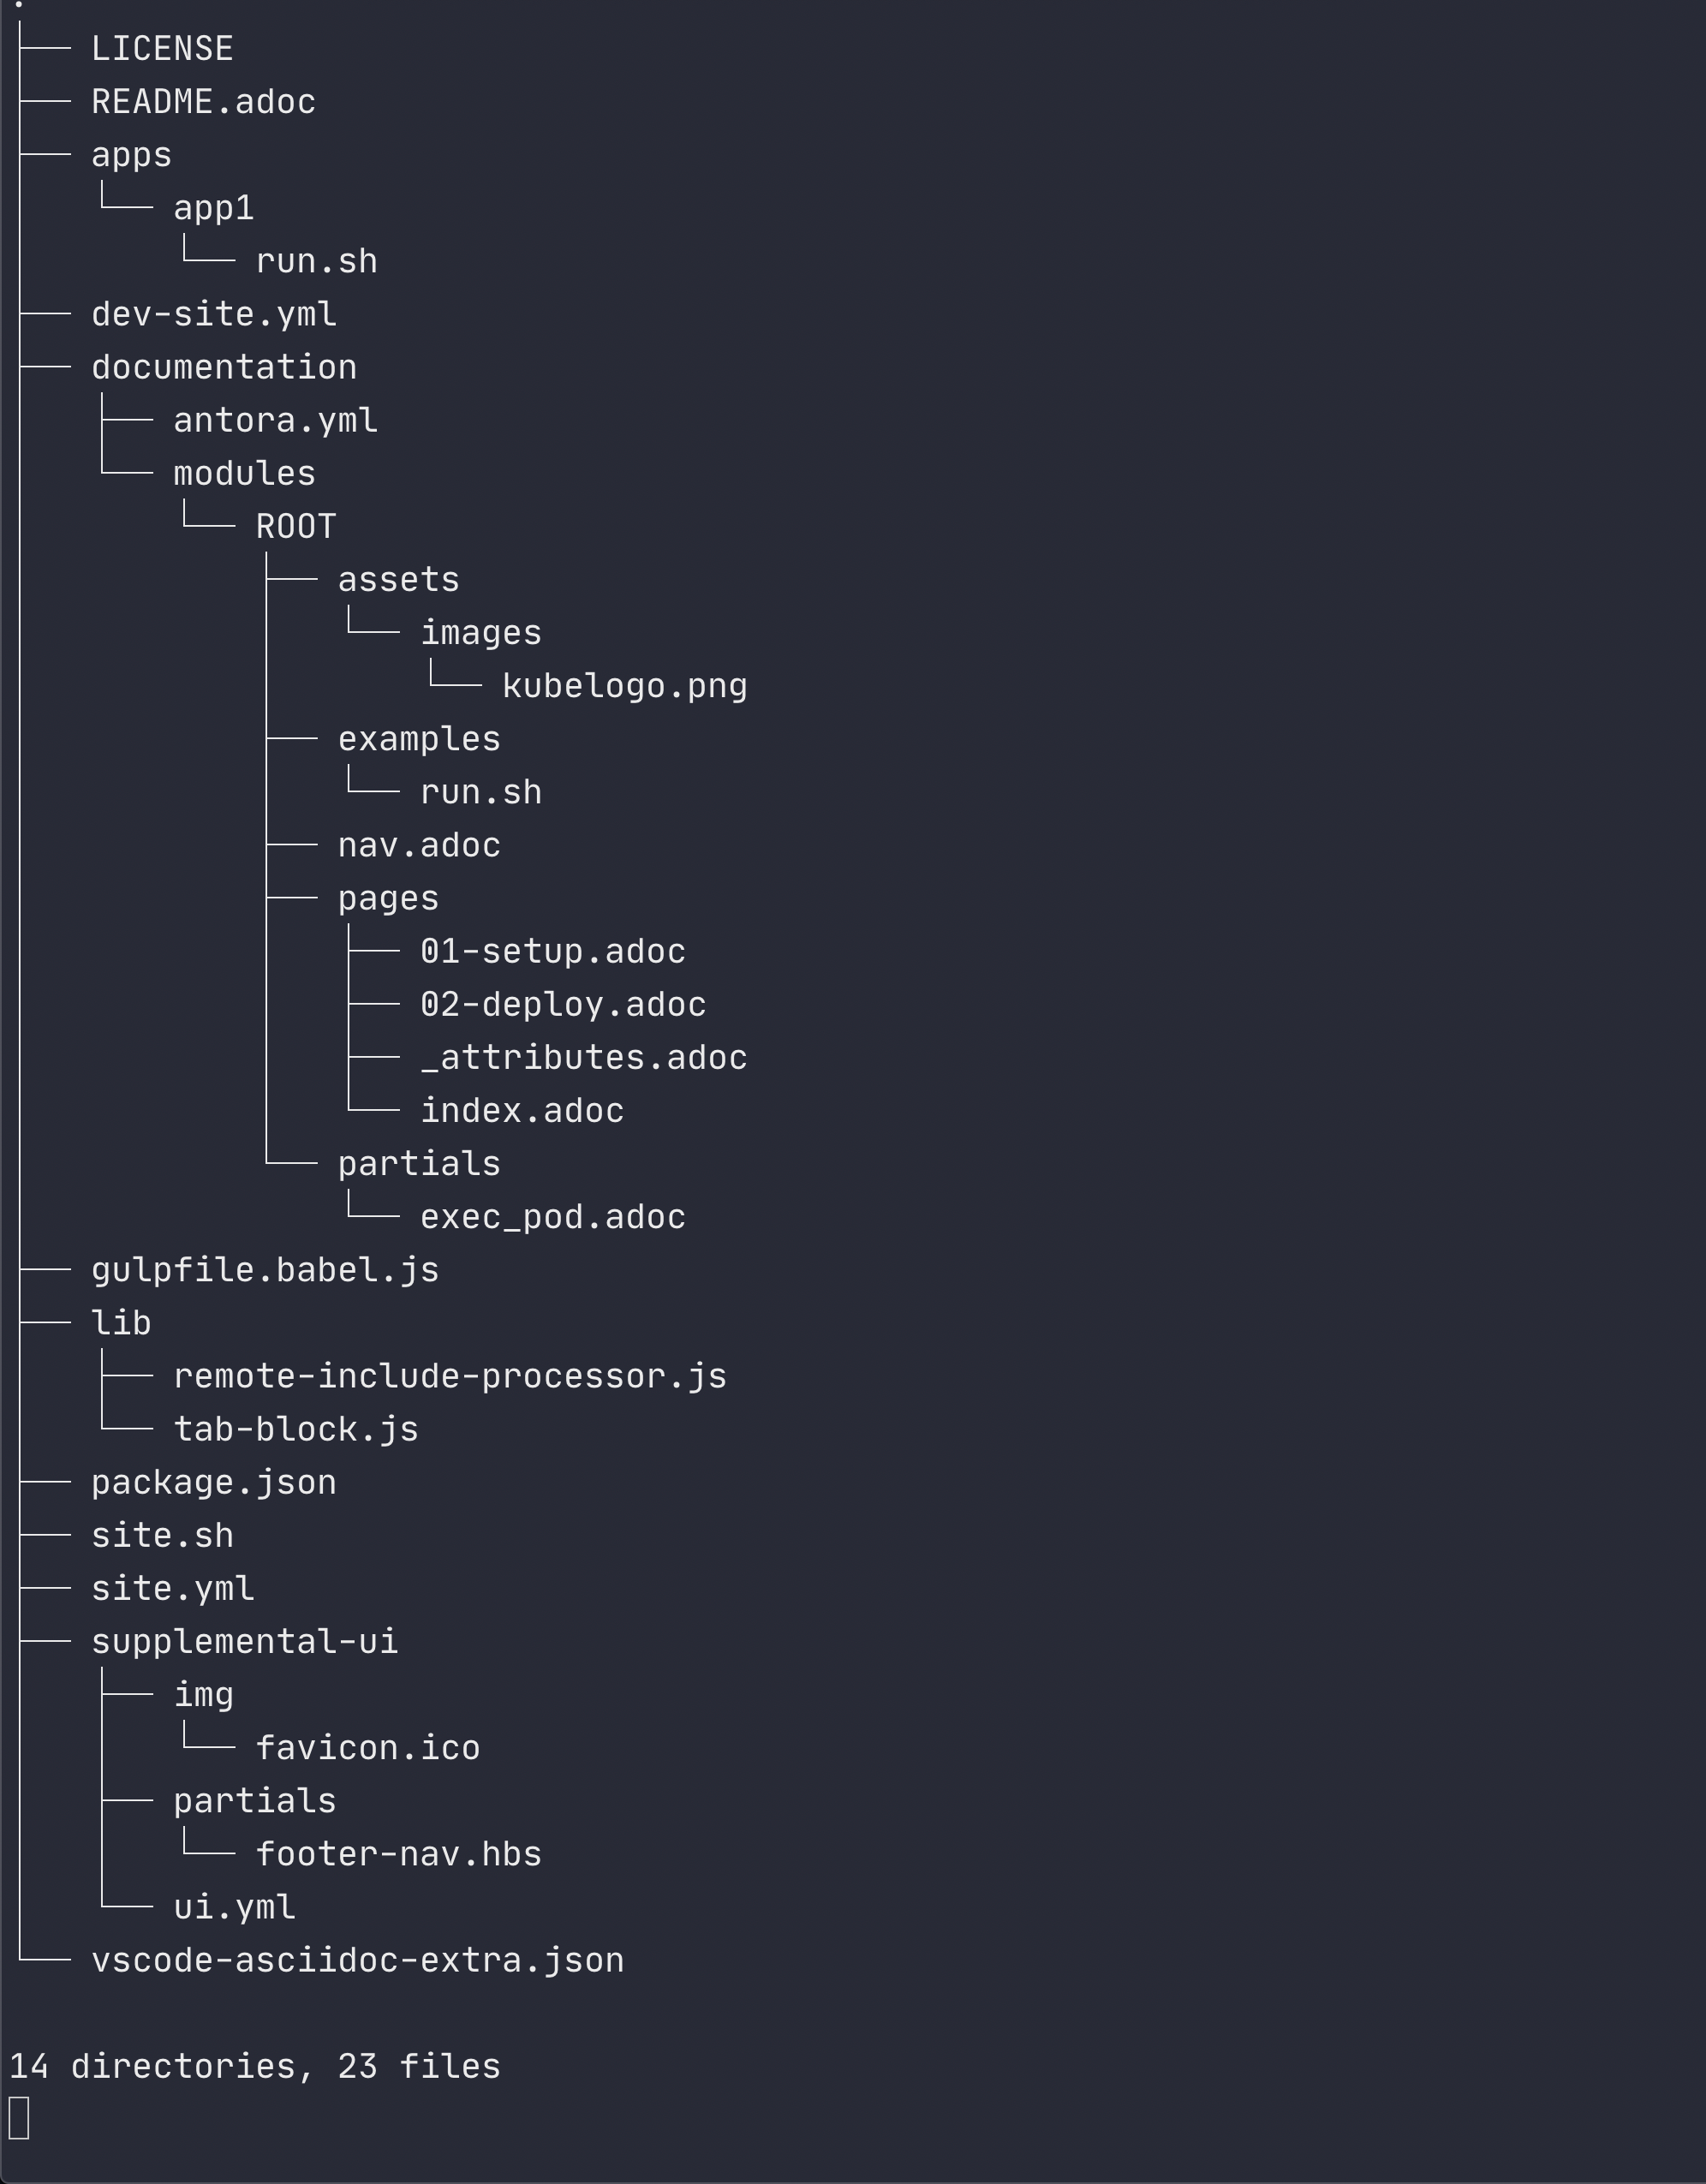
The course repository has the following structure:

apps
The apps folder is used to add any demo/example applications that will be used in course exercies, e.g. a Java application which will be used to show how to build the container image
documentation
All the content within this directory are called resources and are uniquely identifed by Antora using resource ID.
The documention folder is where all the ASCIIDoc will be placed. The course site will be generated using the docs, assets from this folder.
Module Manifest
File: documentation/antora.yml
This is kind of the manifest file that uniquely identifies the course. More info on antora.yml is available in official Antora docs
Navigation
File: documentation/modules/ROOT/nav.adoc
The nav.adoc holds the navgation and menus for the course. For an example the navigation content will generate a navigation structure as shown below:

Refer to Antora navgation for more information.
Attributes
File: documentation/modules/ROOT/pages/_attributes.adoc
Any attributes that will be used in the pages can be set in this doc and included in all the needed content pages via include::_attributes.adoc[]. The AsciiDoc interpolation happens using the pattern {attribute-name}
= {title}
include::_attributes.adoc[]
More information on how to define and use attributes is available here. Also check the out of box attributes that are available for use.
Image Assets
Folder: documentation/modules/ROOT/assets/images
All the assets such as images can be placed in this folder and can be referred using the macro image::<your-image-path>. If you create a folder within this folder then your macro needs to be adjusted like image::<your-folder>/<your-image-path>.
image::<your-image-path>[]Examples
documentation/modules/ROOT/examples
If you want to inline the code in a listing with a source from a file, then add the file to this folder and use the include macro like:
[source,yaml]
----
include::examples/foo.yaml[]
----
Refer to docs for more information on the examples directory.
Partials
documentation/modules/ROOT/partials
Partials allows you to reuse content(AsciiDoc) snippets via special include macro.
Say for example you want to have the following AsciiDoc content:
Check that the pod is up and running:

[.lines_space]
[.console-input]
[source,bash, subs="+macros,+attributes"]
----
kubectl get pods
----

[.console-output]
[source,bash,subs="+macros,+attributes"]
----
NAME                        READY   STATUS    RESTARTS   AGE
{podname}   1/1     Running   0          5s
----

Then let's go into the running pod to execute some commands:

[.console-input]
[source,bash, subs="+macros,+attributes"]
----
kubectl exec -ti {podname} /bin/bash
----

NOTE: Change the pod name with your pod name.
The you can create file called exec-pod.adoc in the documentation/modules/ROOT/partials and include it using the include macro like:
include::partial$exec_pod.adoc[]The partials could be created in any module, if you wish to include a parital from a module called foo then its include syntax will look like:
include::foo:partial$exec_pod.adoc[]Refer to the parital docs for more patterns and customization.