Continuous Delivery with Openshift Pipelines
20 MINUTE EXERCISE
In this lab you will learn about deployment pipelines and you will create a pipeline to automate build and deployment of the Inventory service.
Create a custom Task
You have learnt and understood how to create a simple Pipeline. Now, let’s create a task to deploy the OpenShift Configuration from Argo CD and add it the existing pipeline.
|
A Task consists of a collection of Steps that are executed sequentially with a pod. Each Step is executed in a separate container within the same pod. They can also have inputs and outputs in order to interact with other tasks in the pipeline. |
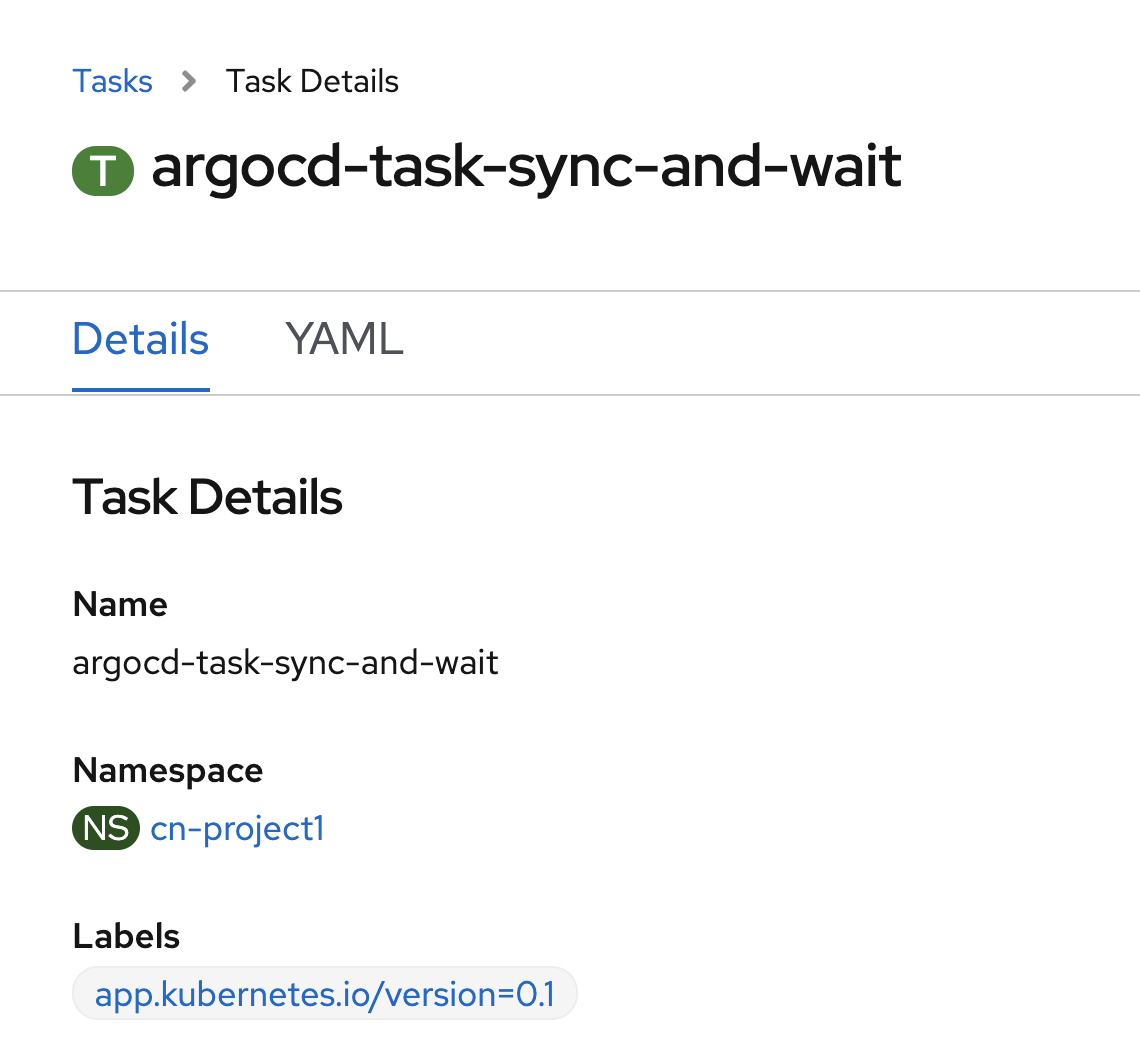
In the OpenShift Web Console, from the Developer view,
click on 'Search' → 'Task' → 'T Task' → 'Create Task'.
Then update the content as follows:
apiVersion: tekton.dev/v1beta1
kind: Task
metadata:
  name: argocd-task-sync-and-wait
  namespace: cn-project%USER_ID%
  labels:
    app.kubernetes.io/version: "0.1"
  annotations:
    tekton.dev/pipelines.minVersion: "0.12.1"
    tekton.dev/tags: deploy
    tekton.dev/displayName: "argocd"
spec:
  description: >-
    This task syncs (deploys) an Argo CD application and waits for it to be healthy.
    To do so, it requires the address of the Argo CD server and some form of
    authentication either a username/password or an authentication token.
  params:
    - name: application-name
      description: name of the application to sync
  stepTemplate:
    envFrom:
      - configMapRef:
          name: argocd-env-configmap  # used for server address
      - secretRef:
          name: argocd-env-secret  # used for authentication (username/password or auth token)
  steps:
    - name: login
      image: argoproj/argocd:v1.7.6
      script: |
        if [ -z $ARGOCD_AUTH_TOKEN ]; then
          yes | argocd login $ARGOCD_SERVER --username=$ARGOCD_USERNAME --password=$ARGOCD_PASSWORD --plaintext;
        fi
    - name: sync
      image: argoproj/argocd:v1.7.6
      script: |
        argocd app sync cn-project%USER_ID% --label app.kubernetes.io/instance=$(params.application-name)
    - name: wait
      image: argoproj/argocd:v1.7.6
      script: |
        argocd app wait -l app.kubernetes.io/instance=$(params.application-name) --health
Then click on 'create'. Your Argo CD Task is now created.
Now let’s define the Argo CD server endpoint as well as the credentials so that the Task you just created has access to the server.
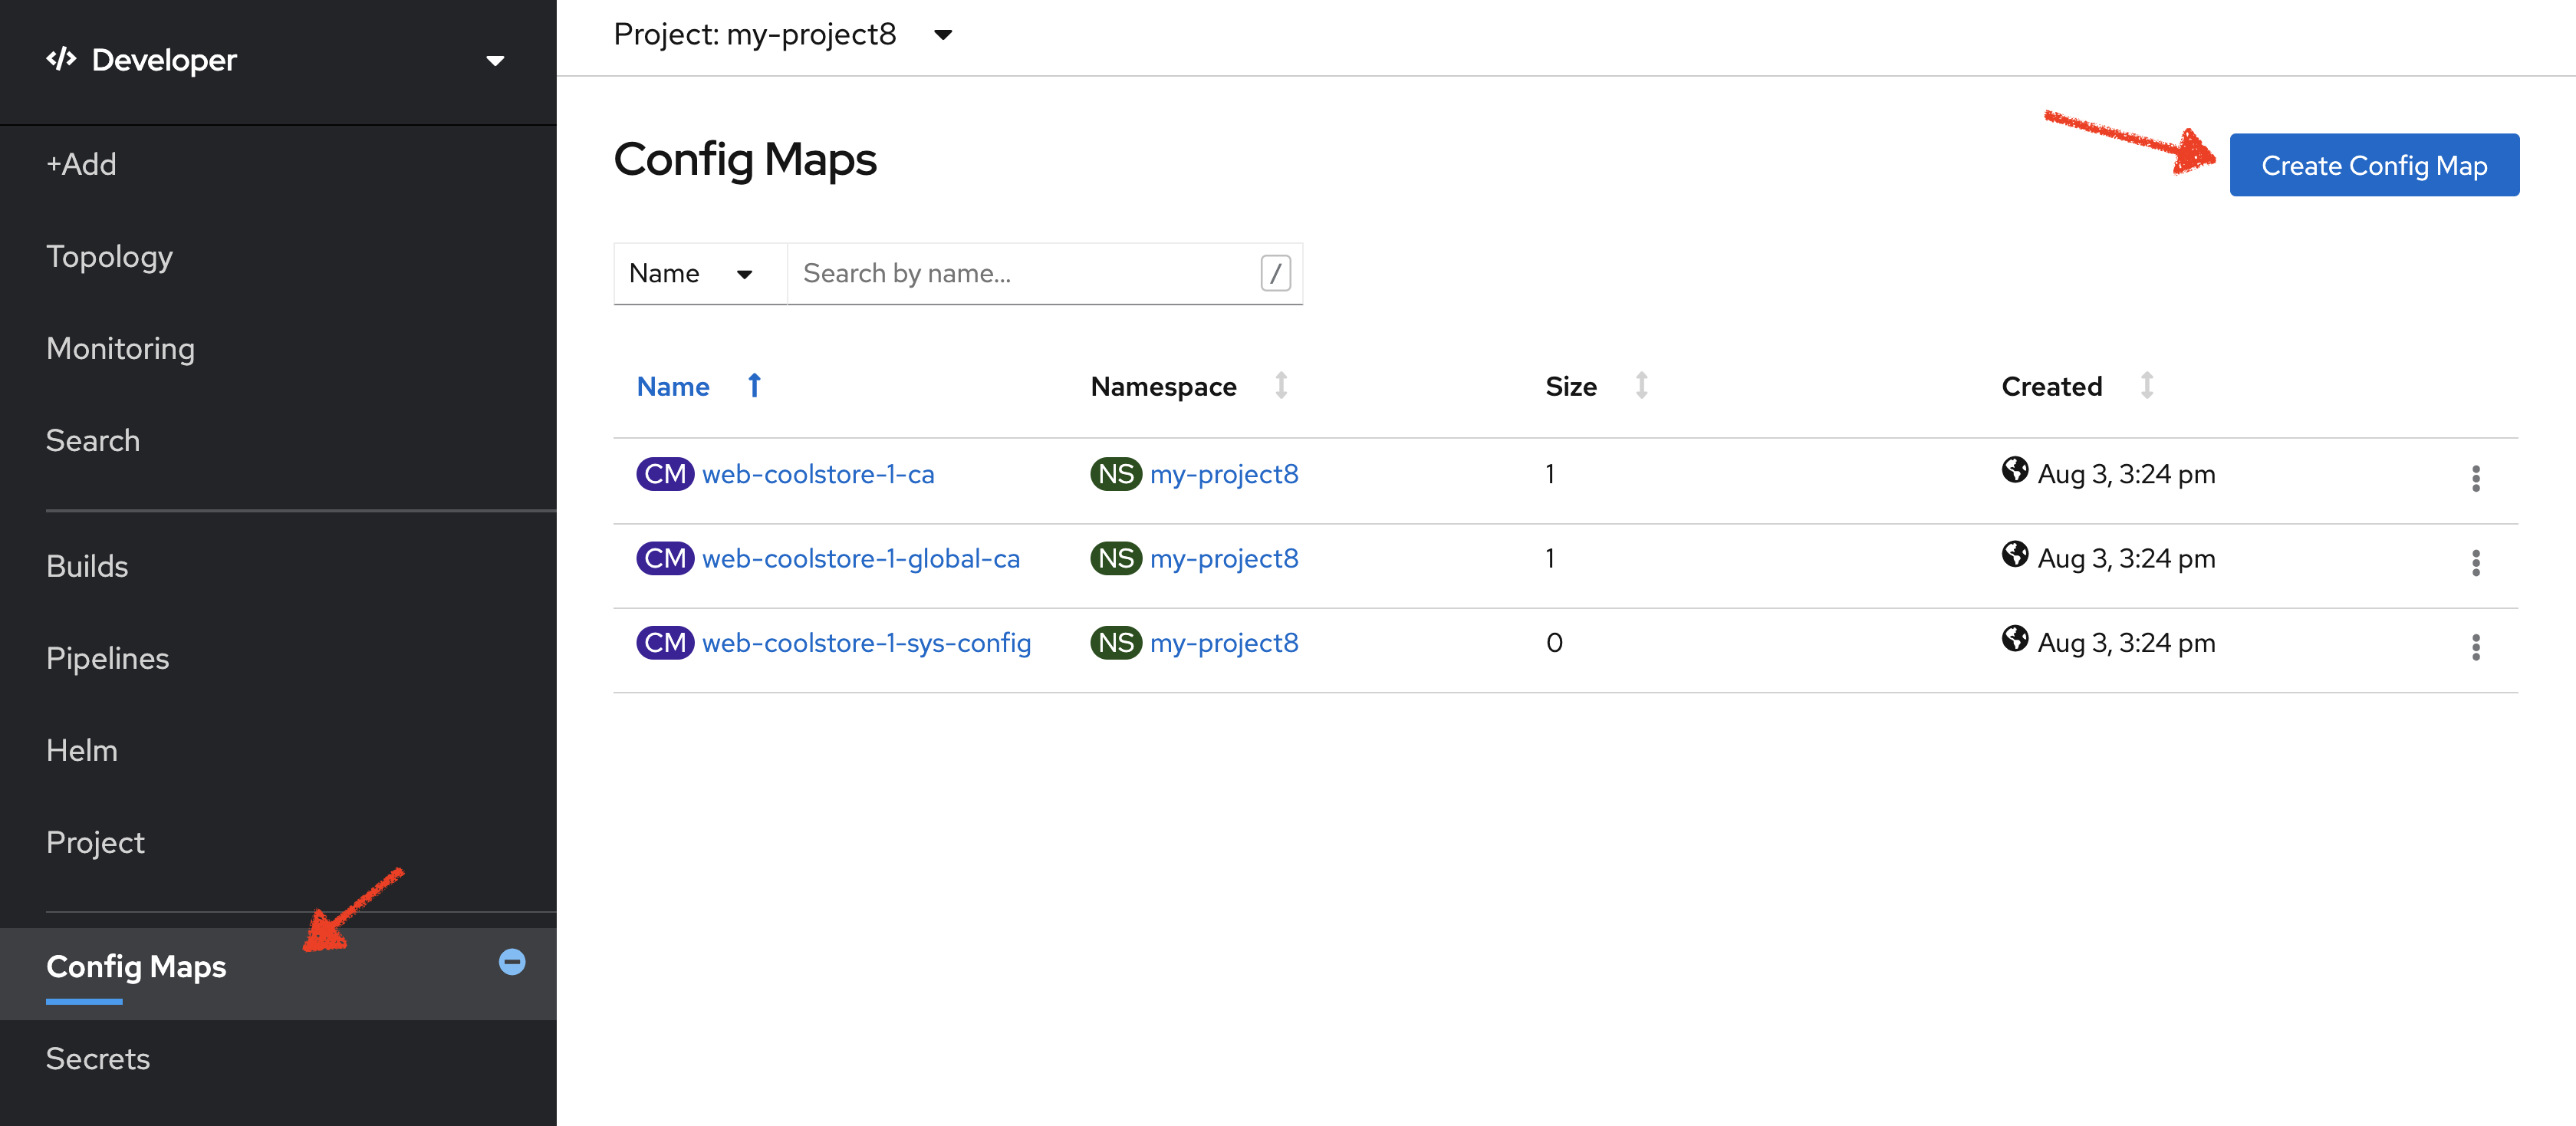
In the OpenShift Web Console, from the Developer view,
click on 'Config Maps' then click on the 'Create Config Map' button.
Then replace the content with the following input:
apiVersion: v1
kind: ConfigMap
metadata:
  name: argocd-env-configmap
  namespace: cn-project%USER_ID%
data:
  ARGOCD_SERVER: argocd-server.argocd.svc
Click on the 'Create' button.
Then click on 'Secrets' → 'Create' → 'Key/Value Secret'.
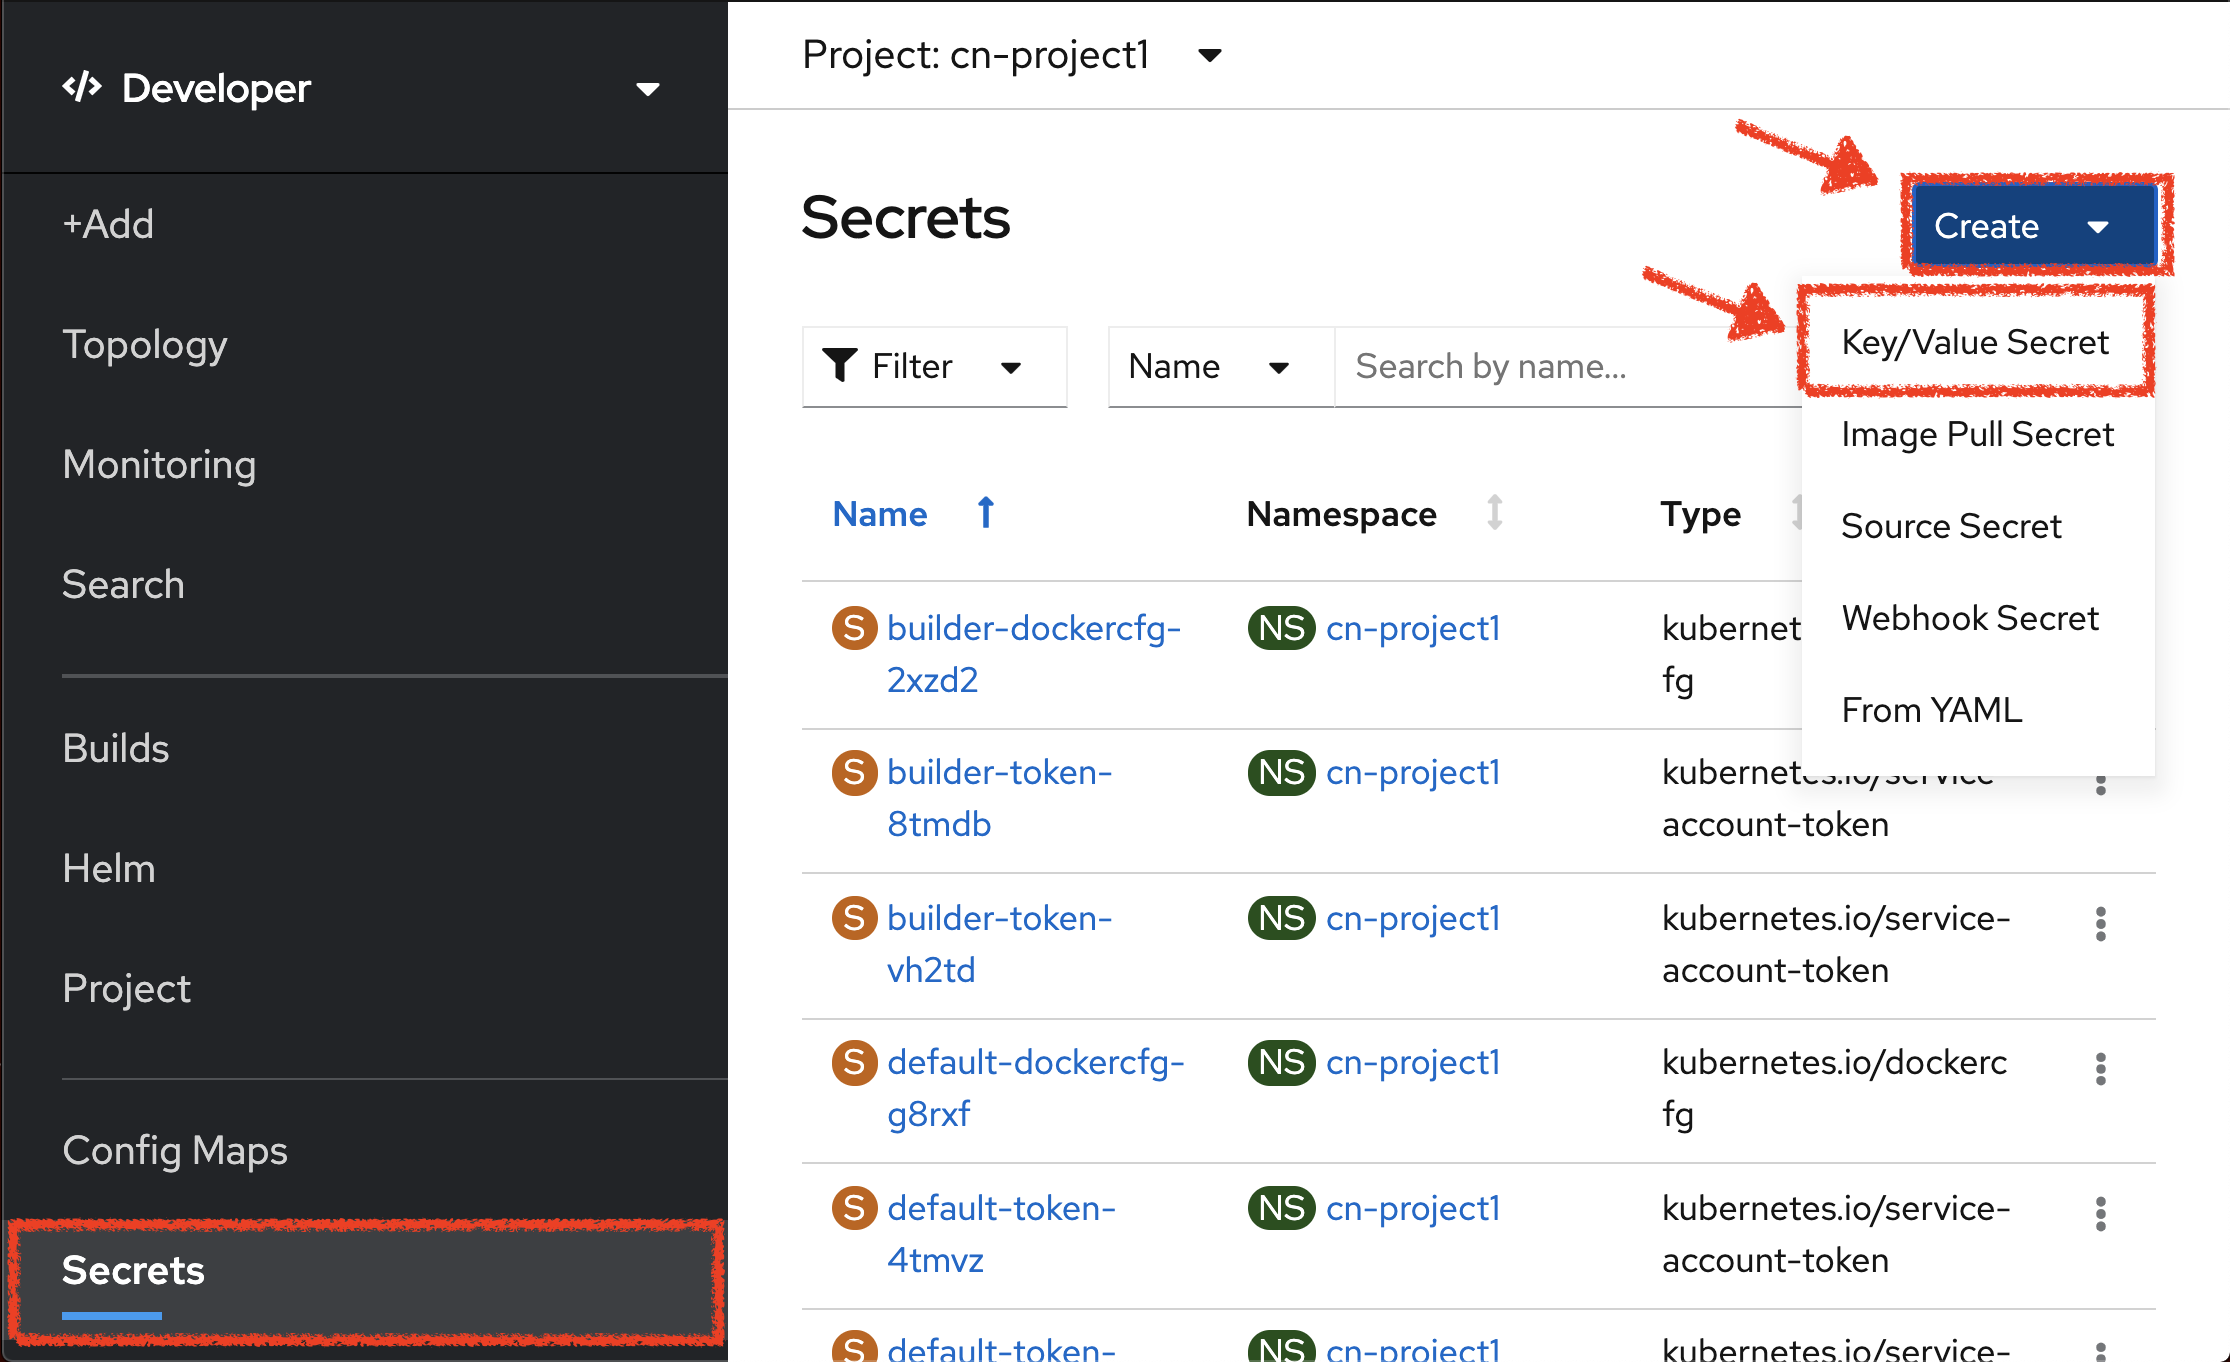
Enter the following configuration:
| Parameter | Value |
|---|---|
Secret Name * |
argocd-env-secret |
| Key | Value |
|---|---|
ARGOCD_USERNAME |
user%USER_ID% |
ARGOCD_PASSWORD |
%OPENSHIFT_PASSWORD% |
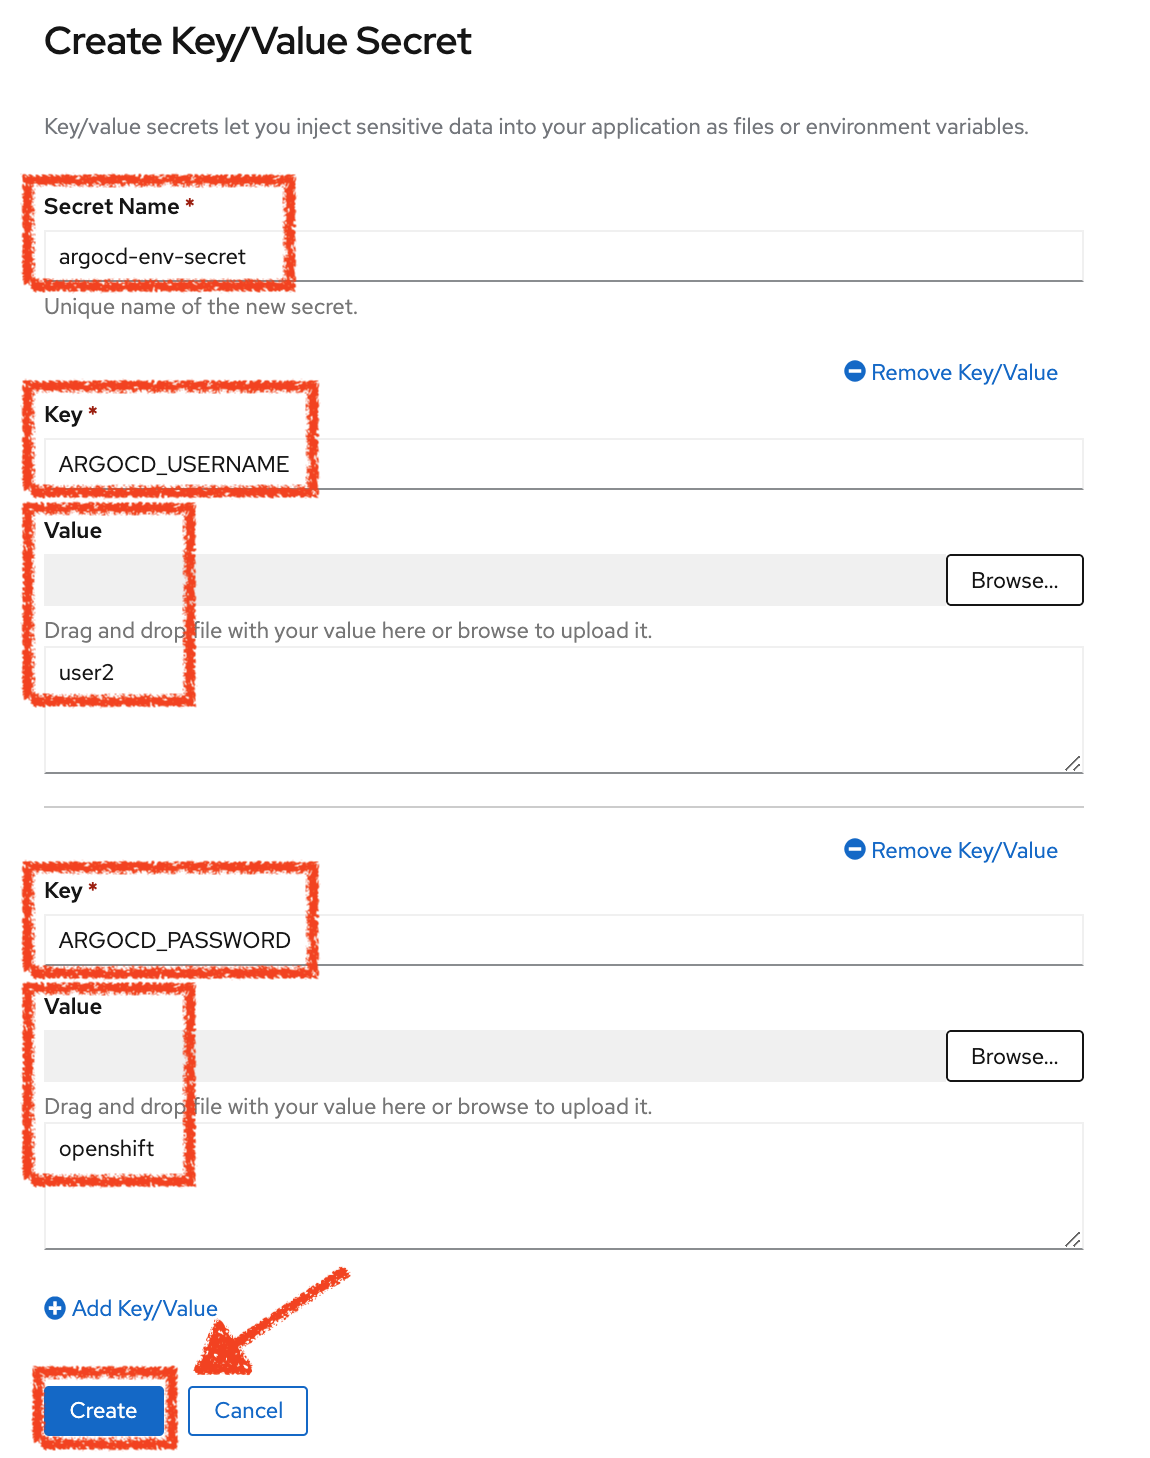
Click on the 'Create' button
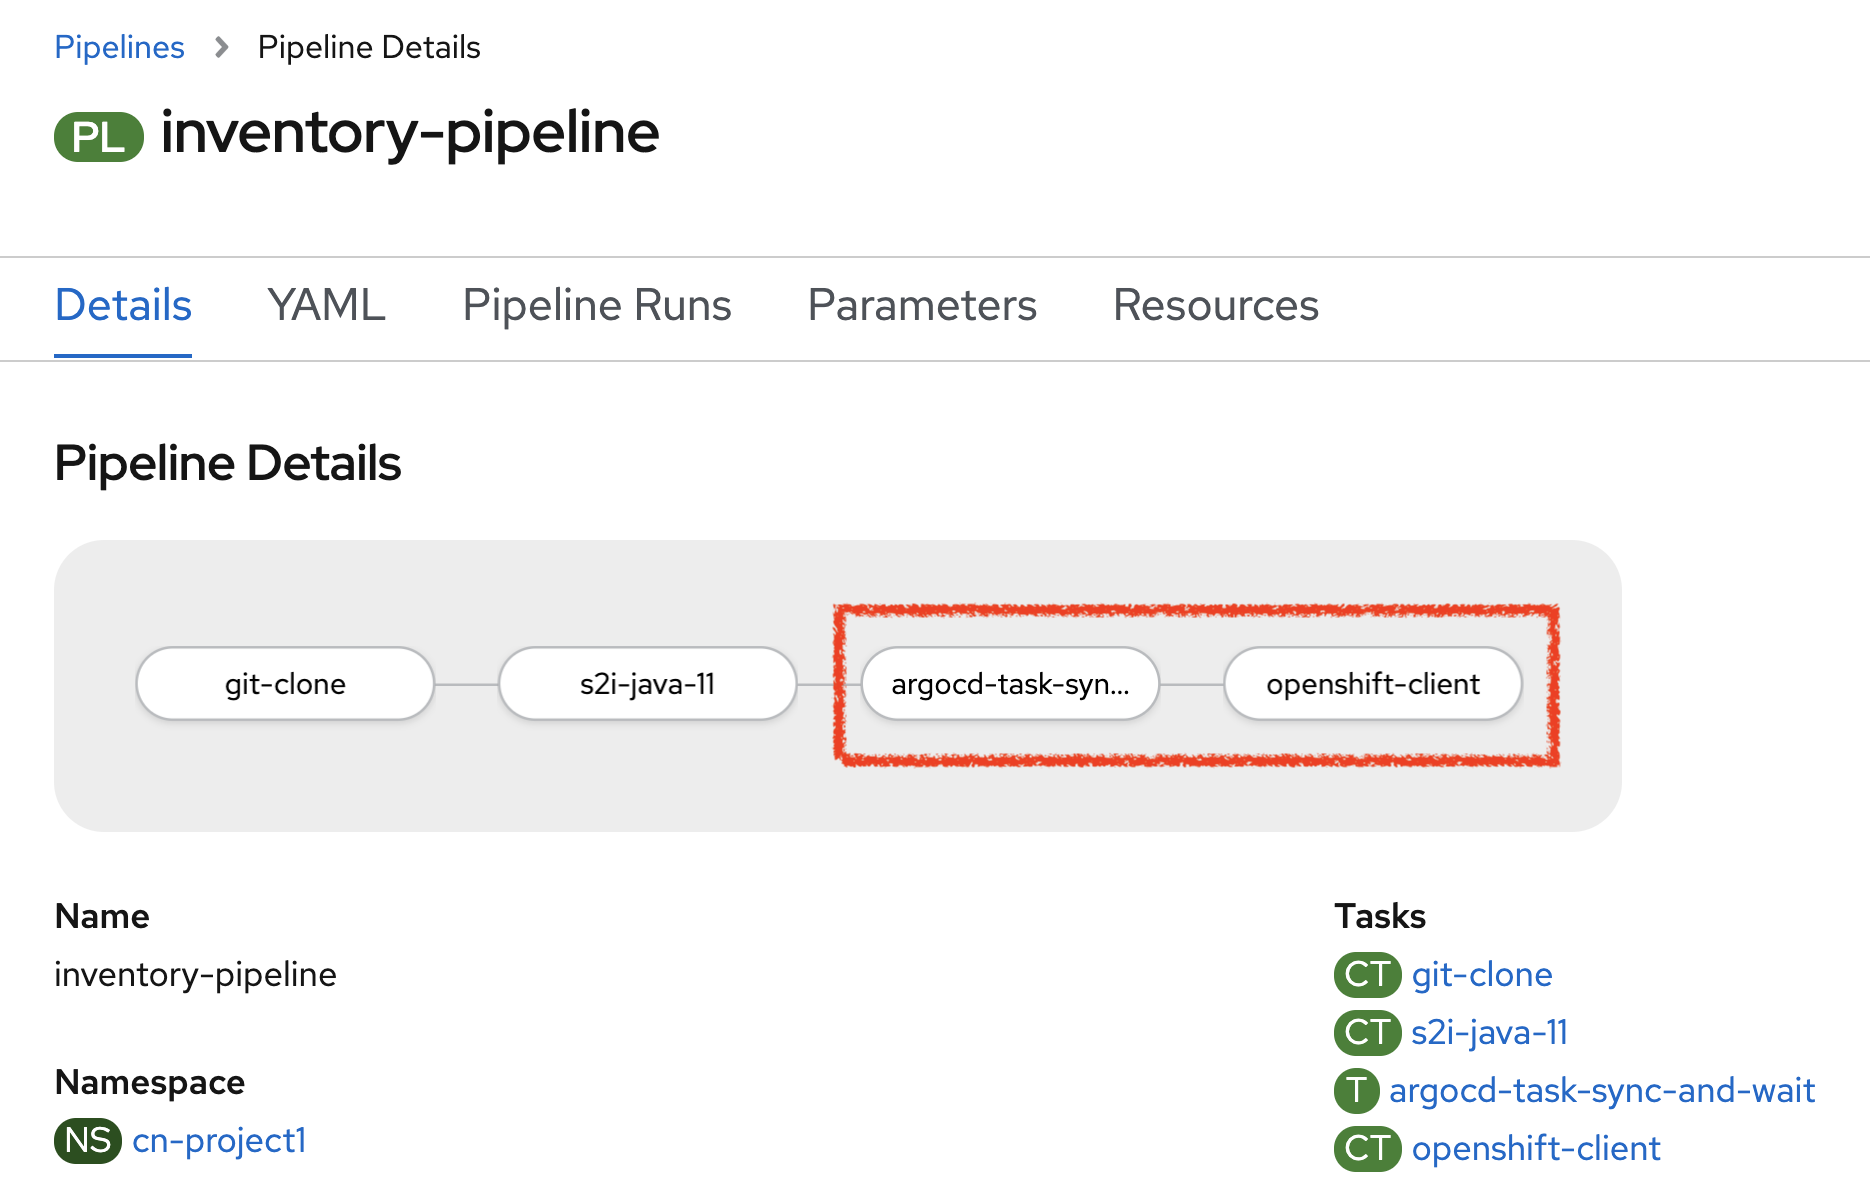
Expand your Pipeline
Now let’s expand your Inventory Pipeline to cover the Continuous Deployment.
In the OpenShift Web Console, from the Developer view,
click on 'Pipelines' → 'PL inventory-pipeline' → 'Actions' → 'Edit Pipeline'
then, complete your pipeline with the two following tasks and their configurations:
| Section | Parameter | Value |
|---|---|---|
Parameters |
application-name * |
inventory |
| Section | Parameter | Value |
|---|---|---|
Parameters |
SCRIPT |
oc $@ |
Parameters |
ARGS1 |
rollout |
Parameters |
ARGS2 |
latest |
Parameters |
ARGS3 |
inventory-coolstore |
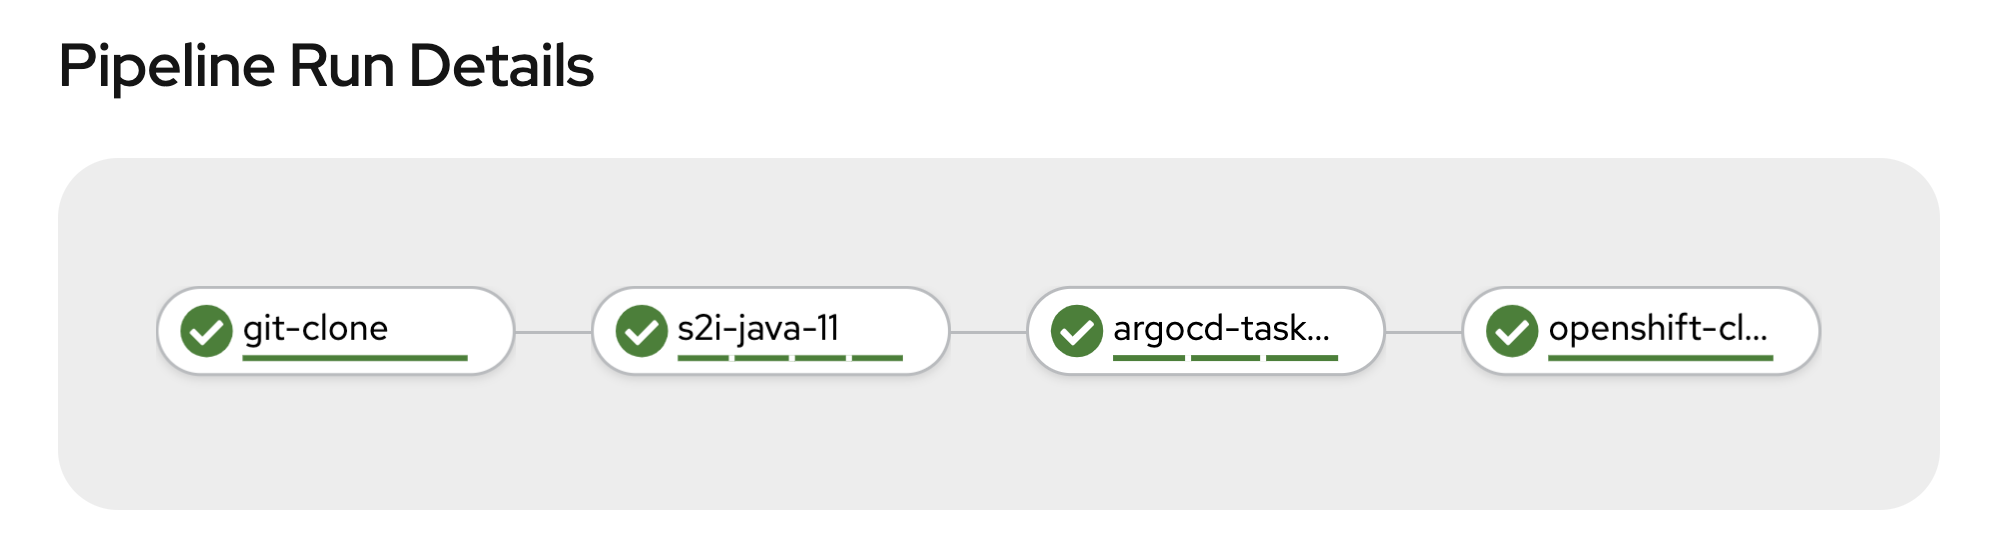
Run the Full Pipeline
In the OpenShift Web Console, from the Developer view,
click on 'Pipelines' → 'PL inventory-pipeline' → 'Actions' → 'Start' and enter the following parameters
| Name | Type | Value |
|---|---|---|
shared-workspace |
PVC |
PVC inventory-pipeline-pvc |
Finally, click on 'Start'
Congratulations!! You have deployed your first application using OpenShift Pipeline!!
Once finished, from the Topology view, select the 'cn-project%USER_ID%'.
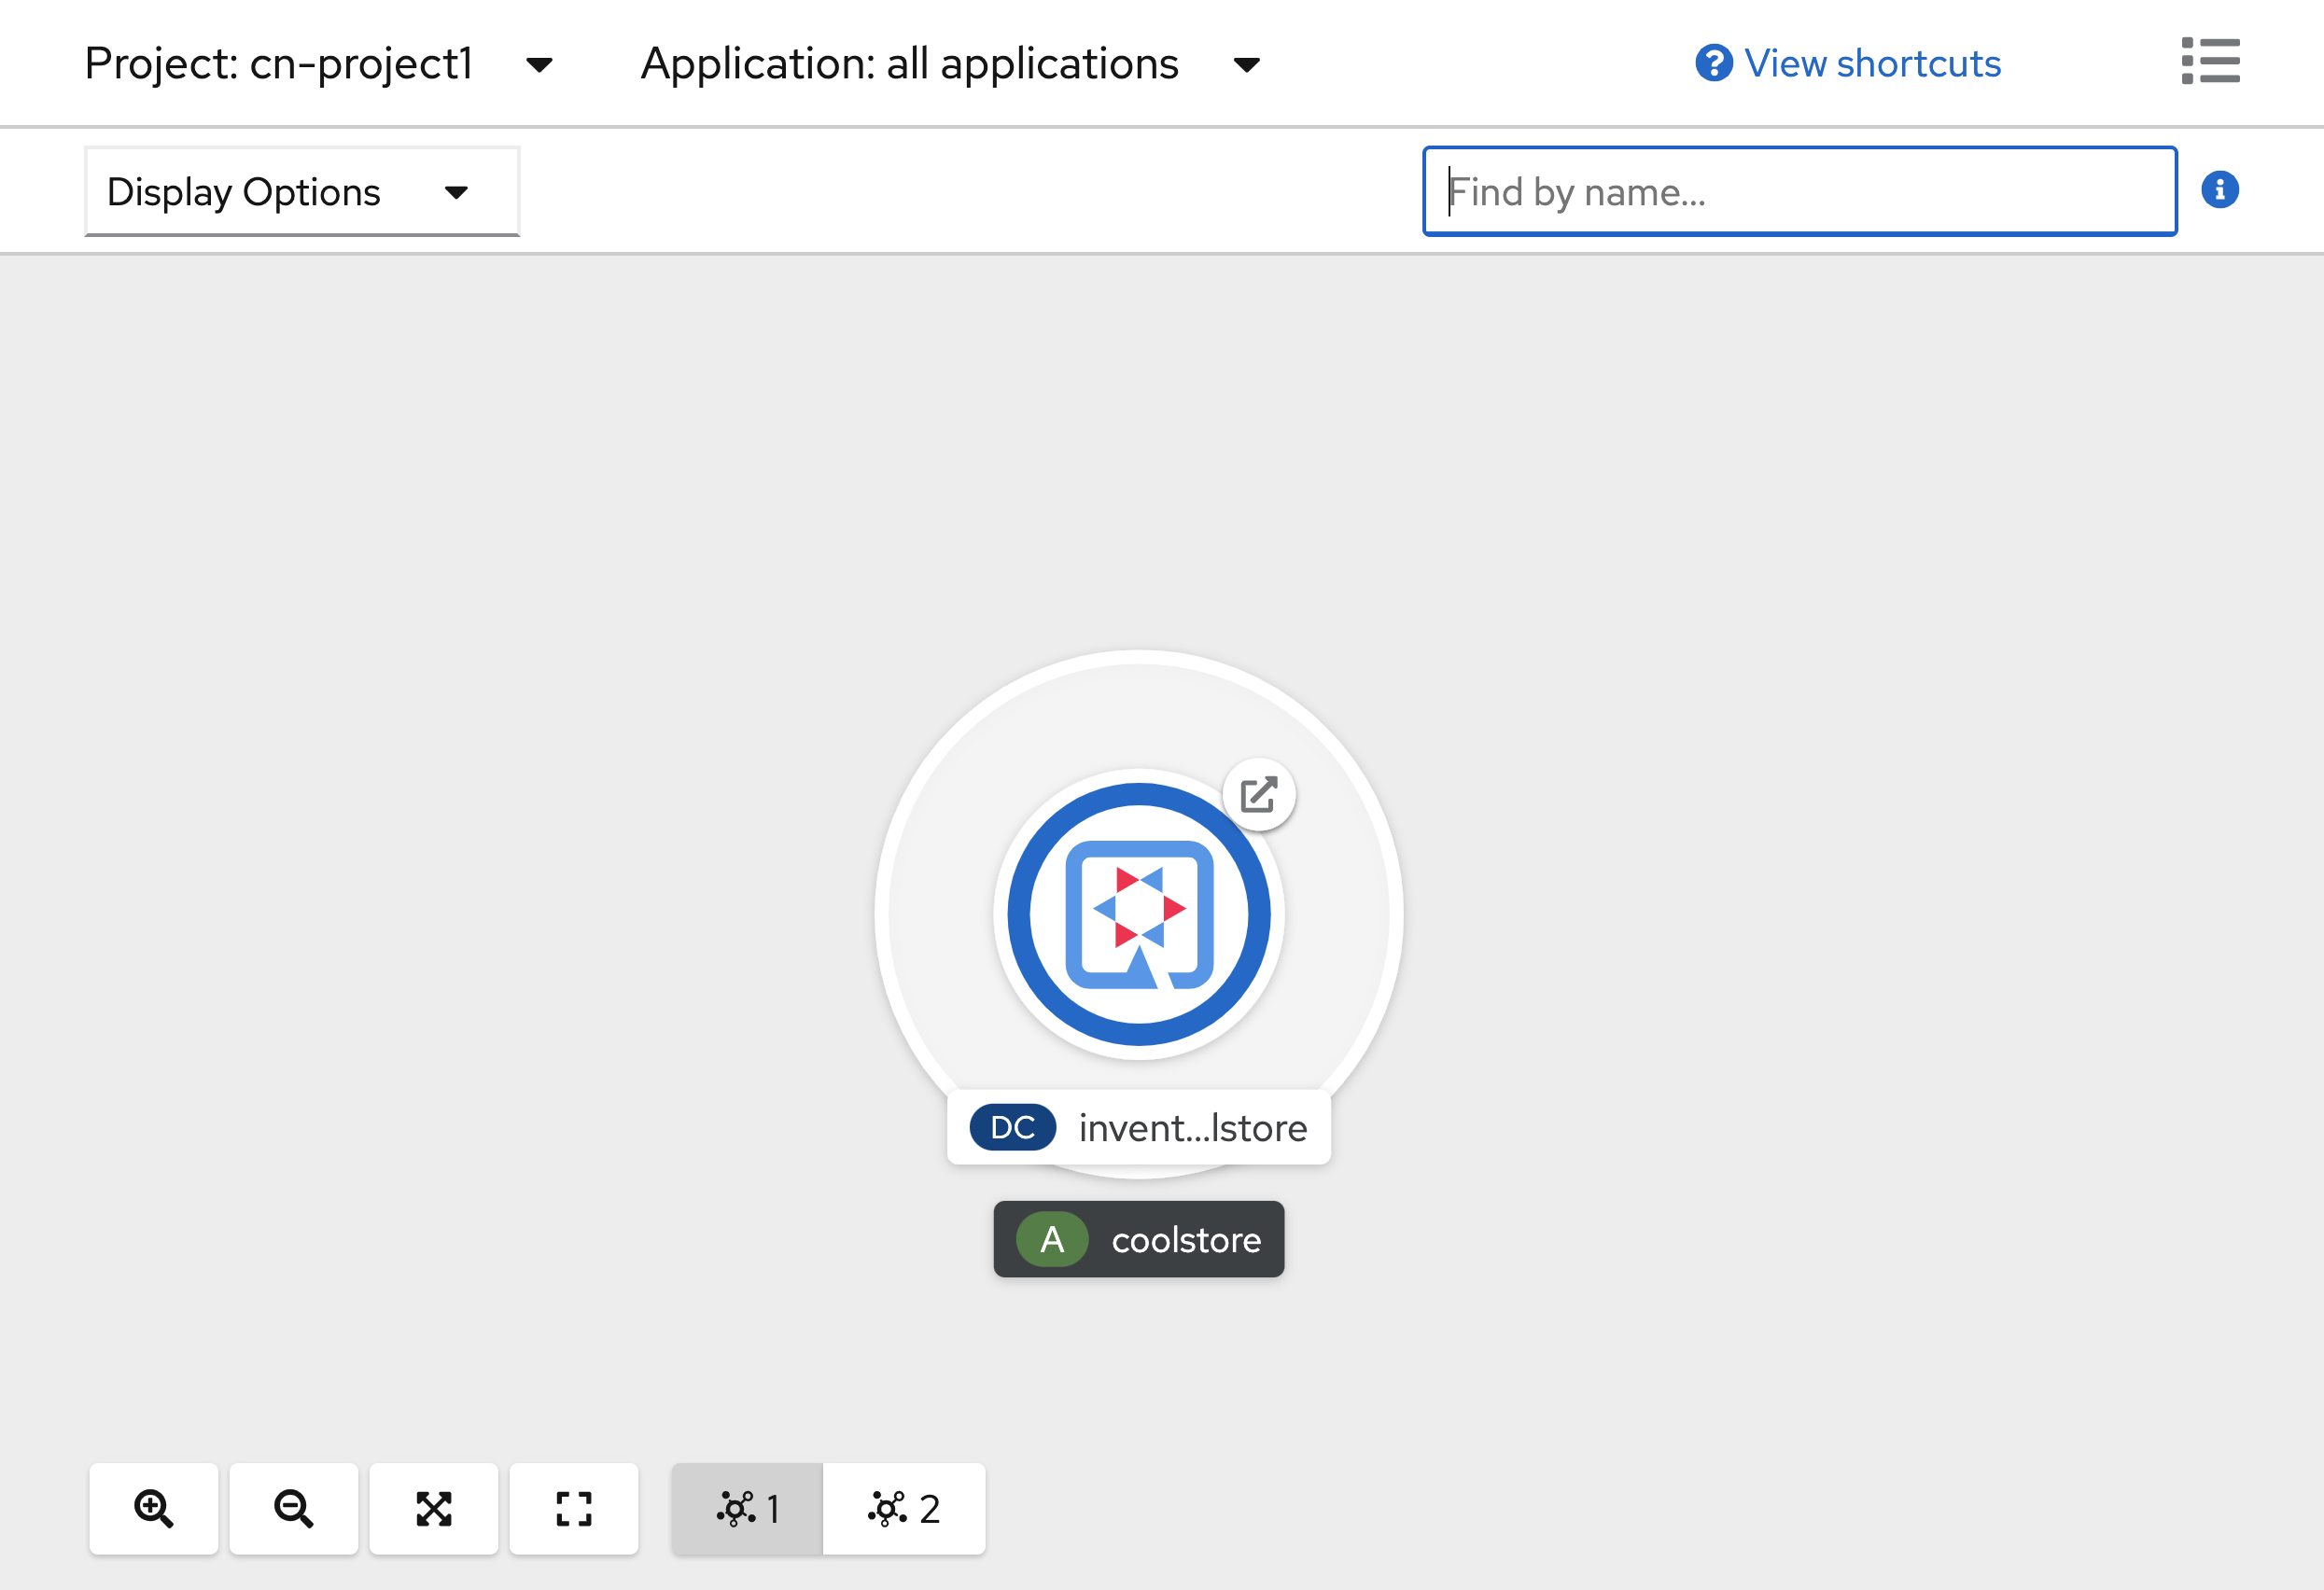
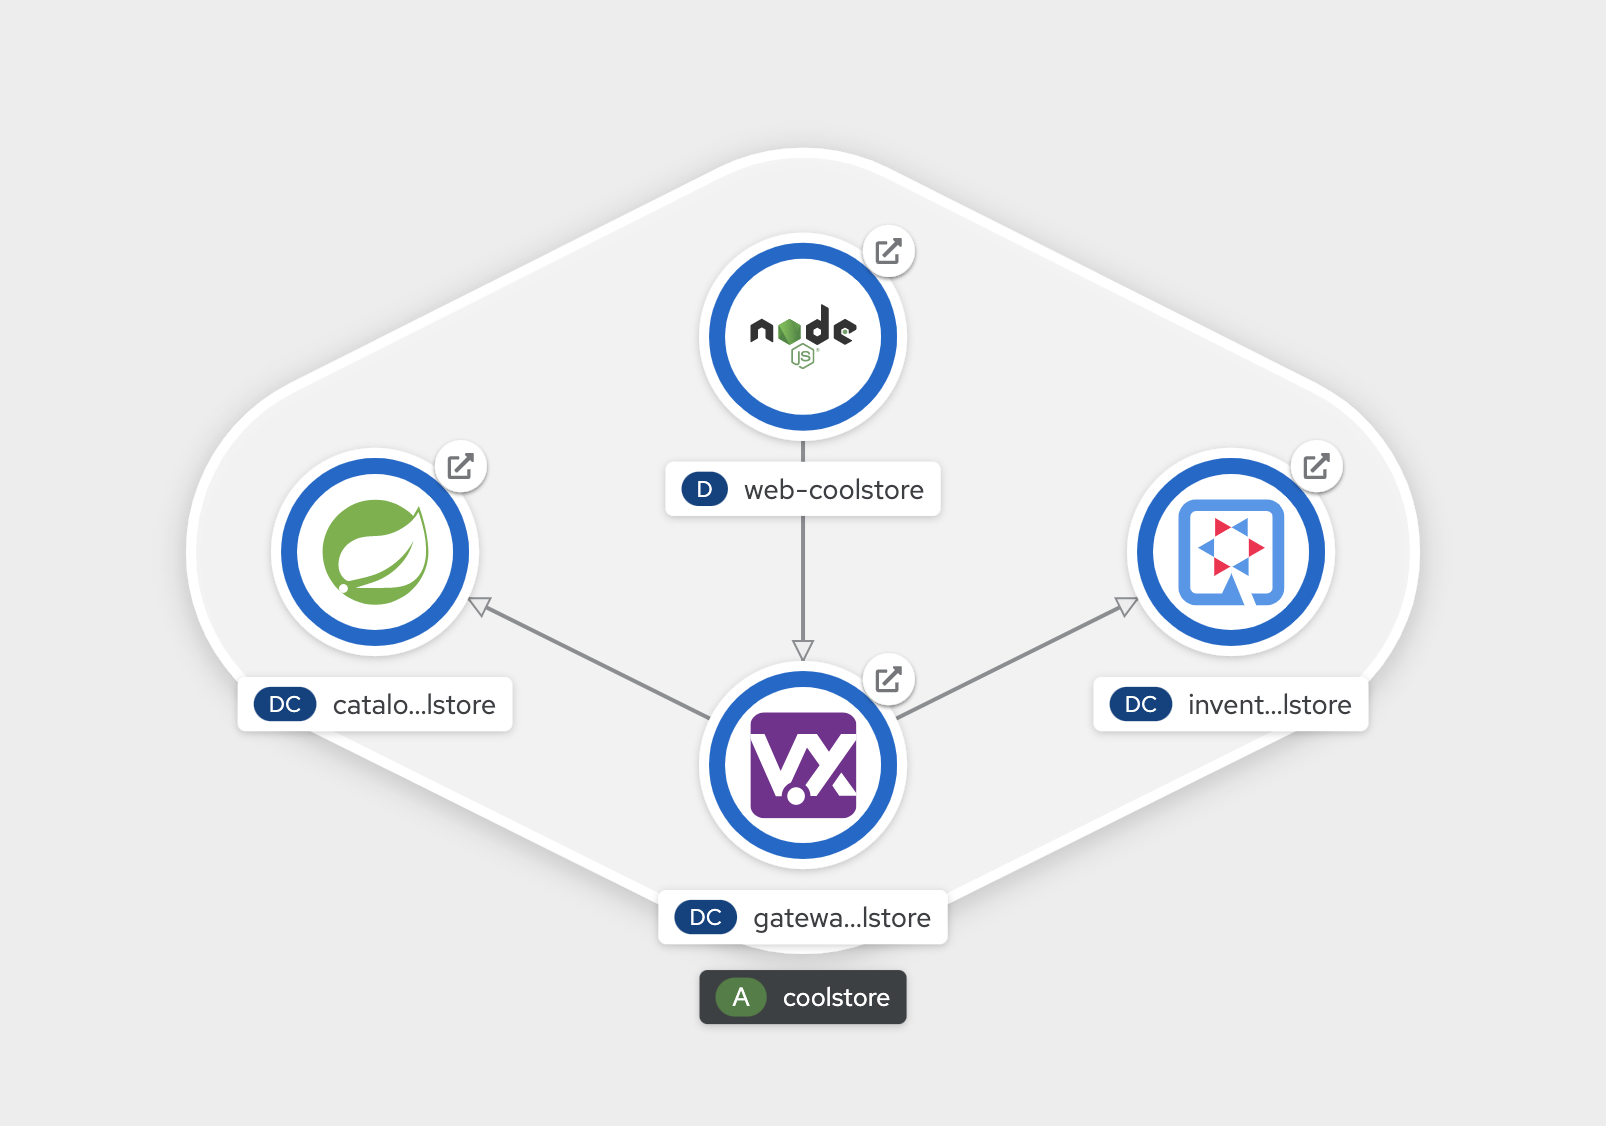
Now, you can see that the Inventory Service has been deployed by OpenShift Pipeline and it is up and running.
In the Argo CD, Select the 'Application menu' then click on the 'cn-project%USER_ID%' application:
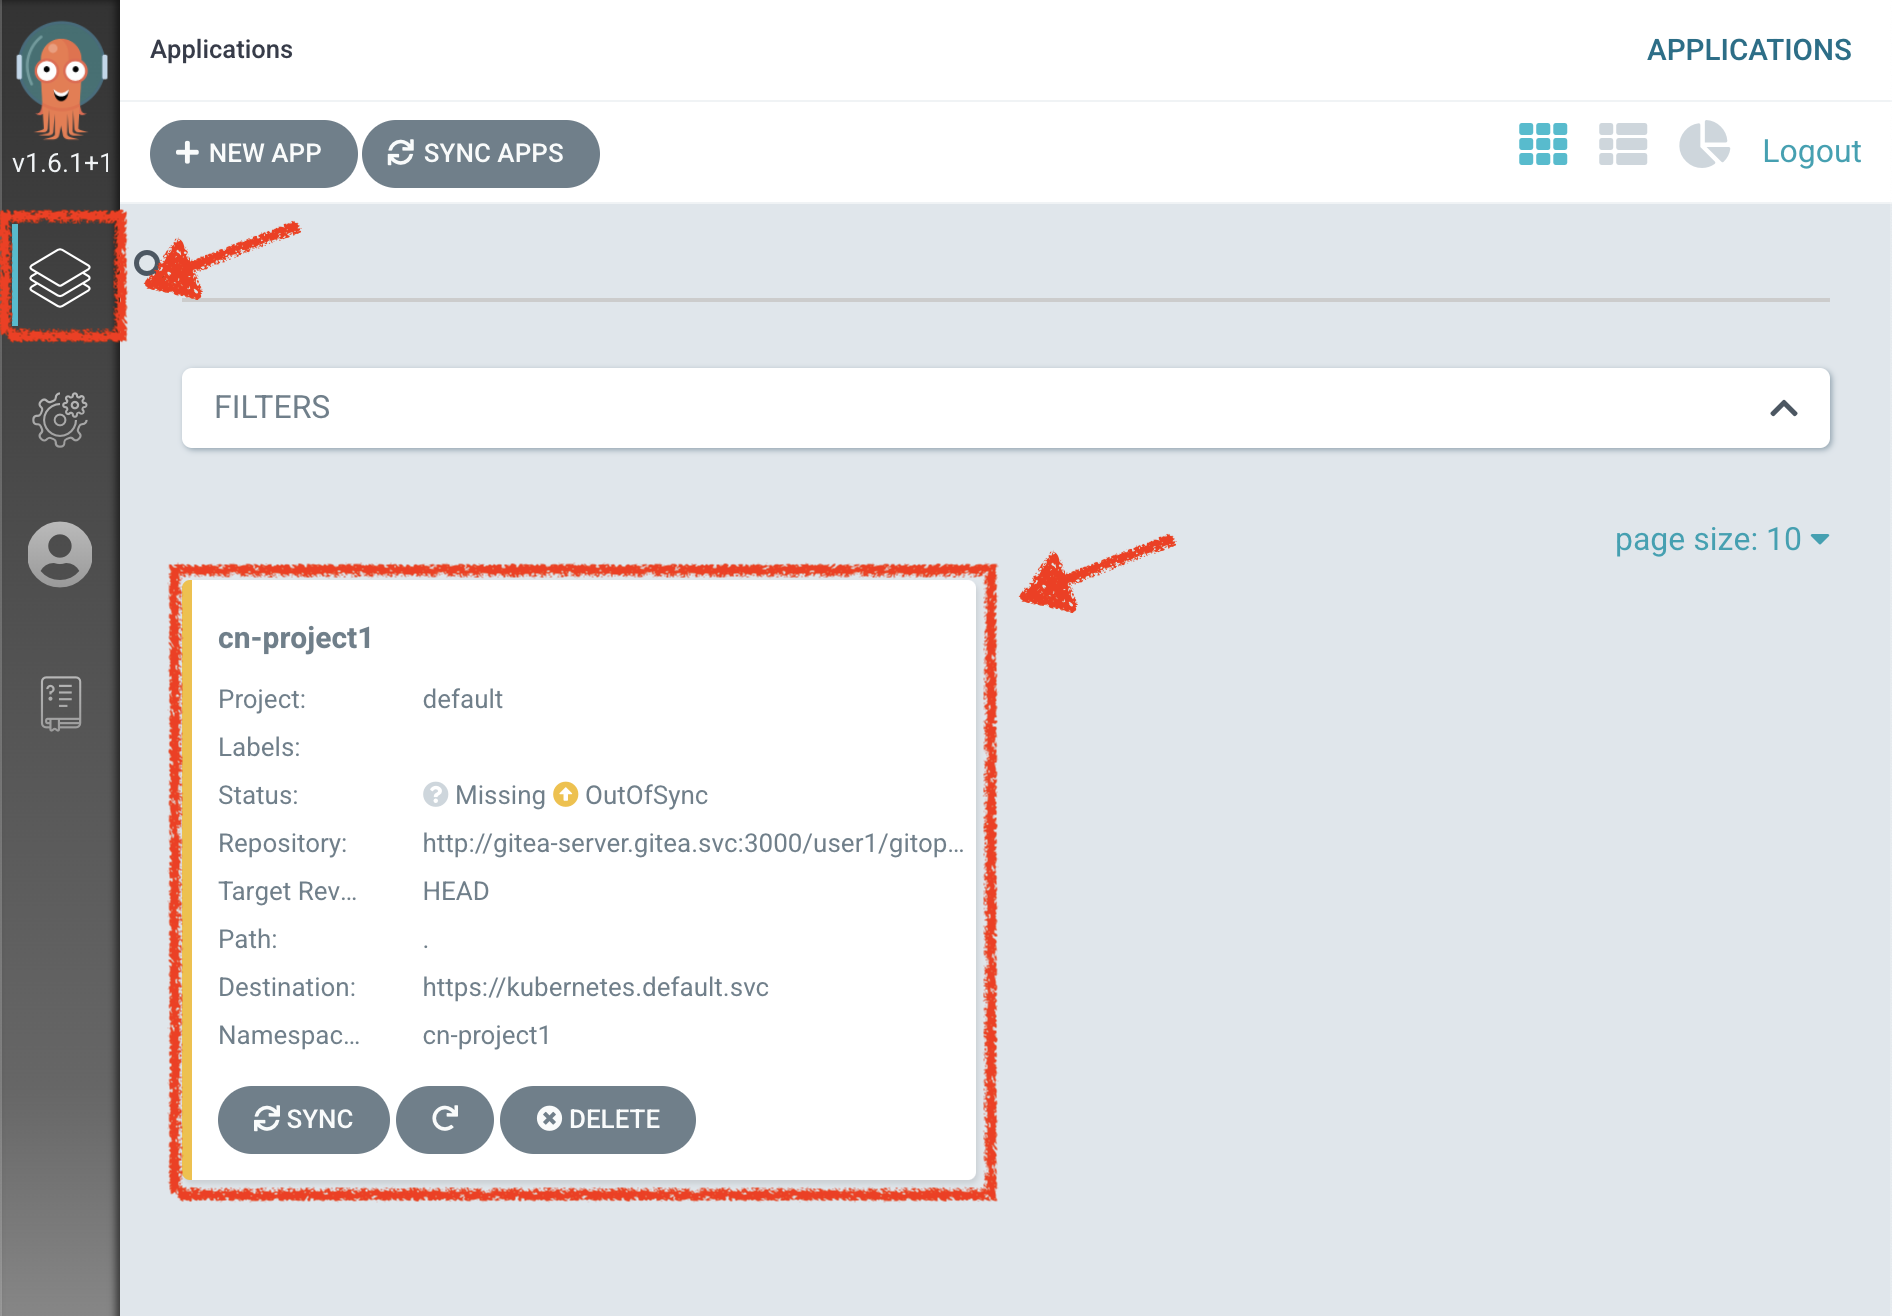
Filter to only display the Synced resources. Argo CD has synchronized all the Inventory OpenShift manifests stored into your Git Repository
with your 'cn-project%USER_ID%' project on OpenShift.
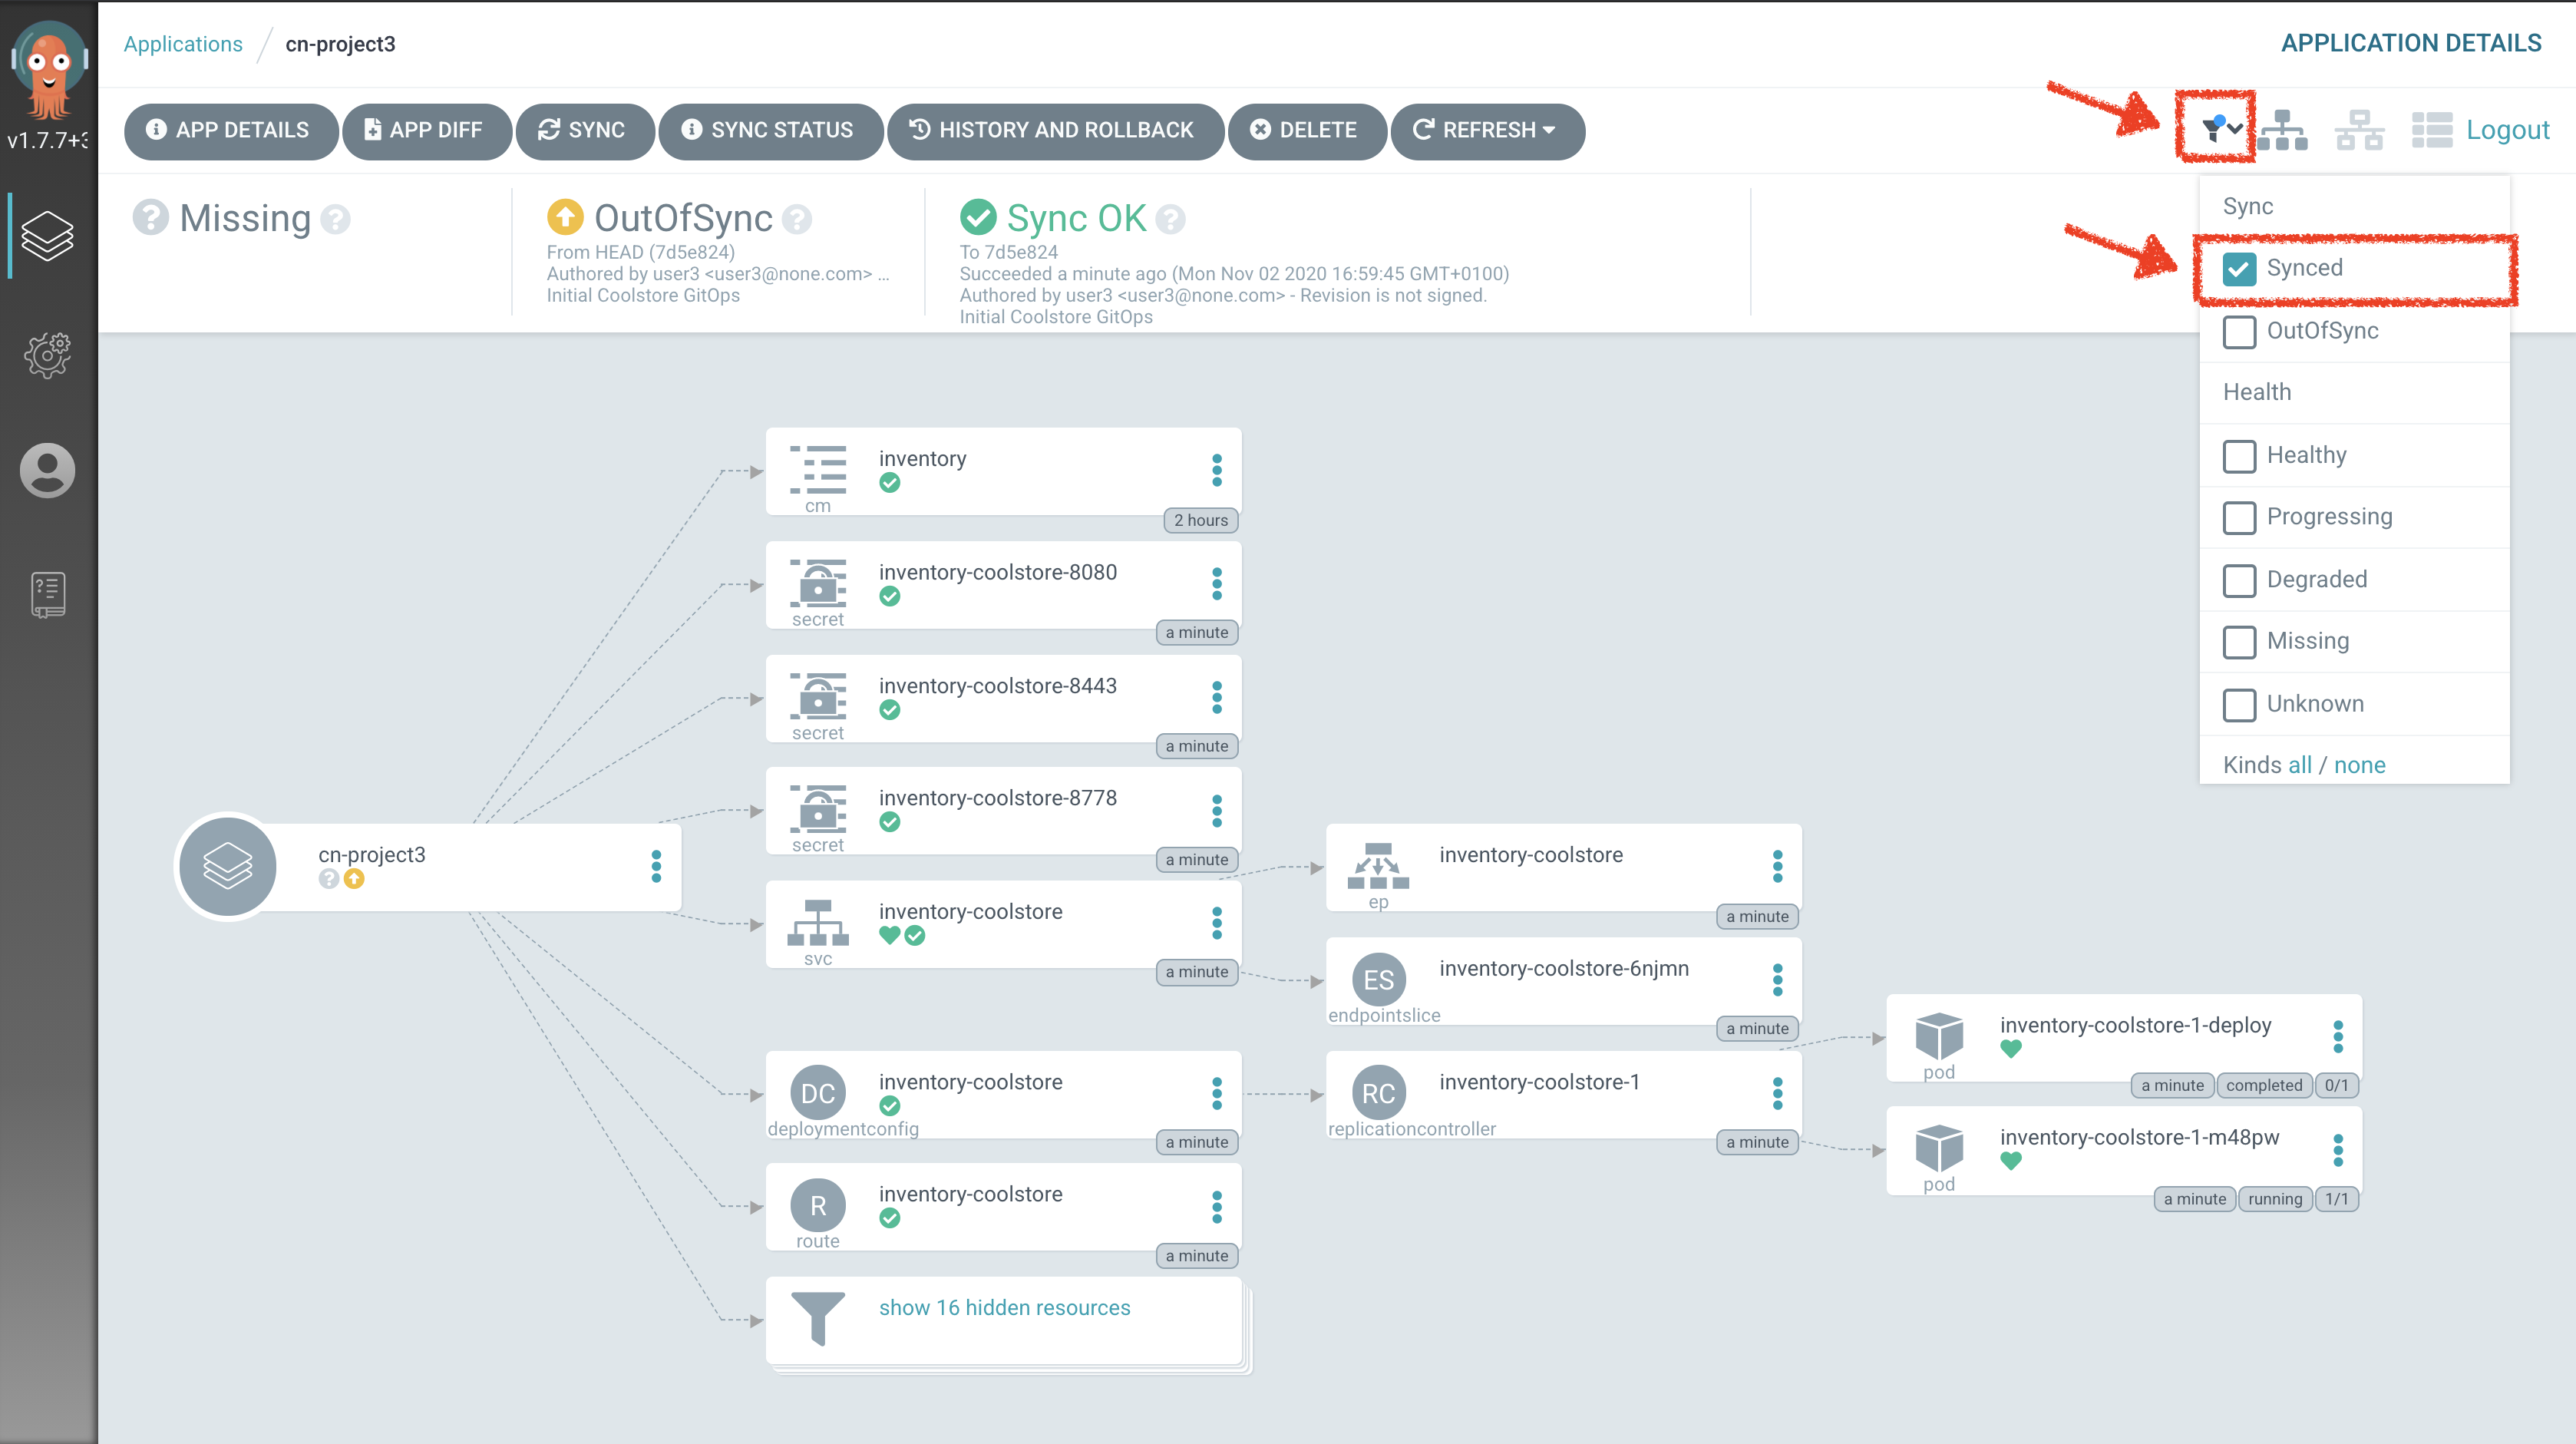
Your Argo CD application is still 'OutofSync' because the other OpenShift Manifests (Catalog, Gateway and Web) are not synchronized yet. That is the next step.
Deploy the whole application with Tekton
Previously, for the Inventory Service, you have learned how to create, configure and run an OpenShift pipeline.
Now, let’s deploy the rest of the application.
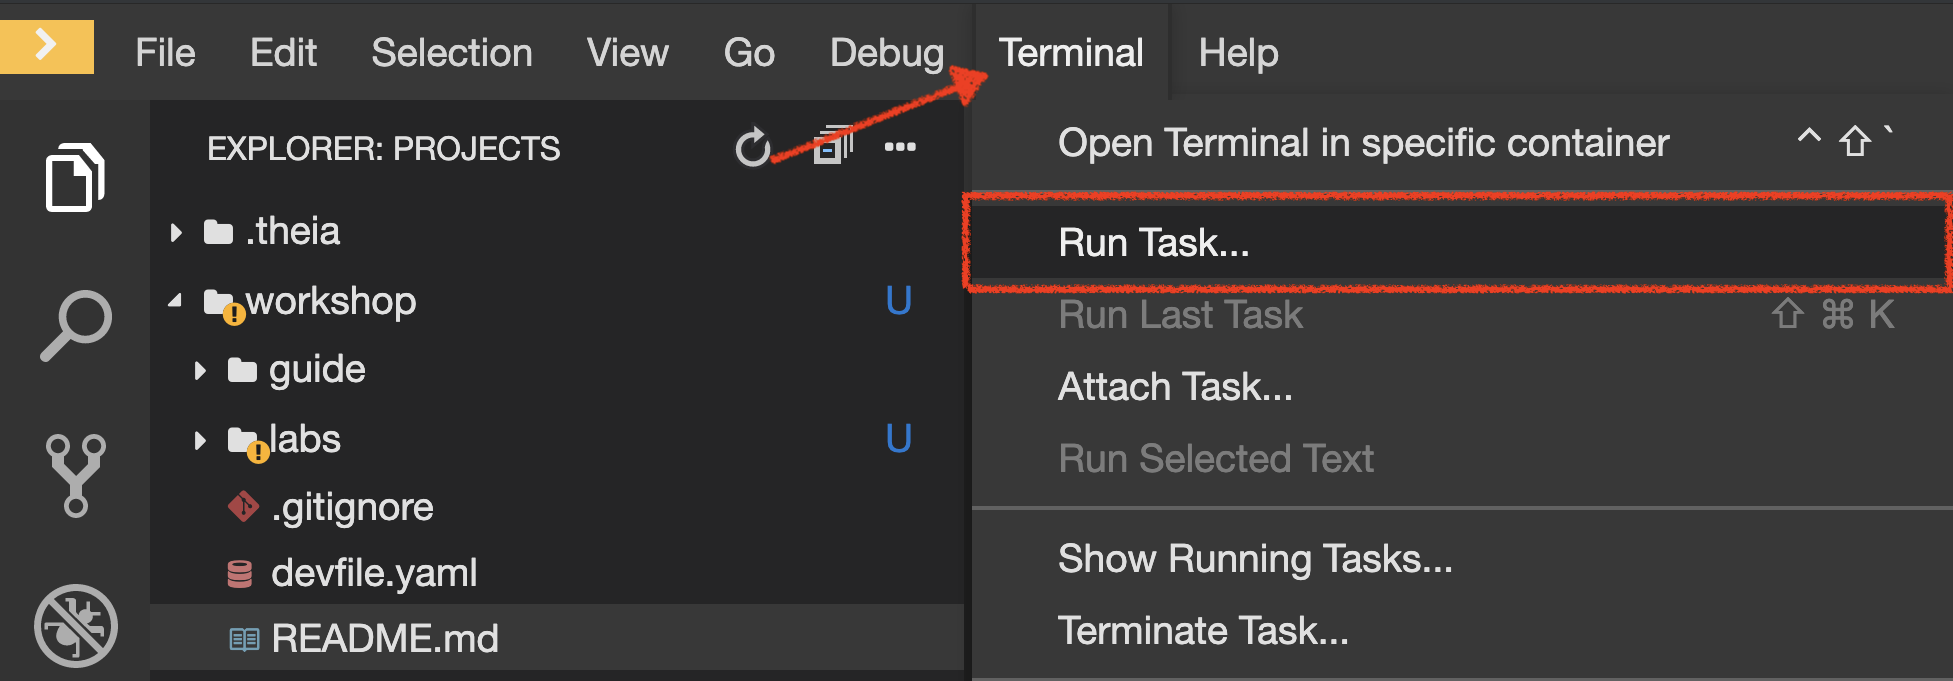
For doing so, click on 'Terminal' → 'Run Task…' → 'Pipeline - Deploy Coolstore'
Once executed, in the OpenShift Web Console, from the Developer view,
click on 'Pipelines' → 'PL - coolstore-java-pipeline' → 'Pipeline Runs'
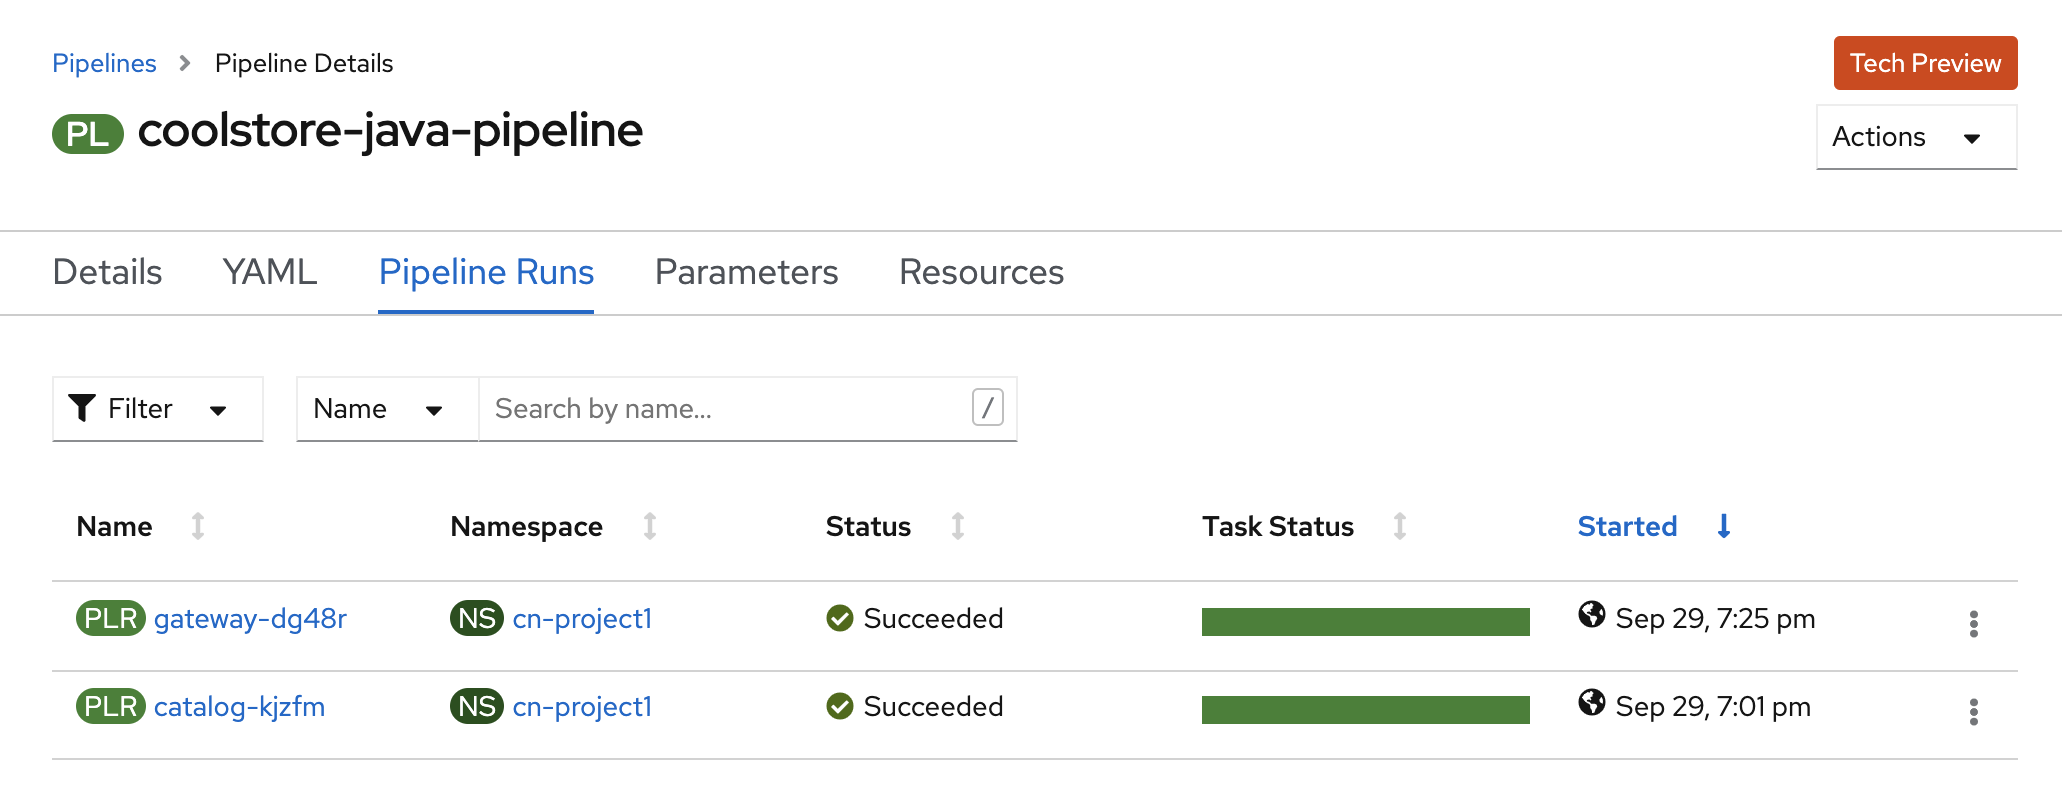
You should see 2 pipelines running for the 2 Java services (Catalog and Gateway).
Click on 'Pipelines' → 'PL - coolstore-nodejs-pipeline' → 'Pipeline Runs'
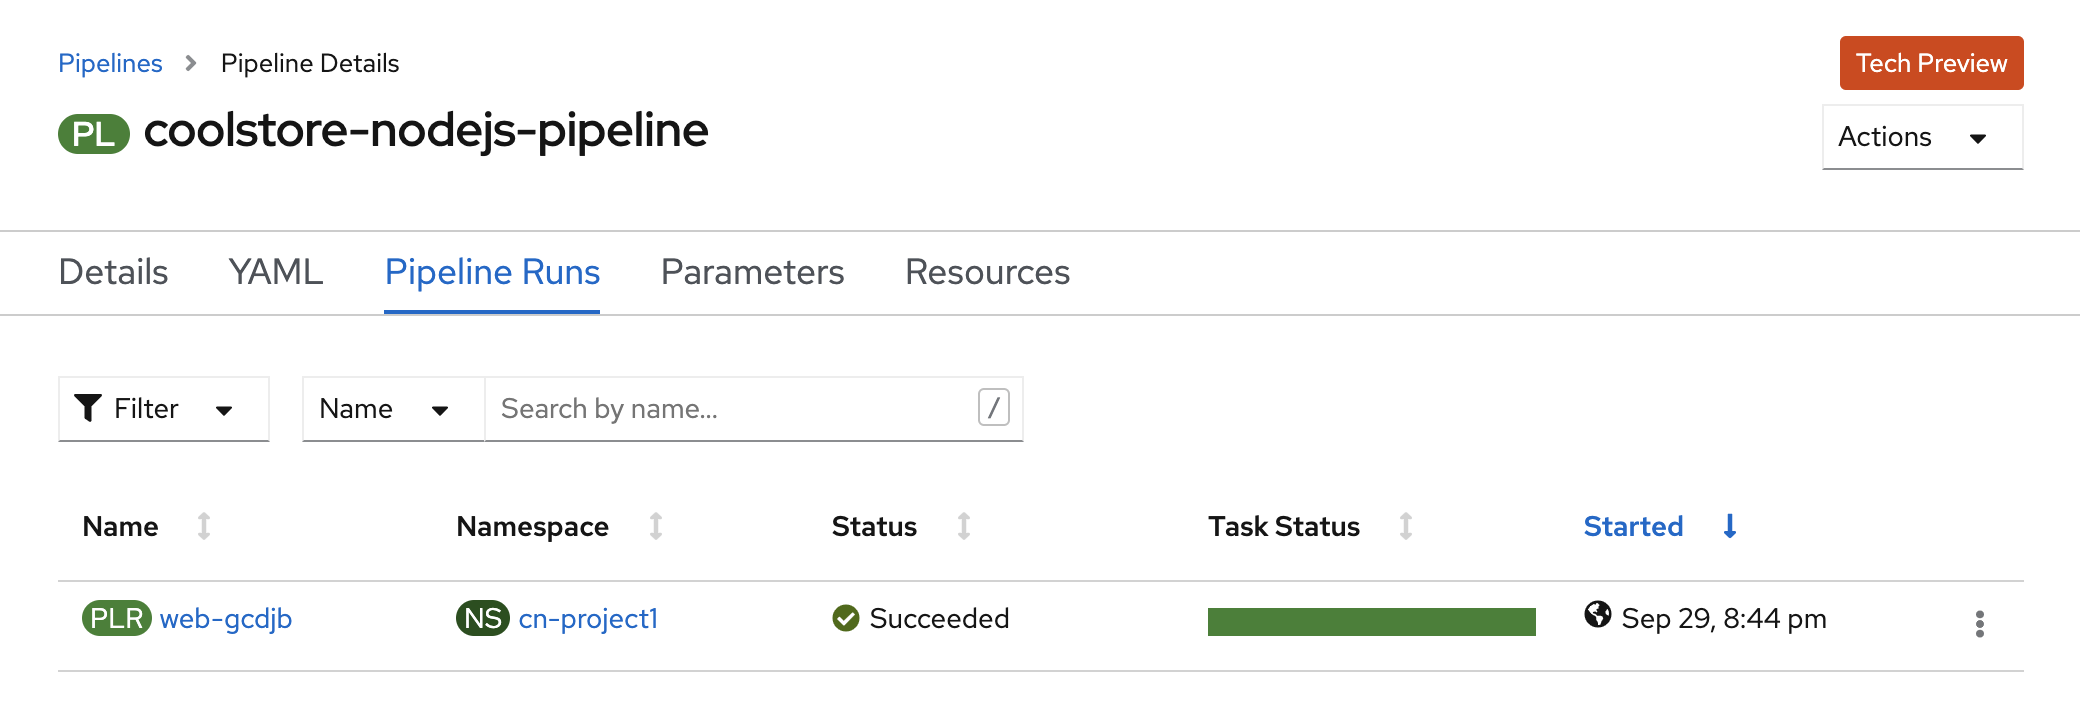
You should see 1 pipeline running for the Web services.
Click on 'Topology' from the Developer view of the OpenShift Web Console
and validate that the CoolStore application is deployed, up and running in the cn-project%USER_ID% project.
Finally, in Argo CD, Select the 'Application menu' then click on the 'cn-project%USER_ID%' application:
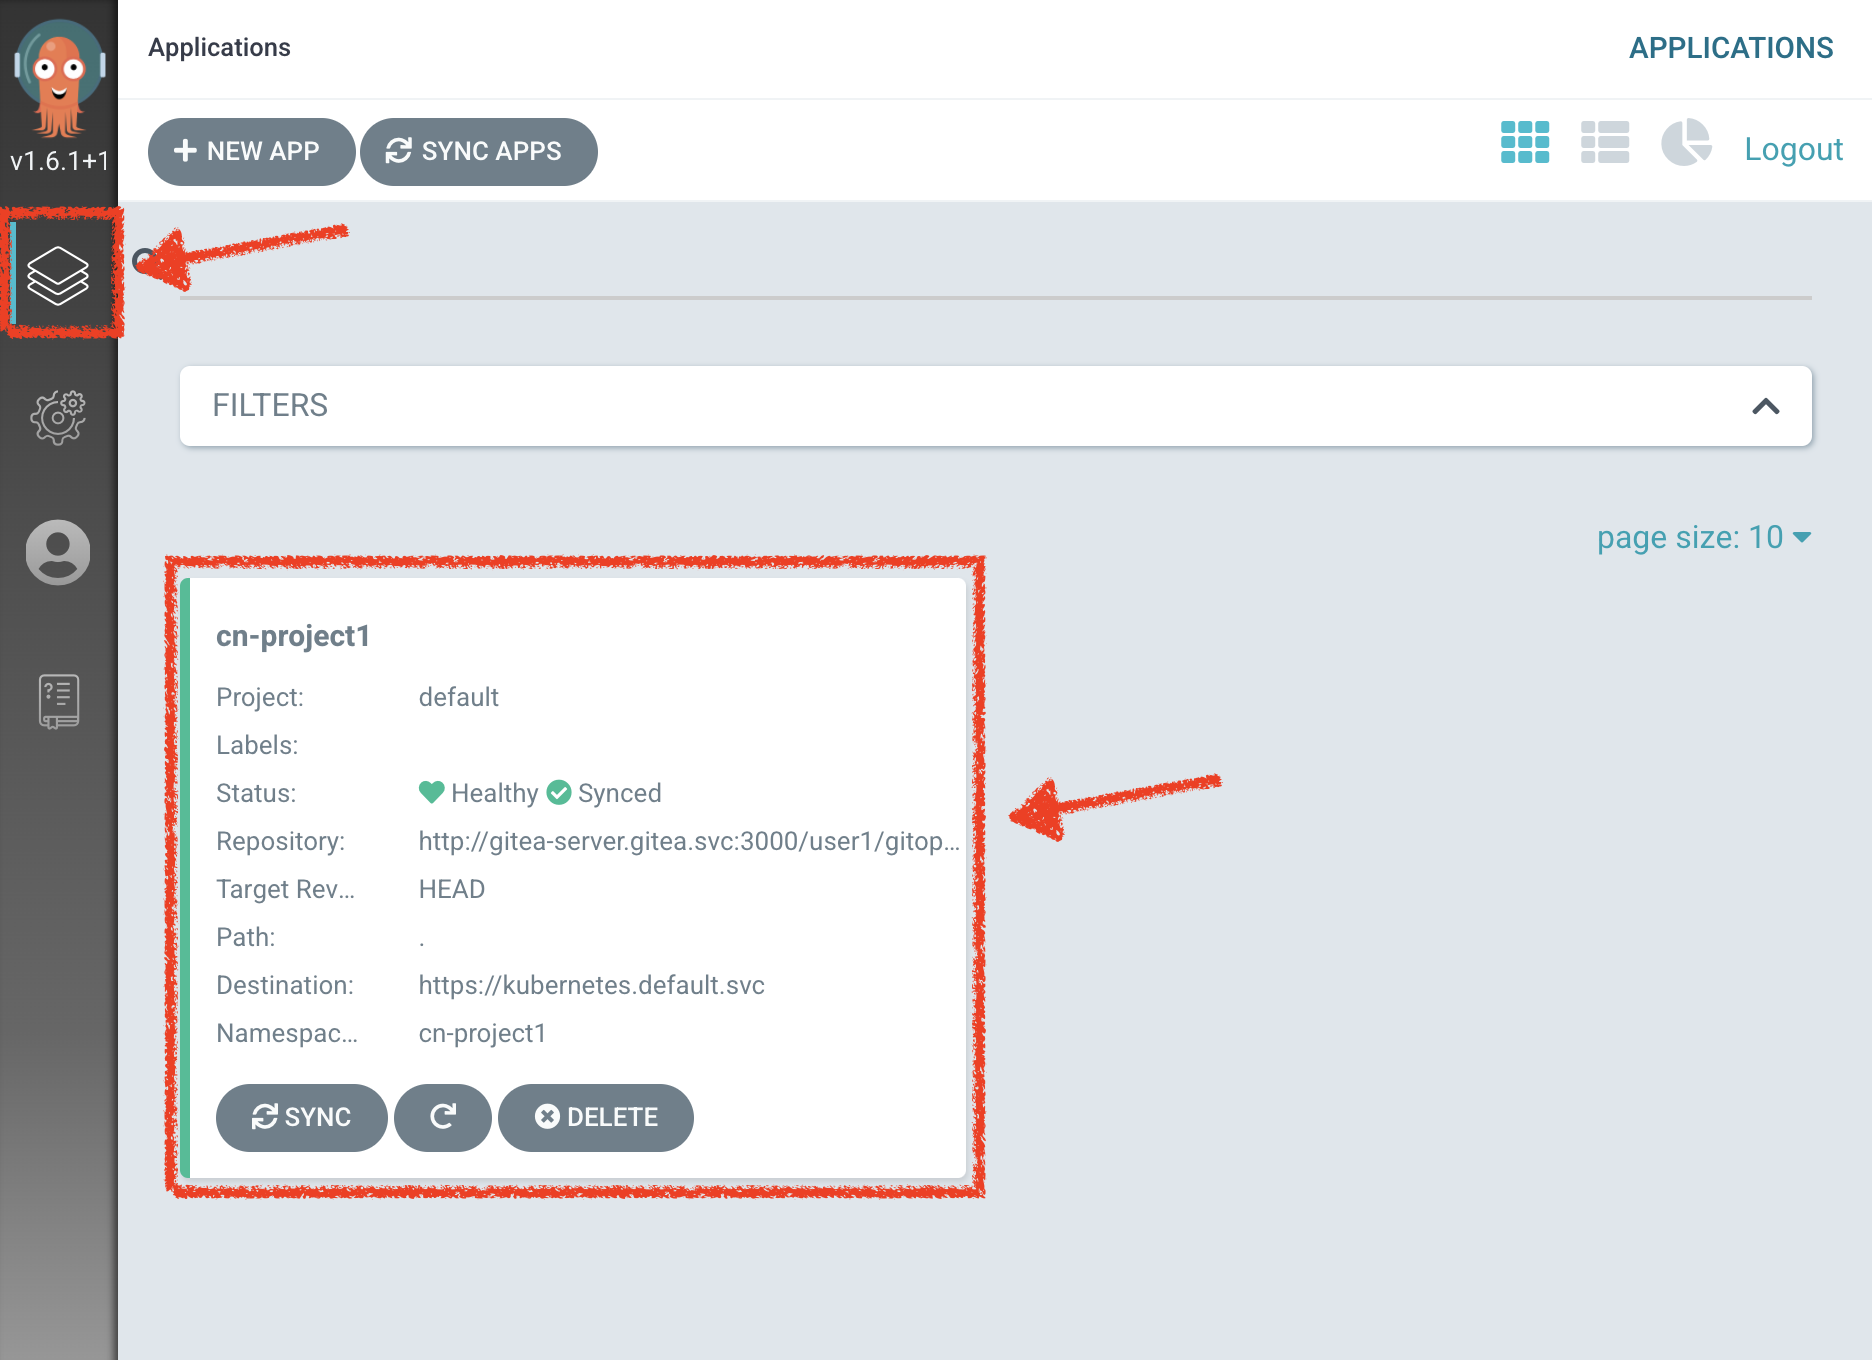
Argo CD has synchronized all the OpenShift manifests stored into your Git Repository with your 'cn-project%USER_ID%' project on OpenShift.
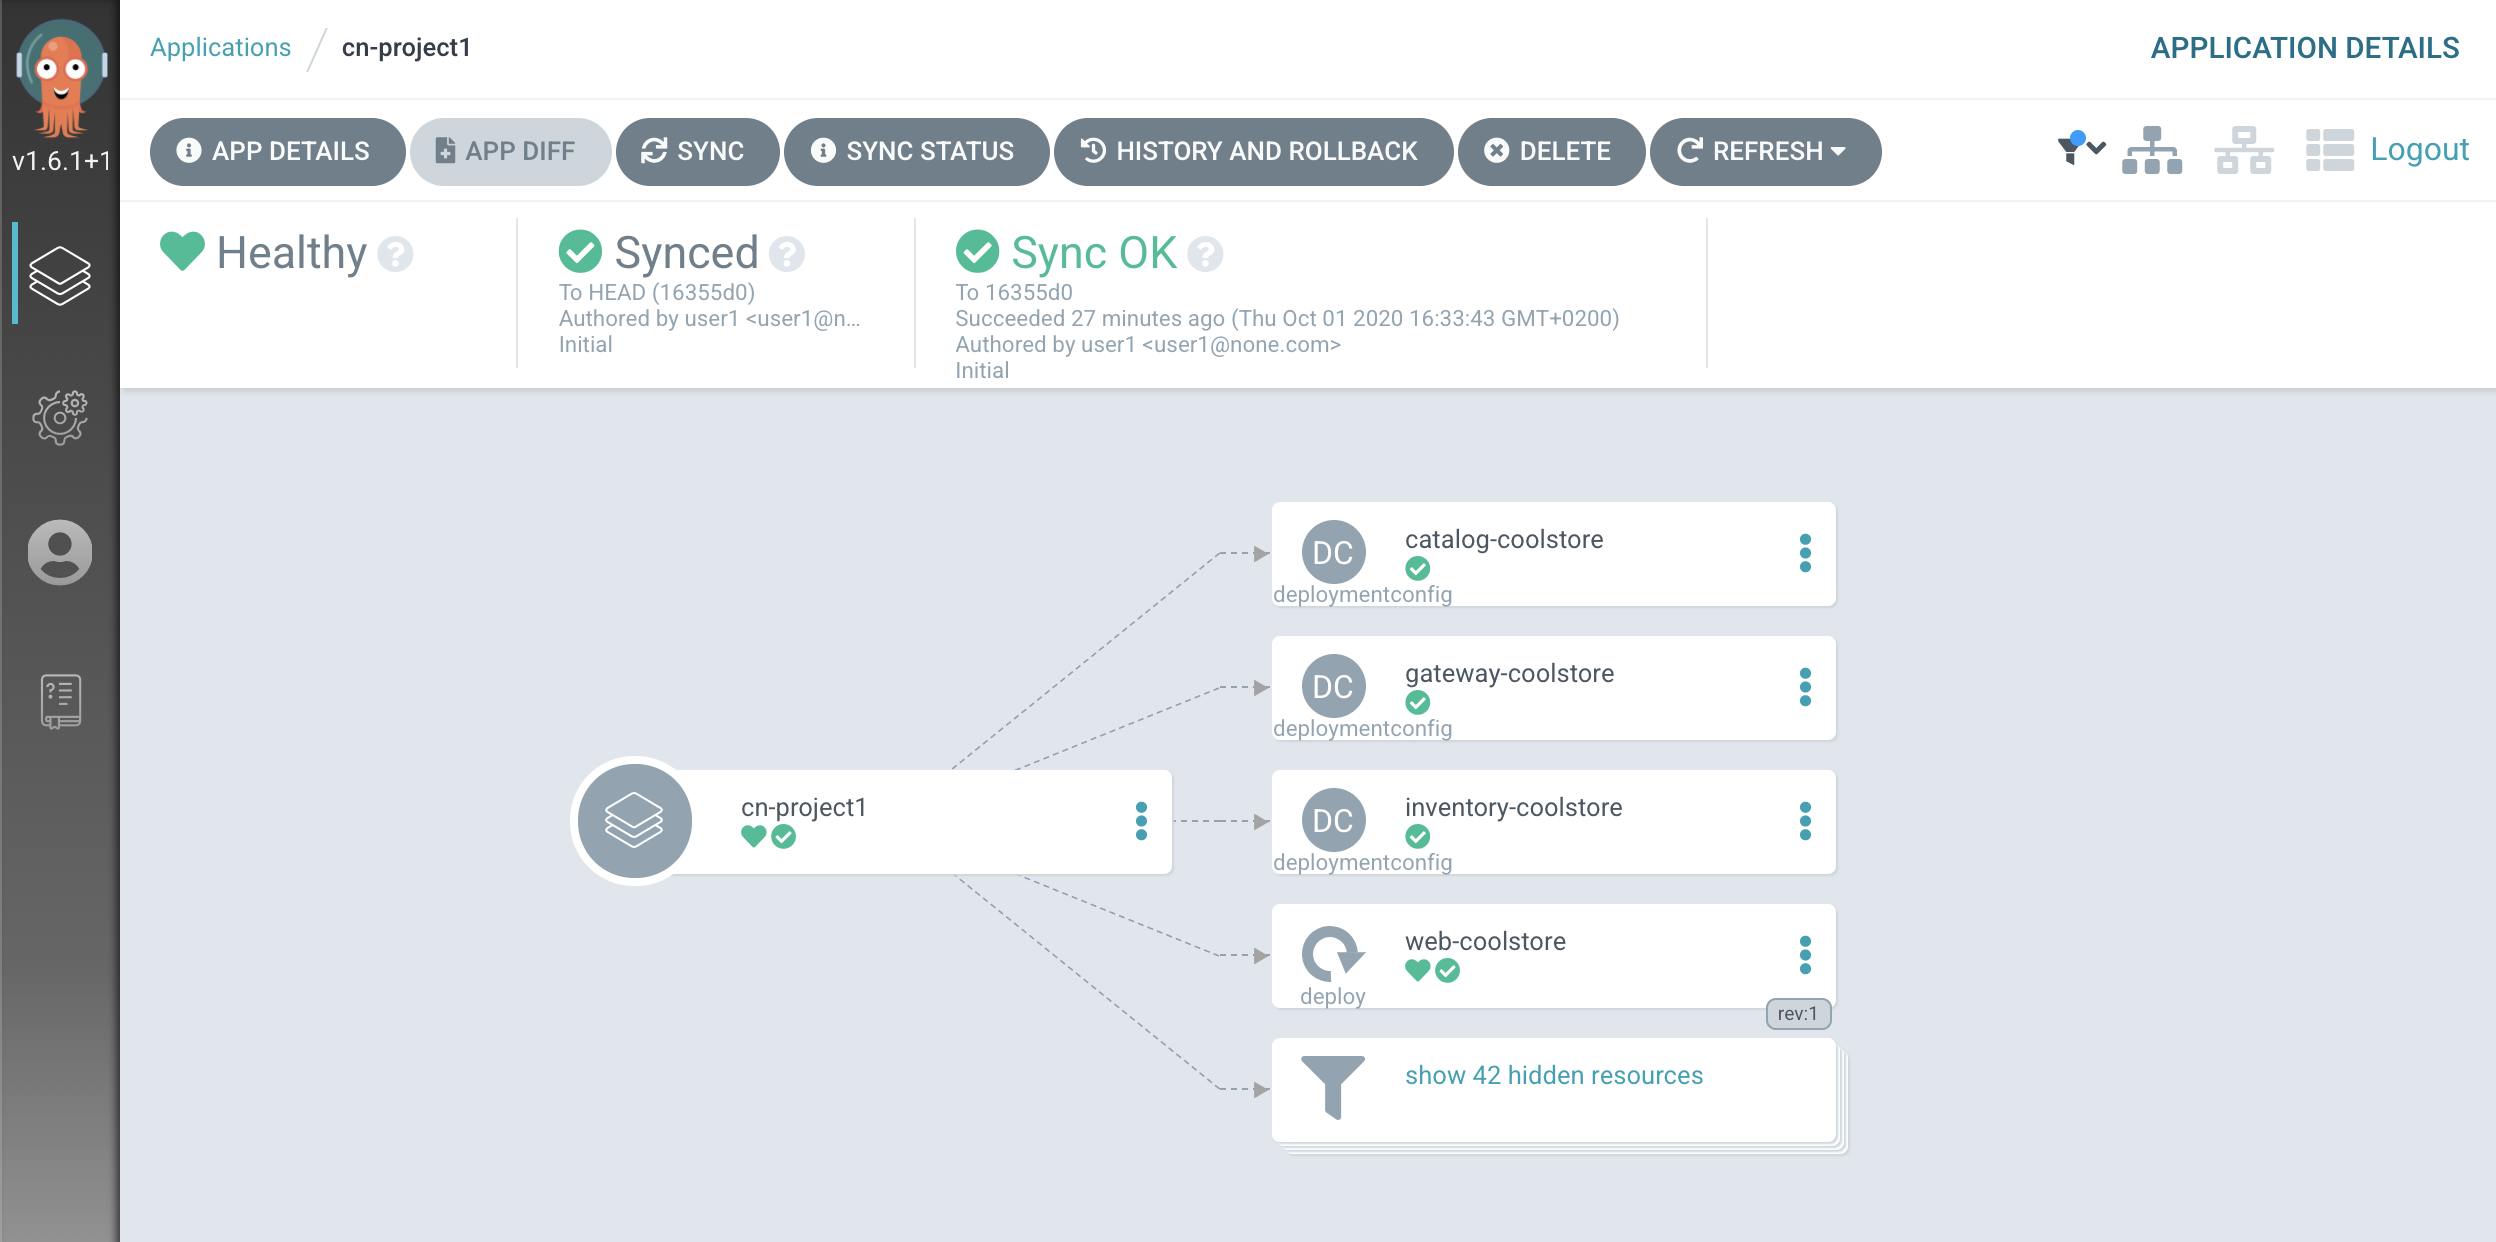
Your Argo CD application is now 'Synced'.
Well done! You are ready for the next lab.