Volumes & Persistent Volumes
Containers are ephemeral by definition, which means that anything that it is stored at running time is lost when the container is stopped. This might cause problems with containers that need to persist their data, like database containers.
A Kubernetes volume is just a directory that is accessible to the Containers in a Pod. The concept is similar to Docker volumes, but in Docker you are mapping the container to a computer host, whereas in the case of Kubernetes volumes, the medium that backs it and the contents of it are determined by the particular volume type used.
Some of the volume types are:
-
awsElasticBlockStore
-
azureDisk
-
cephfs
-
nfs
-
local
-
empty dir
-
host path
Preparation
Namespace
Make sure the proper namespace myspace is created and context is set to point to it.
|
You will need to create the If the response is: Then you can create the namespace with: |
kubectl config set-context --current --namespace=myspaceWatch
If it’s not open already, you’ll want to have a terminal open (call it Terminal 2) to watch what’s going on with the pods in our current namespace
watch -n 1 "kubectl get pods -o wide \(1)
| awk '{print \$1 \" \" \$2 \" \" \$3 \" \" \$5 \" \" \$7}' | column -t" (2)| 1 | the -o wide option allows us to see the node that the pod is schedule to |
| 2 | to keep the line from getting too long we’ll use awk and column to get and format only the columns we want |
Volumes
Let’s start with two examples of Volumes.
EmptyDir
An emptyDir volume is first created when a Pod is assigned to a node and exists as long as that Pod is running on that node.
As the name says, it is initially empty.
All Containers in the same Pod can read and write in the same emptyDir volume.
When a Pod is restarted or removed, the data in the emptyDir is lost forever.
Let’s deploy a service that exposes two endpoints, one to write content to a file and another one to retrieve the content from that file. Open myboot-pod-volume.yml
|
If you’re running this from within VSCode you can use CTRL+p (or CMD+p on Mac OSX) to quickly open |
apiVersion: v1
kind: Pod (1)
metadata:
  name: myboot-demo
spec:
  containers:
  - name: myboot-demo
    image: quay.io/rhdevelopers/myboot:v4

    volumeMounts:
    - mountPath: /tmp/demo (2)
      name: demo-volume (3)

  volumes:
  - name: demo-volume
emptyDir: {}| 1 | Notice that this is a Pod and not a Deployment |
| 2 | This is where this mount point will appear in the pod. See below |
| 3 | This must match the name of a volume that we define, in this case it is defined right at the bottom of the file |
In volumes section, you are defining the volume, and in volumeMounts section, how the volume is mounted inside the container.
kubectl apply -f apps/kubefiles/myboot-pod-volume.ymlThen in our watch window we should see something like
Once the pod is running, let’s exec into the container:
kubectl exec -ti myboot-demo -- /bin/bashAnd once exec 'd into the container, run the following commands:
curl localhost:8080/appendgreetingfile
curl localhost:8080/readgreetingfile
Which should return
JamboIn this case, the emptyDir was set to /tmp/demo so you can check the directory content by running ls:
ls /tmp/demogreeting.txtEmptyDir Ephemerality
If you haven’t already, close the container’s shell:
And delete the pod:
kubectl delete pod myboot-demo|
You need to wait until the pod is completely deleted before trying to deploy it again |
Then if you deploy the same service again:
kubectl apply -f apps/kubefiles/myboot-pod-volume.ymlAnd once in the Running state exec into the pod:
kubectl exec -ti myboot-demo -- /bin/bashLet’s list the contents of our mount point in our new pod
ls /tmp/demoYou’ll notice that the directory content is empty, meaning that the file we created with the last pod was destroyed when the pod was deleted
root@myboot-demo:/app#Exit the pod
exitNow delete the pod.
kubectl delete pod myboot-demoEmptyDir Sharing in Pod
emptyDir is shared between containers of the same Pod. Let’s take a look at a deployment that creates two containers in the same pod that mount the same emptyDir volume.
|
If you’re running this from within VSCode you can use CTRL+p (or CMD+p on Mac OSX) to quickly open |
Consider myboot-pods-volume.yml:
apiVersion: v1
kind: Pod
metadata:
  name: myboot-demo
spec:
  containers:
  - name: myboot-demo-1 (1)
    image: quay.io/rhdevelopers/myboot:v4
    volumeMounts:
    - mountPath: /tmp/demo
      name: demo-volume

  - name: myboot-demo-2 (2)
    image: quay.io/rhdevelopers/myboot:v4 (3)

    env:
    - name: SERVER_PORT (4)
      value: "8090"

    volumeMounts:
    - mountPath: /tmp/demo
      name: demo-volume

  volumes:
  - name: demo-volume (5)
emptyDir: {}| 1 | The first container in the pod is called myboot-demo-1 and mounts demo-volume at /tmp/demo |
| 2 | The second container in the pod is called myboot-demo-2 and mounts demo-volume at the same /tmp/demo point |
| 3 | Both containers use the same exact image |
| 4 | Notice that the second container needs to listen on a different port from the first since the containers share ports on the pod. The env directive at this level only applies to the myboot-demo-2 container |
| 5 | The volume is defined only once but referenced by each container in the pod |
Now let’s create that deployment in the myspace namespace
kubectl apply -f apps/kubefiles/myboot-pods-volume.ymlAnd in our pod watch we should see
NAME          READY   STATUS    RESTARTS   AGE
myboot-demo   2/2    Running   0          4s
Notice the 2/2 ready status. This represents the 2 containers in the pod definition
First, let’s exec into the second container in the pod and start a watch on the mount point. For this we’ll open yet another terminal (Terminal 3) exec into the other container in the pod to run the cat command
kubectl exec -it myboot-demo -c myboot-demo-2 -- bashAnd then from inside the myboot-demo-2 container in the pod, run the following command:
watch -n1 -- "ls -l /tmp/demo && eval ""cat /tmp/demo/greeting.txt"""Which will at first return
total 0
cat: /tmp/demo/greeting.txt: No such file or directory
Let’s access into the first container in the main terminal and see if we can get it to create a file that the second container can see
kubectl exec -ti myboot-demo -c myboot-demo-1 -- /bin/bashand generate some content to /tmp/demo directory.
curl localhost:8080/appendgreetingfileAnd then show that the file exists and what its content is:
ls -l /tmp/demo && echo $(cat /tmp/demo/greeting.txt)total 4
-rw-r--r--. 1 root root 5 Jul 13 08:11 greeting.txt
JamboMeanwhile in Terminal 3 you should see something like:
total 4
-rw-r--r--. 1 root root 5 Jul 13 08:11 greeting.txt
JamboHit CTRL+c to exit the watch and then exit out of the exec to the pod
exitNow, back in your terminal you can get the volume information from a Pod by running:
kubectl describe pod myboot-demoVolumes:
demo-volume:
Type: EmptyDir (a temporary directory that shares a pods lifetime)
Medium:
SizeLimit: <unset>HostPath
A hostPath volume mounts a file or directory from the node’s filesystem into the Pod. Take a look at myboot-pod-volume-hostpath.yml
|
If you’re running this from within VSCode you can use CTRL+p (or CMD+p on Mac OSX) to quickly open |
apiVersion: v1
kind: Pod
metadata:
  name: myboot-demo
spec:
  containers:
  - name: myboot-demo
    image: quay.io/rhdevelopers/myboot:v4

    volumeMounts:
    - mountPath: /tmp/demo
      name: demo-volume

  volumes:
  - name: demo-volume
    hostPath: (1)
path: "/mnt/data" (2)| 1 | We’re mounting the same location as before, but you can see that we define the volume as hostPath here instead of emptyDir |
| 2 | /mnt/data is a location on the kubernetes node to which this pod gets assigned |
In this case, you are defining the host/node directory where the contents are going to be stored.
kubectl apply -f apps/kubefiles/myboot-pod-volume-hostpath.yamlNow, if you describe the Pod, in volumes section, you’ll see:
kubectl describe pod myboot-demoVolumes:
demo-volume:
Type: HostPath (bare host directory volume)
Path: /mnt/data
HostPathType:Let’s open a terminal where we can watch the directory on the 'host' or the 'node'
Let’s use the minikube ssh command to simulate a connection to the kubernetes node. (There is only one node running in minikube)
minikube sshLast login: Tue Jul 13 08:26:18 2021 from 192.168.49.1
docker@devnation:~$Now that we’re there, let’s watch the /mnt/data directory that the pod has mounted as /tmp/demo
watch -n1 -- "ls -al /mnt/data && eval ""cat /mnt/data/greeting.txt"""kubectl exec -ti myboot-demo -- /bin/bashand then from within the pod, generate some content to /tmp/demo directory.
curl localhost:8080/appendgreetingfileMeanwhile in the other terminal (Terminal 3) you should at the same time see the watch output change
Every 1.0s: eval ls -al /mnt/da...  devnation: Tue Jul 13 09:14:28 2021

total 4
drwxr-xr-x. 1 root root 24 Jul 13 09:13 .
drwxr-xr-x. 1 root root  8 Jul 13 08:24 ..
-rw-r--r--. 1 root root  5 Jul 13 09:13 greeting.txt
Jambo
Notice that now the content stored in /tmp/demo inside the Pod is stored at host path /mnt/data, so if the Pod dies, the content is not lost.
But this might not solve all the problems as if the Pod goes down and it is rescheduled in another node, then the data will not be in this other node.
Let’s see another example, in this case for an Amazon EBS Volume:
apiVersion: v1
kind: Pod
metadata:
  name: test-ebs
spec:
...
  volumes:
    - name: test-volume
      awsElasticBlockStore:
        volumeID: <volume-id>
        fsType: ext4
What we want you to notice from the previous snippet is that you are mixing things from your application (ie the container, probes, ports, …) things that are more in the dev side with things more related to the cloud (ie physical storage), which falls more in the ops side.
To avoid this mix of concepts, Kubernetes offers some layer of abstractions, so developers just ask for space to store data (persistent volume claim), and the operations team offers the physical storage configuration.
Persistent Volume & Persistent Volume Claim
A PersistentVolume (PV) is a Kubernetes resource that is created by an administrator or dynamically using Storage Classes independently from the Pod.
It captures the details of the implementation of the storage and can be NFS, Ceph, iSCSI, or a cloud-provider-specific storage system.
A PersistentVolumeClaim (PVC) is a request for storage by a user.
It can request for a specific volume size or, for example, the access mode.
Persistent volume/claim with hostPath
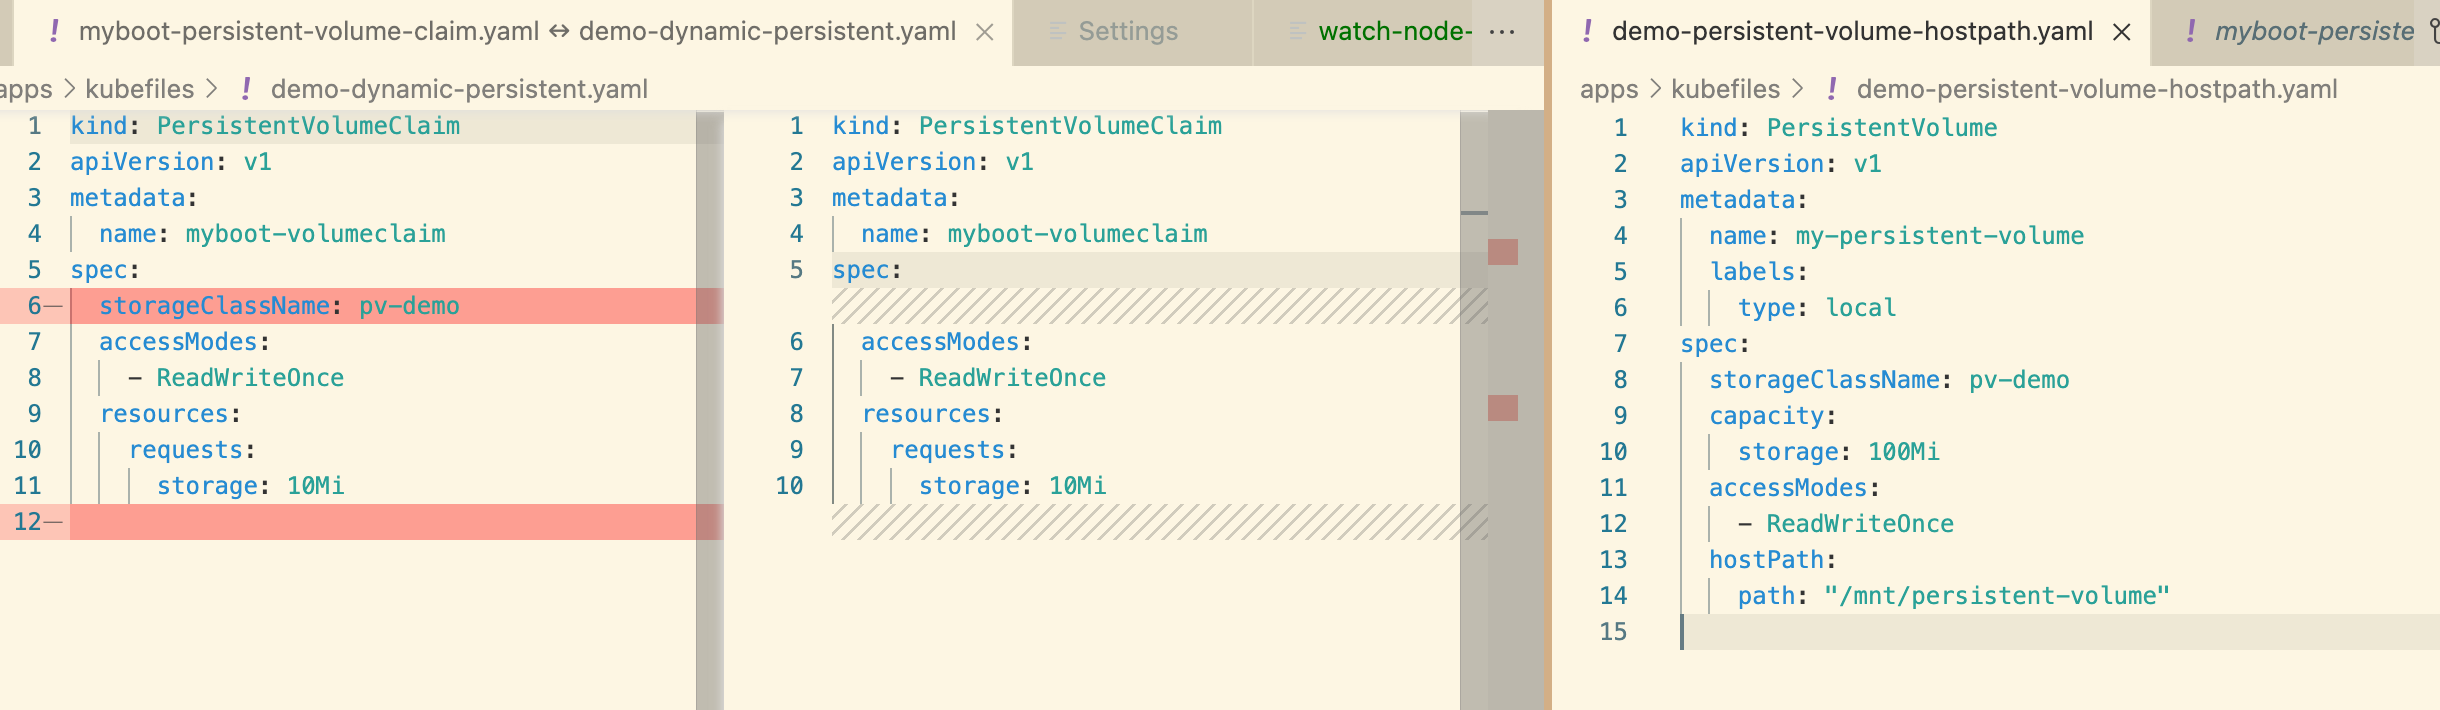
Let’s use hostPath strategy, but not configuring it directly as volume, but using persistent volume and persistent volume claim. Check out demo-persistent-volume-hostpath.yaml:
|
If you’re running this from within VSCode you can use CTRL+p (or CMD+p on Mac OSX) to quickly open |
kind: PersistentVolume
apiVersion: v1
metadata:
  name: my-persistent-volume
  labels:
    type: local
spec:
  storageClassName: pv-demo
  capacity:
    storage: 100Mi
  accessModes:
    - ReadWriteOnce
  hostPath:
    path: "/mnt/persistent-volume"
Now, the volume information is not in the pod anymore but in the persistent volume object.
kubectl apply -f apps/kubefiles/demo-persistent-volume-hostpath.yaml

kubectl get pv -w
NAME CAPACITY ACCESS MODES RECLAIM POLICY STATUS CLAIM STORAGECLASS REASON AGE
my-persistent-volume 100Mi RWO Retain Available pv-demo 5sOnce the volume is established, let’s update our file watch terminal to look in the volume’s new location: /mnt/persistent-volume
Hit CTRL+c to exit out of the current watch
Then start a new watch
watch -n1 -- "ls -al /mnt/persistent-volume && eval ""cat /mnt/persistent-volume/greeting.txt"""Then from the dev side, we need to claim what we need from the PV.
In the following example, we are requesting for 10Mi space. See myboot-persistent-volume-claim.yaml:
|
If you’re running this from within VSCode you can use CTRL+p (or CMD+p on Mac OSX) to quickly open |
kind: PersistentVolumeClaim
apiVersion: v1
metadata:
  name: myboot-volumeclaim
spec:
  storageClassName: pv-demo
  accessModes:
    - ReadWriteOnce
  resources:
    requests:
      storage: 10Mi
kubectl apply -f apps/kubefiles/myboot-persistent-volume-claim.yaml
kubectl get pvc -wNAME STATUS VOLUME CAPACITY ACCESS MODES STORAGECLASS AGE
myboot-volumeclaim Bound my-persistent-volume 100Mi RWO pv-demo 3sThe big difference is that now in the pod you are just defining in the volumes section, not the volume configuration directly, but the persistent volume claim to use. See myboot-pod-volume-pvc.yaml:
|
If you’re running this from within VSCode you can use CTRL+p (or CMD+p on Mac OSX) to quickly open |
apiVersion: v1
kind: Pod
metadata:
  name: myboot-demo
spec:
  containers:
  - name: myboot-demo
    image: quay.io/rhdevelopers/myboot:v4

    volumeMounts:
    - mountPath: /tmp/demo
      name: demo-volume

  volumes:
  - name: demo-volume
    persistentVolumeClaim:
      claimName: myboot-volumeclaim
kubectl apply -f apps/kubefiles/myboot-pod-volume-pvc.yaml
kubectl describe pod myboot-demoVolumes:
demo-volume:
Type: PersistentVolumeClaim (a reference to a PersistentVolumeClaim in the same namespace)
ClaimName: myboot-volumeclaim
ReadOnly: falseNotice that now the description of the pod shows that the volume is not set directly but through a persistent volume claim.
kubectl exec -ti myboot-demo -- /bin/bashand then from within the pod, generate some content to /tmp/demo directory.
curl localhost:8080/appendgreetingfileAnd as soon as we’ve done that we’ll expect to see the following on the path on the node that the PersistentVolume maps to:
Every 1.0s: ls -al /mnt/persistent-volume && eval c...  devnation: Mon Jul 19 14:07:53 2021

total 4
drwxr-xr-x. 1 root root 24 Jul 19 14:06 .
drwxr-xr-x. 1 root root 42 Jul 13 09:21 ..
-rw-r--r--. 1 root root  5 Jul 19 14:06 greeting.txt
Jambo
Clean Up
Exit the exec command
exitNow delete the pod
kubectl delete pod myboot-demoHit CTRL+c to exit out of the watch
And then in the ssh shell type
exitOnce all is cleaned, run the following:
kubectl get pvcResults in:
NAME                 STATUS   VOLUME                 CAPACITY   ACCESS MODES   STORAGECLASS   AGE
myboot-volumeclaim   Bound    my-persistent-volume   100Mi      RWO            pv-demo        14m
Even though the pod has been deleted, the PVC (and the PV) are still there and need to be deleted manually.
kubectl delete -f apps/kubefiles/myboot-persistent-volume-claim.yaml
kubectl delete -f apps/kubefiles/demo-persistent-volume-hostpath.yaml
Static vs Dynamic Provisioning
Persistent Volumes can be provisioned dynamically or statically.
Static provisioning allows cluster administrators to make existing storage device available to a cluster. When it is done in this way, the PV and the PVC must be provided manually.
So far, in the last example, you’ve seen static provisioning.
The dynamic provisioning eliminates the need for cluster administrators to pre-provision storage. Instead, it automatically provisions storage when it is requested by users. To make it run you need to provide a Storage Class object and a PVC referring to it. After the PVC is created, the storage device and the PV are automatically created for you. The main purpose of dynamic provisioning is to work with cloud provider solutions.
Normally, the Kubernetes implementation offers a default Storage Class so anyone can get started quickly with dynamic provisioning. You can get information from the default Storage Class by running:
kubectl get scNAME PROVISIONER RECLAIMPOLICY VOLUMEBINDINGMODE ALLOWVOLUMEEXPANSION AGE
standard (default) k8s.io/minikube-hostpath Delete Immediate false 47dNAME PROVISIONER AGE
gp2 (default) kubernetes.io/aws-ebs 31hBy default, when OpenShift is installed in a cloud provider, it automatically creates a Storage Class with the underlying persistent technology of the cloud. For example in the case of AWS, a default Storage Class is provided pointing out to AWS EBS.
Then you can create a Persistent Volume Claim which will create a Persistent Volume automatically. Use CTRL+p to open demo-dynamic-persistent.yaml quickly:
kind: PersistentVolumeClaim
apiVersion: v1
metadata:
  name: myboot-volumeclaim
spec:
  accessModes:
    - ReadWriteOnce
  resources:
    requests:
      storage: 10Mi
Since we’ve not specified any storage class but there is one defined as the default, the PVC implicitly refers to that one. (You might consider comparing this pod definition to myboot-persistent-volume-claim.yaml)
kubectl apply -f apps/kubefiles/demo-dynamic-persistent.yaml

kubectl get pvcNAME STATUS VOLUME CAPACITY ACCESS MODES STORAGECLASS AGE
myboot-volumeclaim Pending standard 2sNAME STATUS VOLUME CAPACITY ACCESS MODES STORAGECLASS AGE
myboot-volumeclaim Pending gp2 46sçNotice that the PVC is in Pending STATUS, because remember that we are creating dynamic storage and it means that while the pod doesn’t request the volume, the PVC will remain in a pending state and the PV will not be created.
kubectl apply -f apps/kubefiles/myboot-pod-volume-pvc.yamlWhen the pod is in Running status, then you can get PVC and PV parameters.
kubectl get pvcNAME STATUS VOLUME CAPACITY ACCESS MODES STORAGECLASS AGE
myboot-volumeclaim Bound pvc-170f2e9a-4afc-4869-bd19-f10c86bff34b 10Mi RWO standard 5sNAME STATUS VOLUME CAPACITY ACCESS MODES STORAGECLASS AGE
myboot-volumeclaim Bound pvc-6de4f27e-bd40-4b58-bb46-91eb08ca5bd7 1Gi RWO gp2 116sNotice that now the volume claim is Bound to a volume.
Finally, you can check that the PV has been created automatically:
kubectl get pvNAME CAPACITY ACCESS MODES RECLAIM POLICY STATUS CLAIM STORAGECLASS REASON AGE
pvc-170f2e9a-4afc-4869-bd19-f10c86bff34b 10Mi RWO Delete Bound myspace/myboot-volumeclaim standard 56sNAME CAPACITY ACCESS MODES RECLAIM POLICY STATUS CLAIM STORAGECLASS REASON AGE
pvc-6de4f27e-bd40-4b58-bb46-91eb08ca5bd7 1Gi RWO Delete Bound default/myboot-volumeclaim gp2 77sNotice that the CLAIM field points to the PVC responsible for the creation of the PV.