Deploy Web UI with with Node.js and AngularJS
10 MINUTE EXERCISE
In this lab you will learn about Node.js and will deploy the Node.js and Angular-based web frontend for the CoolStore online shop which uses the API Gateway services you deployed in previous labs.
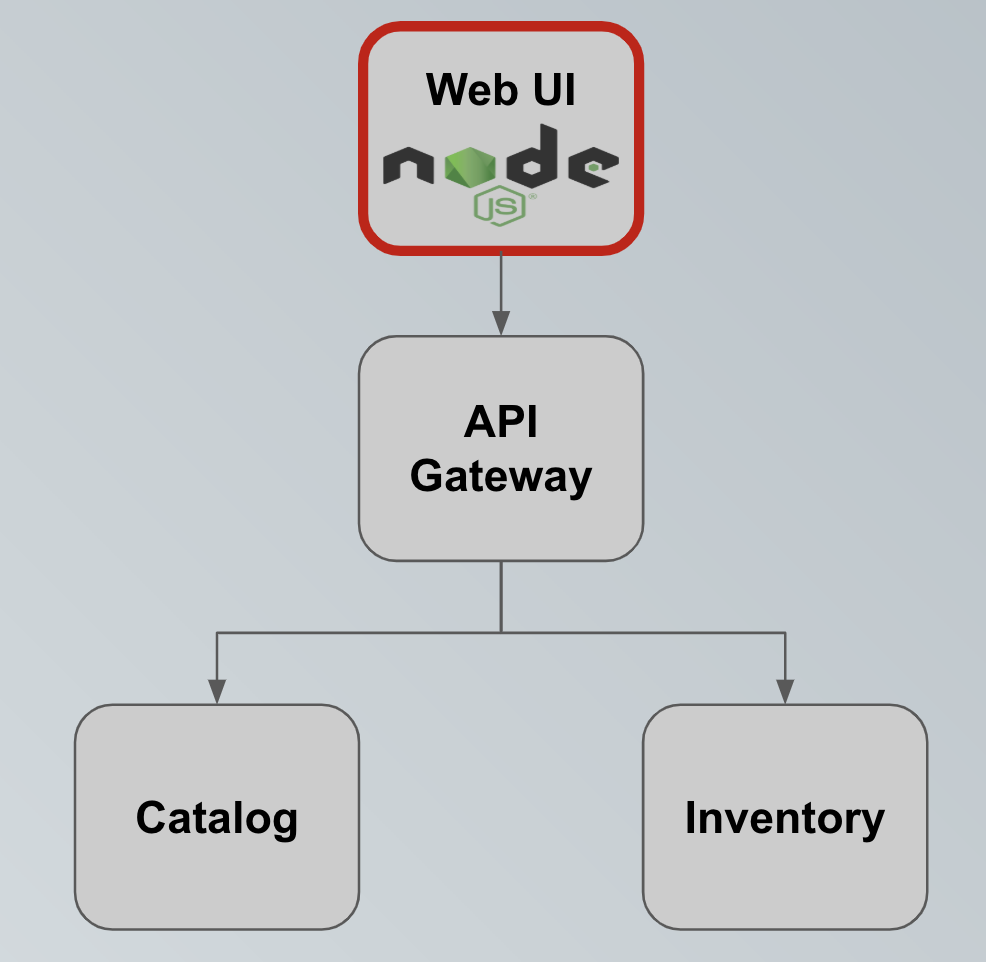
Deploy on OpenShift
The Web UI is built using Node.js for server-side JavaScript and AngularJS for client-side JavaScript. Let’s deploy it on OpenShift using the certified Node.js container image available in OpenShift.
In this lab, again you will use OpenShift Source-to-Image (S2I). OpenShift will obtain the application code directly from the source repository then build and deploy a container image of it.
For a change, rather than using the CLI option you will start this process from the web console.
In the OpenShift Web Console, from the Developer view,
click on '+Add' and select 'Import from Git'
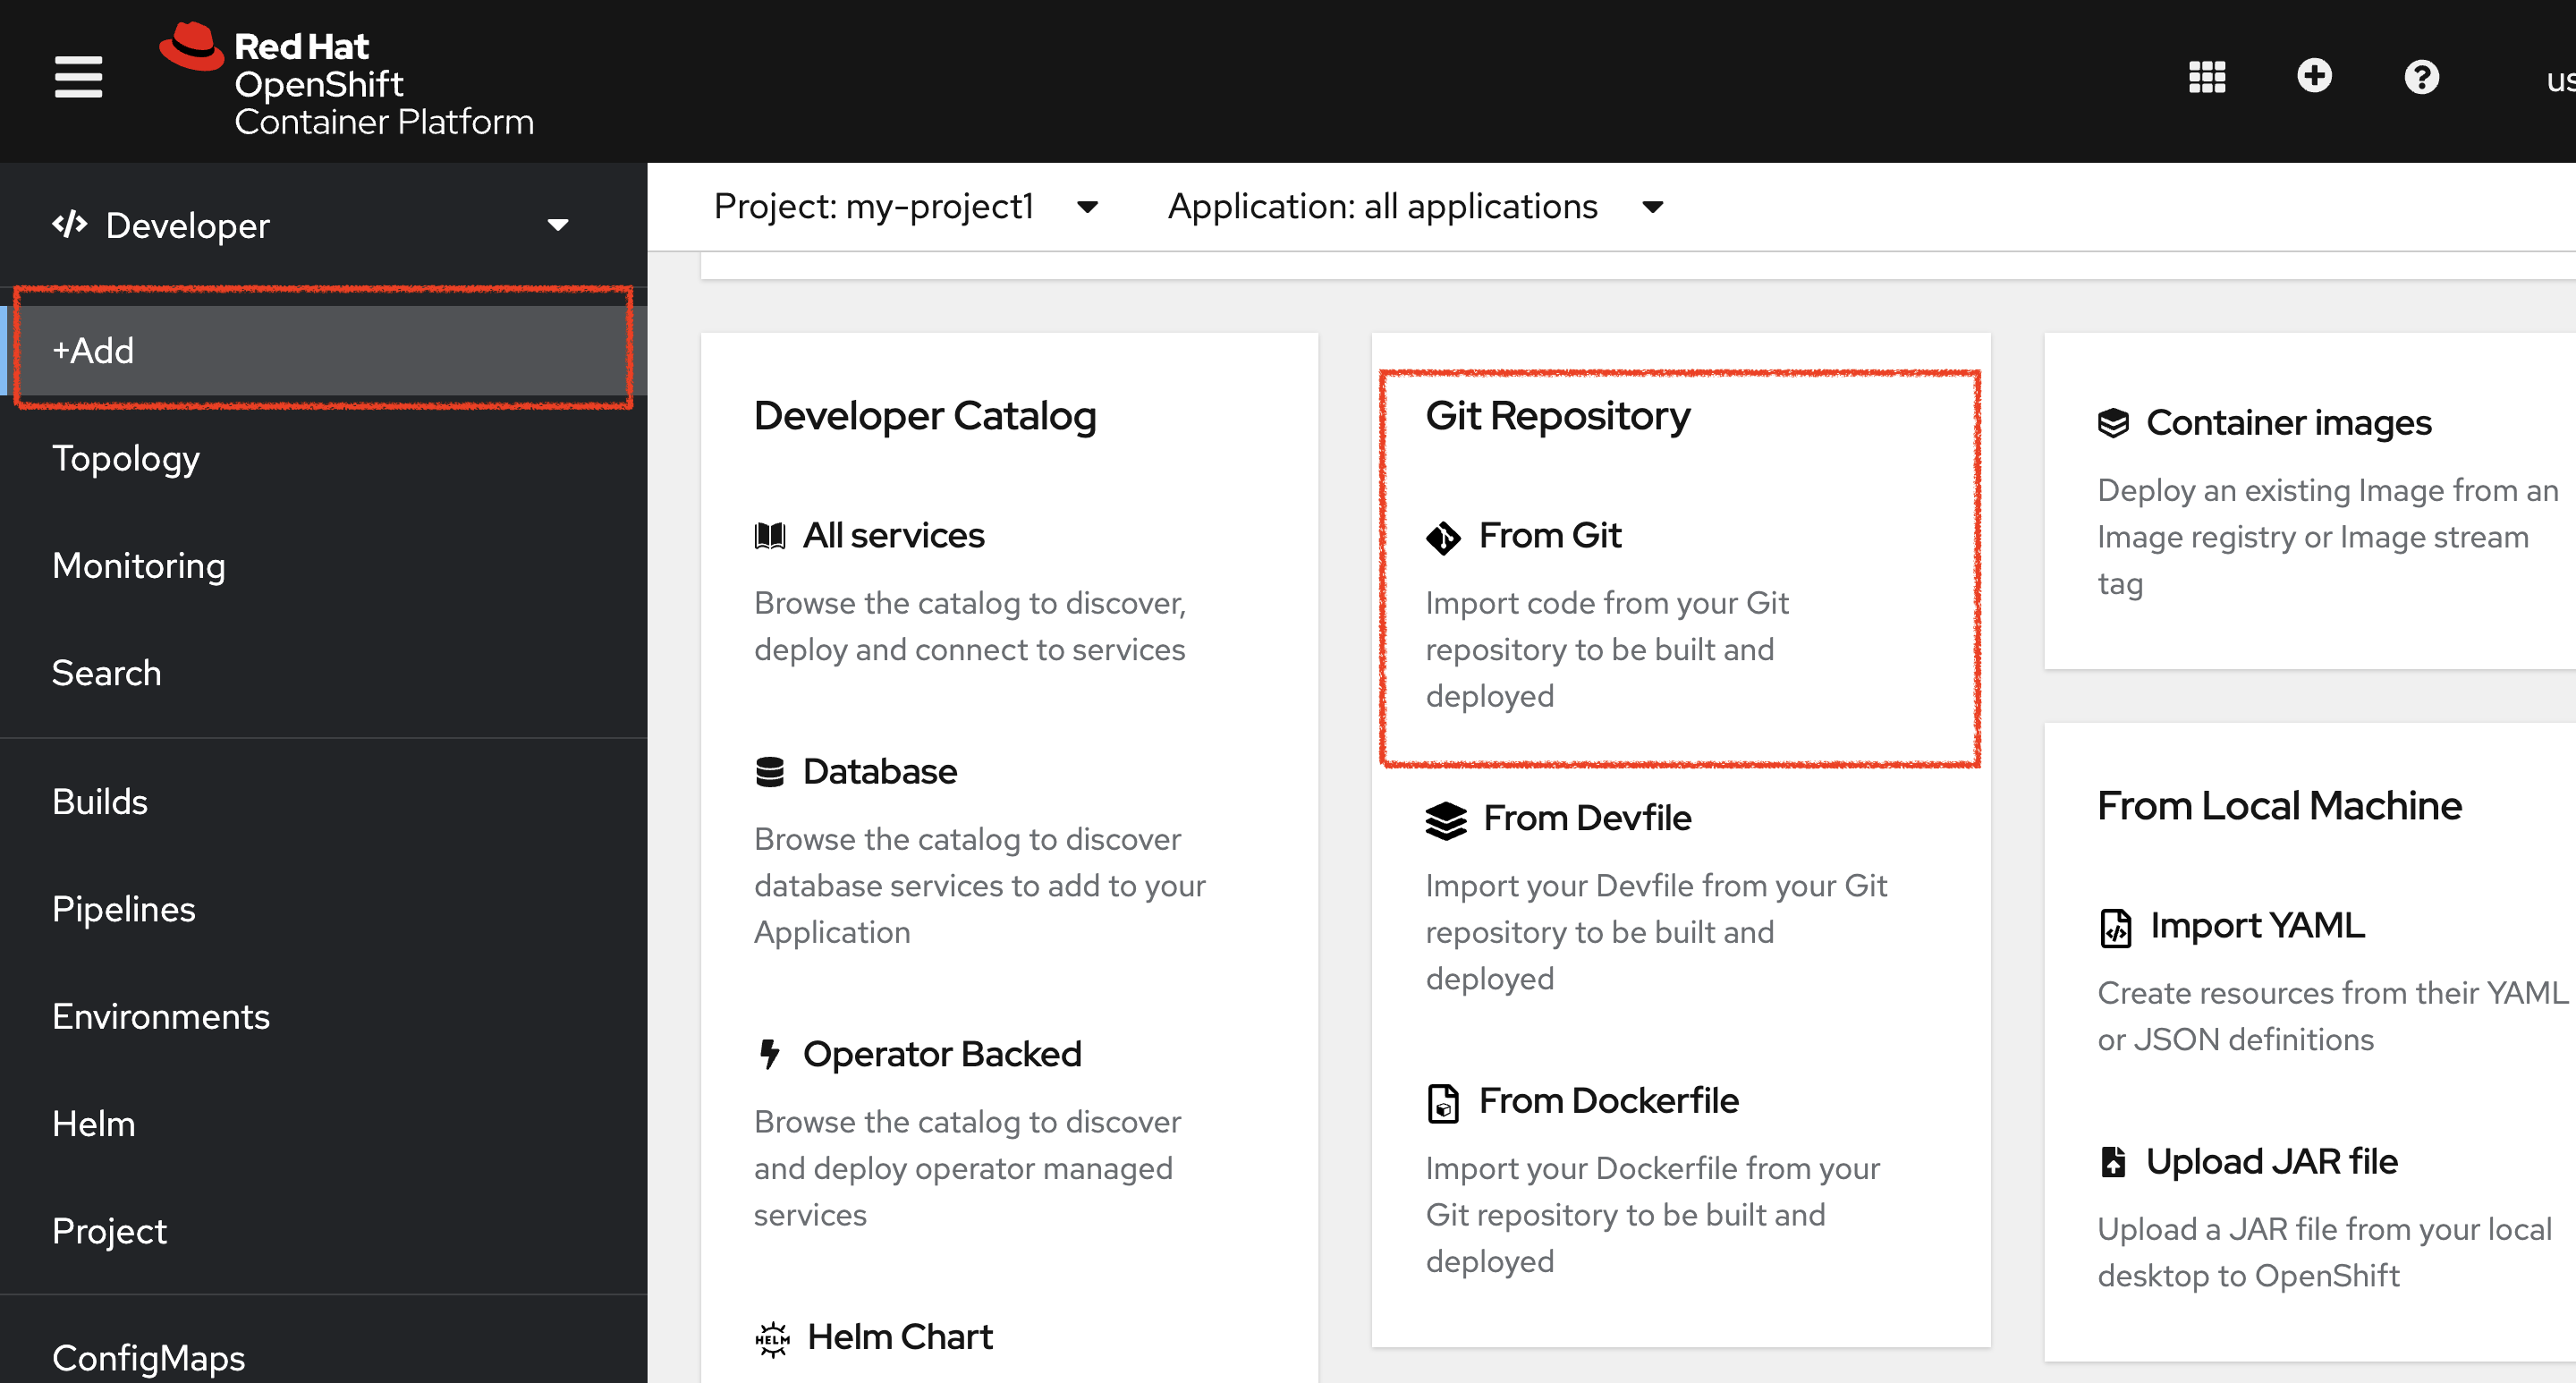
Then, enter the following information:
| Parameter | Value |
|---|---|
Git Repo URL |
%WORKSHOP_GIT_REPO% |
Git Reference (see advanced Git options) |
%WORKSHOP_GIT_REF% |
Context Dir |
/labs/web-nodejs |
Builder Image |
Node.js |
Application |
coolstore |
Name |
web-coolstore |
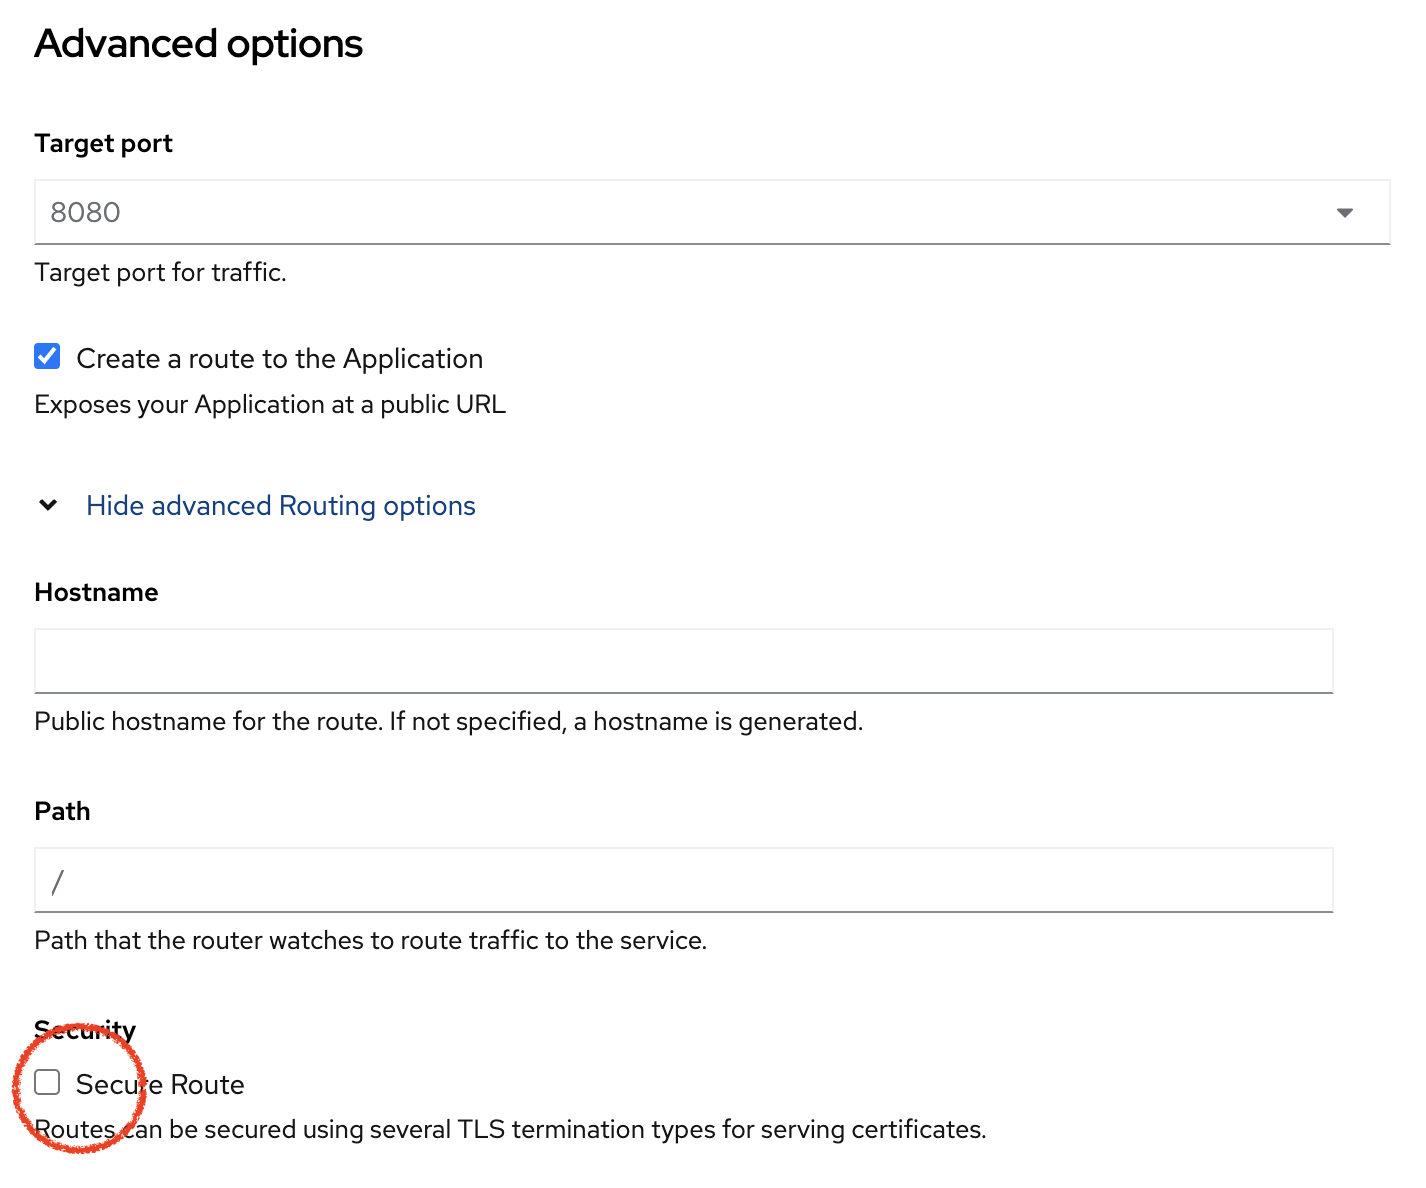
Create a route to the application |
Checked |
Show advanced Routing options |
Expand - see below |
From the advanced Routing options de-select the Secure Route option, so this creates an HTTP route
like below:-
Click on 'Create' button
Now wait a few minutes for the application to built by OpenShift and deployed to your project. In the topology view, the web application pod will not be ready until the blue ring goes dark blue.
Test your Service
In the OpenShift Web Console, from the Developer view,
click on the 'Open URL' icon of the Web Service
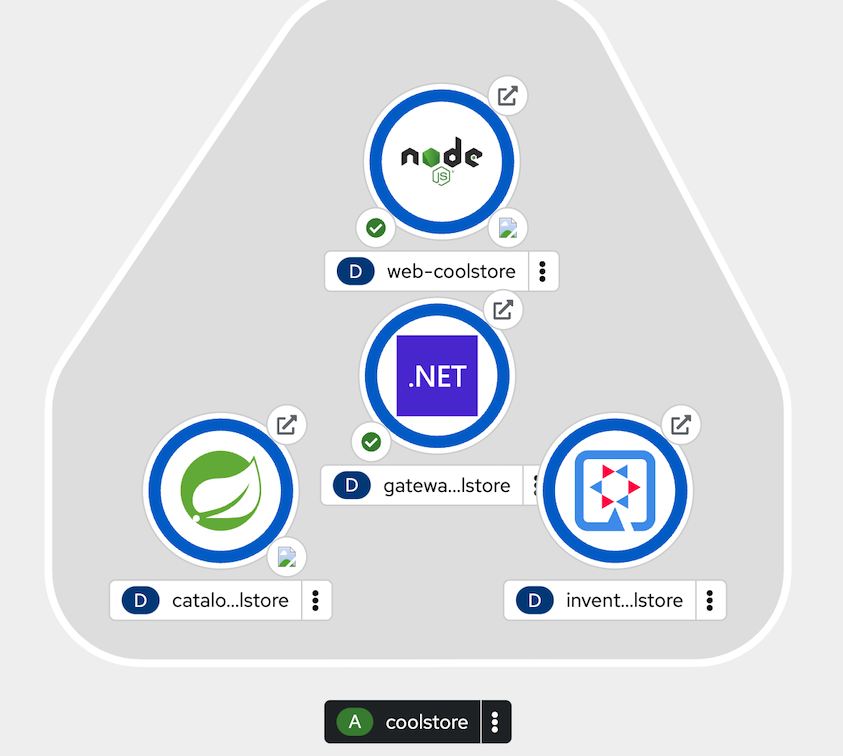
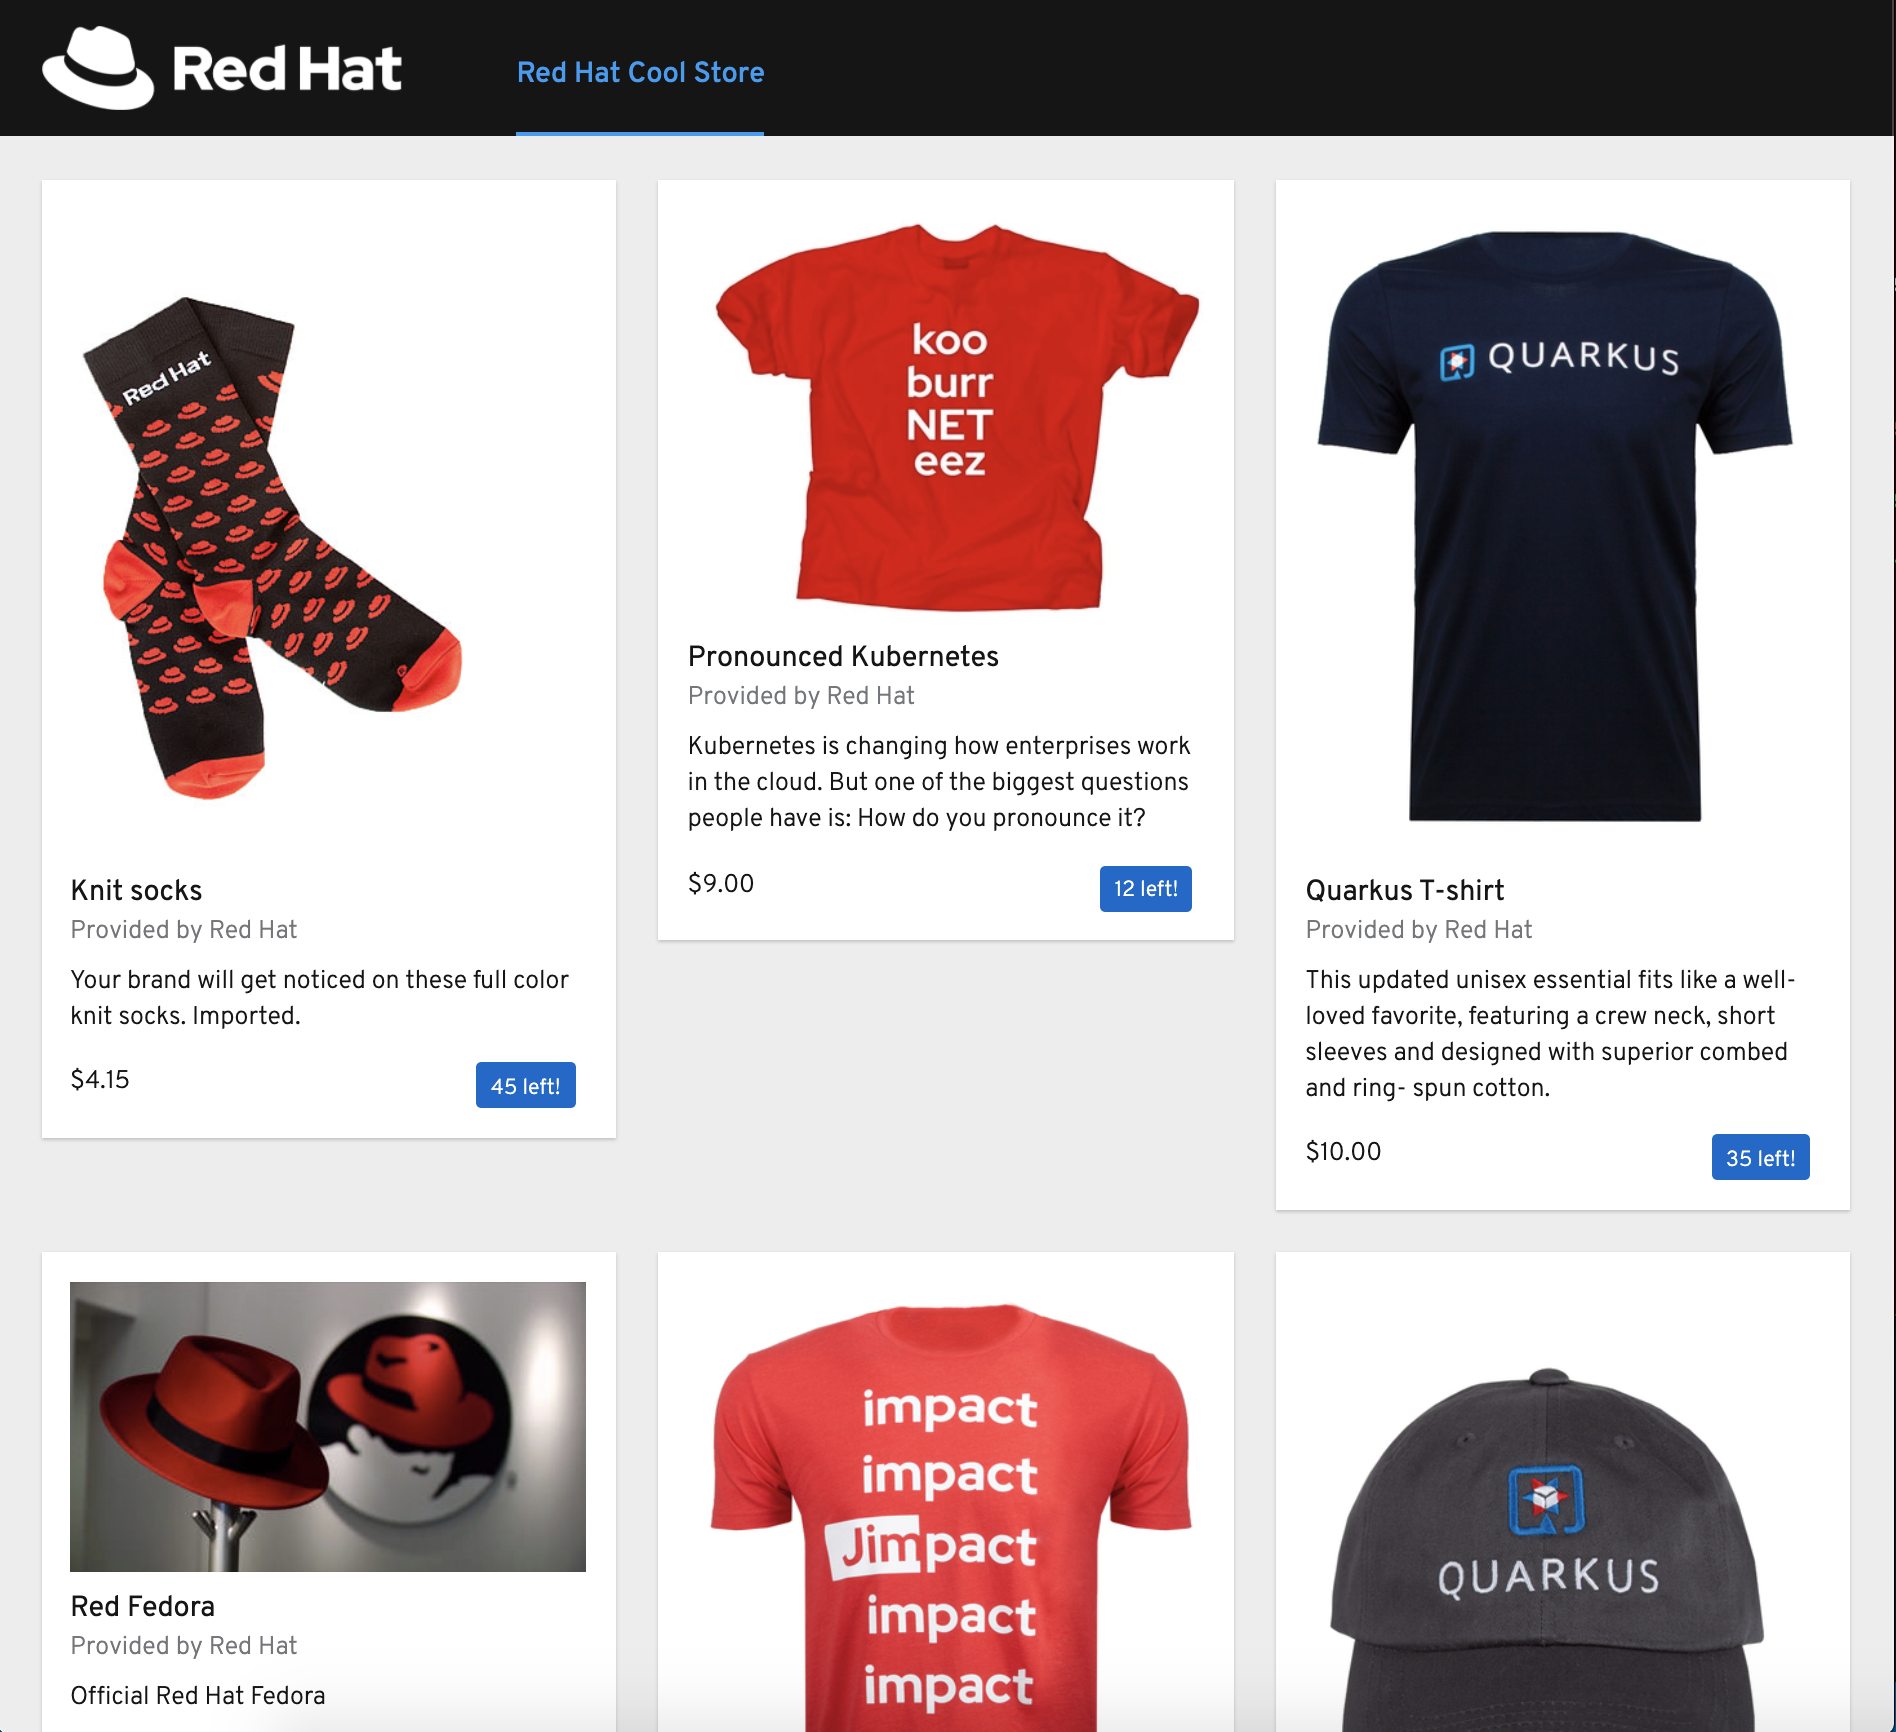
Your browser will be redirected to your Web Service running on OpenShift. You should be able to see the CoolStore application with all products and their inventory status.
Well done! You are ready to move on to the next lab.
