Create Gateway Service with .Net
15 MINUTE EXERCISE
In this lab you will learn about .NET and how you can build microservices using ASP.NET principles. During this lab you will create a scalable API Gateway that aggregates Catalog and Inventory APIs.
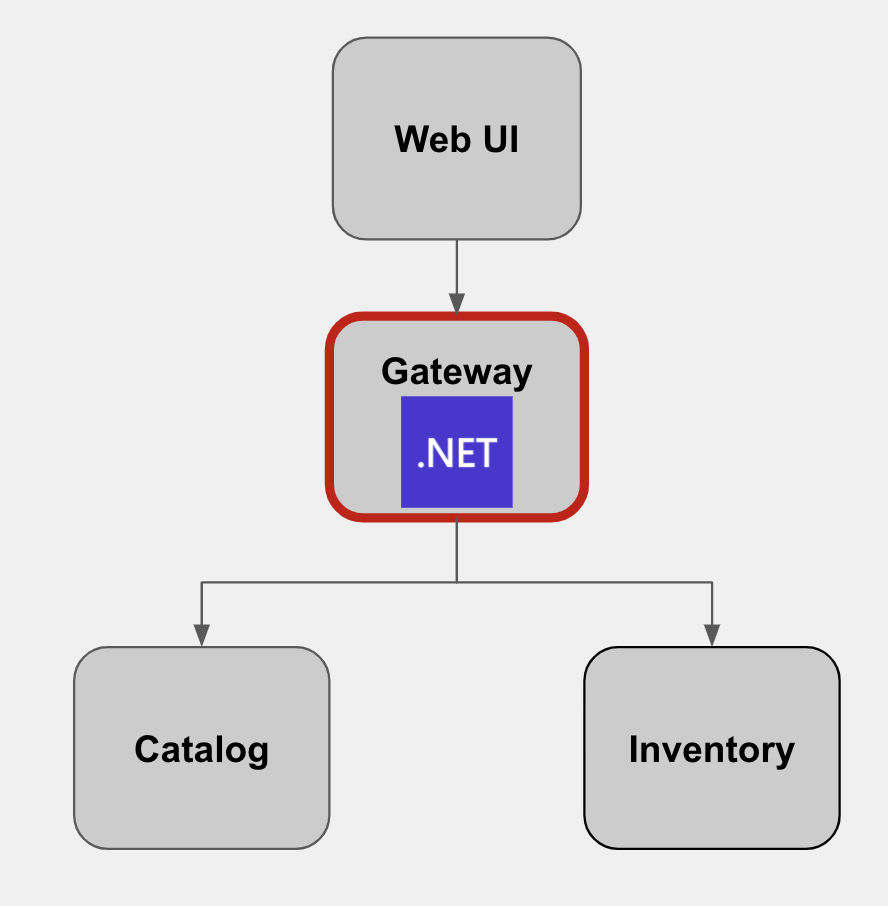
.NET Gateway Project
The gateway-dotnet project has the following structure which shows the components of the project laid out in different subdirectories according to ASP .NET best practices:
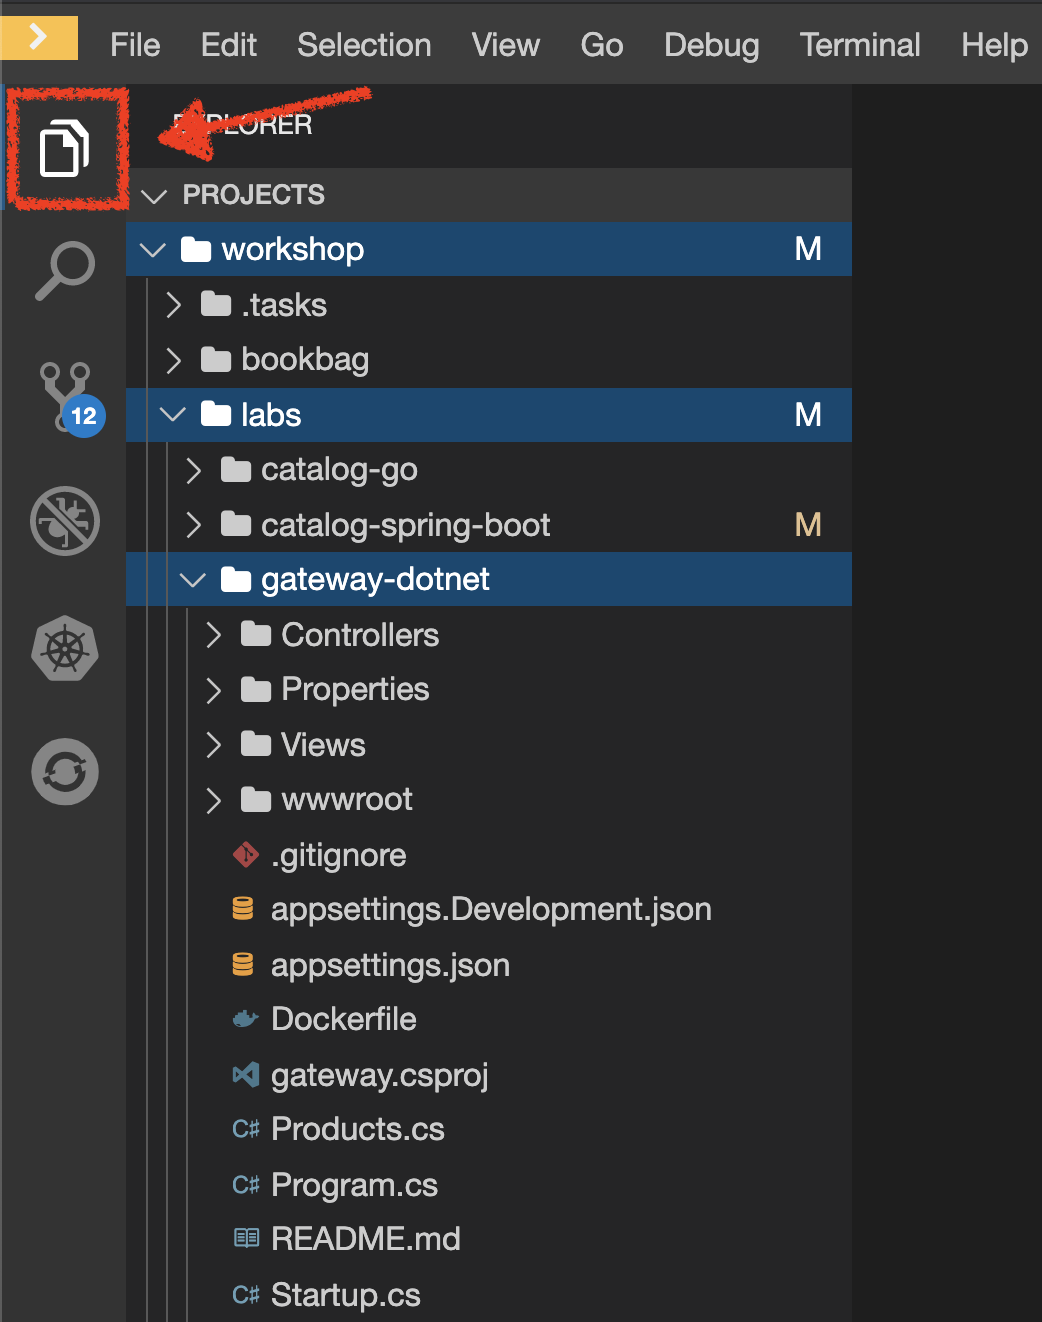
This is a minimal ASP .NET project with support for asynchronous REST services.
Examine 'Startup.cs' class in the /projects/workshop/labs/gateway-dotnet/ directory.
See how the basic web server is started with minimal services, health checks and a basic REST controller is deployed.
// This method gets called by the runtime. Use this method to add services to the container.
public void ConfigureServices(IServiceCollection services)
{
    services.AddCors();

    services.AddControllers().AddJsonOptions(options=>
    {
            options.JsonSerializerOptions.IgnoreNullValues = true;
    });

    services.AddHealthChecks();
    services.AddControllersWithViews();
}

// This method gets called by the runtime. Use this method to configure the HTTP request pipeline.
public void Configure(IApplicationBuilder app, IWebHostEnvironment env)
{

    ProductsController.Config();

    if (env.IsDevelopment())
    {
        app.UseDeveloperExceptionPage();
    }

    app.UseCors(builder => builder
            .AllowAnyOrigin ()
            .AllowAnyHeader ()
            .AllowAnyMethod ());

    app.UseHealthChecks("/health");

    app.UseRouting();
    app.UseDefaultFiles();
    app.UseStaticFiles();

    app.UseEndpoints(endpoints =>
    {
        endpoints.MapControllers();
        endpoints.MapControllerRoute(
            name: "default",
            pattern: "{controller=Home}/{action=Index}/{id?}");
    });

}
Examine 'ProductsController.cs' class in the /projects/workshop/labs/gateway-dotnet/Controllers directory.
[ApiController]
[Route("api/[controller]")] (1)
public class ProductsController : ControllerBase
{
    [HttpGet]
    public IEnumerable<Products> Get()
    {
        private static HttpClient catalogHttpClient = new HttpClient(); (4)
        private static HttpClient inventoryHttpClient = new HttpClient();

        try
        {
            // get the product list
            IEnumerable<Products> productsList = GetCatalog(); (2)

            // update each item with their inventory value
            foreach(Products p in productsList) (3)
            {
                Inventory inv = GetInventory(p.ItemId);
                if (inv != null)
                    p.Availability = new Availability(inv);
            }

            return productsList;
        }
        catch(Exception e)
        {
            Console.WriteLine("Using Catalog service: " + catalogApiHost + " and Inventory service: " + inventoryApiHost);
            Console.WriteLine("Failure to get service data: " + e.Message);
            // on failures return error
            throw e;
        }
    }

    private IEnumerable<Products> GetCatalog()
    {
        var data = catalogHttpClient.GetStringAsync("/api/catalog").Result;
        return JsonConvert.DeserializeObject<IEnumerable<Products>>(data);
    }

    private Inventory GetInventory(string itemId)
    {
        var data = inventoryHttpClient.GetStringAsync("/api/inventory/" + itemId).Result;
        return JsonConvert.DeserializeObject<Inventory>(data);
    }

}| 1 | Not unlike the Quarkus and Spring boot apps previously built, the ProductsController has a single defined REST entrypoint for GET /api/products |
| 2 | In this case the Get() service first requests a list of products from the Catalog microservice |
| 3 | It then steps through each in turn to discover the amount of product in stock. It does this by calling the Inventory service for each product. |
| 4 | By using an HttpClient class for each service, .NET will efficiently manage the connection handling. |
The location or binding to the existing Catalog and Inventory REST services is injected at runtime via environment variables.
Deploy on OpenShift
It’s time to build and deploy your service on OpenShift.
As you did previously for the Inventory and Catalog services in the earlier chapters, you need to create a new Component and URL and then Push it in to the OpenShift cluster
by using the following parameters:
Click on 'Terminal' → 'Run Task…' and execute the 'Gateway' tasks in the correct order.
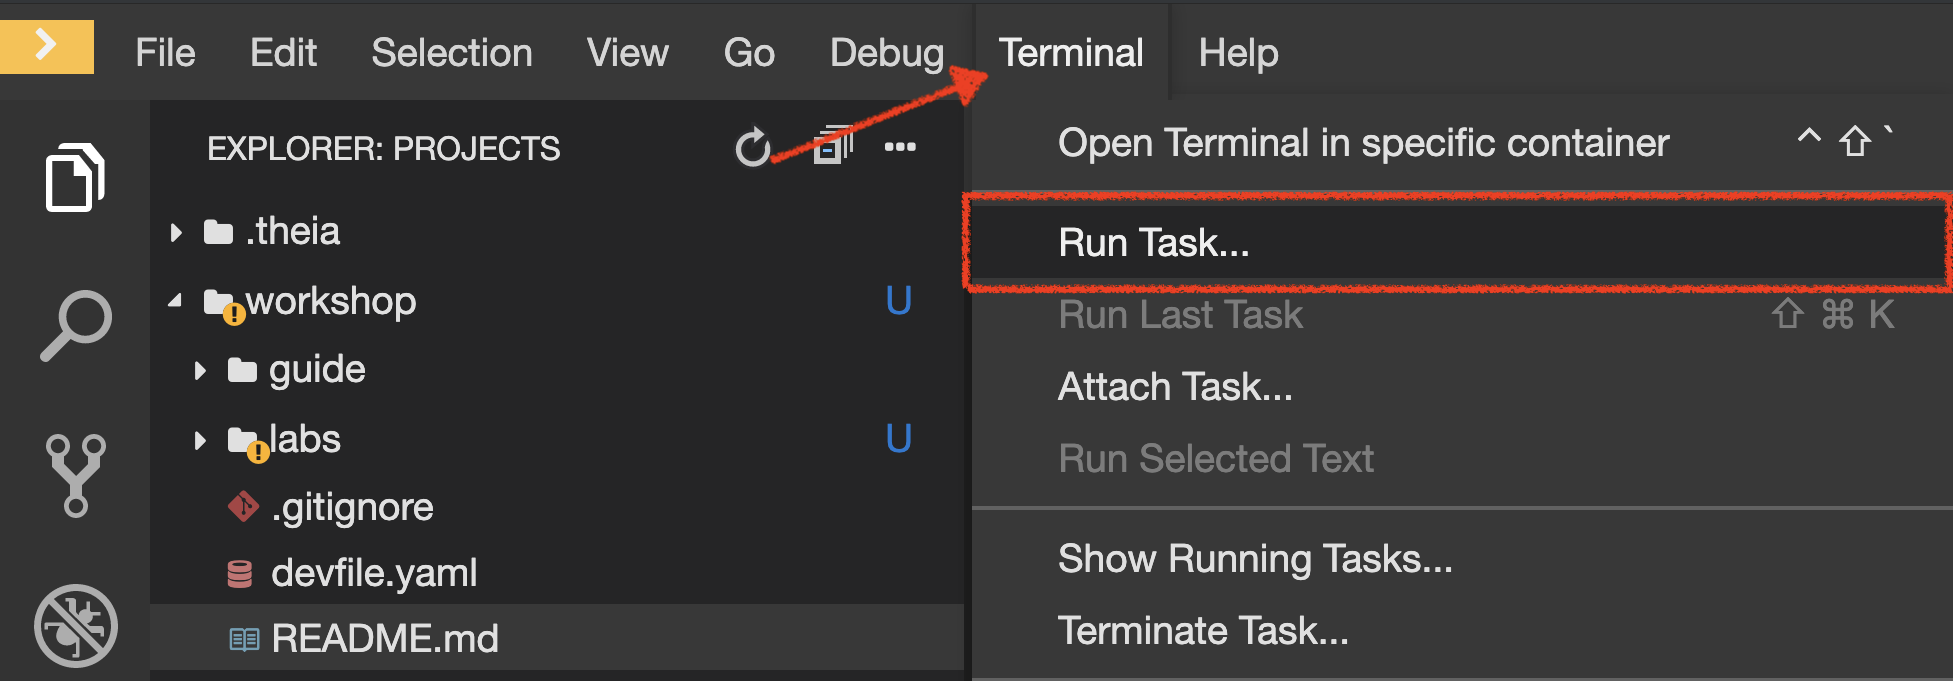
Execute the following commands in the '>_ workshop_tools' terminal window
cd /projects/workshop/labs/gateway-dotnetExecute the proper commands with the following parameters:
| Unlike Catalog and Inventory service, you are going to push the 'gateway-dotnet/' folder as an input to OpenShift. OpenShift will build the .NET .dll file from the project file and source code for you. |
| Question | Answer |
|---|---|
Which component type do you wish to create |
dotnet |
Which version of 'dotnet' component type do you wish to create |
3.1-ubi8 |
Which input type do you wish to use for the component |
local |
Location of context component, relative to '/projects/workshop/labs/gateway-dotnet' (.) |
Empty ('/projects/workshop/labs/gateway-dotnet' by default) |
What do you wish to name the new component (dotnet-gateway—xxx) |
gateway |
Which application do you want the component to be associated with (app) |
coolstore |
Which project go you want the component to be created in (my-project%USER_ID%) |
Empty ('my-project%USER_ID%' by default) |
Do you wish to set advanced options |
Empty ('No' by default) |
| Parameter | Value |
|---|---|
URL name |
gateway |
port to expose |
8080 |
| Do not forget to push your new component |
To open a '>_ workshop_tools' terminal window, click on 'Terminal' → 'Open Terminal in specific container' → 'workshop-tools'
|
The Gateway Component needs to be connected to the Inventory and Catalog components in order to interact.
OpenShift provides linking mechanisms to publish communication bindings from a program to its clients by injecting the environment variables COMPONENT_xxx_HOST and COMPONENT_xxx_PORT.
We are using a simple binding here between services, but in advanced labs you may learn about using service discovery or Service Mesh to make this binding dynamic.
In your Workspace,
Click on 'Terminal' → 'Run Task…' → 'Catalog - Link to Gateway'
Then, click on 'Terminal' → 'Run Task…' → 'Inventory - Link to Gateway'

Execute the following commands in the '>_ workshop_tools' terminal window
cd /projects/workshop/labs/gateway-dotnet
odo link catalog --port 8080 --component gateway
odo link inventory --port 8080 --component gateway
To open a '>_ workshop_tools' terminal window, click on 'Terminal' → 'Open Terminal in specific container' → 'workshop-tools'
|
The configuration information of the Inventory and Catalog component is added to the Gateway component and the Gateway component restarts.
Once this completes, your application should be up and running. OpenShift runs the different components of the application in one or more pods which are the unit of runtime deployment and consists of the running containers for the project.
Test your Service
In the OpenShift Web Console, from the Developer view,
click on the 'Open URL' icon of the Gateway Service
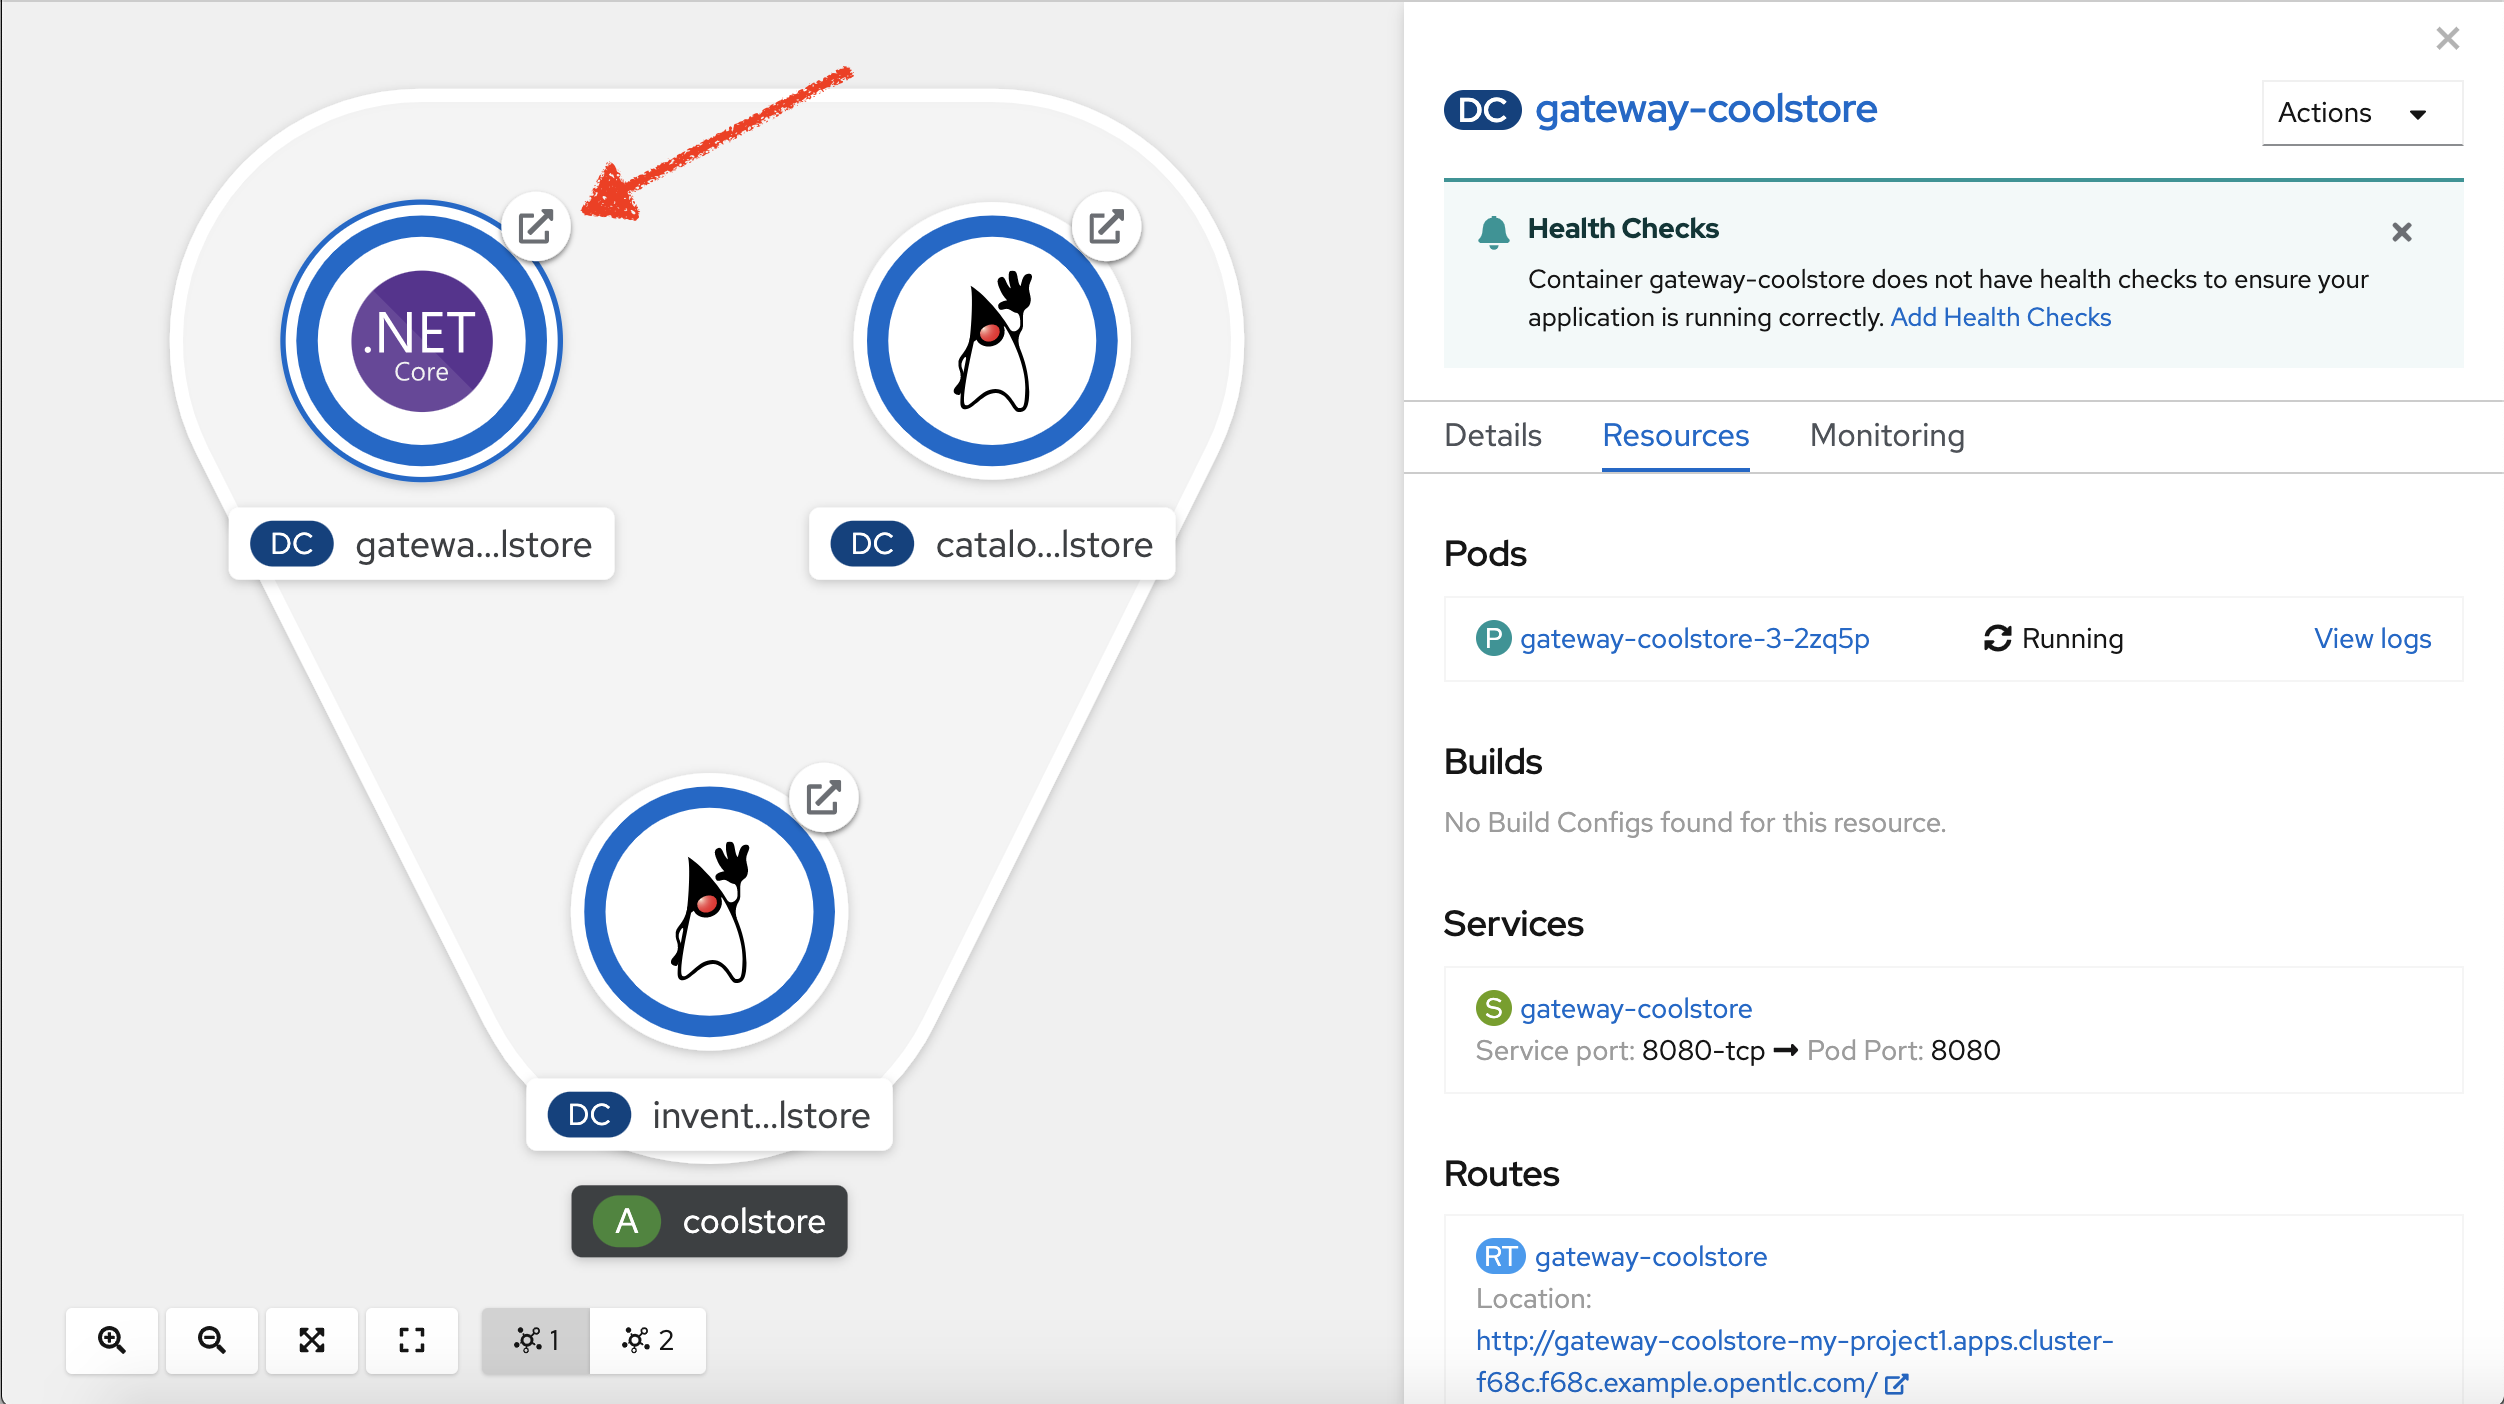
Your browser will be redirect on your Gateway Service running on OpenShift.
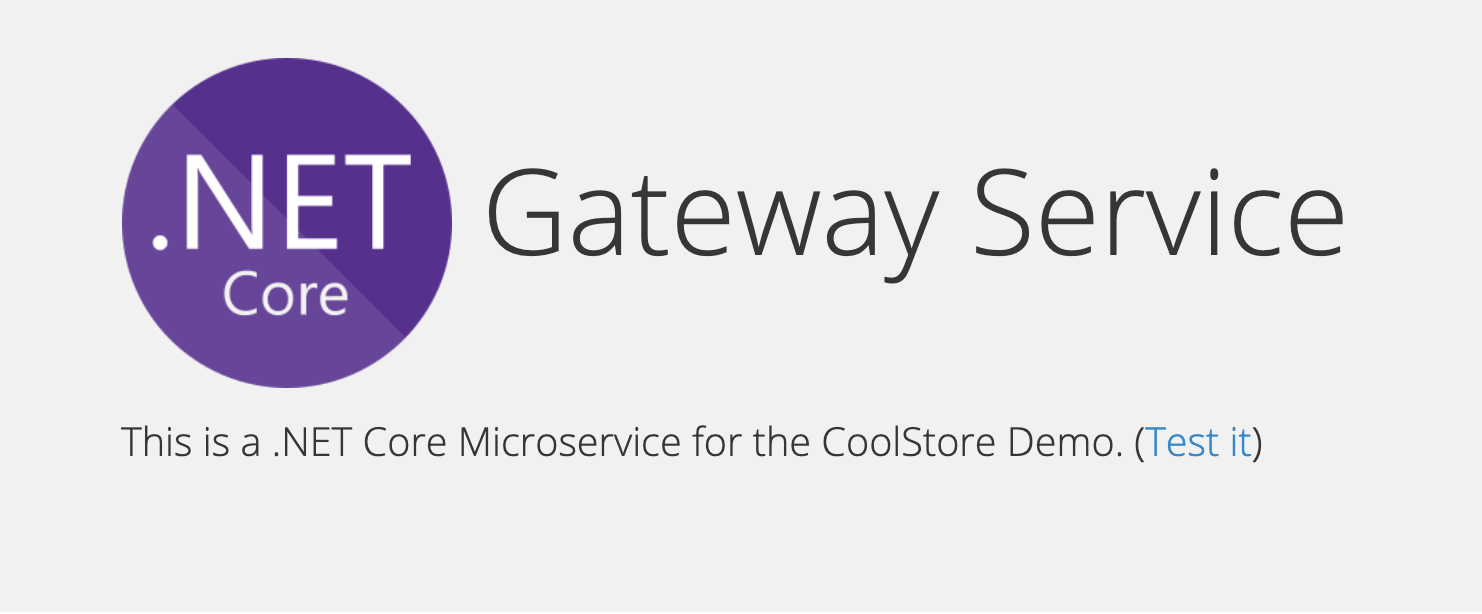
Then click on 'Test it'. You should have the following output:
[ {
  "itemId" : "329299",
  "name" : "Red Fedora",
  "desc" : "Official Red Hat Fedora",
  "price" : 34.99,
  "availability" : {
    "quantity" : 35
  }
},
...
]
Well done! You are ready to move on to the next lab.
